Deploy API7 MCP
API7-MCP is a Model Context Protocol (MCP) server for connecting to the API7ee API, allowing AI LLMs to analyze gateway resource configurations, monitoring data analysis, permission management, risk item detection, and more.
This tutorial walks you through deploying API7-MCP, using it to manage resources and send requests. The tutorial uses VS Code and Cline for demonstration, but you can choose other AI clients such as Cursor and Claude Desktop that best suit your workflow.
Prerequisites
- Install API7 Enterprise.
- Install Cline from the Extension Marketplace in Visual Studio Code (VS Code).
Install and Configure API7-MCP
The following are different ways of installation.
npm
If you are installing from npm, configure the MCP server with the following details. Then update the API7 dashboard address, gateway address, and API7 Enterprise token per your environment in the AI client:
{
  "mcpServers": {
    "api7-mcp": {
      "command": "npx",
      "args": ["-y", "api7-mcp"],
      "env": {
        "DASHBOARD_URL": "your-api7ee-dashboard-url",
        "GATEWAY_URL": "your-api7ee-gateway-server-url",
        "TOKEN": "your-api7ee-token"
      }
    }
  }
}
Source Code
To install from source code, first clone the api7-mcp repository:
git clone https://github.com/api7/api7-mcp.git
cd api7-mcp
Install the dependencies and build the project:
pnpm install
pnpm build
Finally, configure the MCP server with the following details and update the API7 dashboard address, gateway address, and API7 Enterprise token per your environment in the AI client:
{
  "mcpServers": {
    "api7-mcp": {
        "disabled": false,
        "command": "node",

        "args": ["your-project-path/dist/index.js"],
        "env": {
          "DASHBOARD_URL": "your-api7ee-dashboard-url",
          "GATEWAY_URL": "your-api7ee-gateway-server-url",
          "TOKEN": "your-api7ee-token"
      }
    }
  }
}
❶ args: After running the command above, a dist folder will appear in the Explorer panel of VS Code. Keep the path of the dist folder, e.g., /Users/alice/workspace/new/api7-mcp/dist/index.js.
❷ DASHBOARD_URL: The domain name of the API7 Enterprise dashboard, e.g., http://192.168.31.29:7443.
❸ GATEWAY_URL: The gateway server URL of your API7 Enterprise, e.g., http://192.168.64.1:9080.
❹ TOKEN: Configure the token generated on the API7 Enterprise Dashboard.
Once the configurations are saved, you should see that the MCP server is successfully installed in your AI client.
Launch MCP Servers
This tutorial uses VS Code and Cline for demonstration.
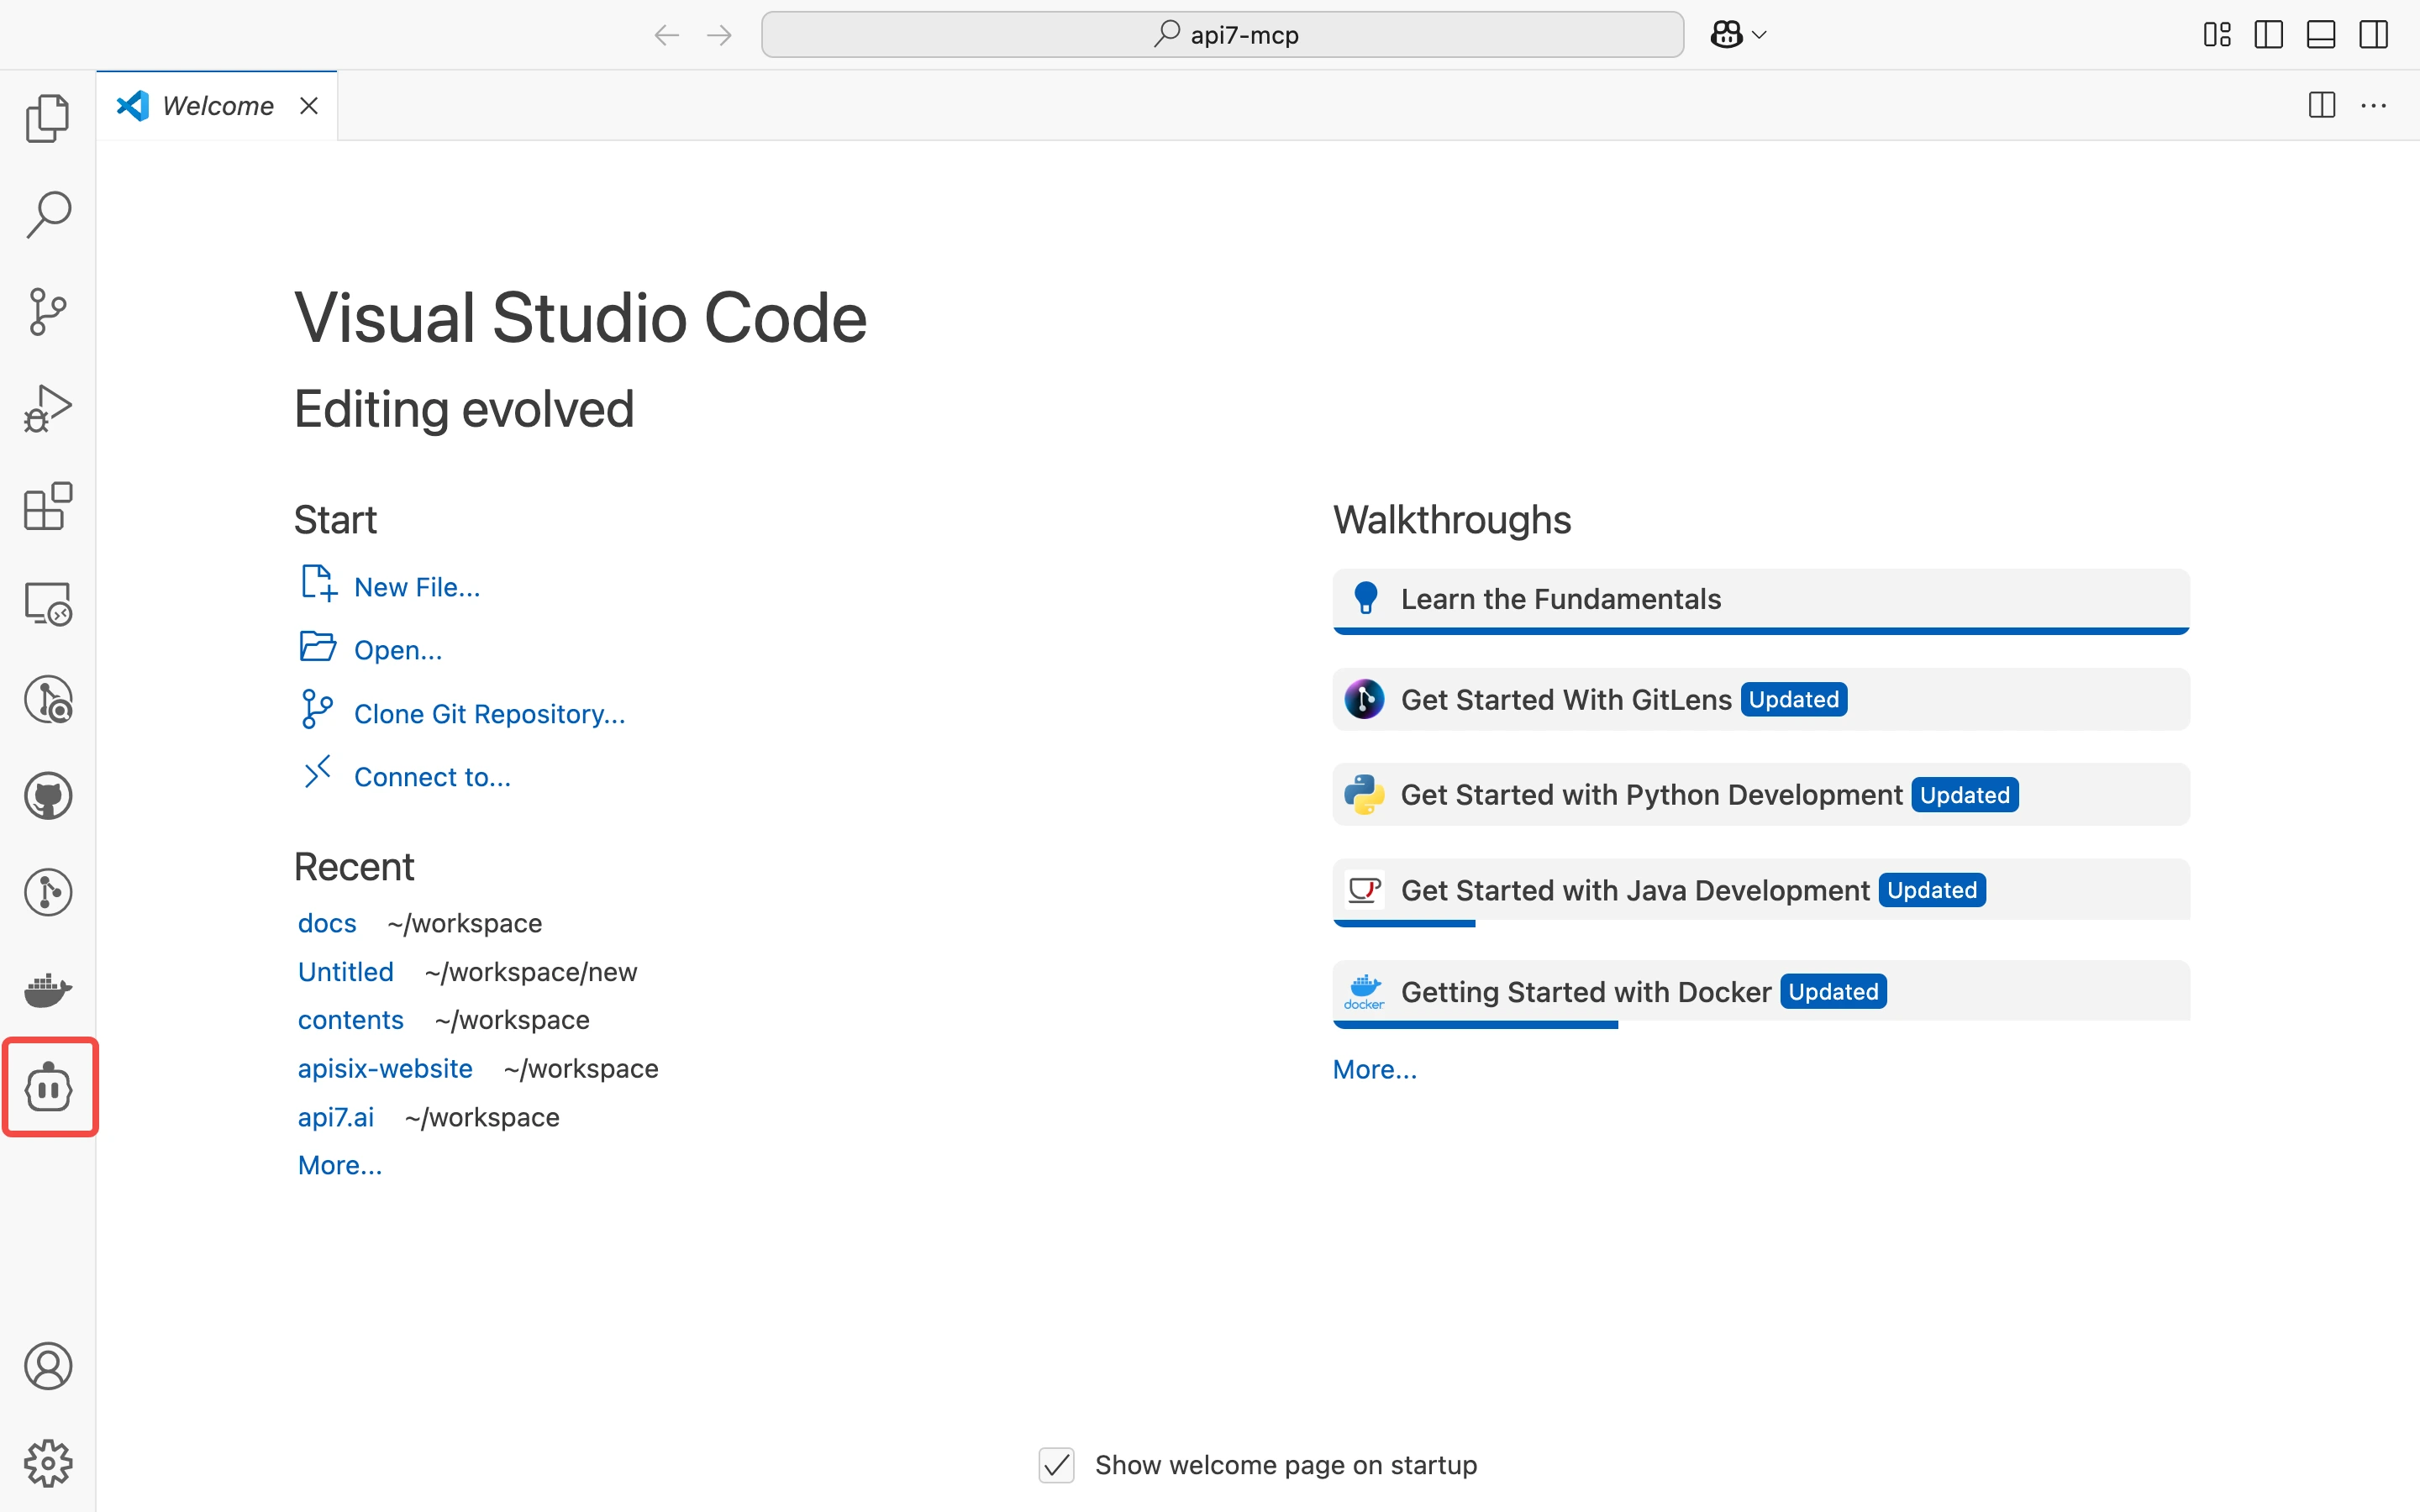
Open VS Code and click Cline on the left side navigation bar to open it.
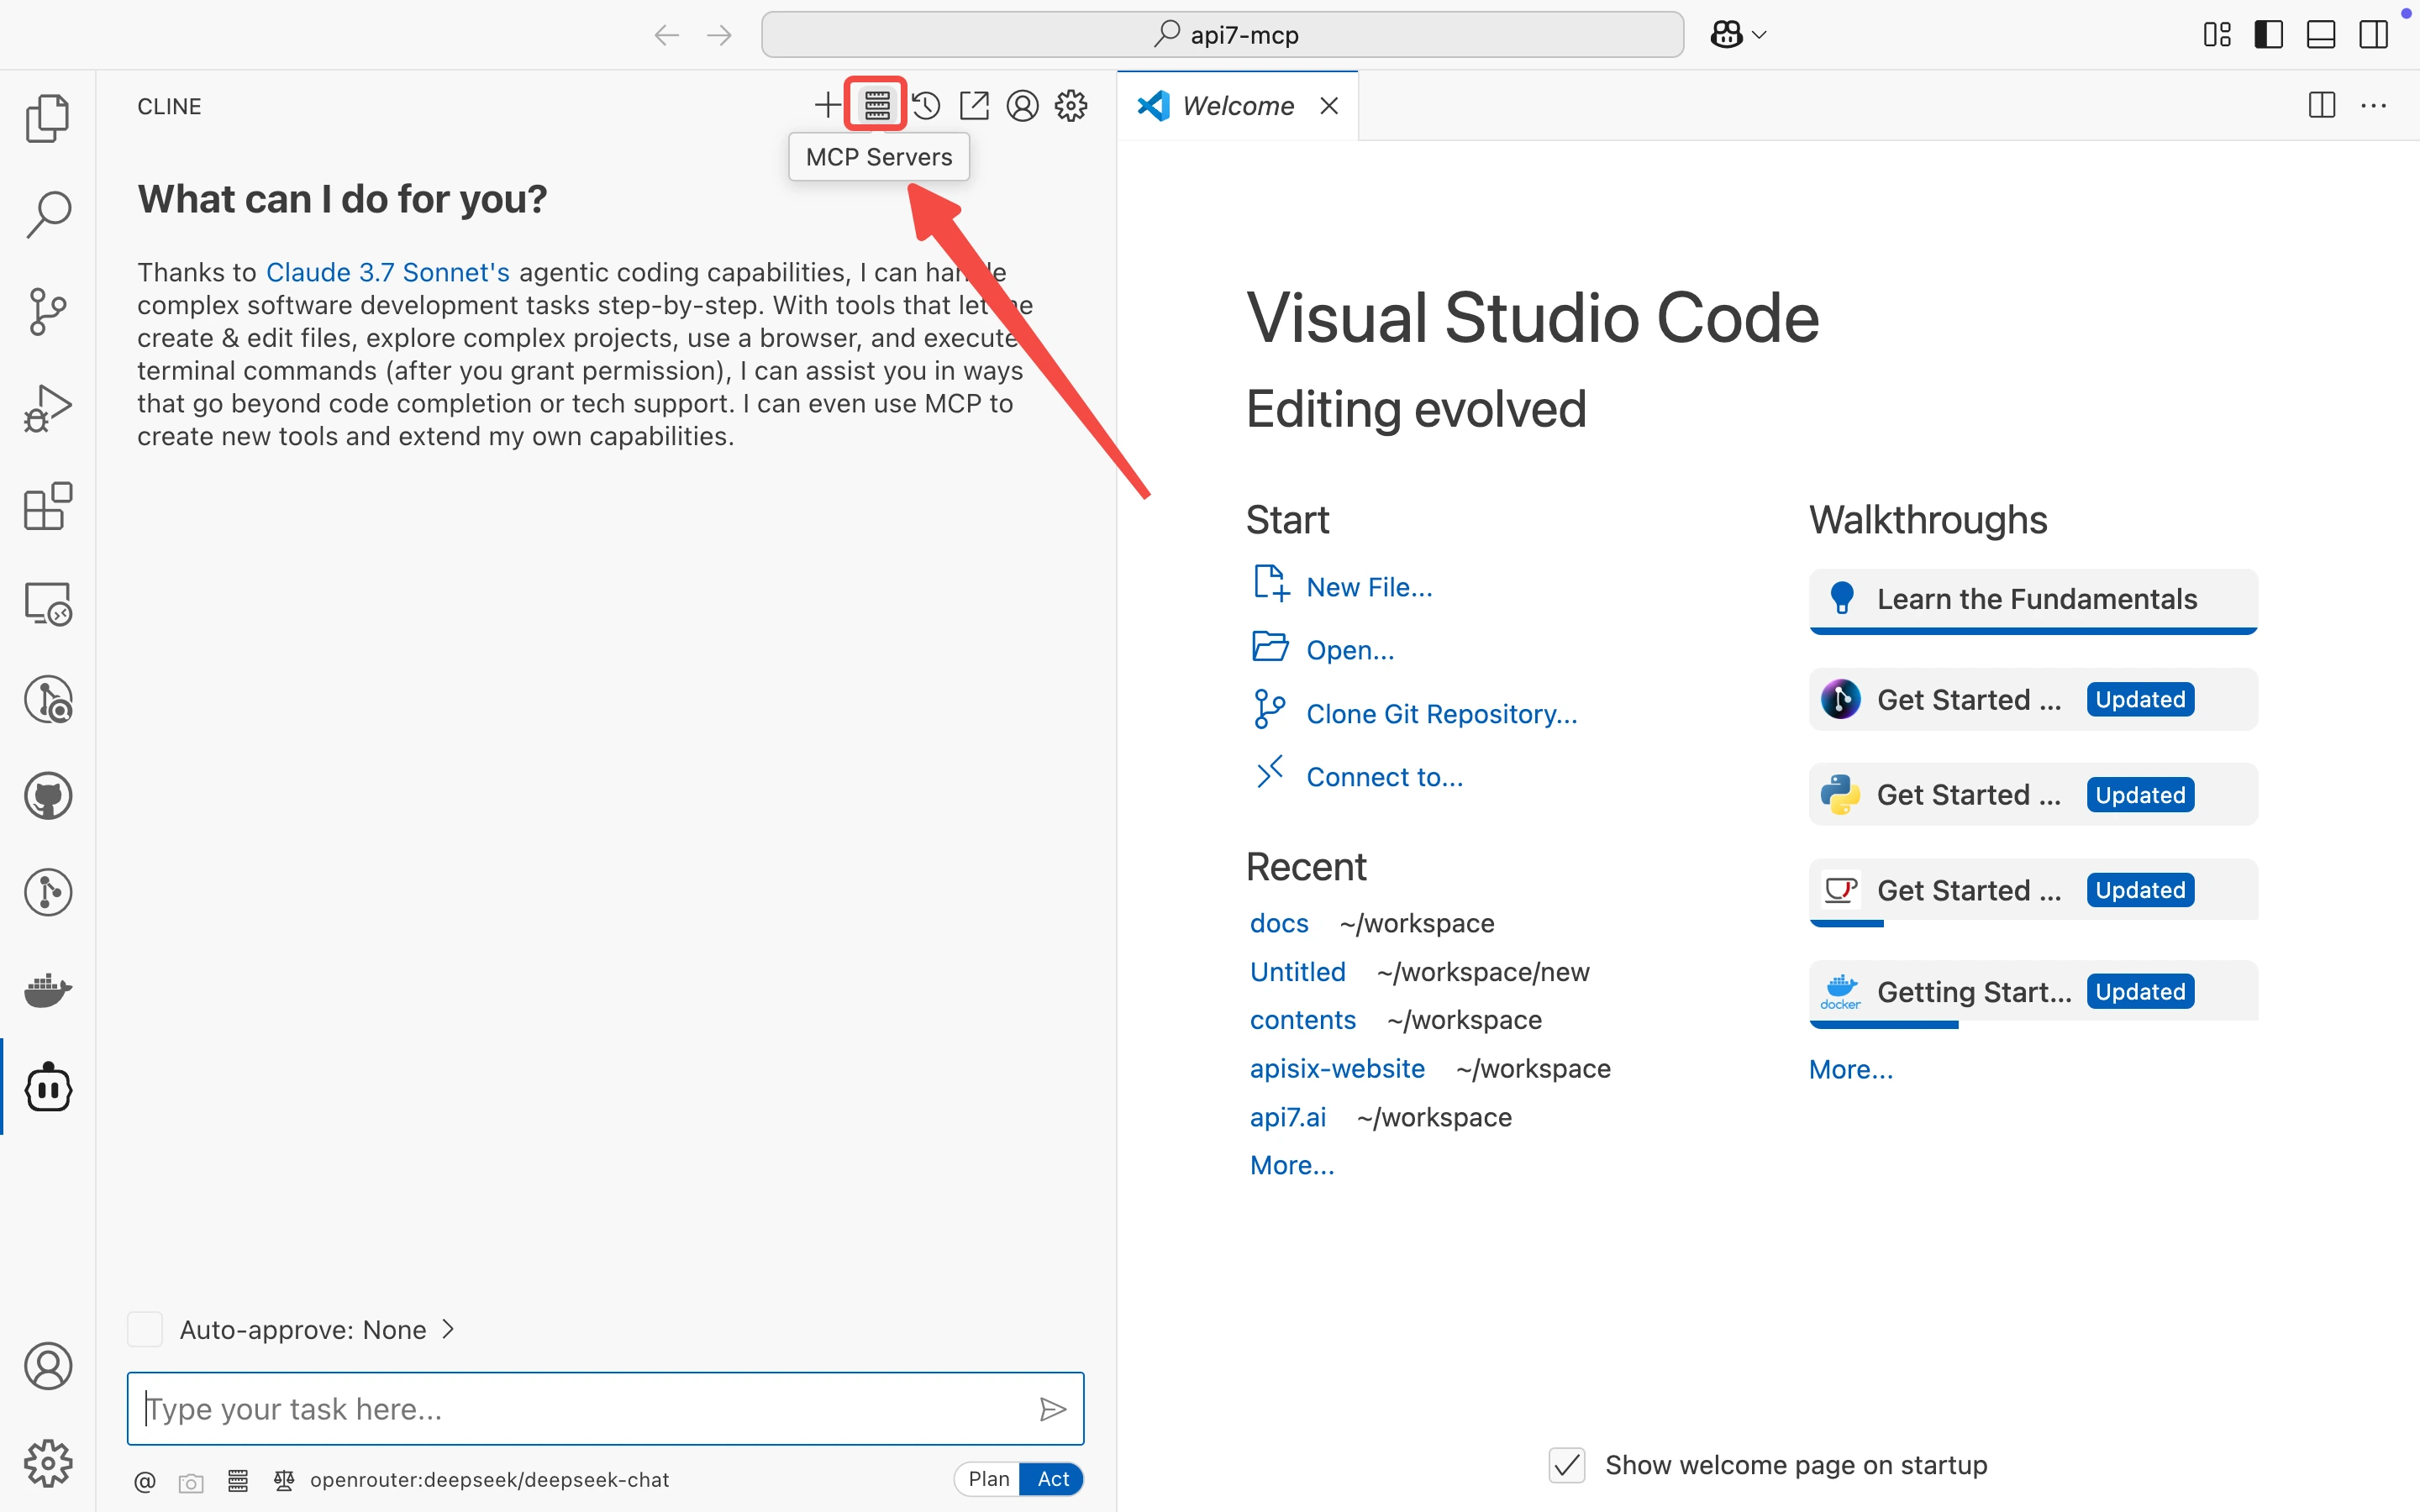
On top of Cline, click on MCP Servers.
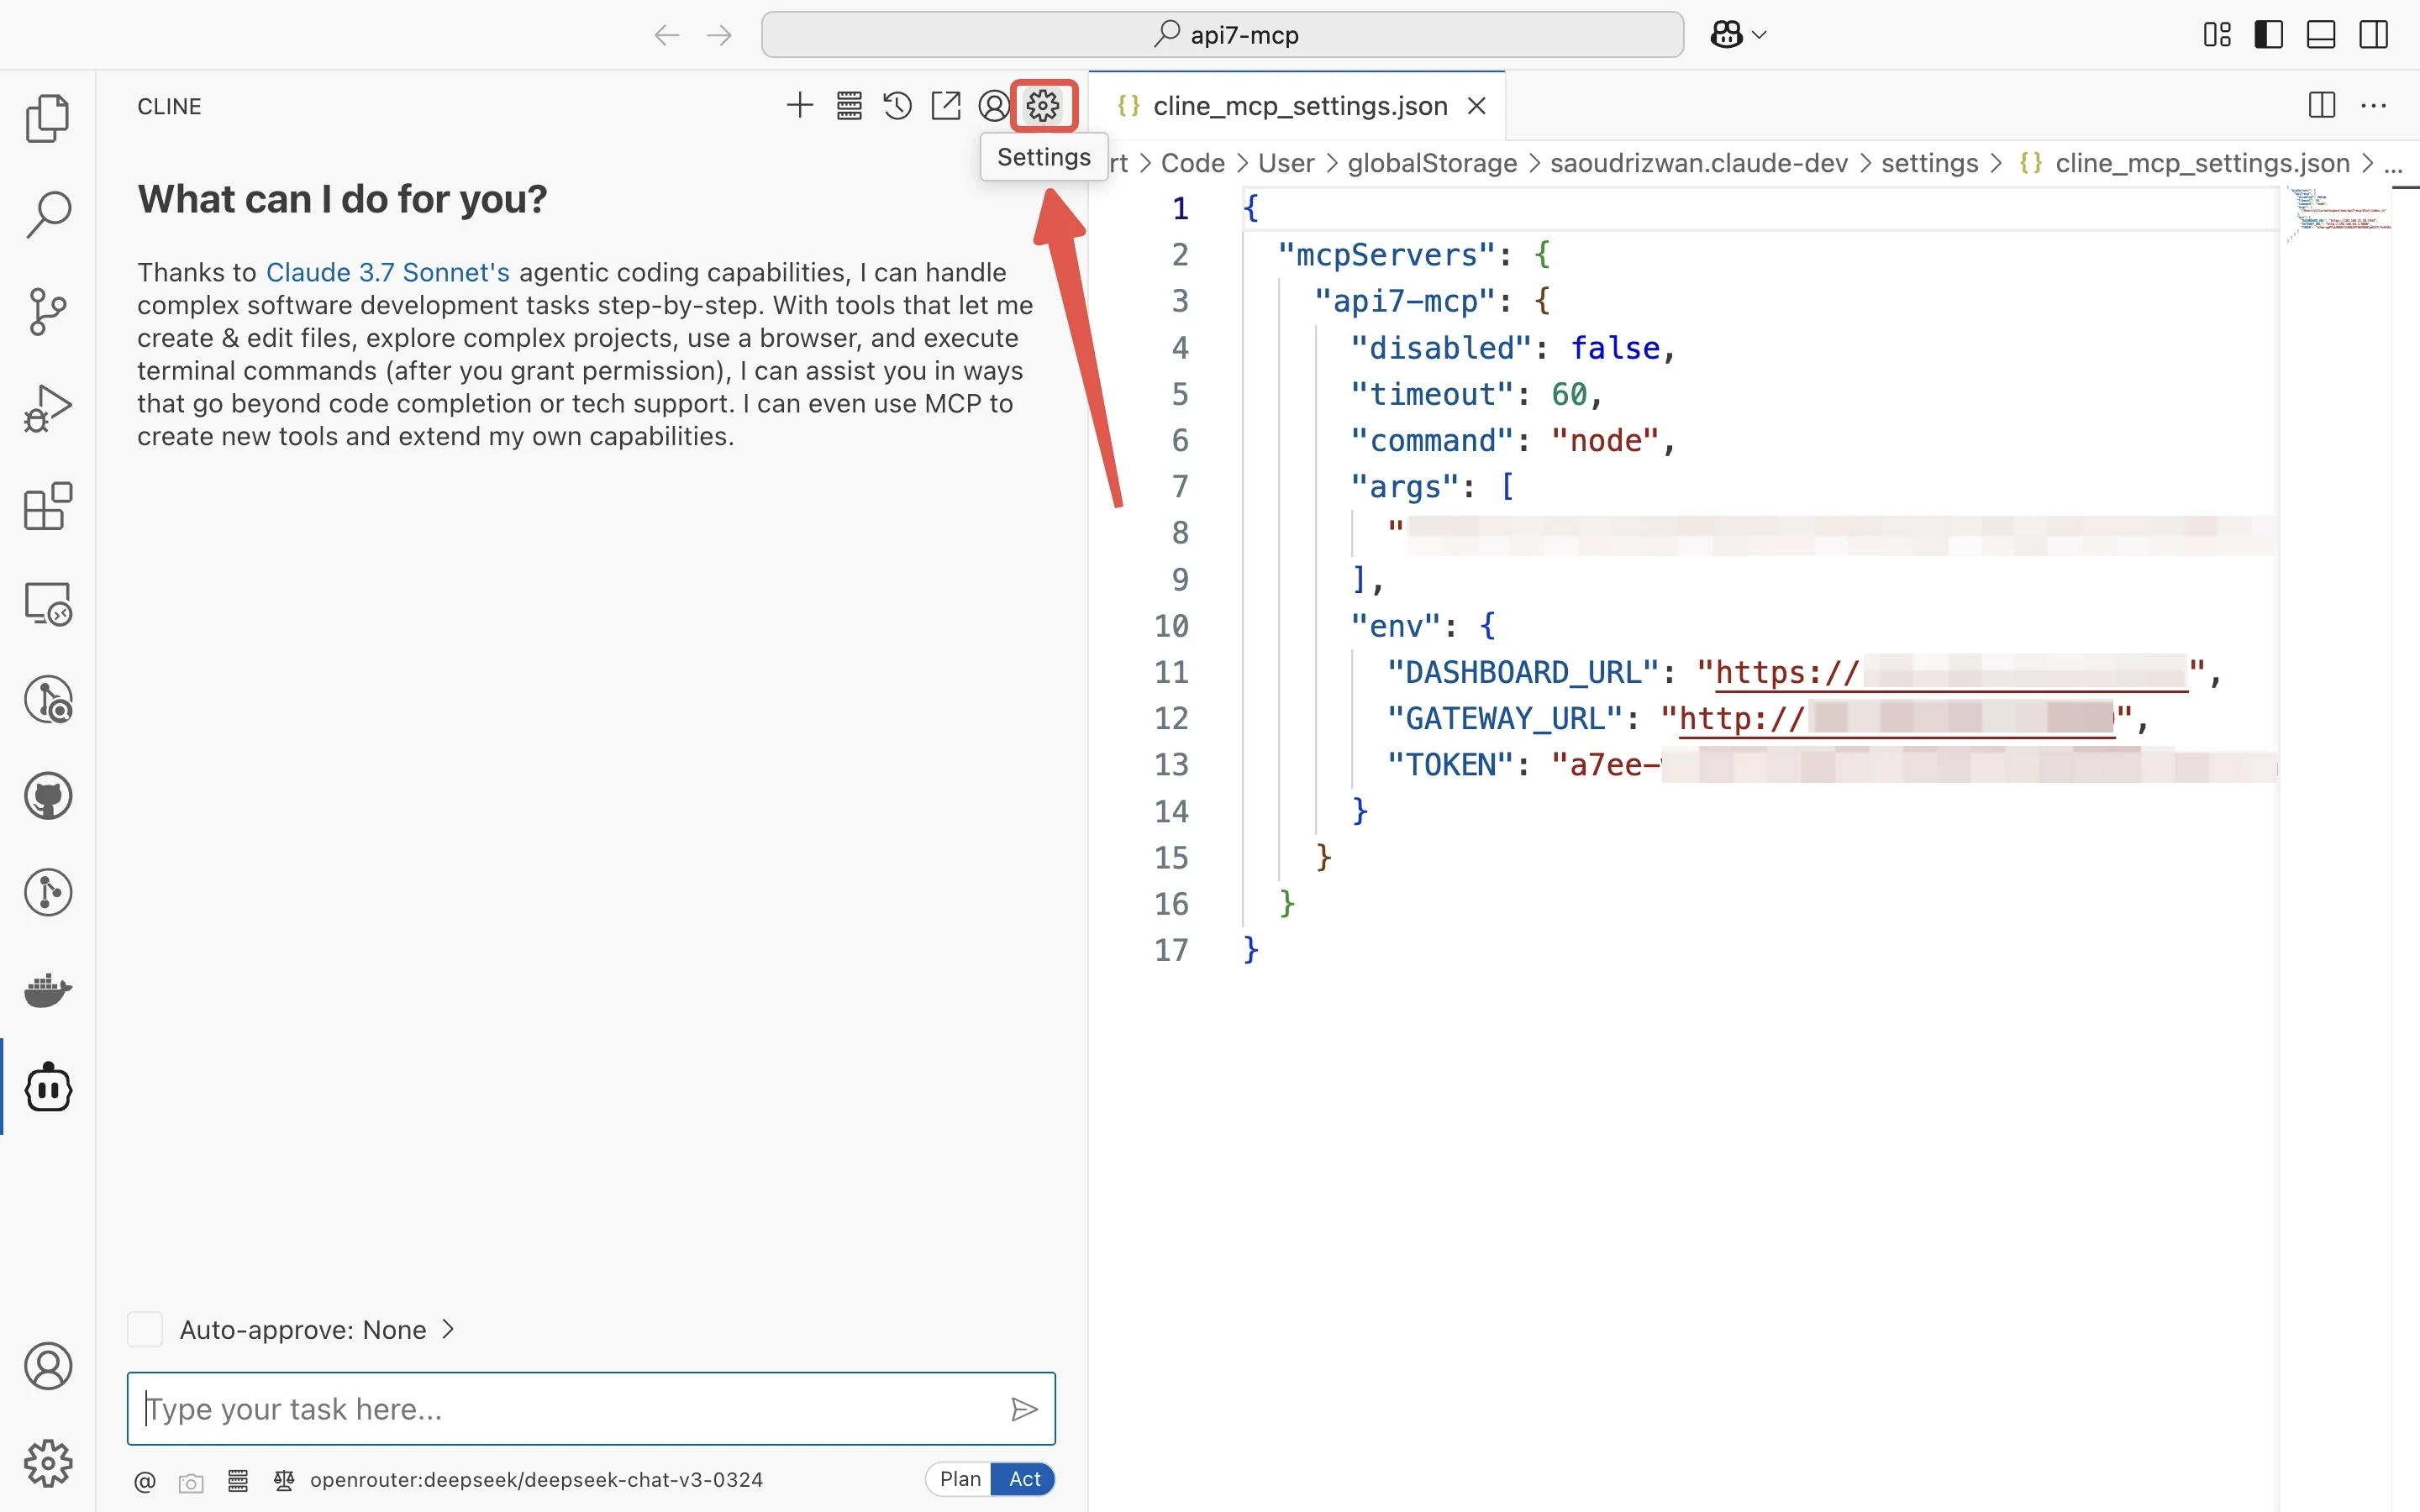
Select Installed and click Configure MCP Servers to open the cline_mcp_settings.json file.
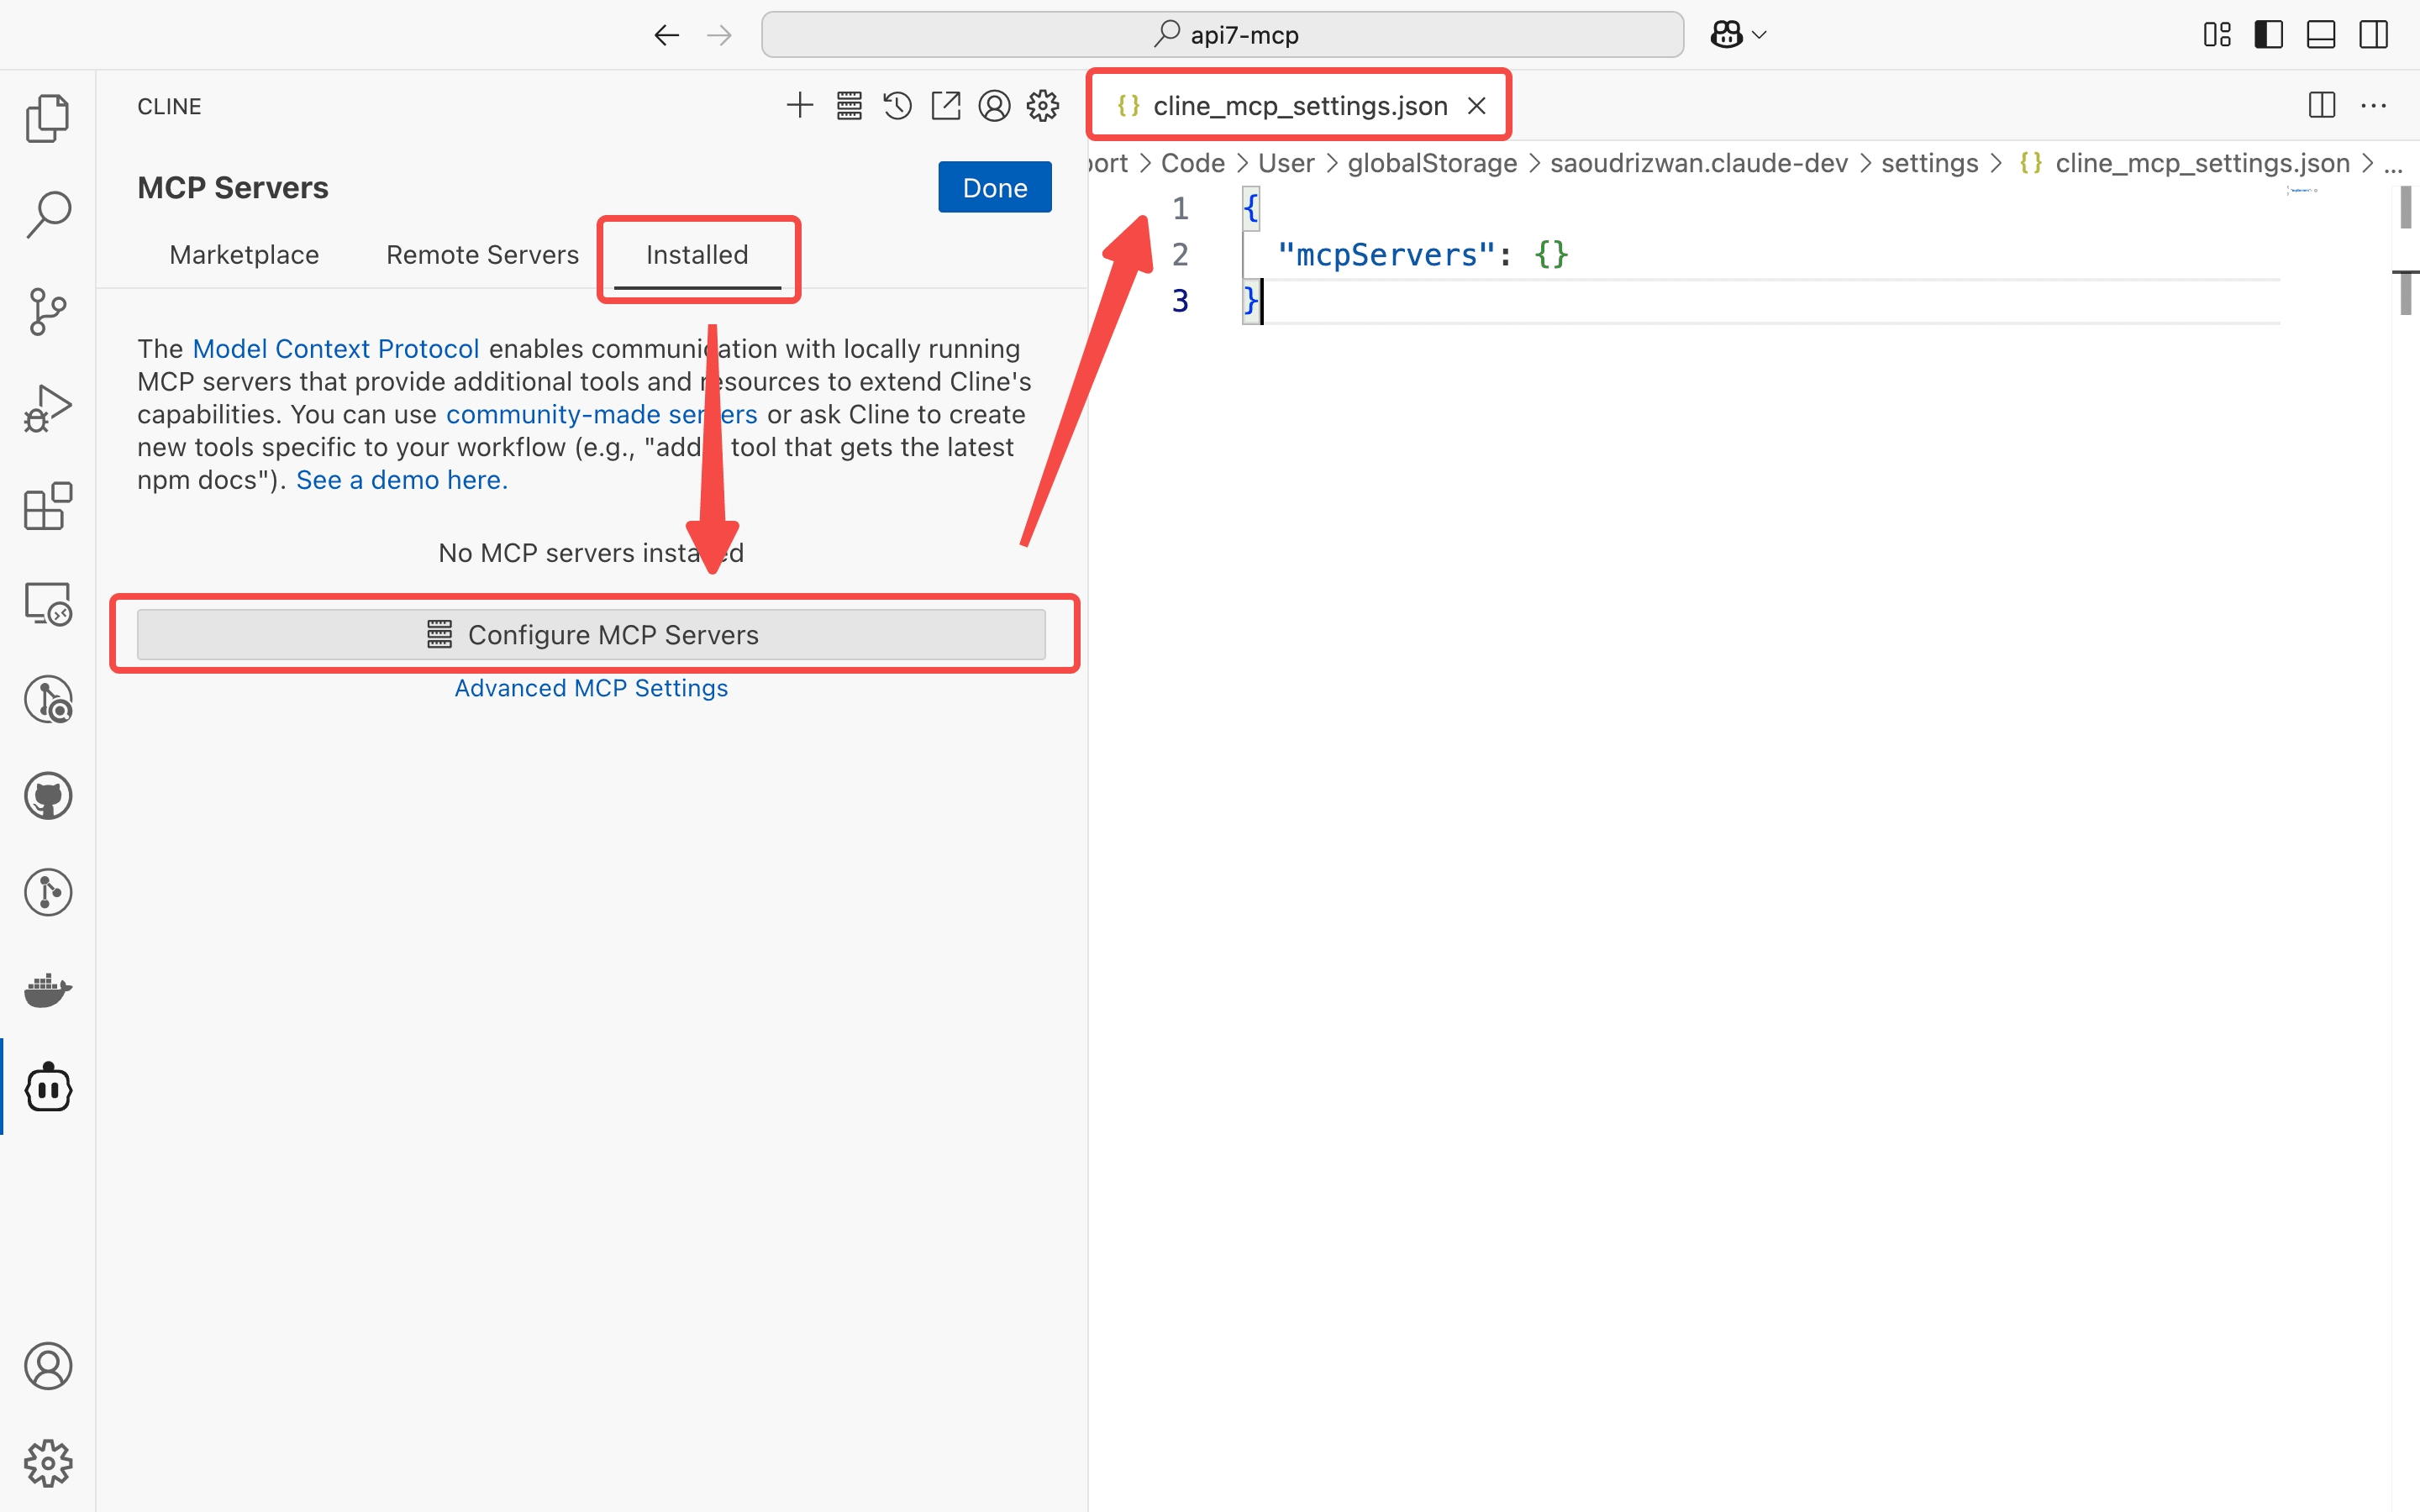
Update the cline_mcp_settings.json file according to the guide of the Source Code part to configure the MCP Server.
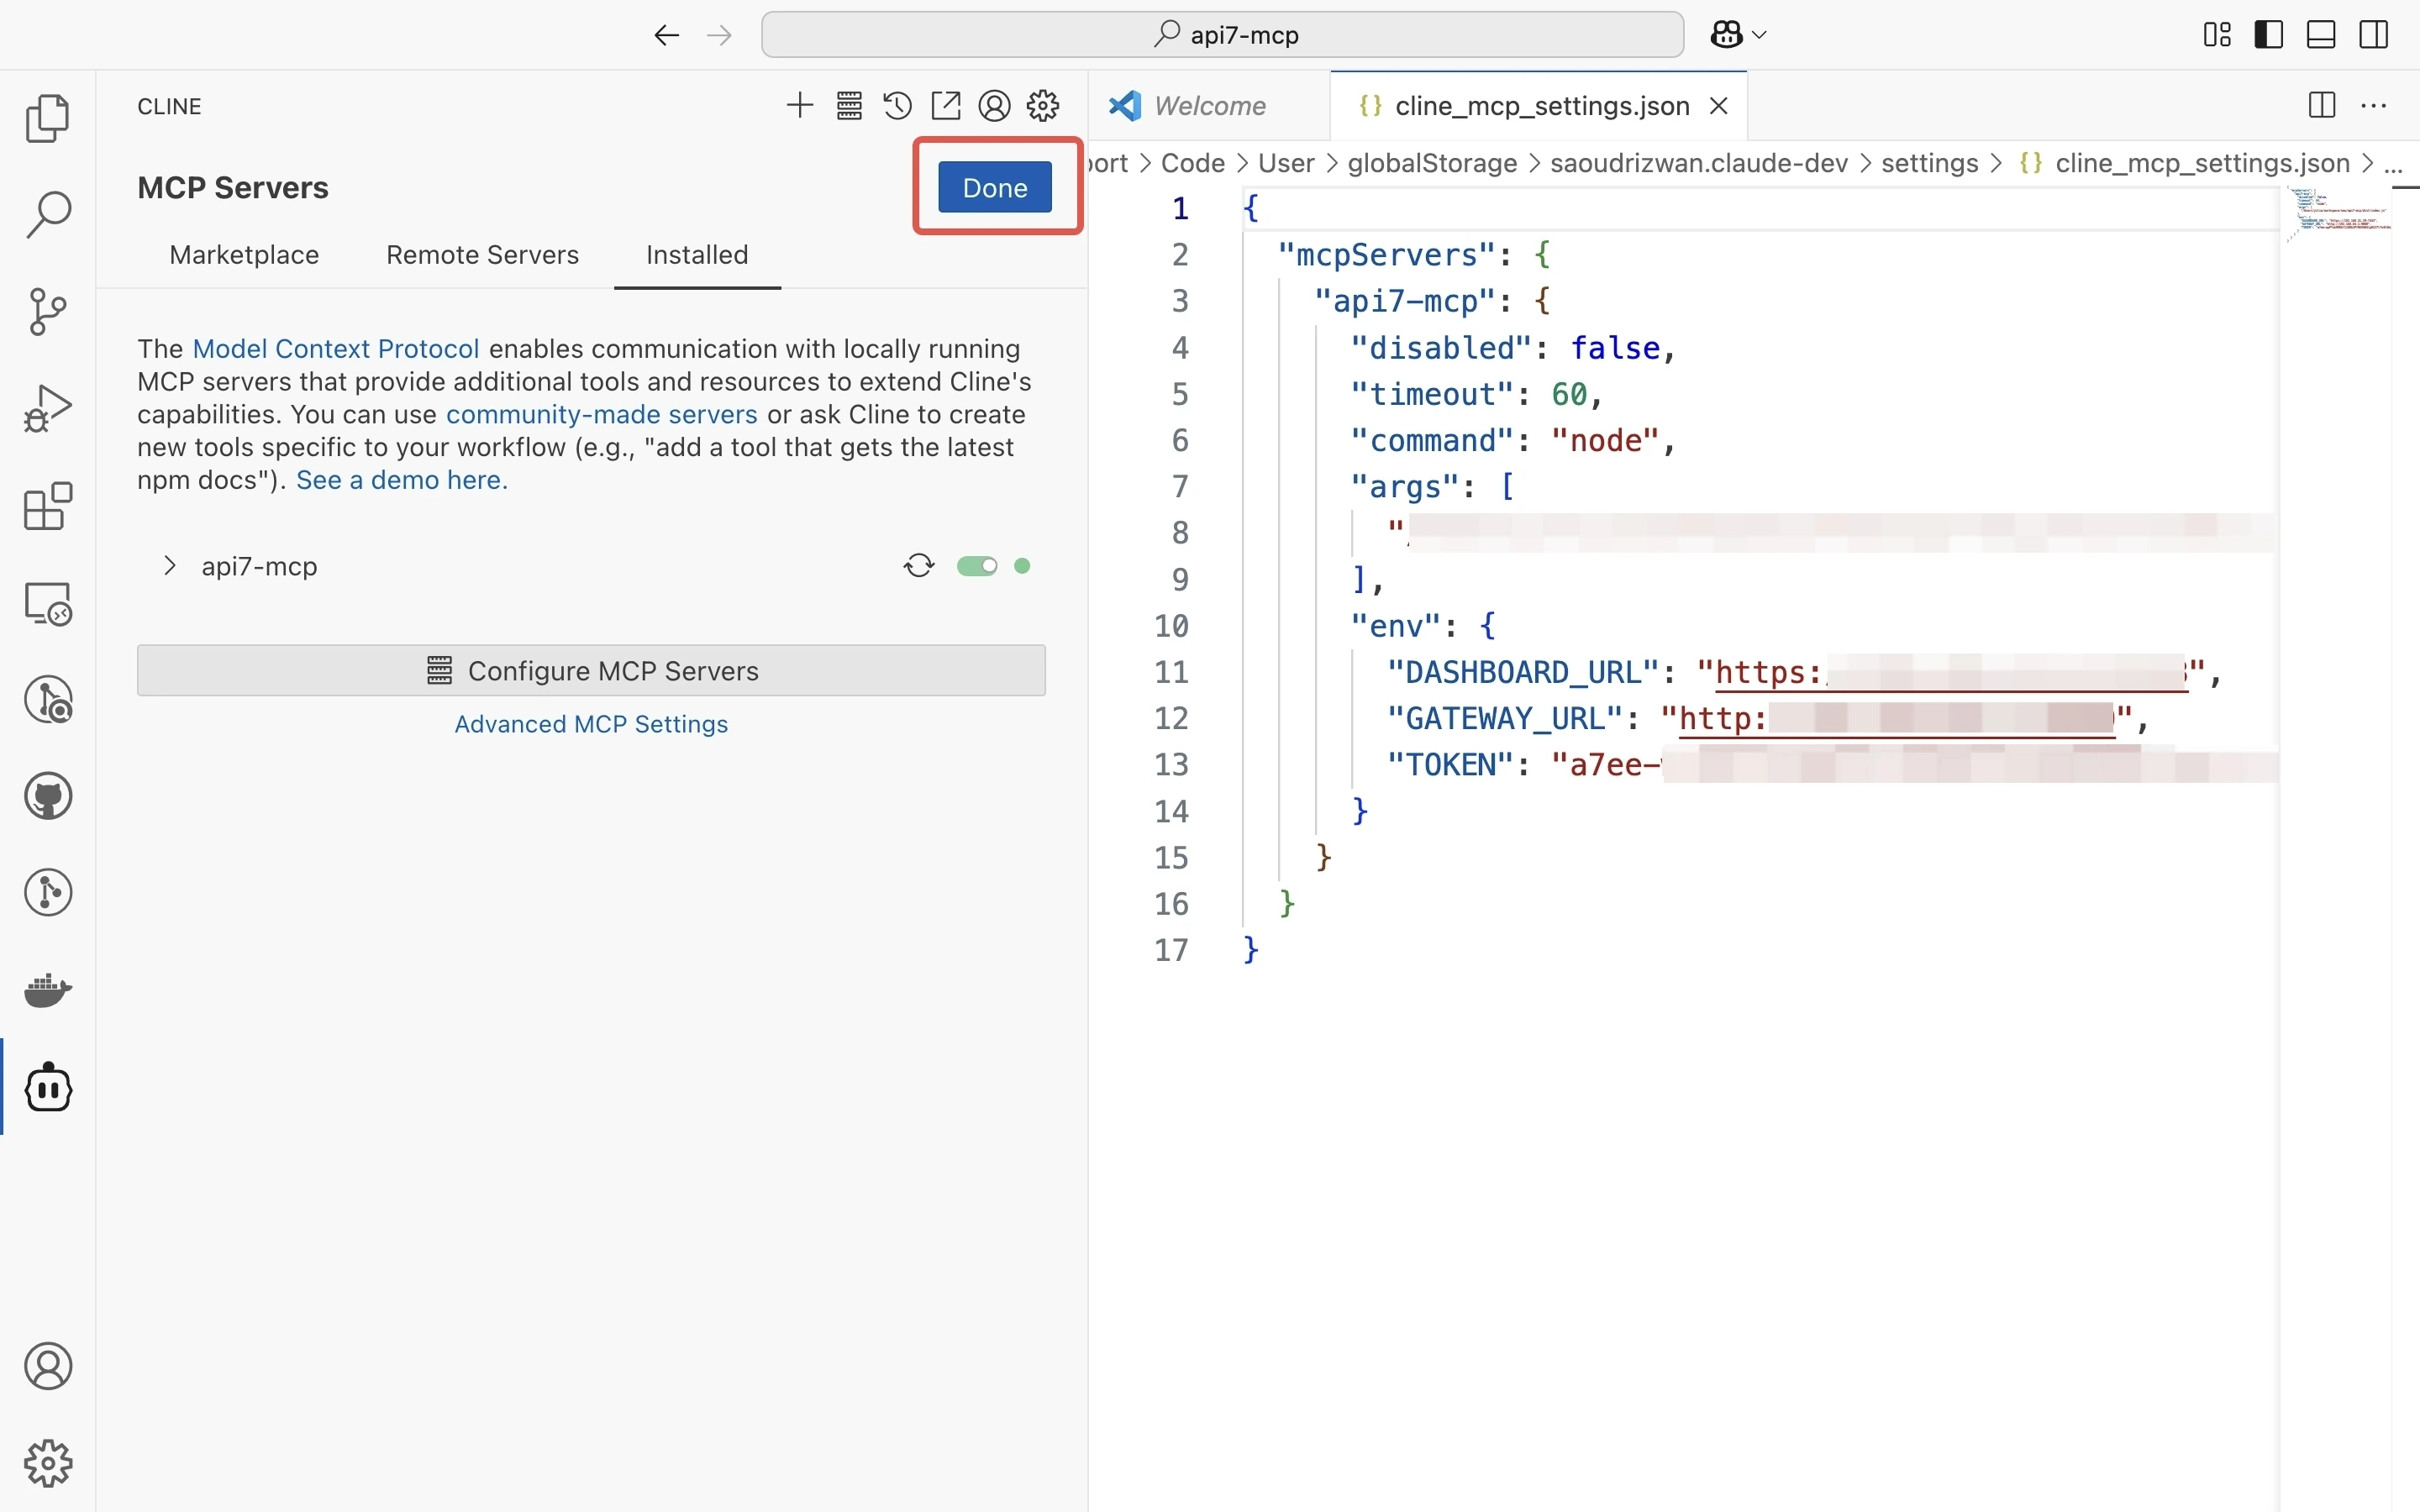
After configuring the cline_mcp_settings.json file, the status on the right side of api7-mcp will turn green, indicating successful configuration and that API7-MCP is running.

Click the Done button in the upper right corner to complete.
Configure Cline in VS Code
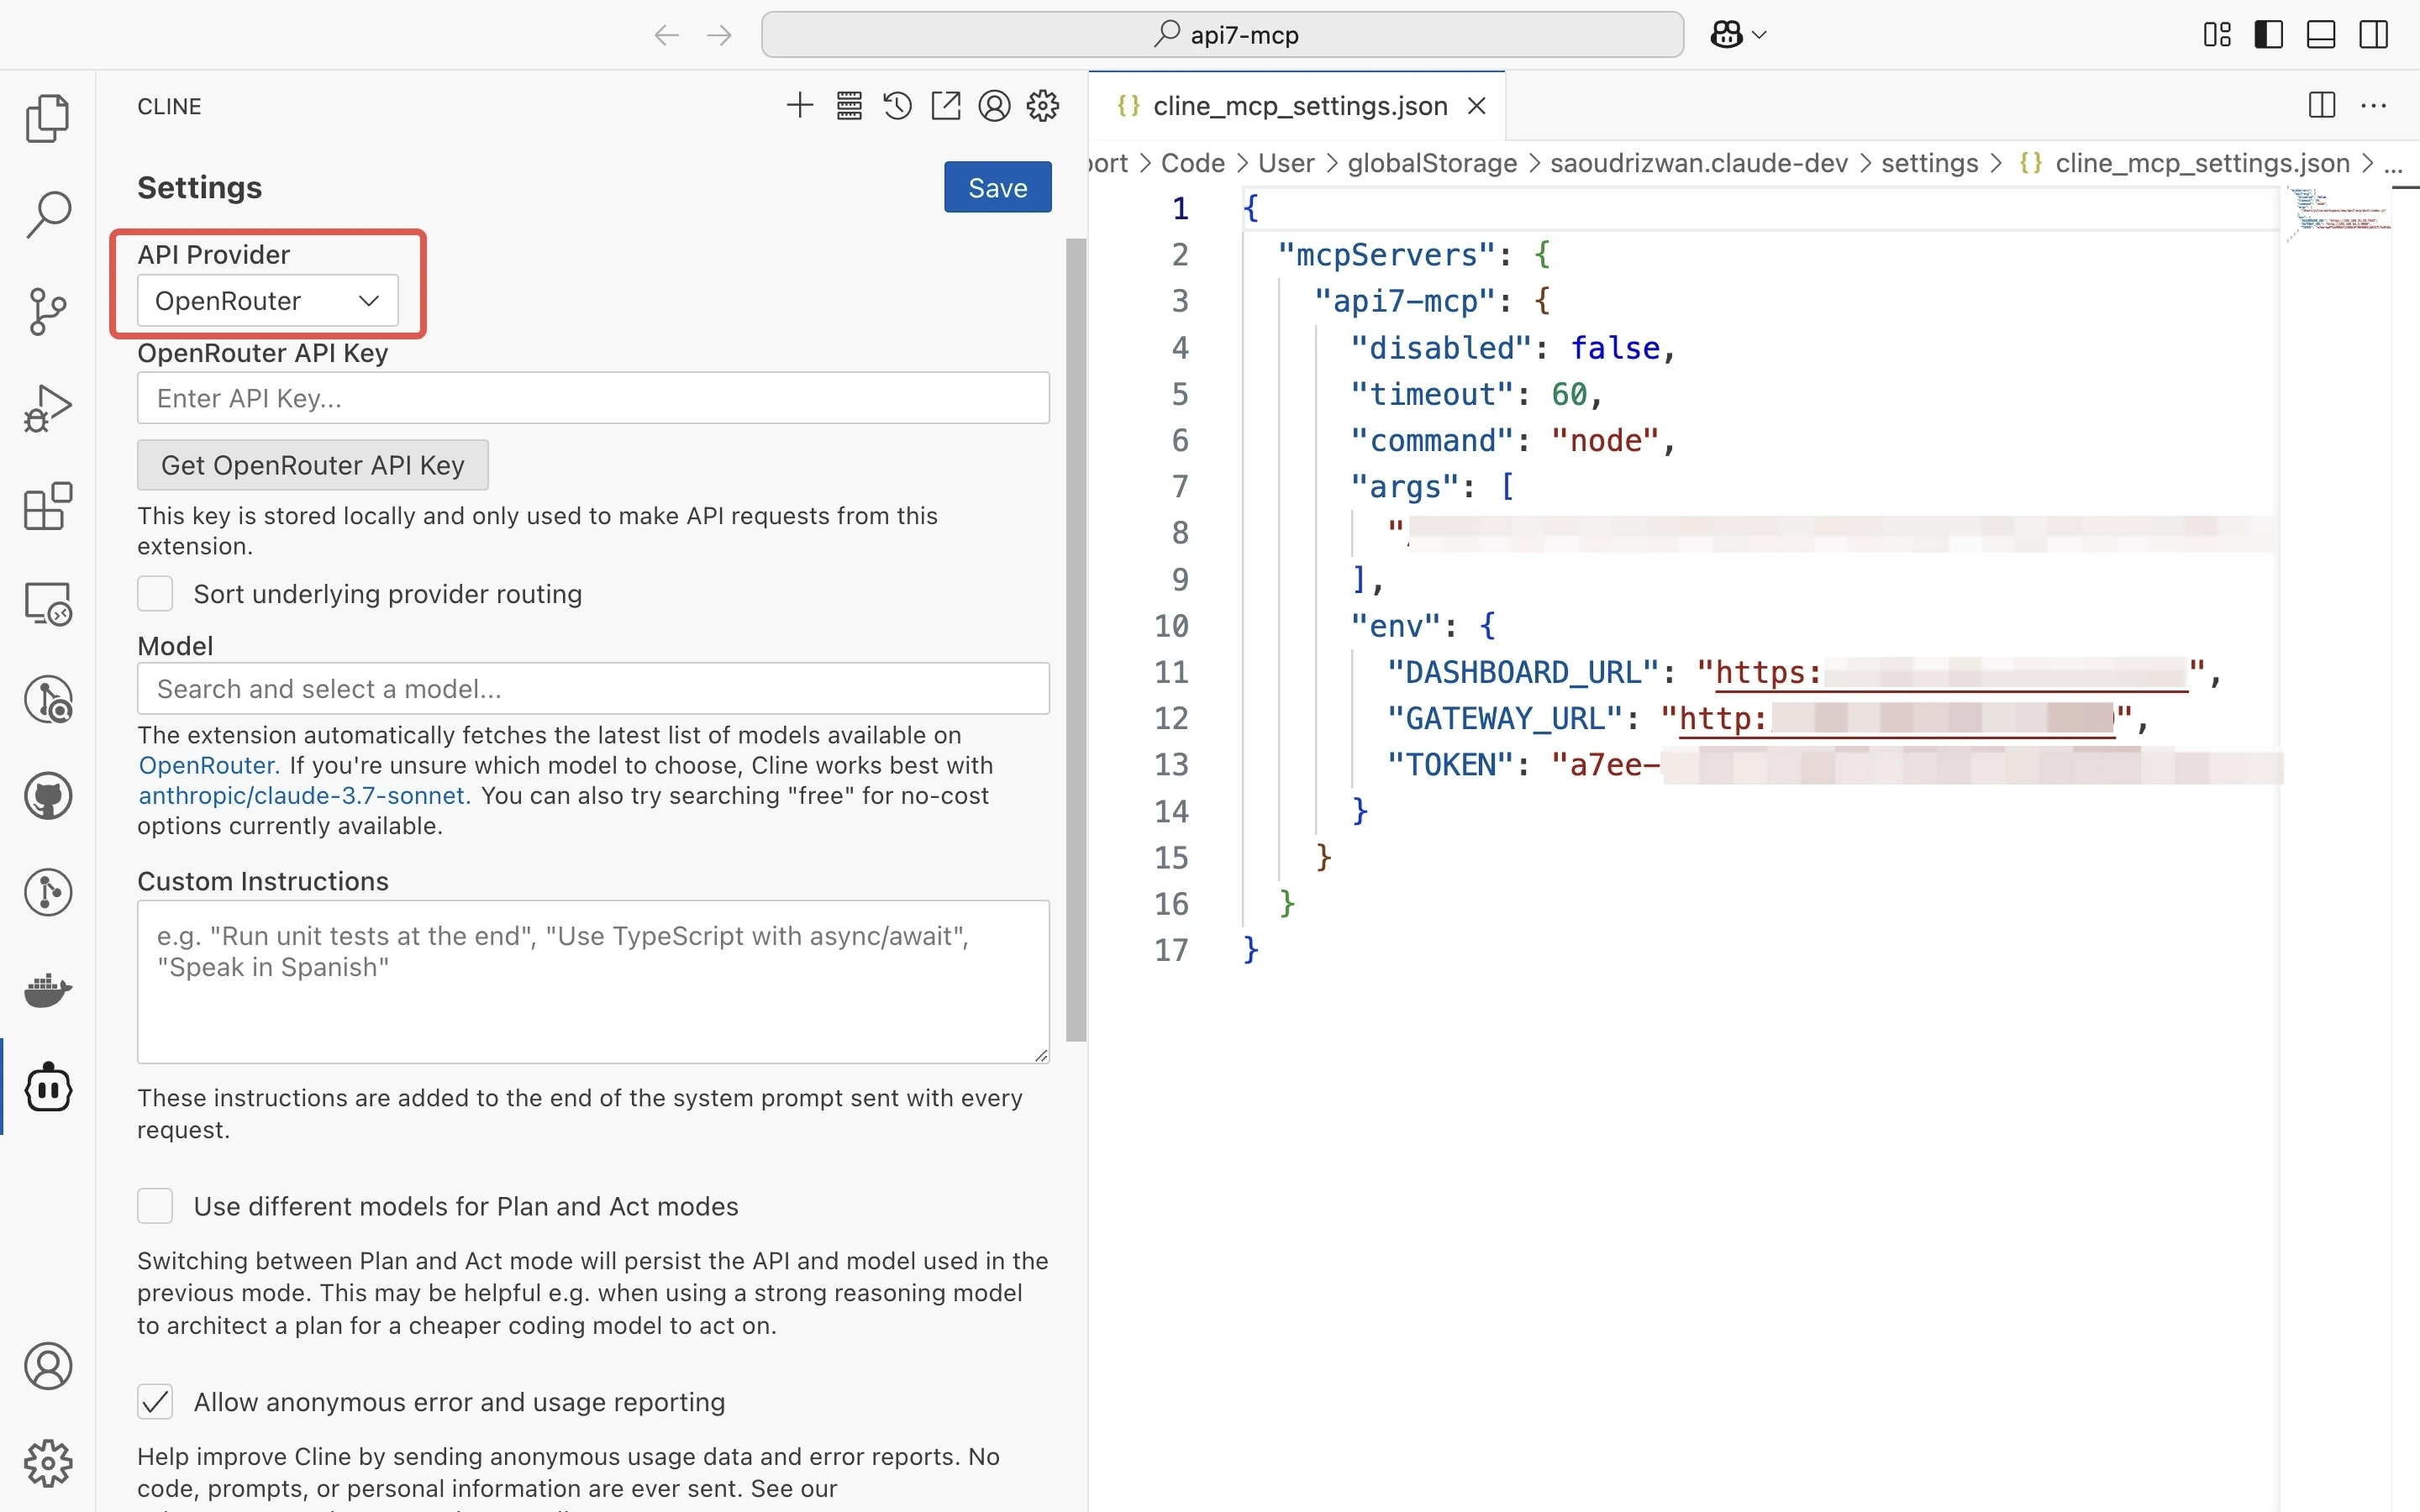
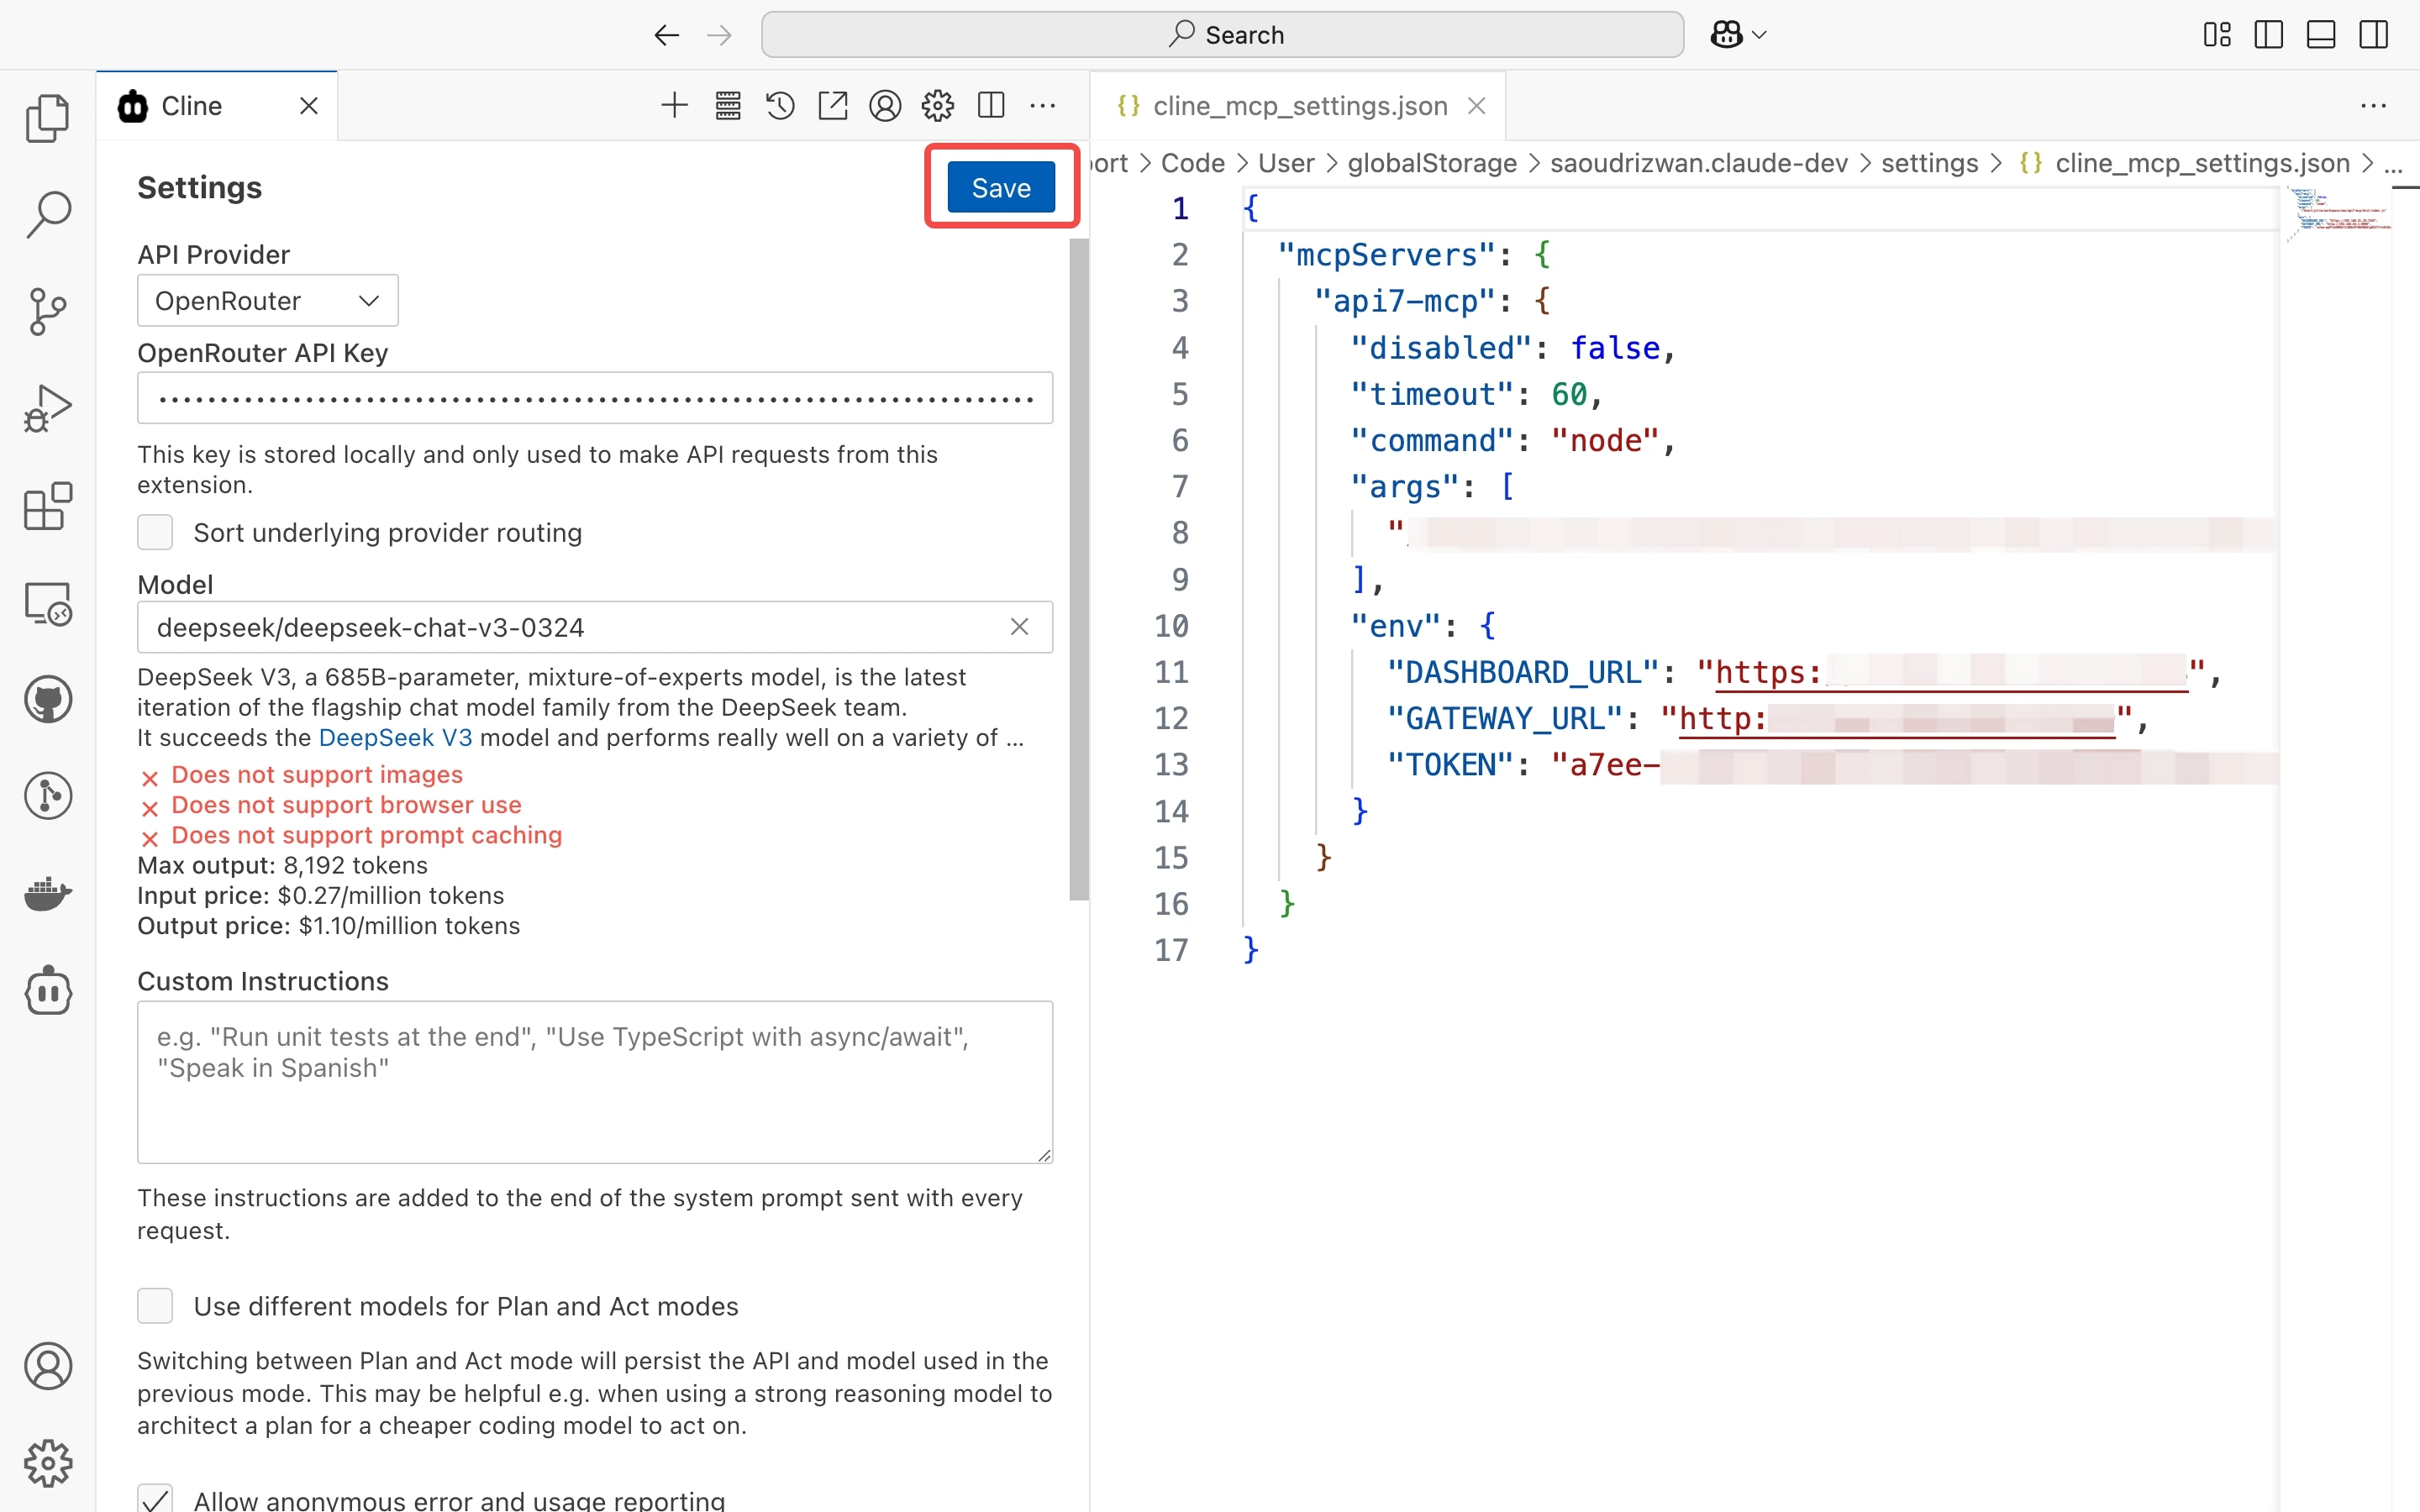
Click the settings icon in the top right corner to access the settings.
In the API Provider field, select your preferred API provider, e.g., OpenRouter.
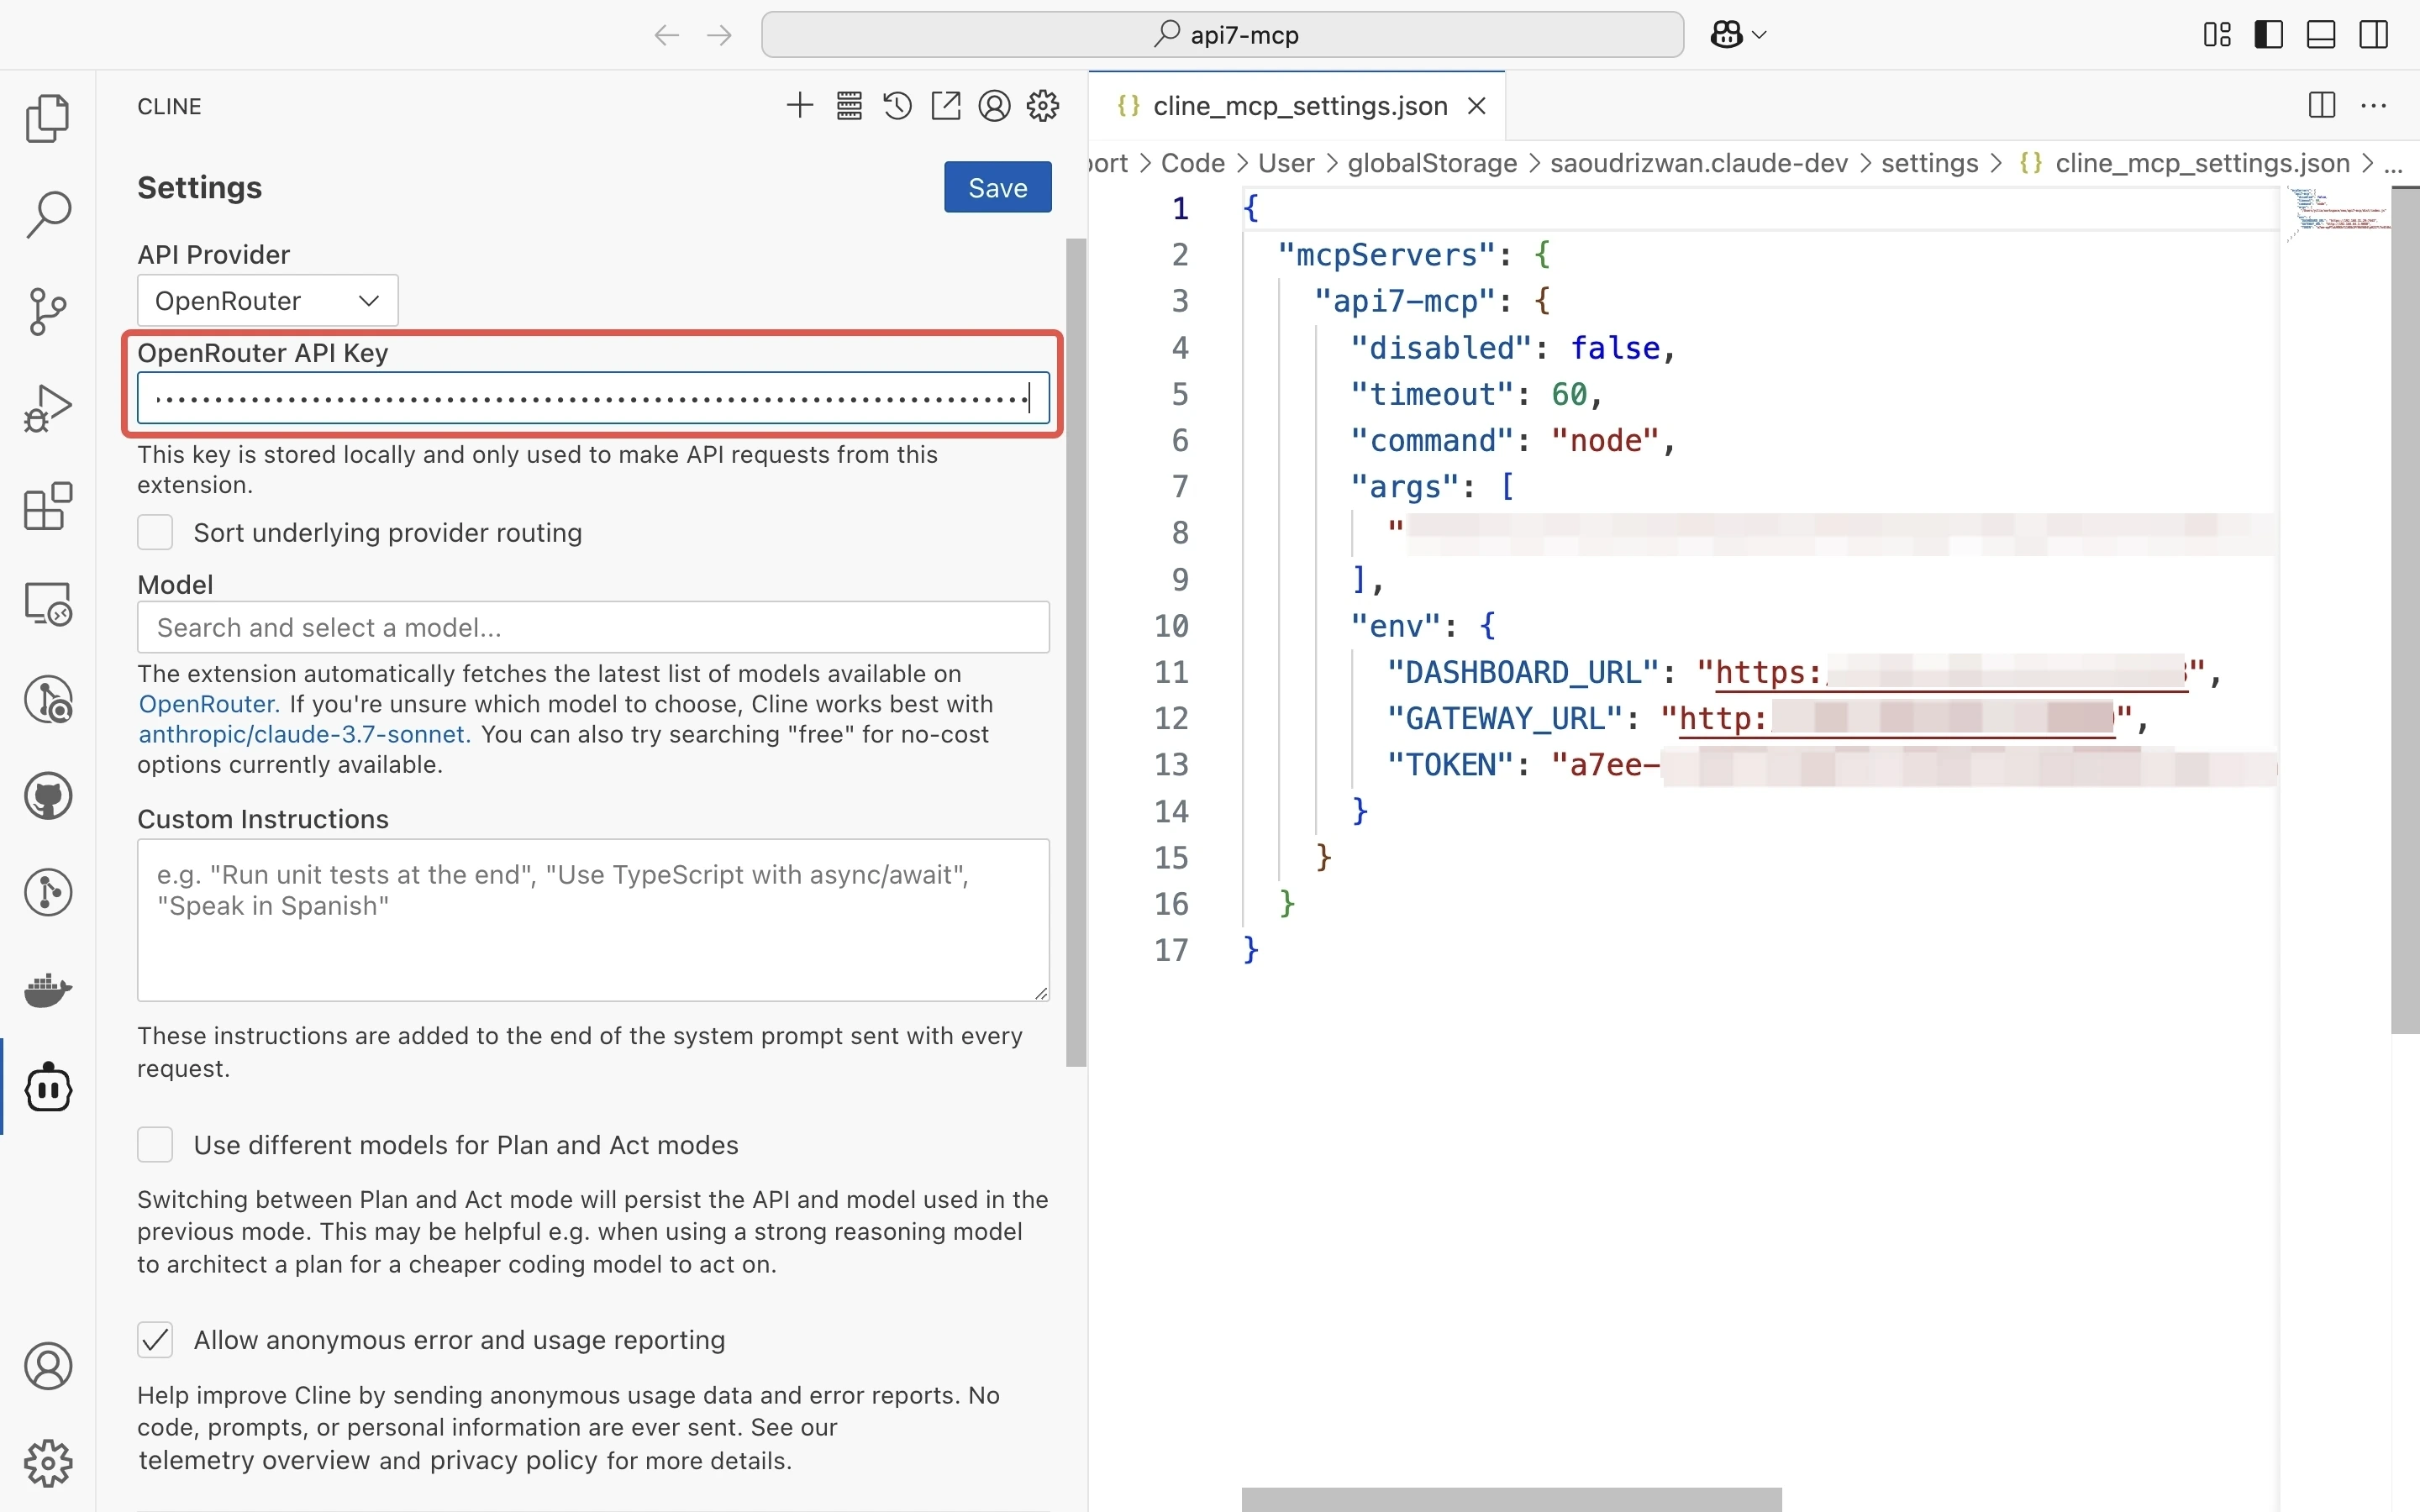
Enter the OpenRouter API Key generated on the OpenRouter platform.
Select the desired AI model, e.g., deepseek/deepseek-chat-v3-0324, as the Model.
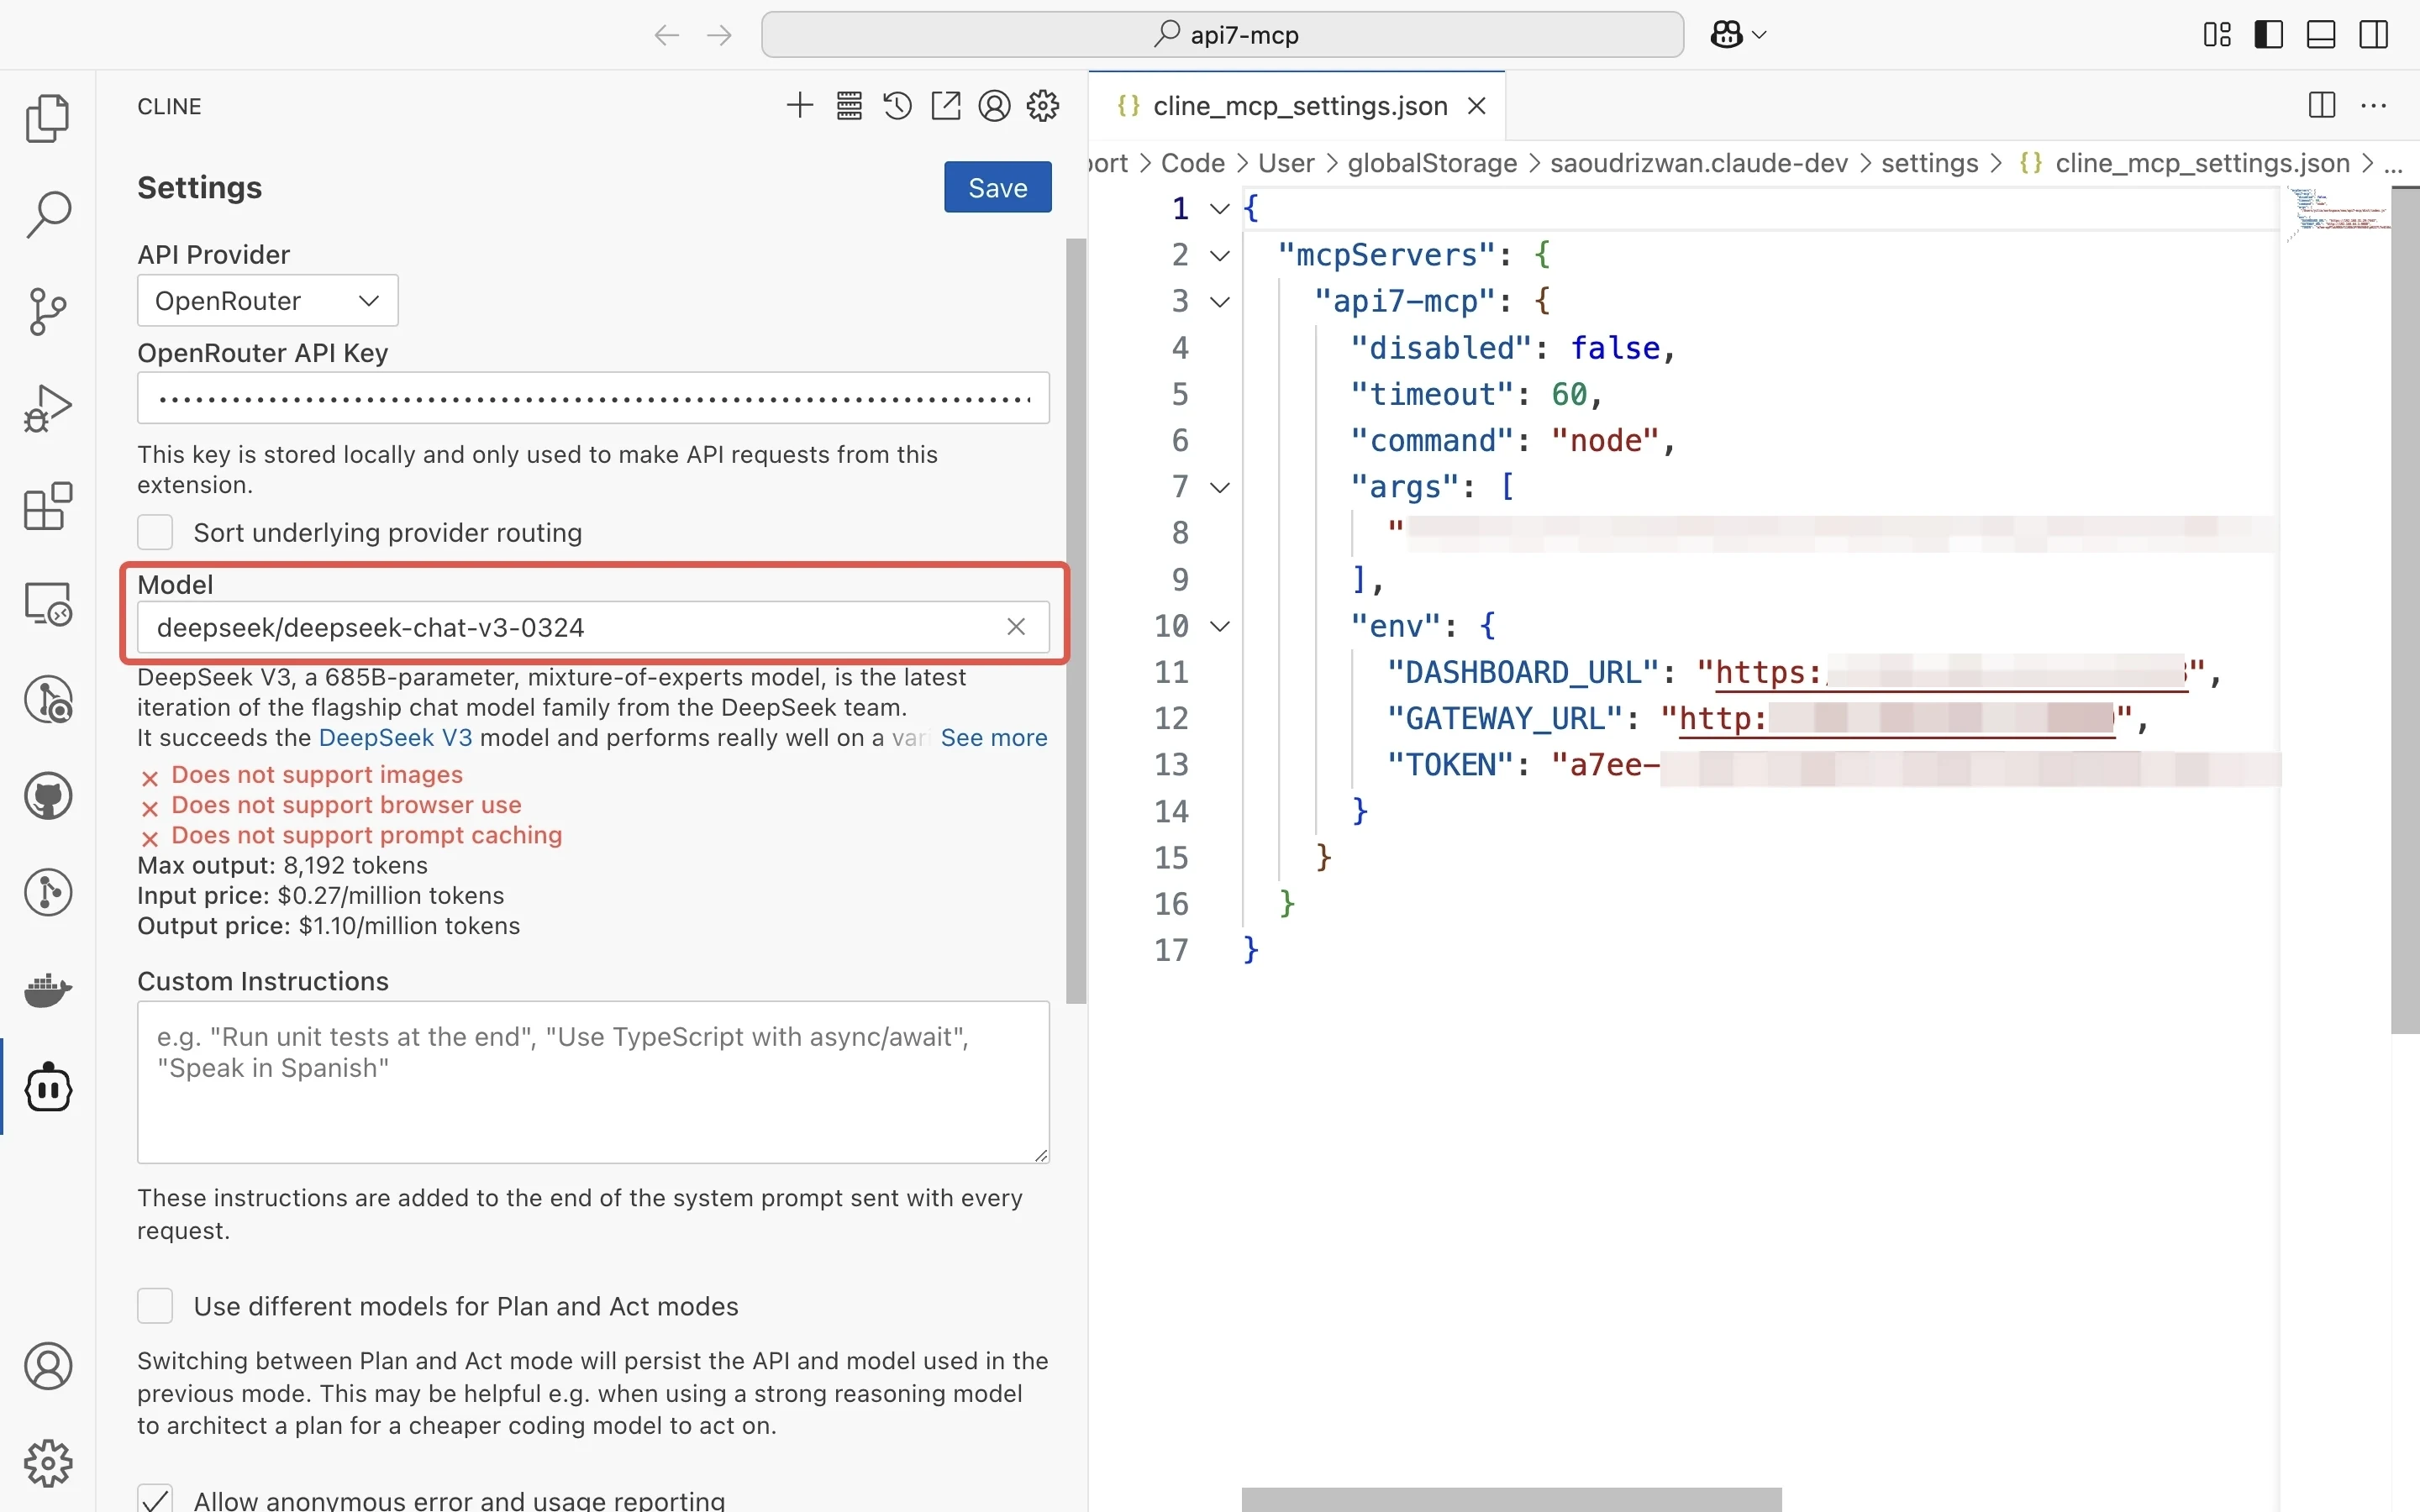
Click Save in the top right corner to complete the configuration.
Verify
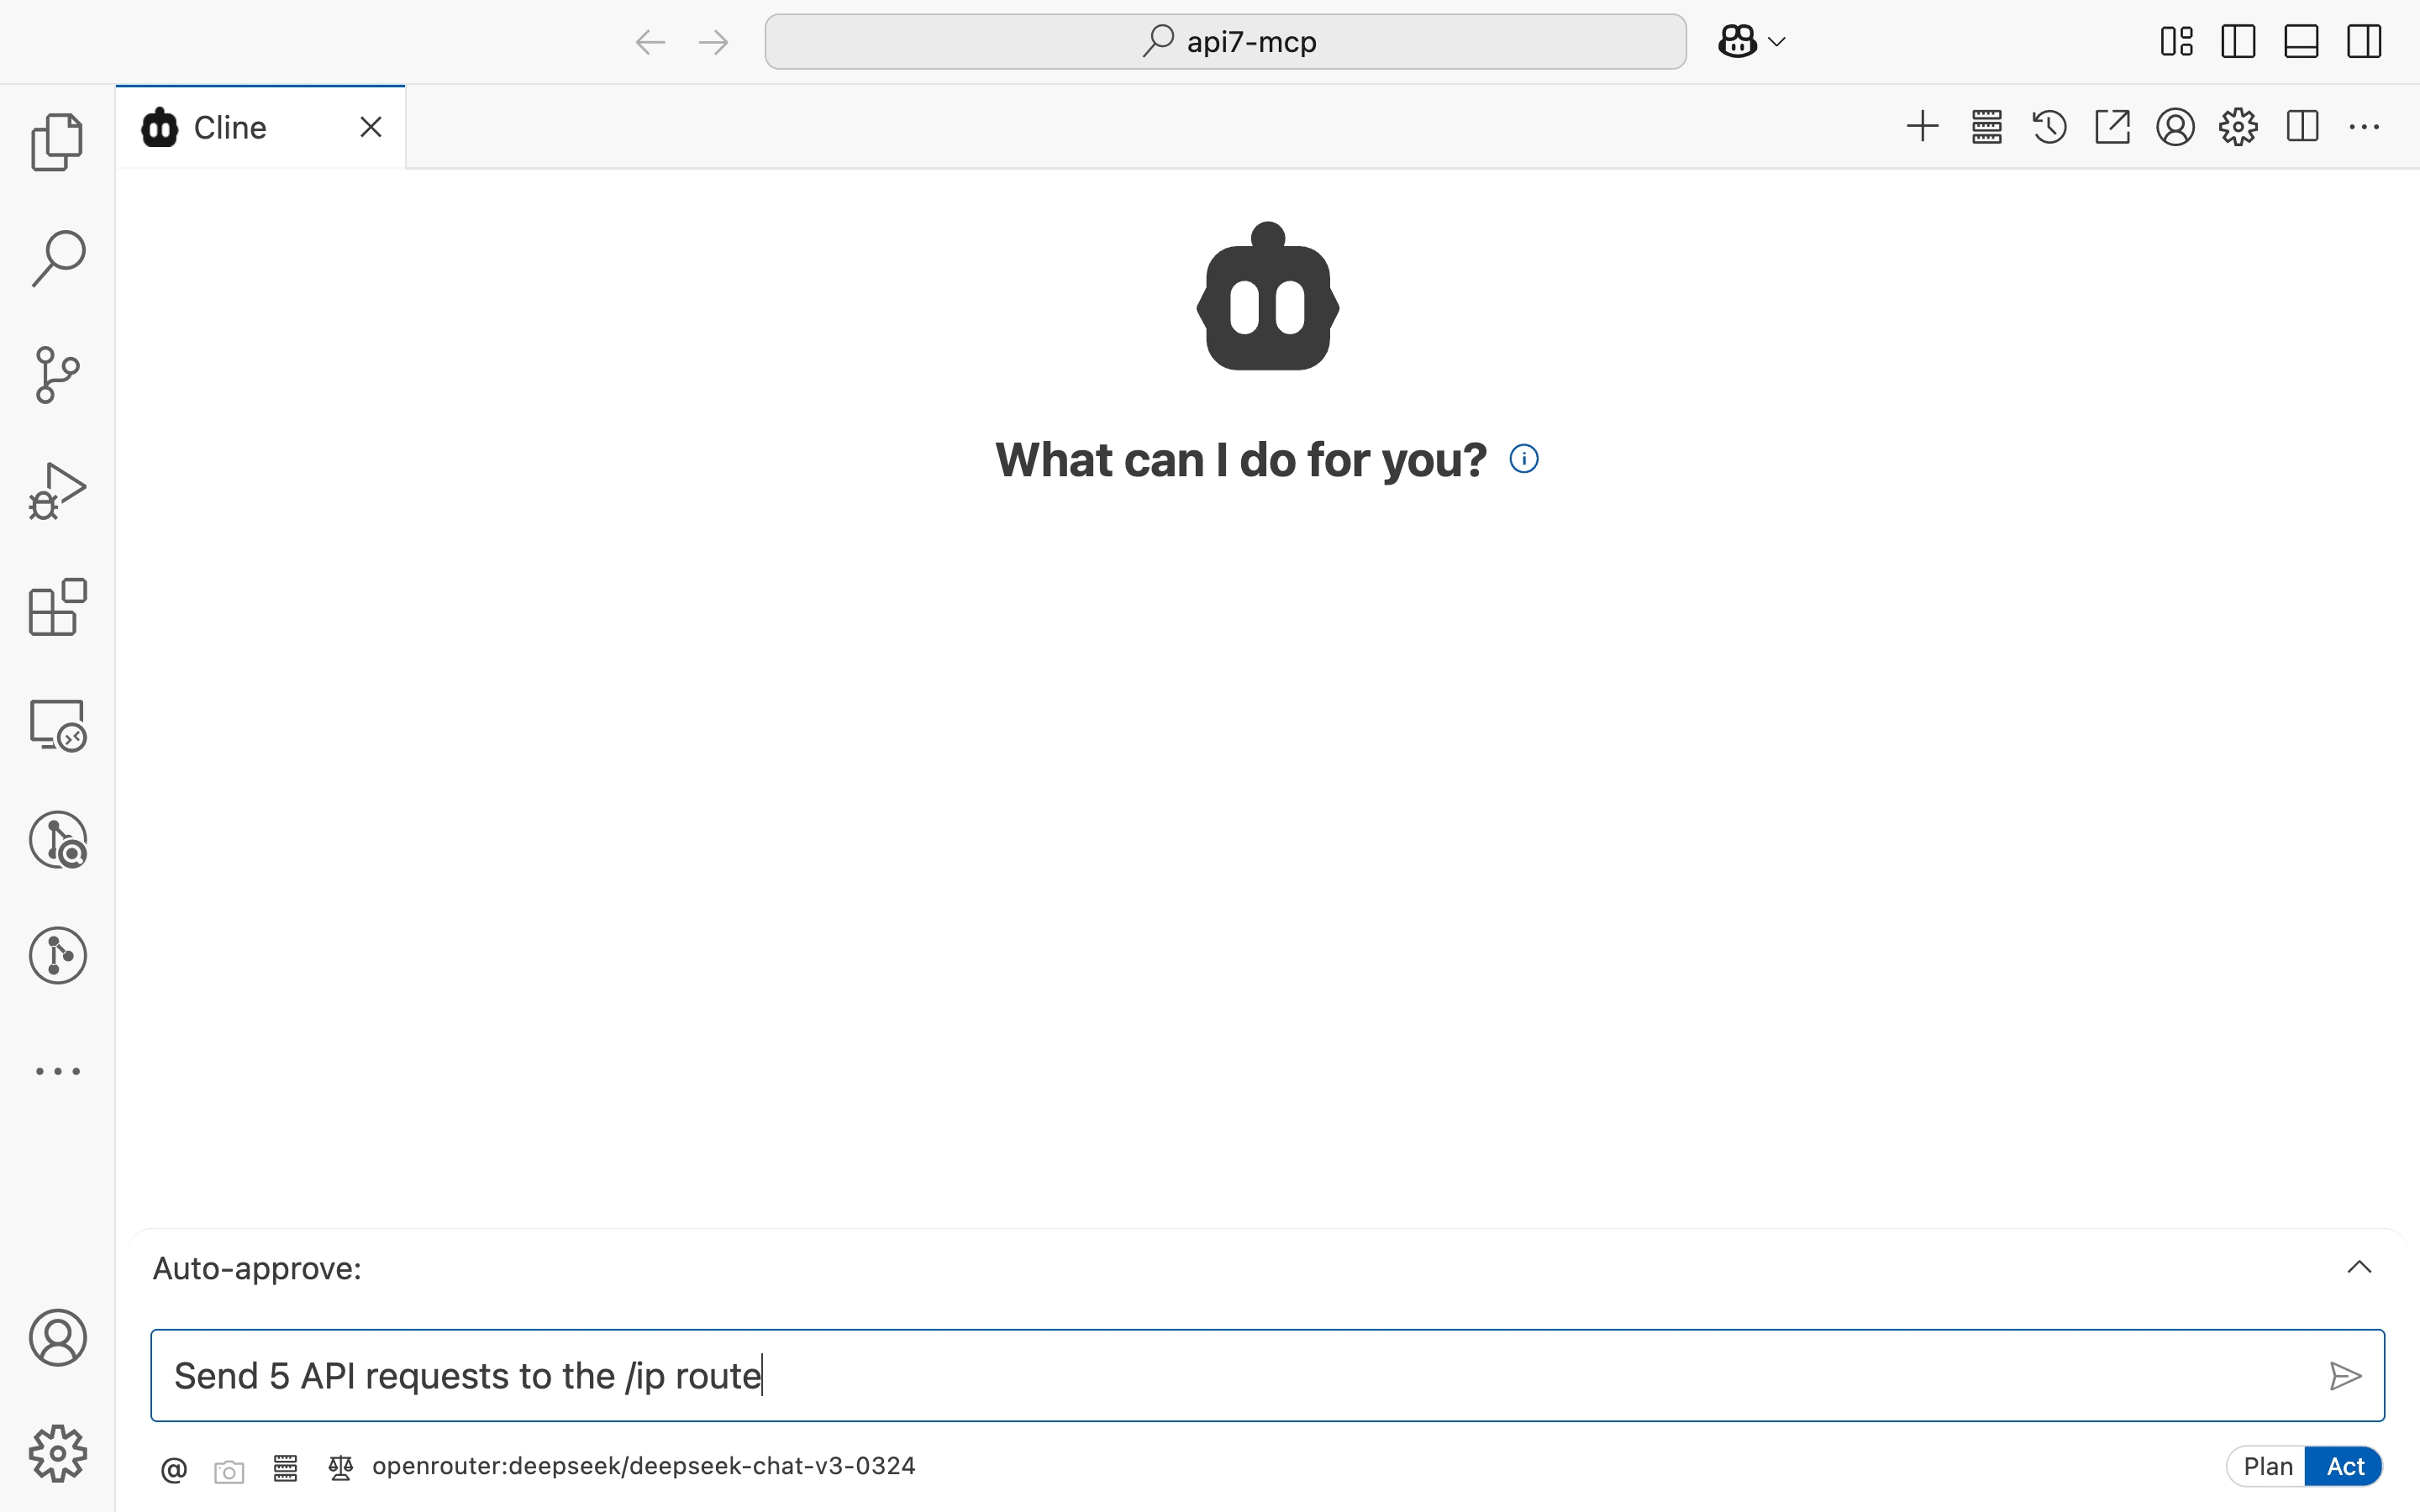
In VS Code, ask Cline to send 5 API requests to API7 Enterprise.
Cline wants to use the send_request_to_gateway operation to run the command. Click Approve to authorize it.

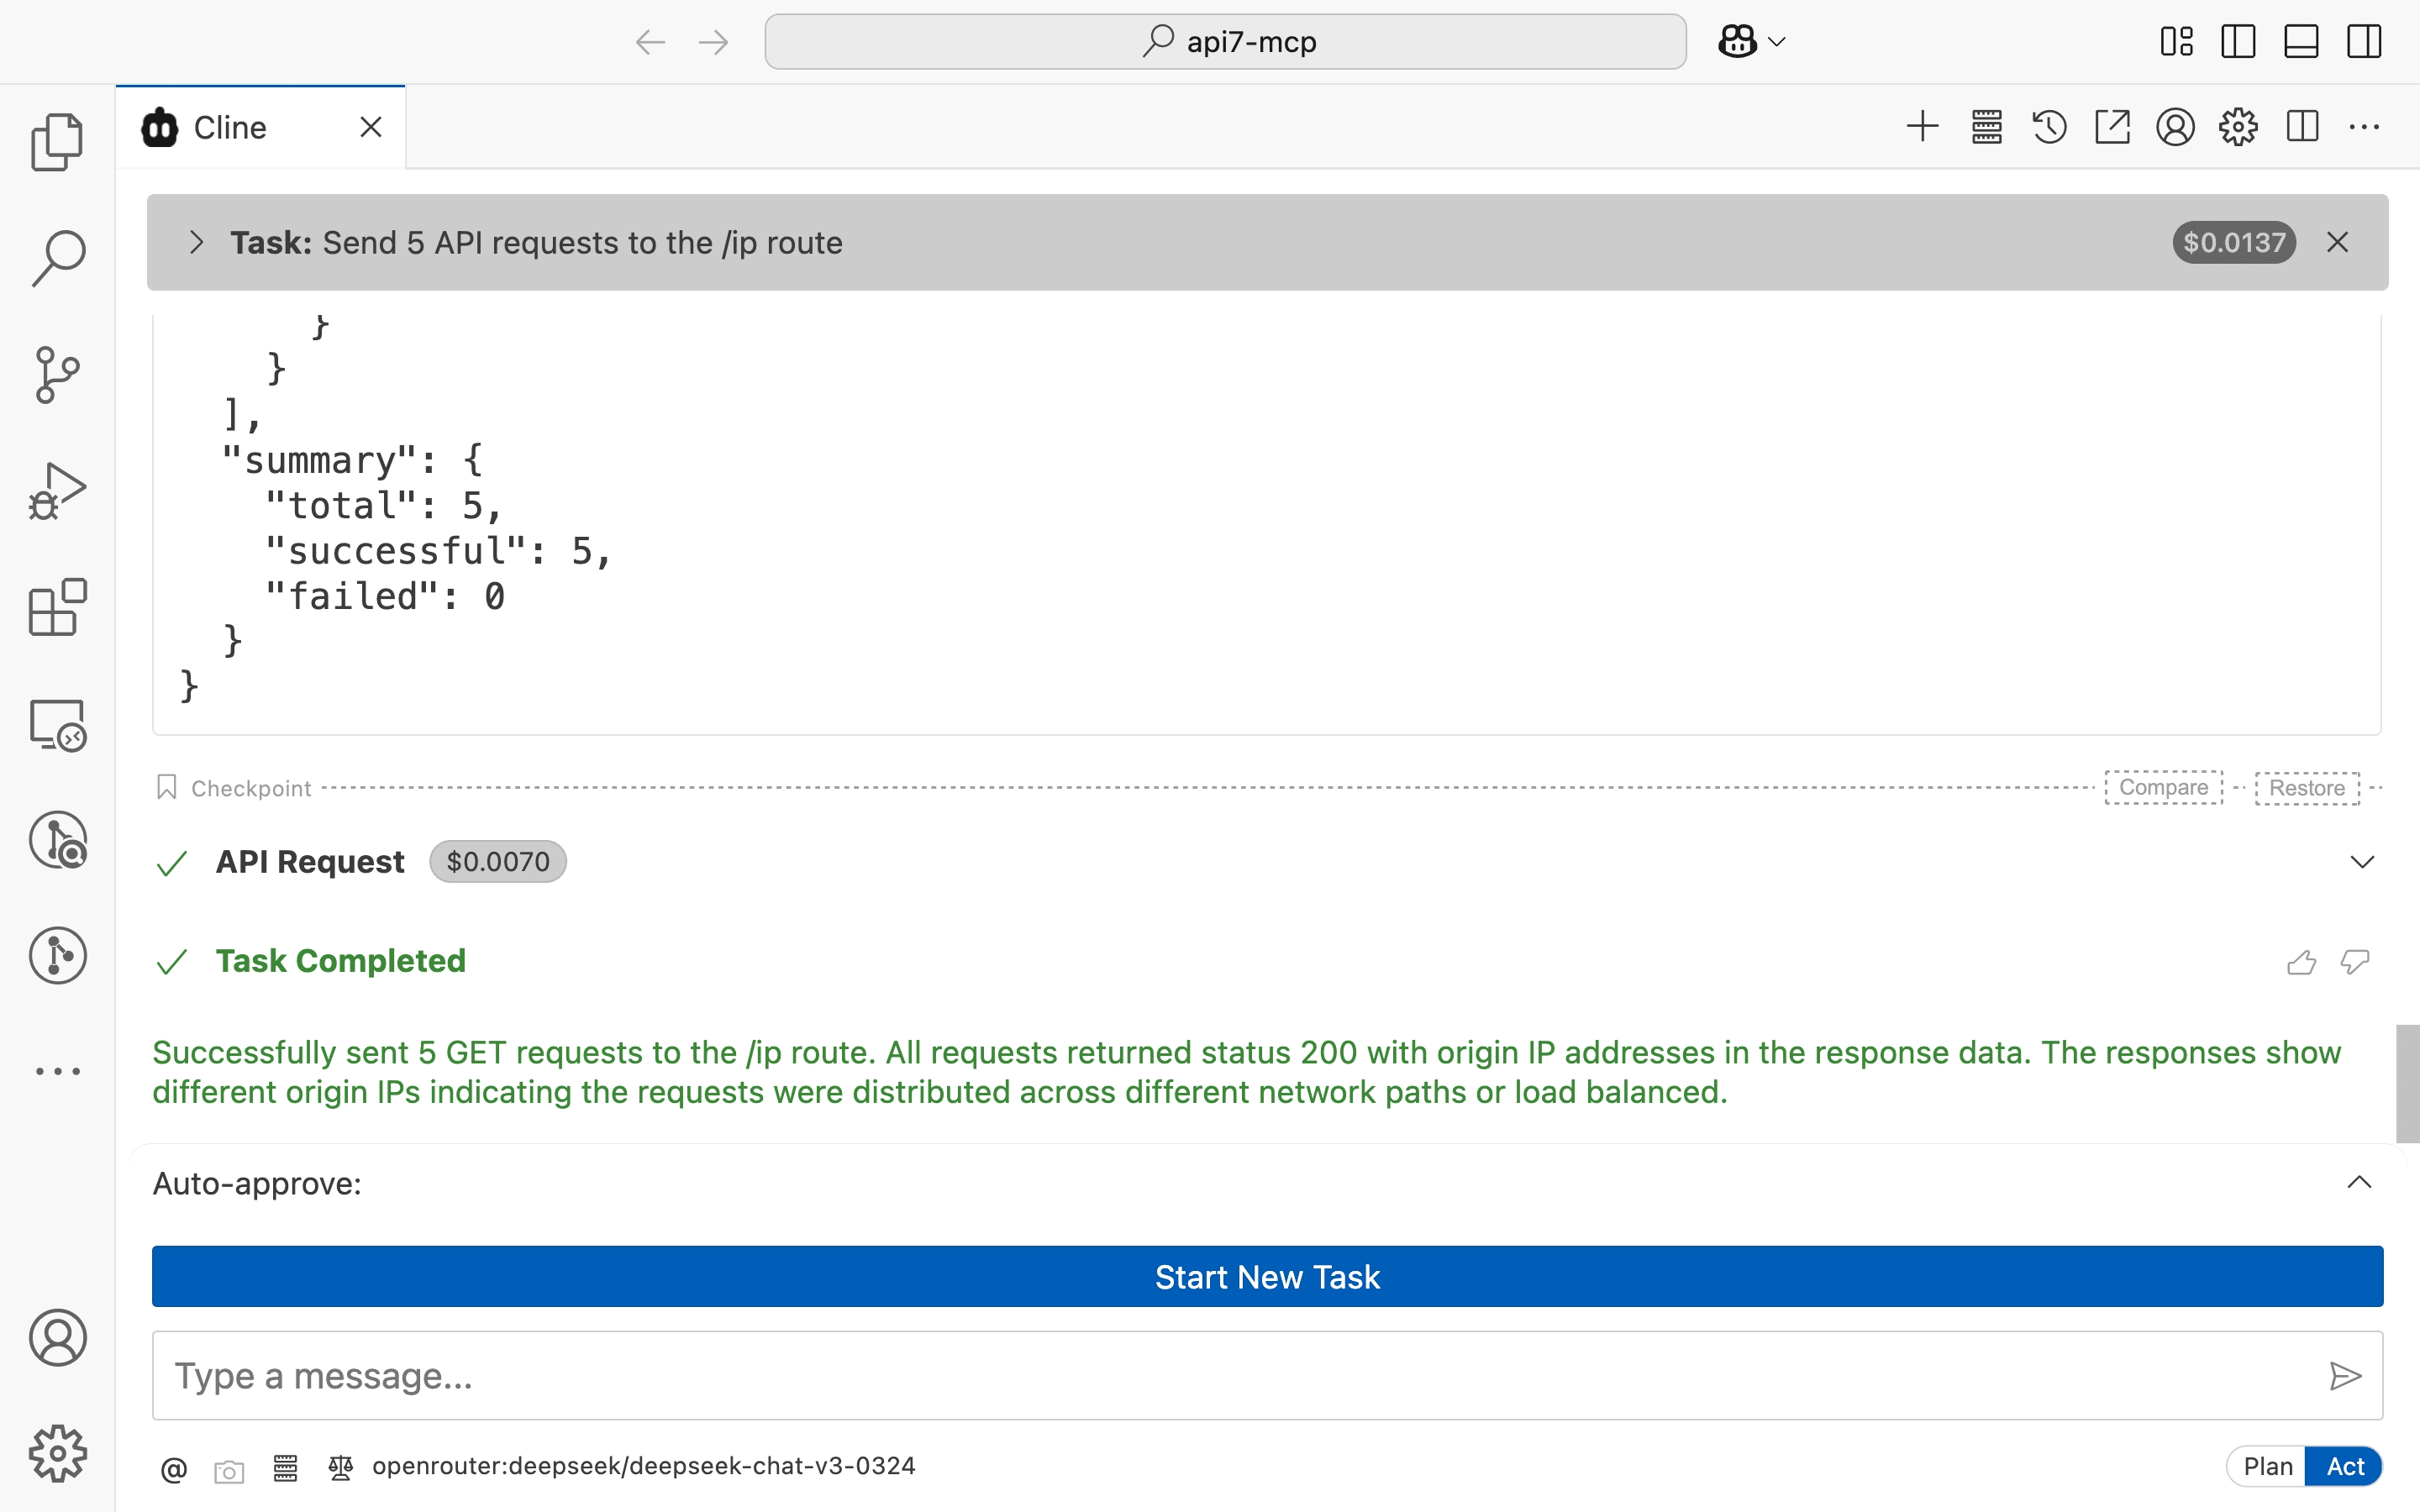
Cline returns that 5 API requests are successfully sent.
Check API Request Count
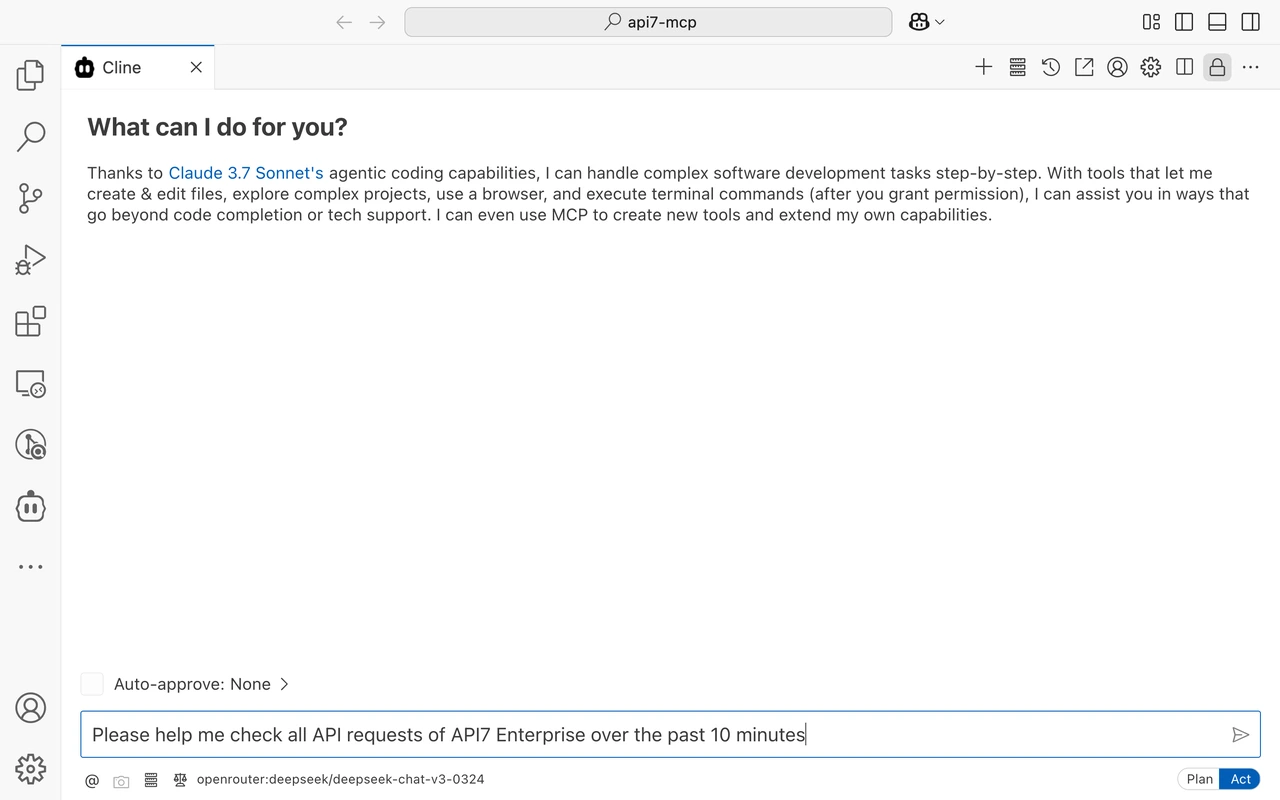
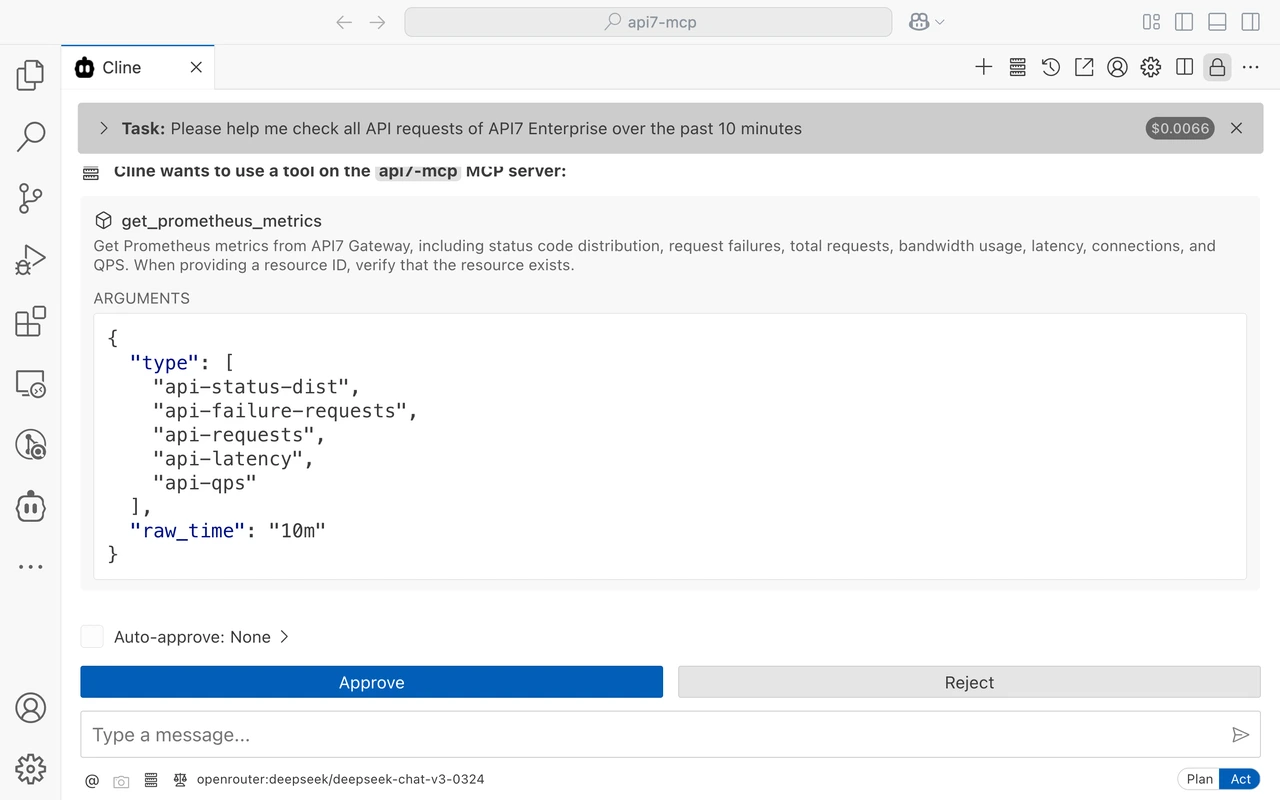
Ask Cline to check all API requests of API7 Enterprise over the past 10 minutes.
Cline requests data on API requests over the past 10 minutes. Click Approve to authorize it.
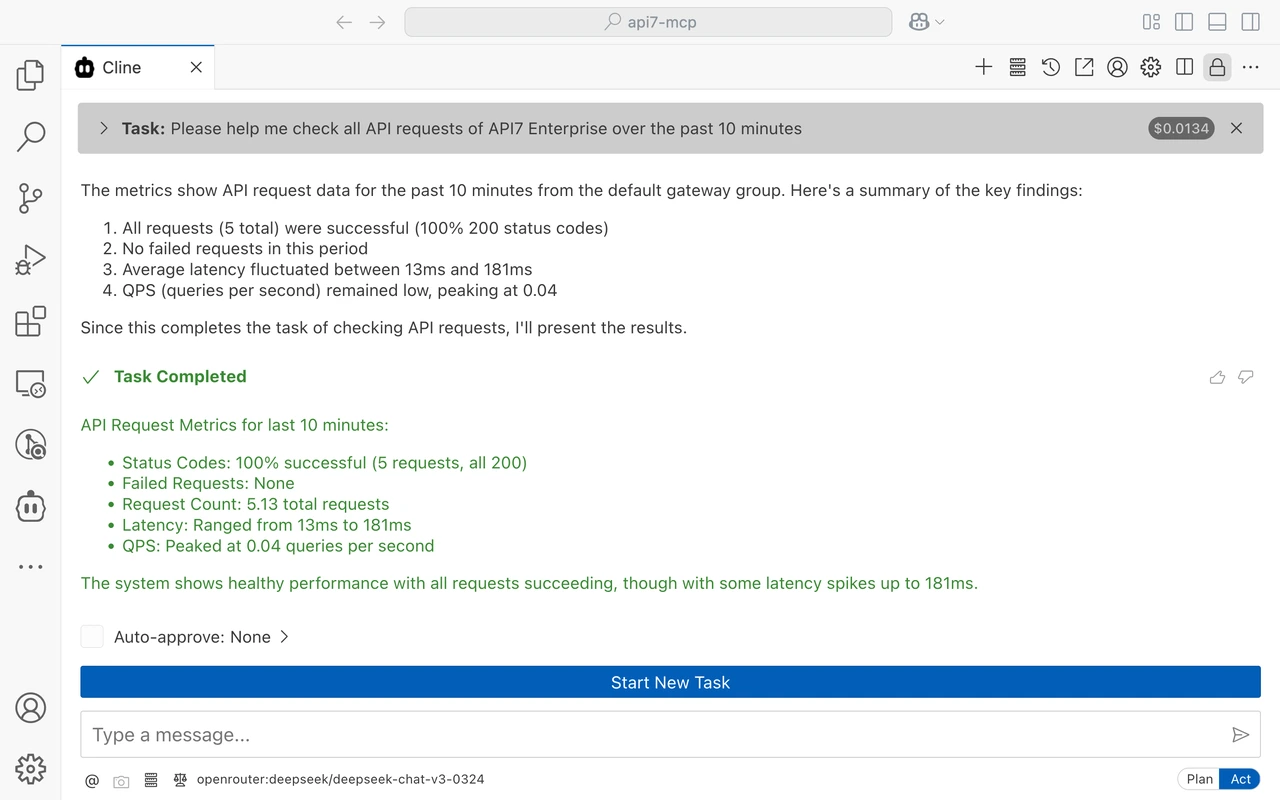
Cline returns the API request data for the past 10 minutes of API7 Enterprise. The result shows that the request count in the past 10 minutes is "5.13", and the 5 requests are sent successfully.
Select Monitoring from the side navigation bar on the API7 Enterprise dashboard. The request volume is 5, and all 5 requests received 200 responses, consistent with the result from API7-MCP.
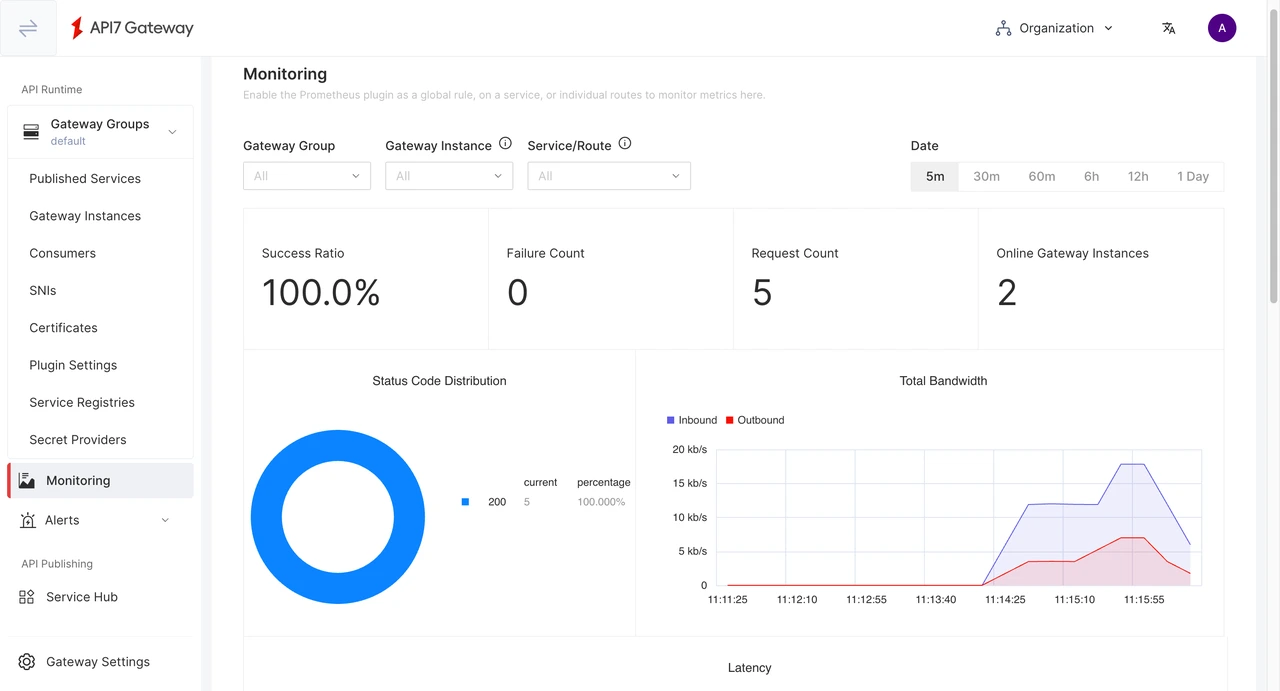
The 13% deviation in the API request count could be attributed to factors such as network latency, data transmission issues, caching mechanisms, or data update delays, which are normal phenomena.
Check QPS and Latency
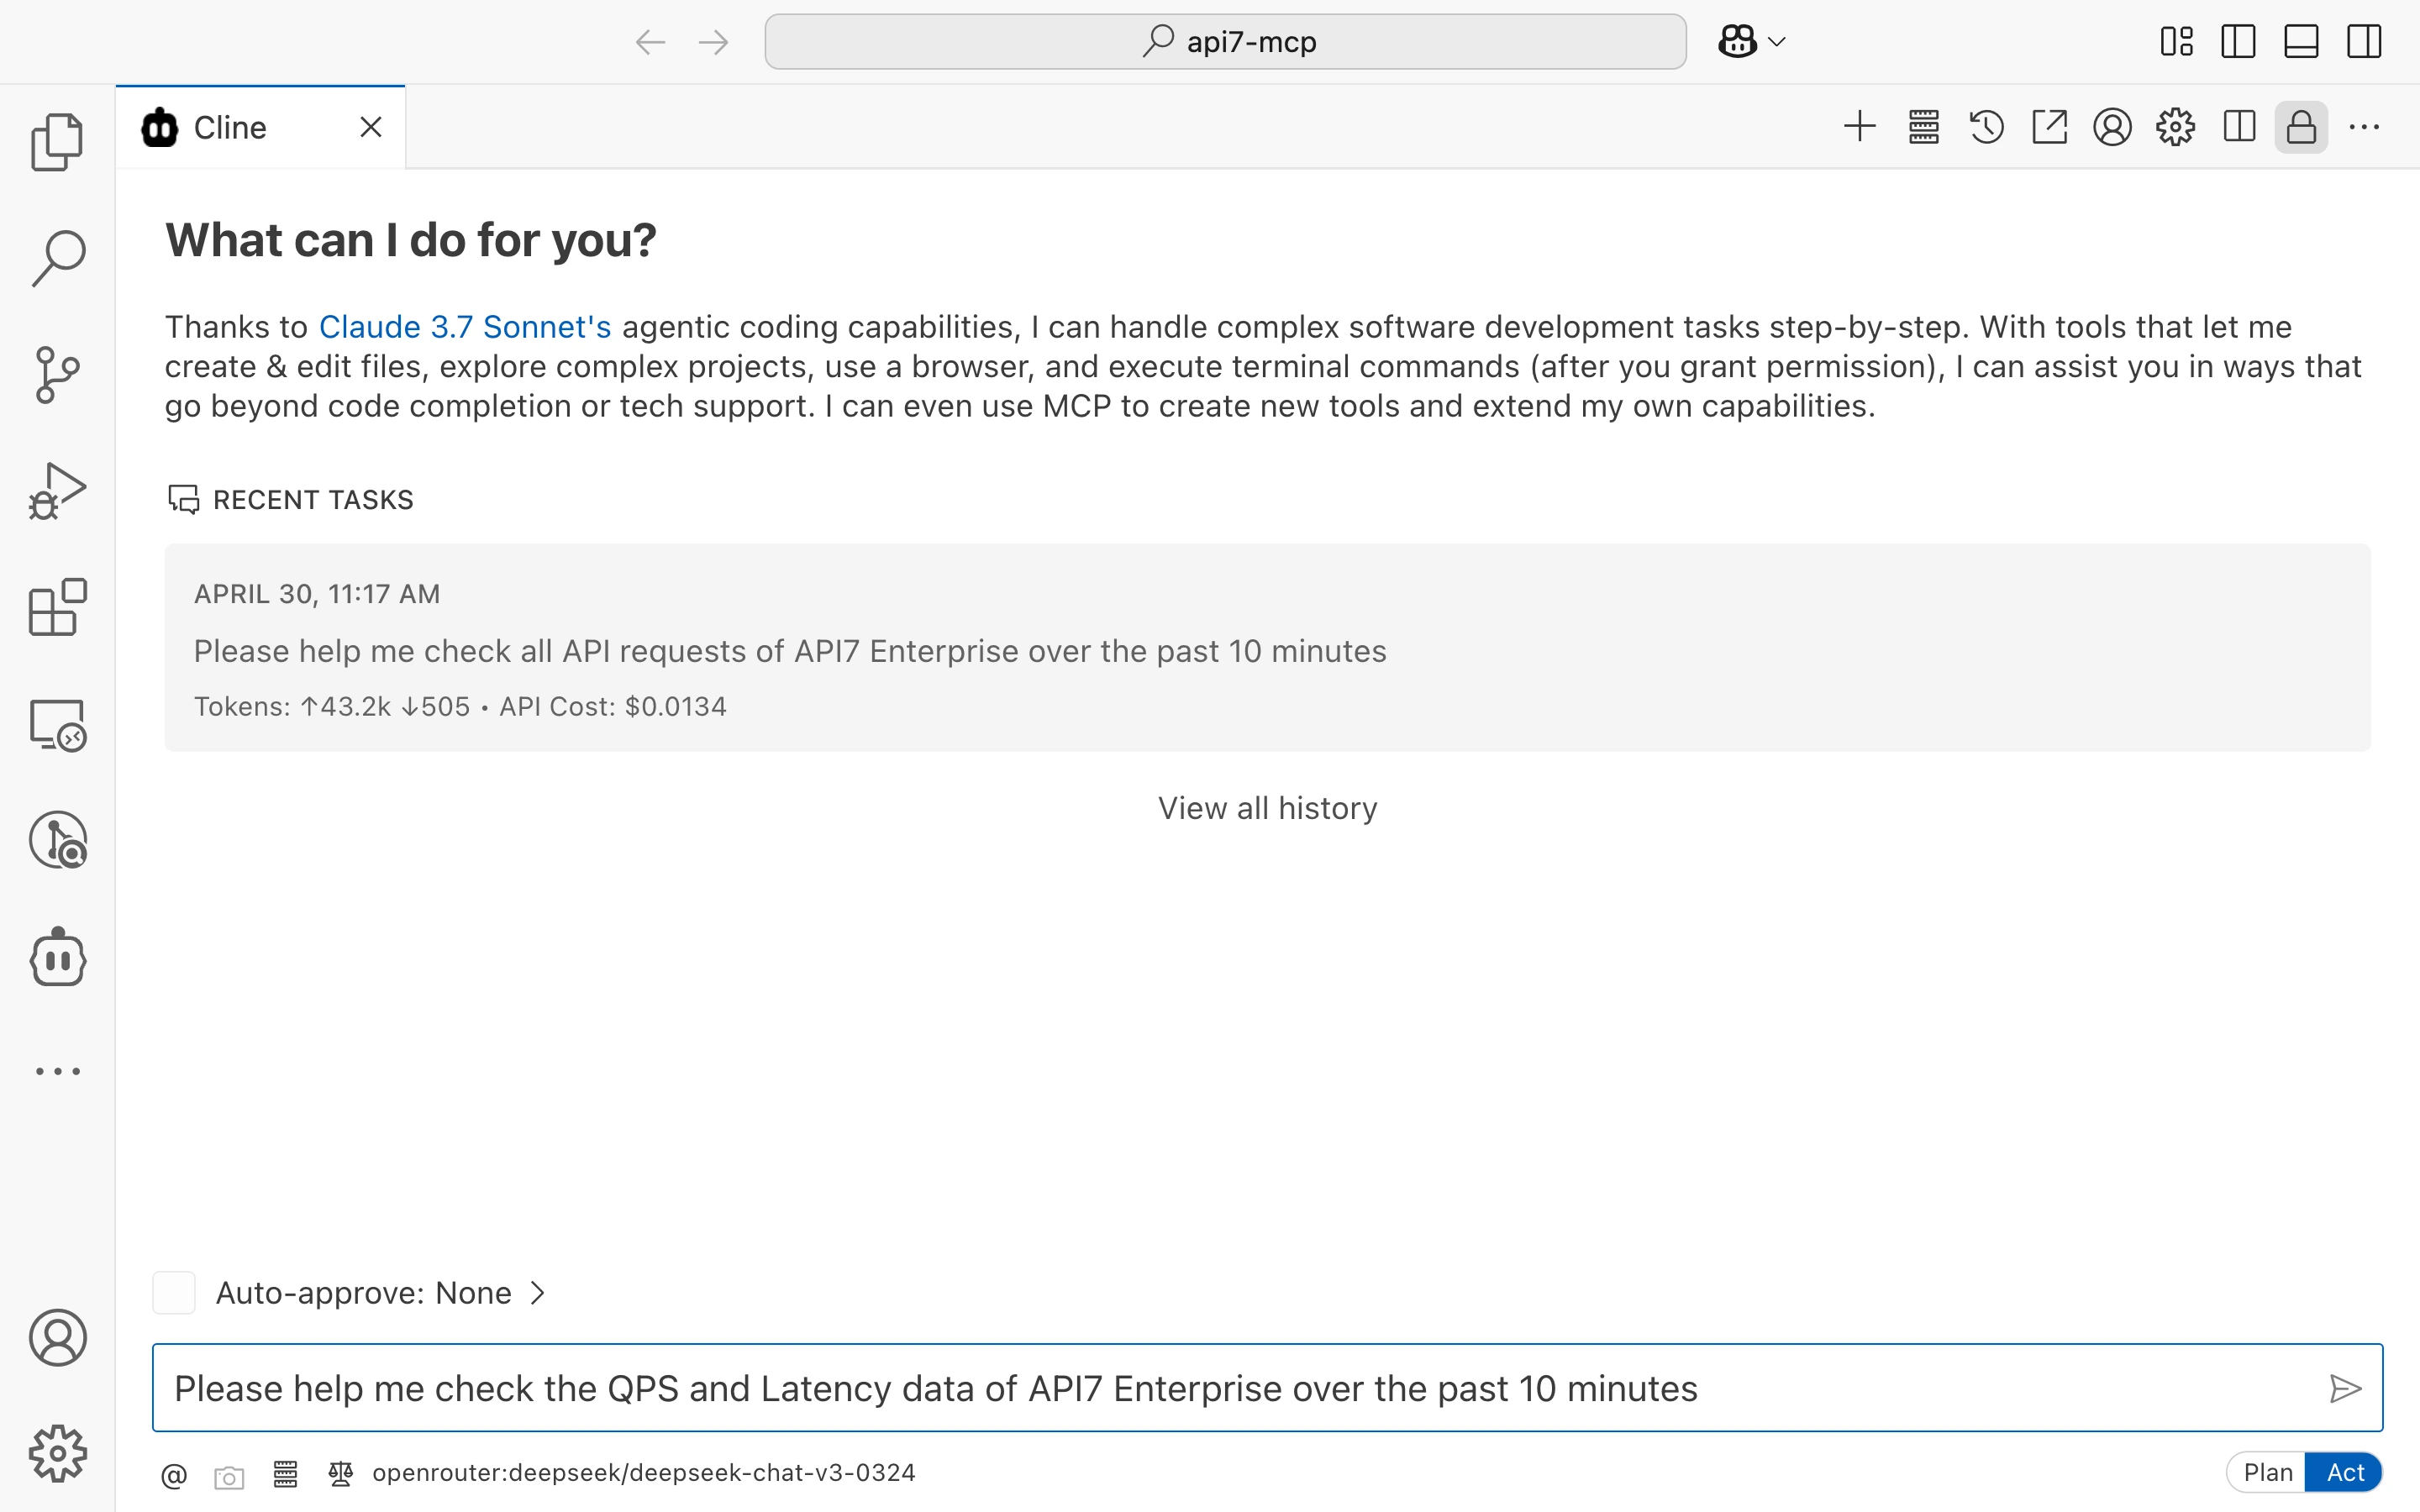
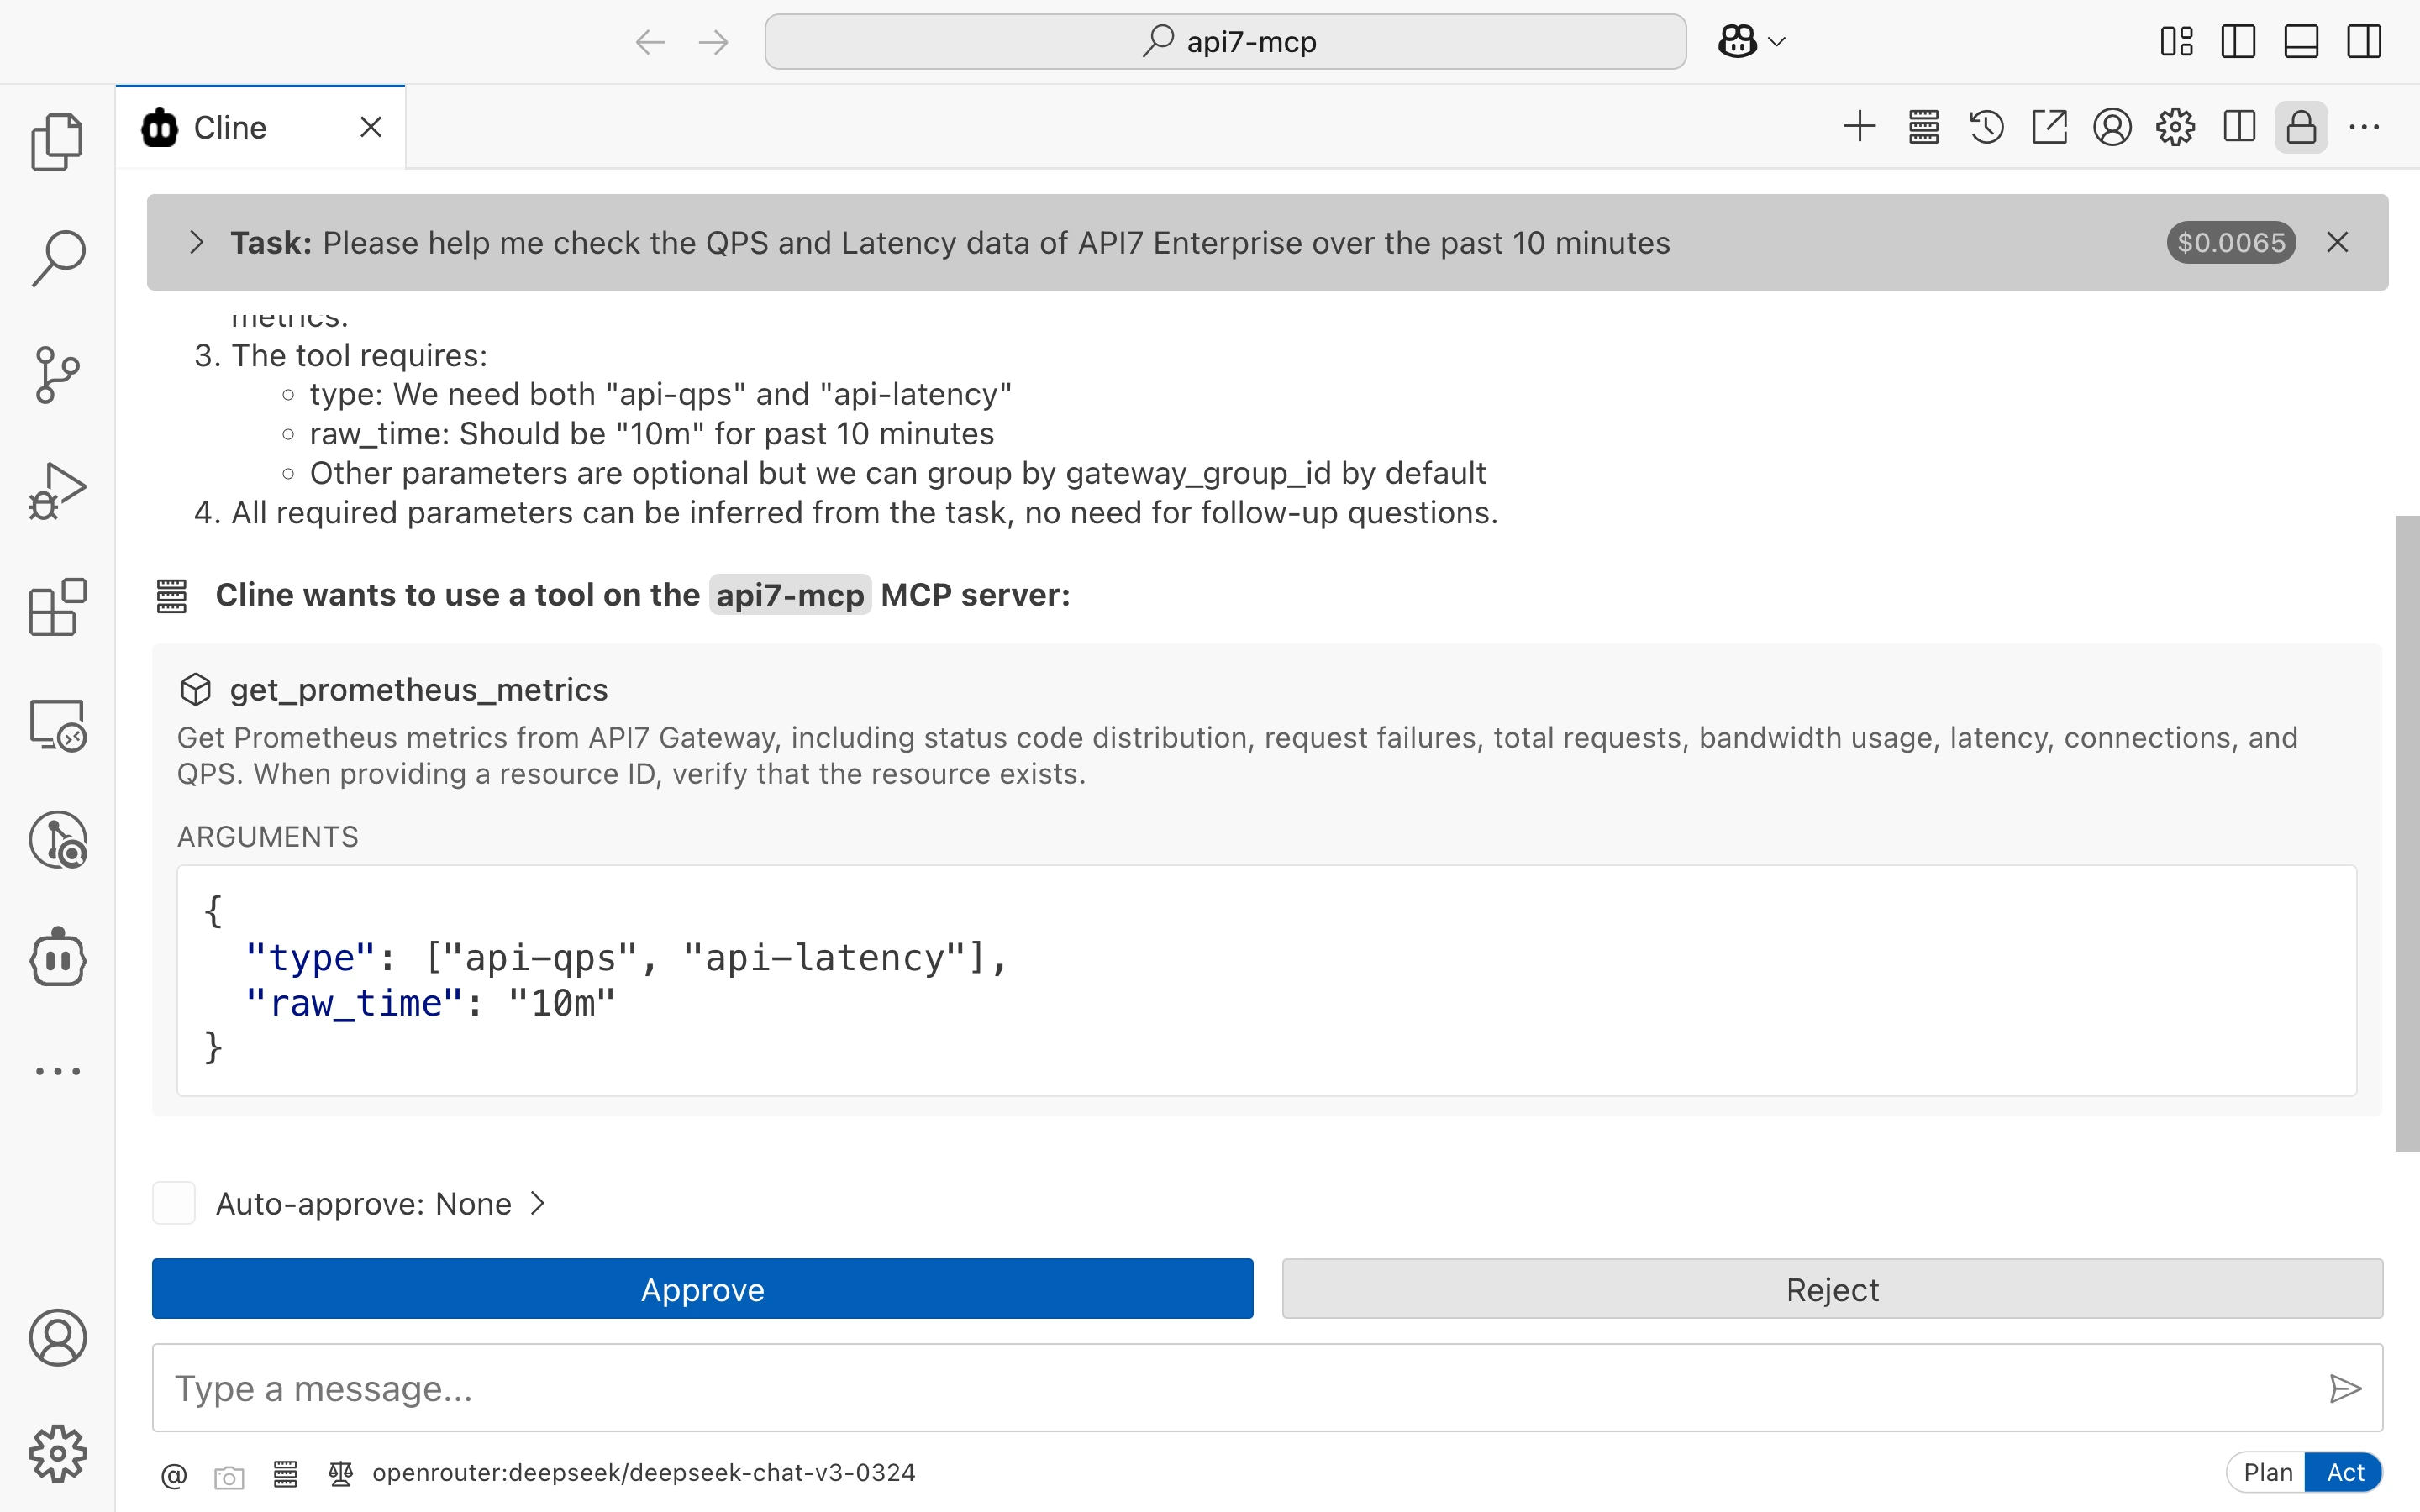
Ask Cline to check the QPS and Latency data of API7 Enterprise over the past 10 minutes.
Cline requests to fetch QPS and latency data using the get_prometheus_metrics operation. Click Approve to authorize it.
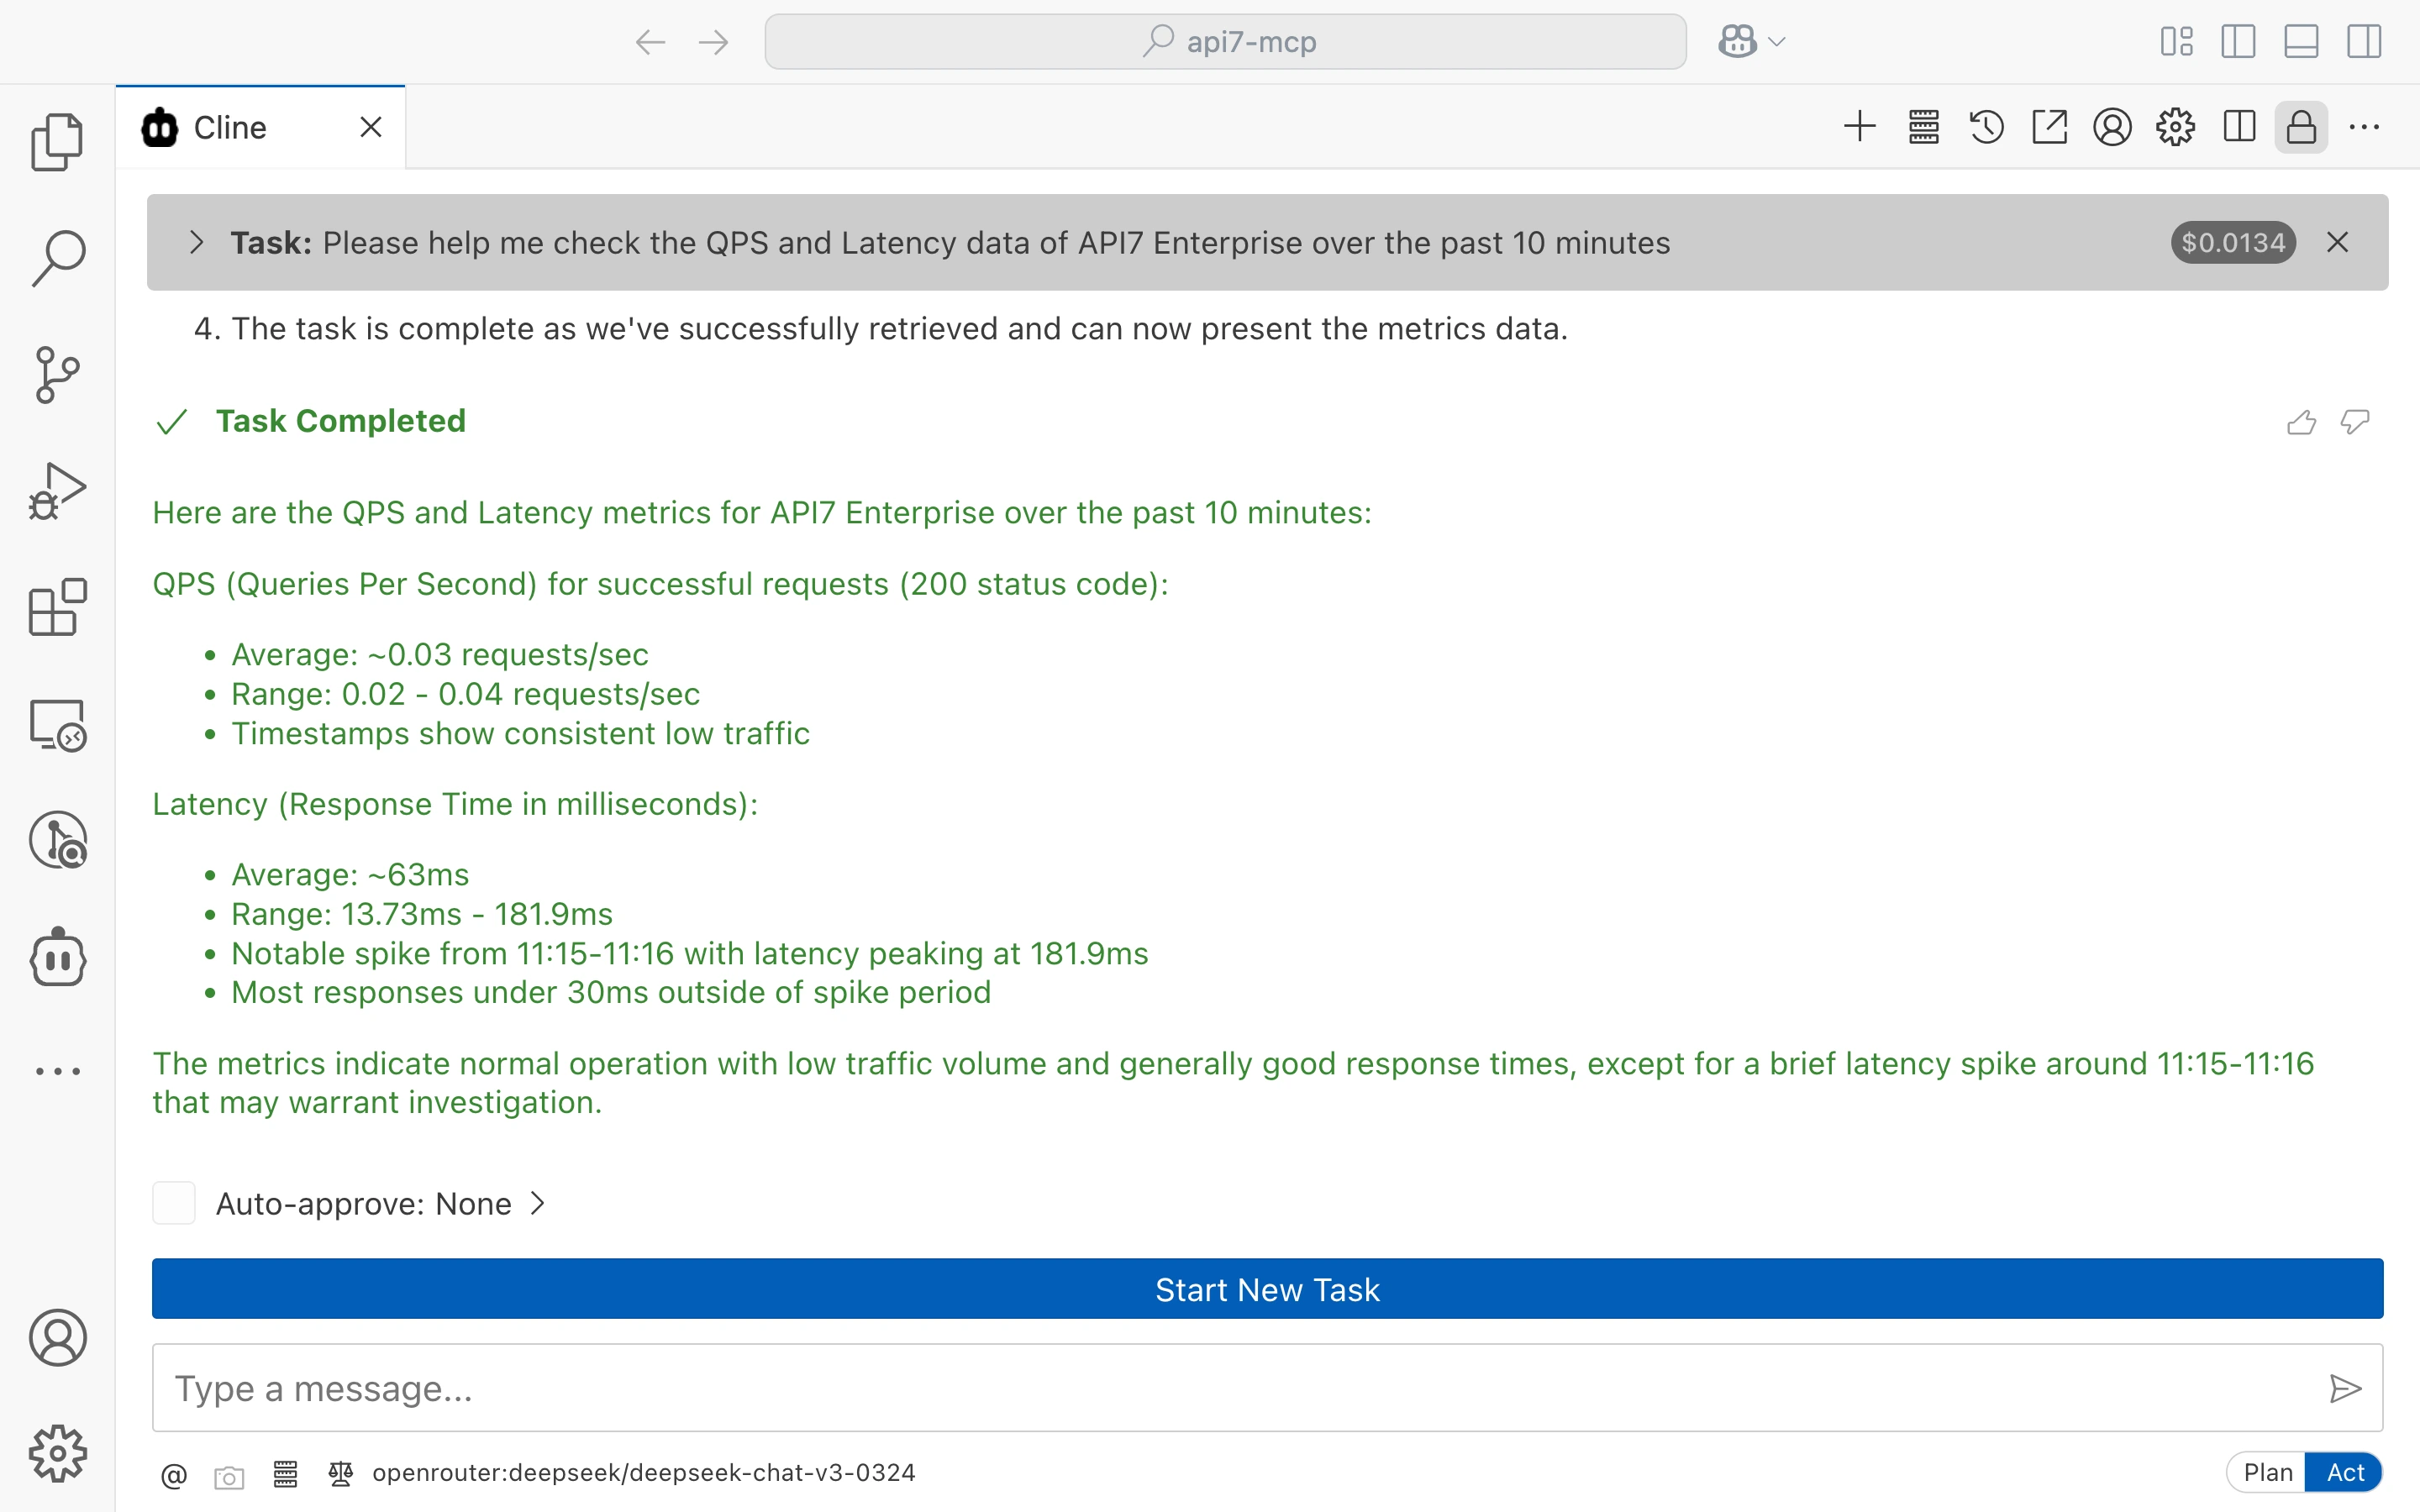
Cline returns the monitoring data of QPS and latency for the past 10 minutes of API7 Enterprise. The result shows that the latency peaked at 181.9ms.
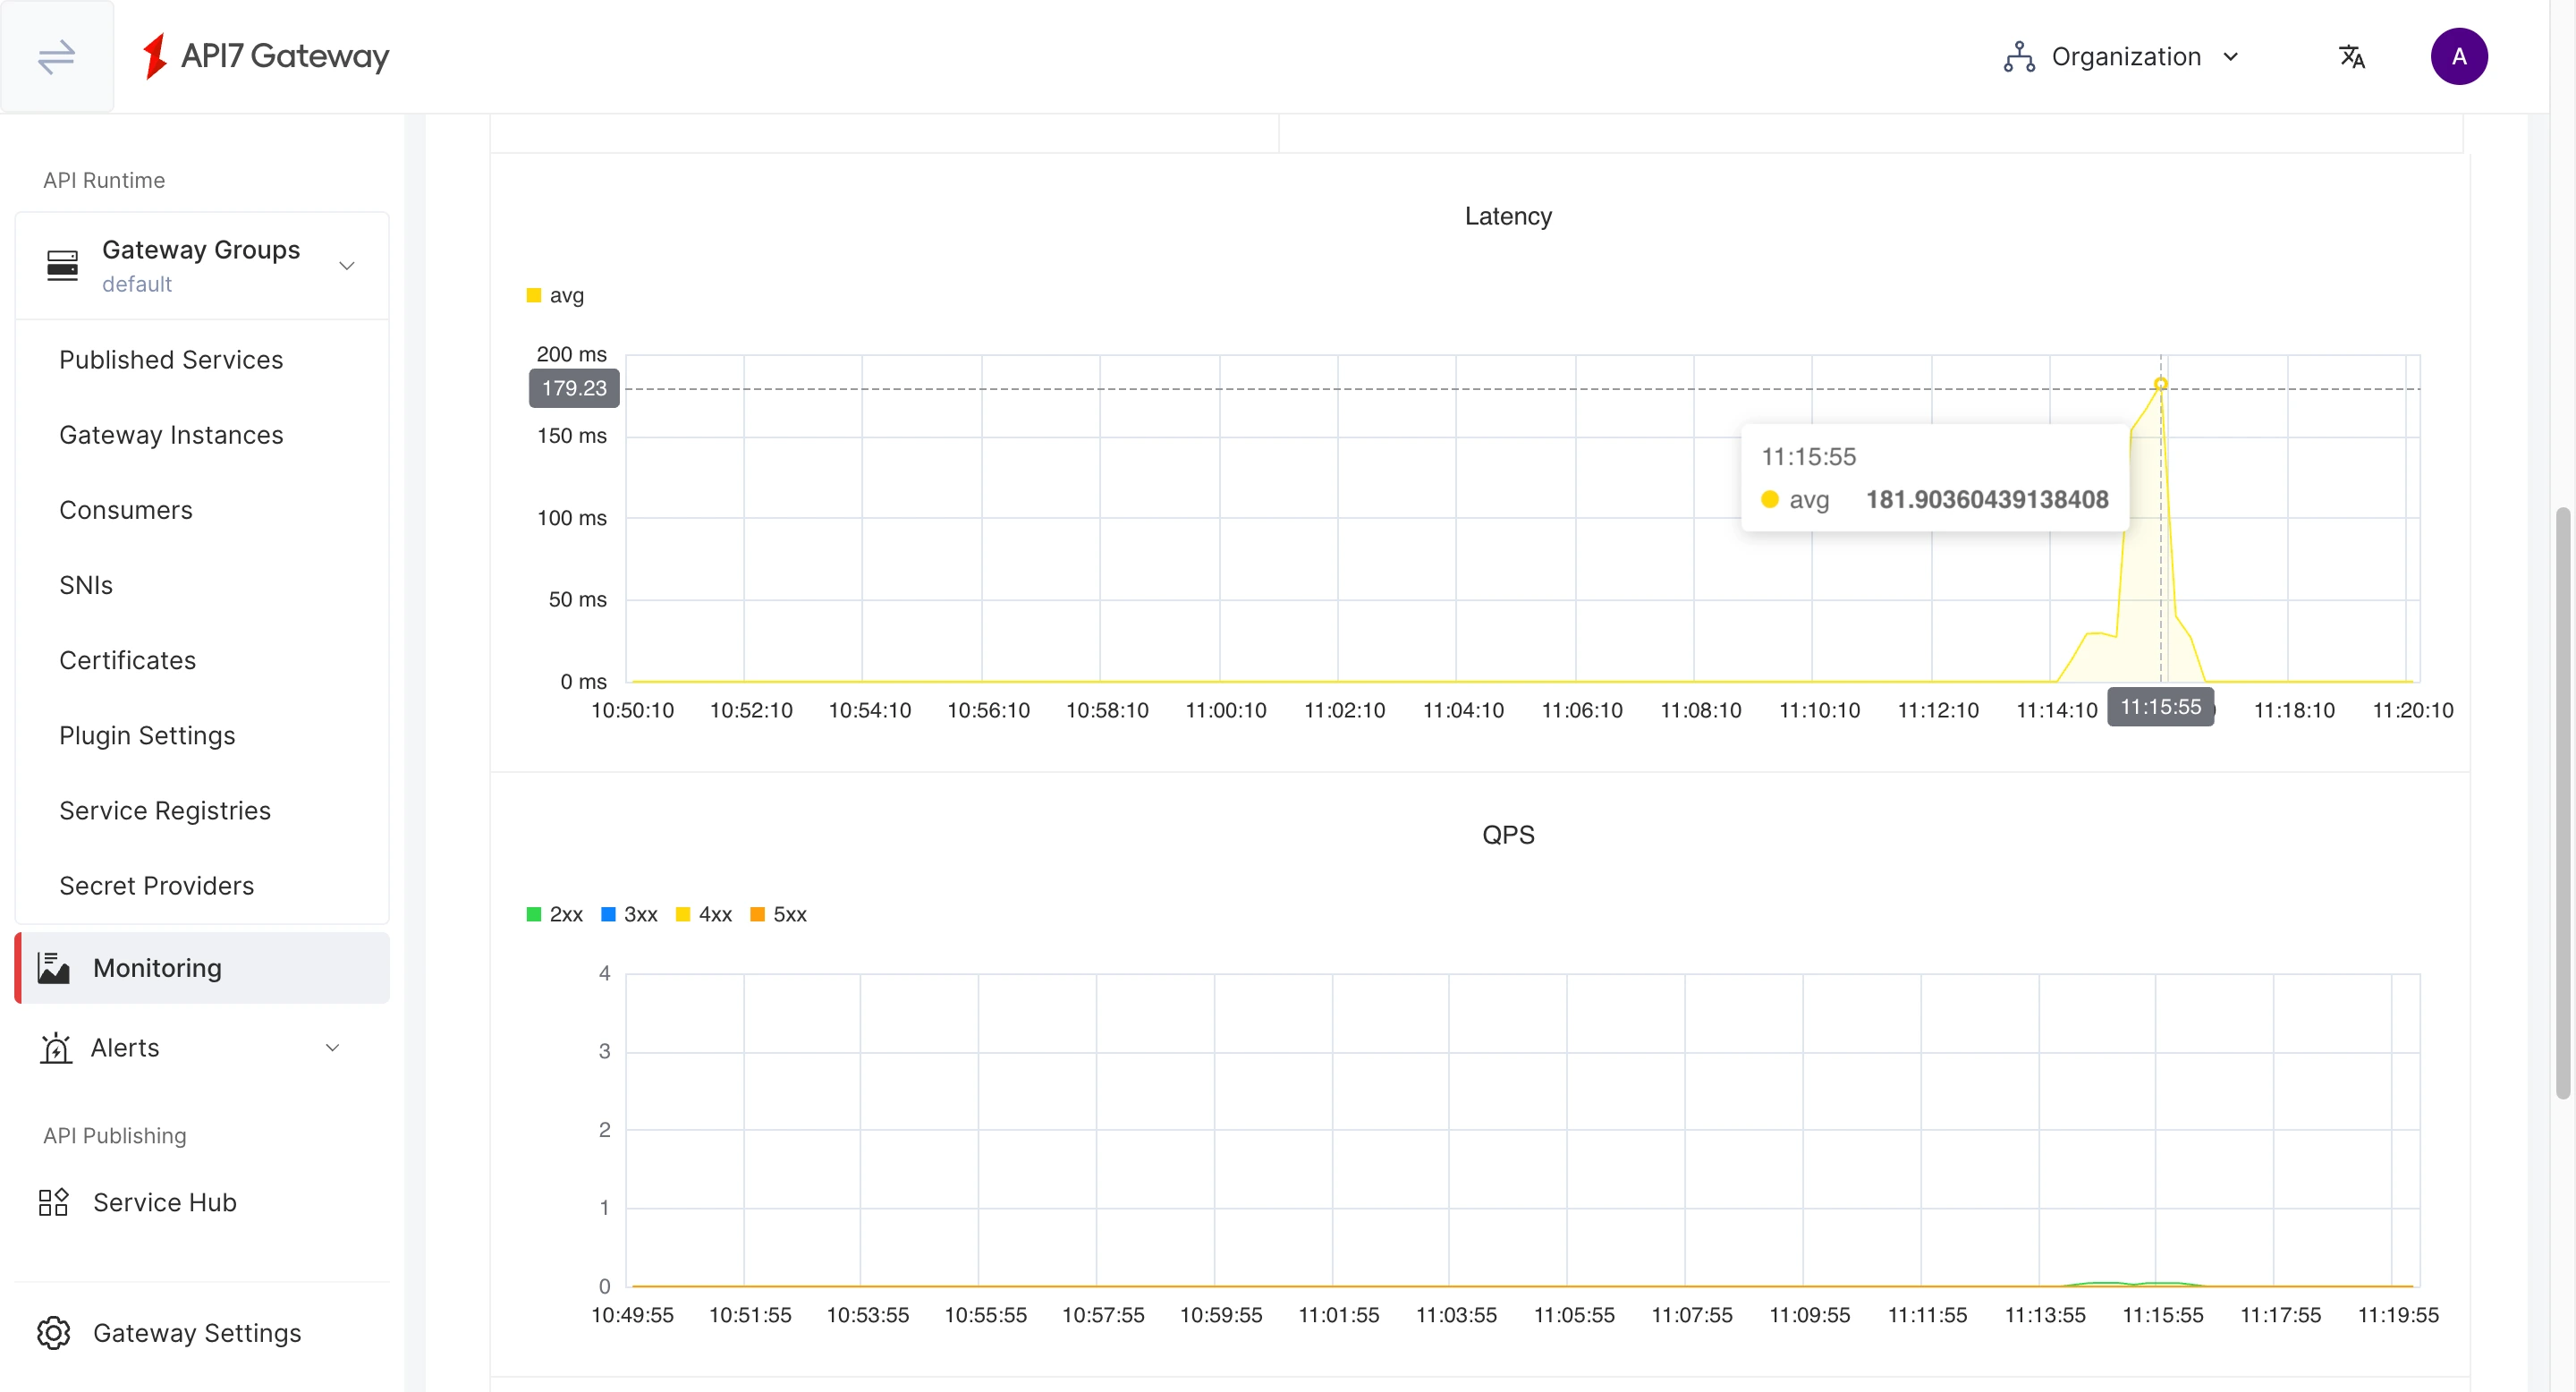
Select Monitoring from the side navigation bar on the API7 Enterprise dashboard. The latency peaking at 181.9ms occurred at 11:15:55, which aligns with the conclusion from API7-MCP.
Additional Resources
- References