Configure SSO with Microsoft Entra ID (Azure AD)
Microsoft Entra ID (formerly Azure AD) is Microsoft's cloud-based identity and access management service. It allows organizations to securely manage and authenticate users and devices, ensuring that the right individuals have the appropriate access to company resources. Microsoft Entra ID offers features such as single sign-on (SSO), multi-factor authentication (MFA), and integration with various third-party applications.
The guide will show you how to integrate API7 Enterprise with Microsoft Entra ID to implement SSO and configure the needed access controls.
Below is an interactive demo that provides a hands-on introduction to integrate Microsoft Entra ID with API7 Enterprise.
Prerequisite(s)
- Install API7 Enterprise.
- Have at least one gateway instance in your gateway group.
- Have an Azure account with an active subscription.
Configure Azure
Register an App
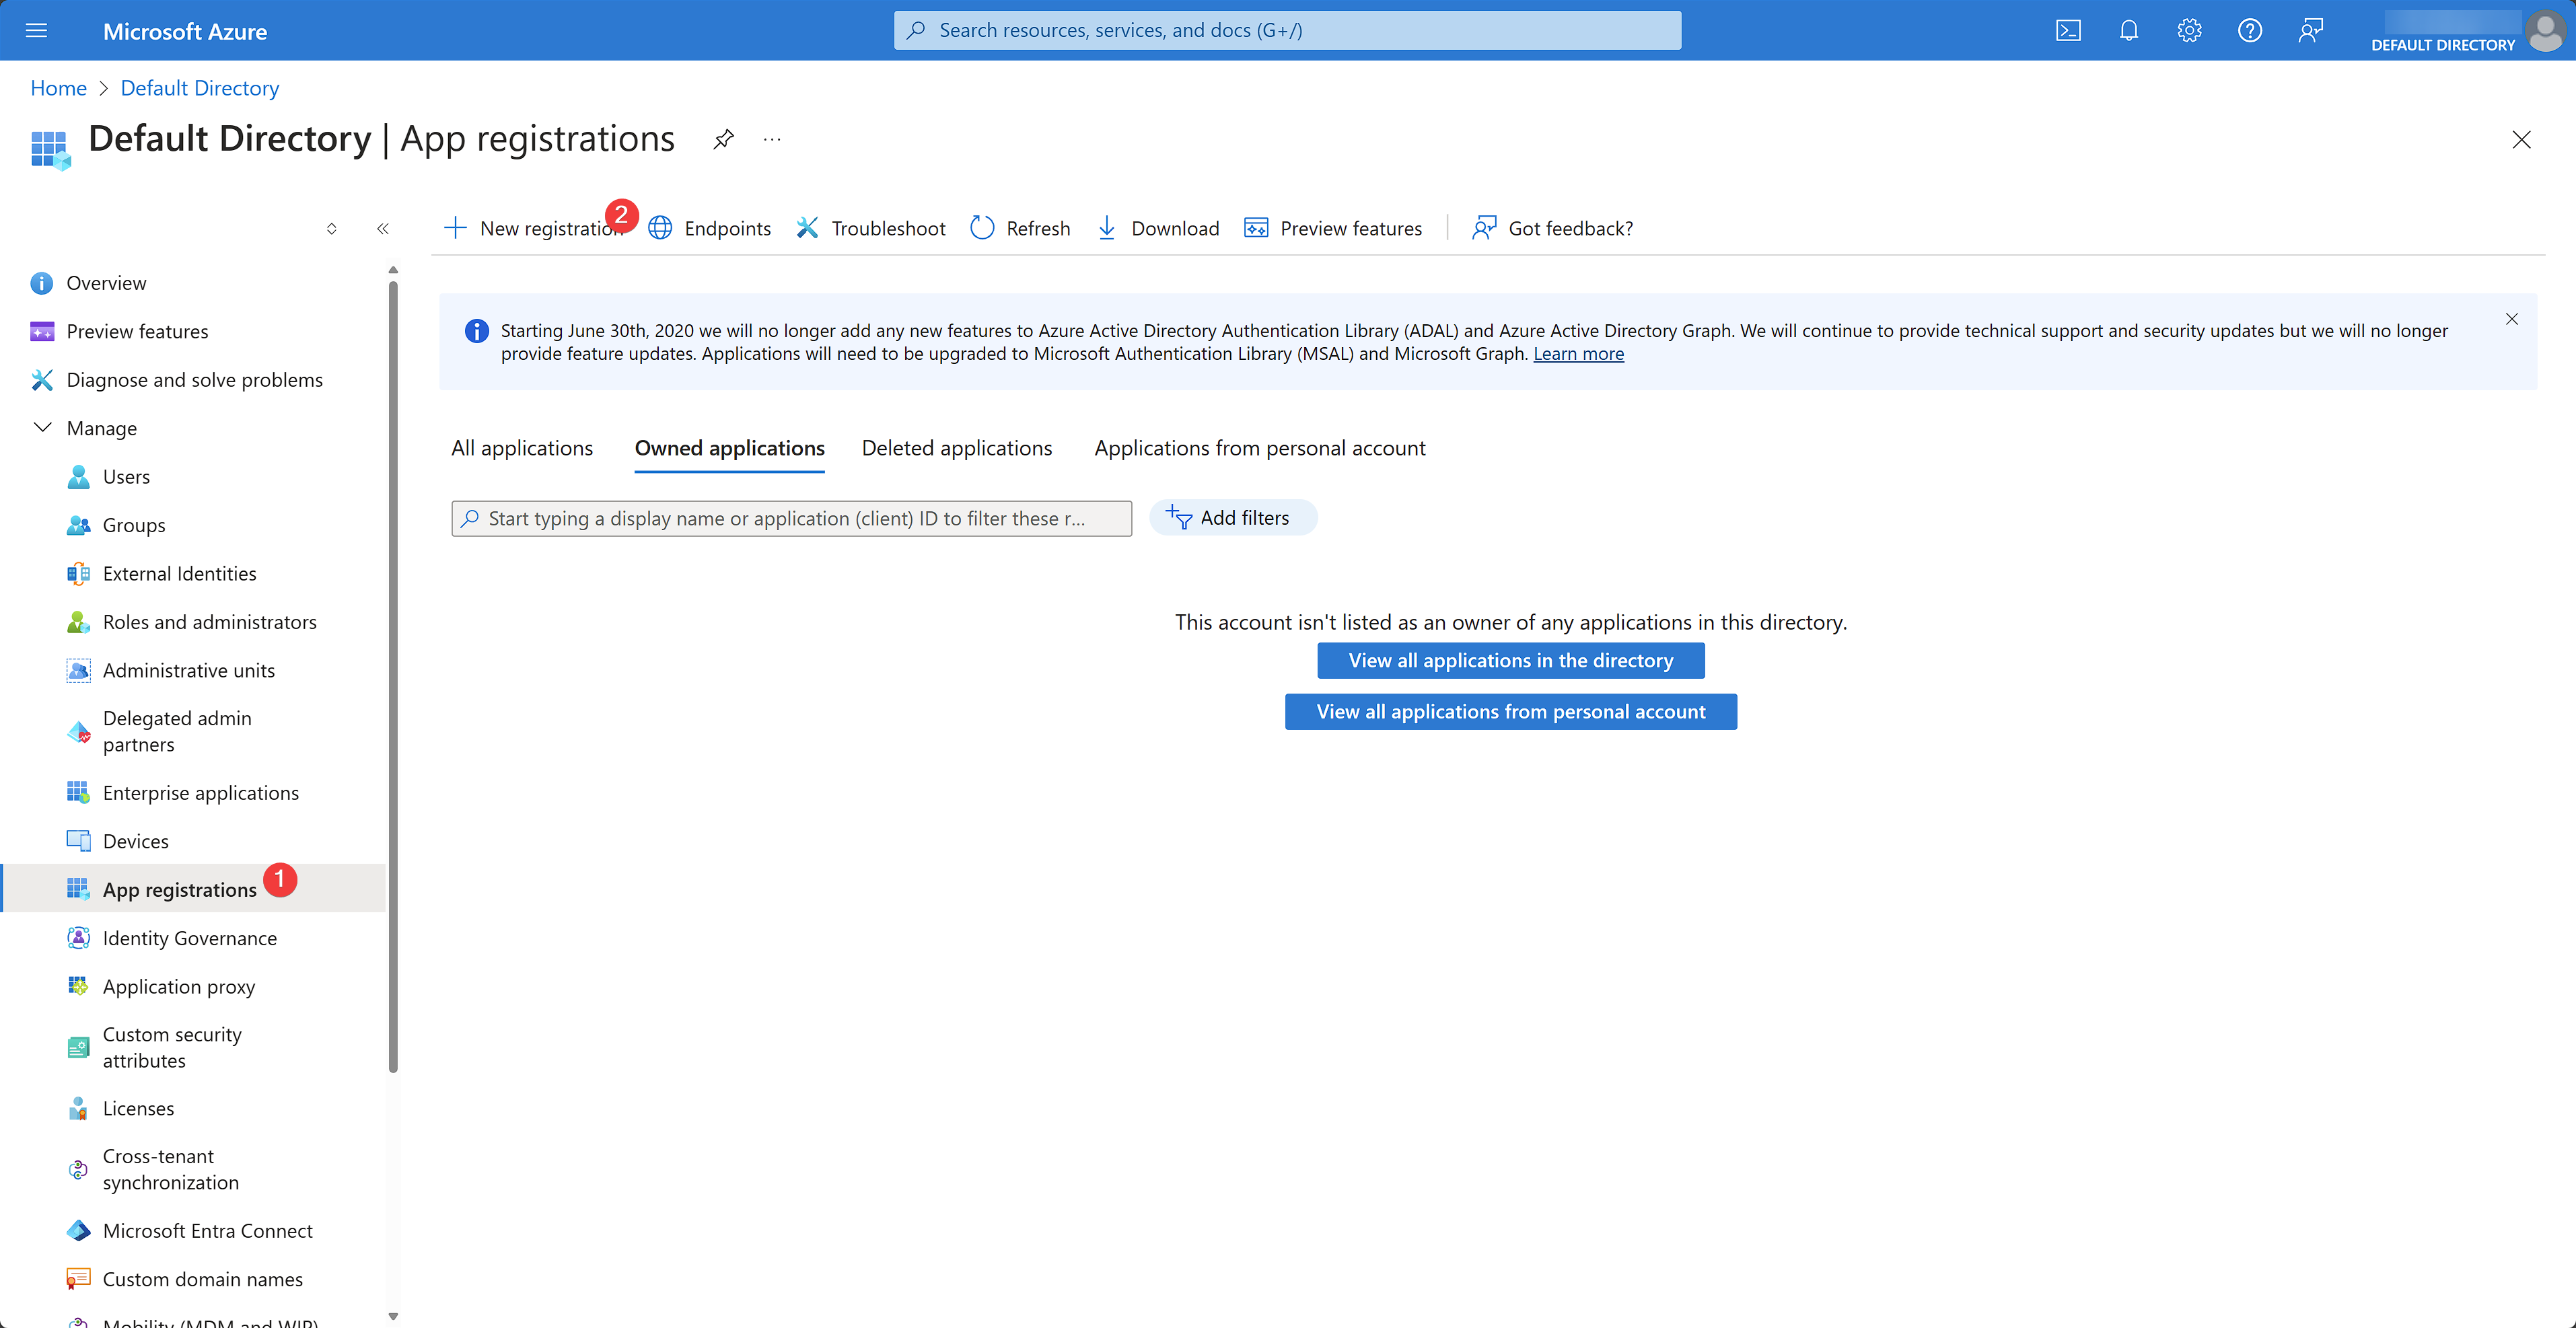
Log in to the Azure portal, go to Microsoft Entra ID, and select App registrations under the Manage dropdown to register a new app:
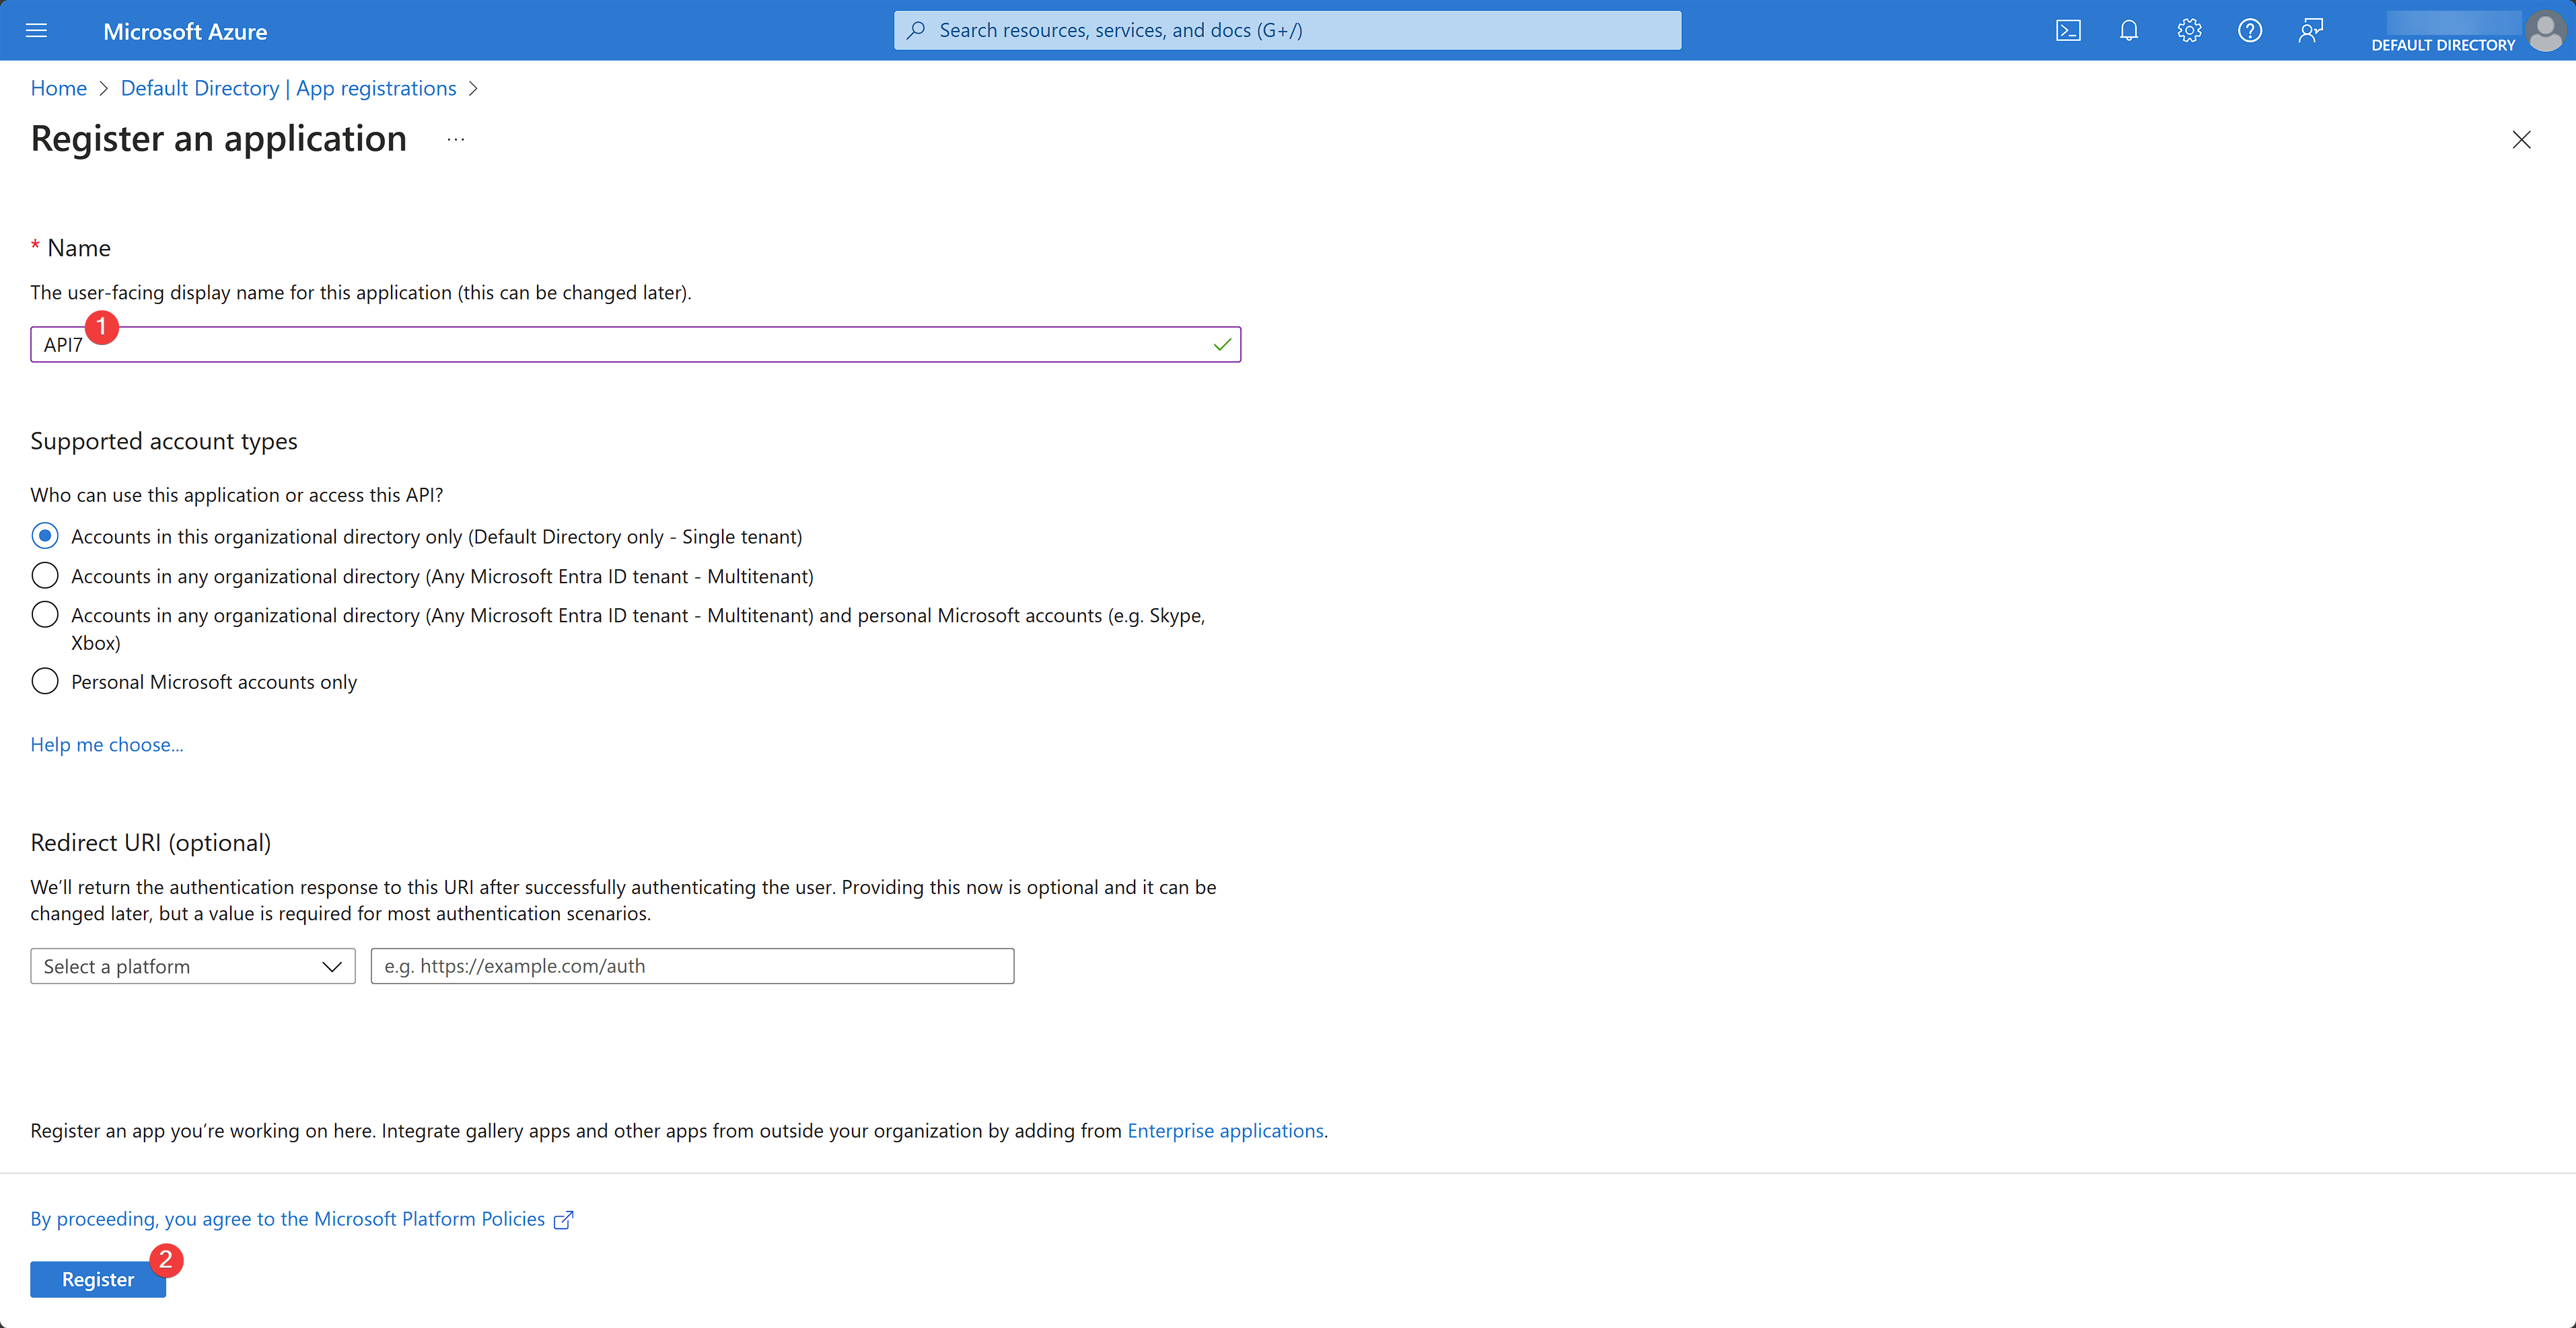
Fill out details for the app and click Register:
Create an App Client Secret
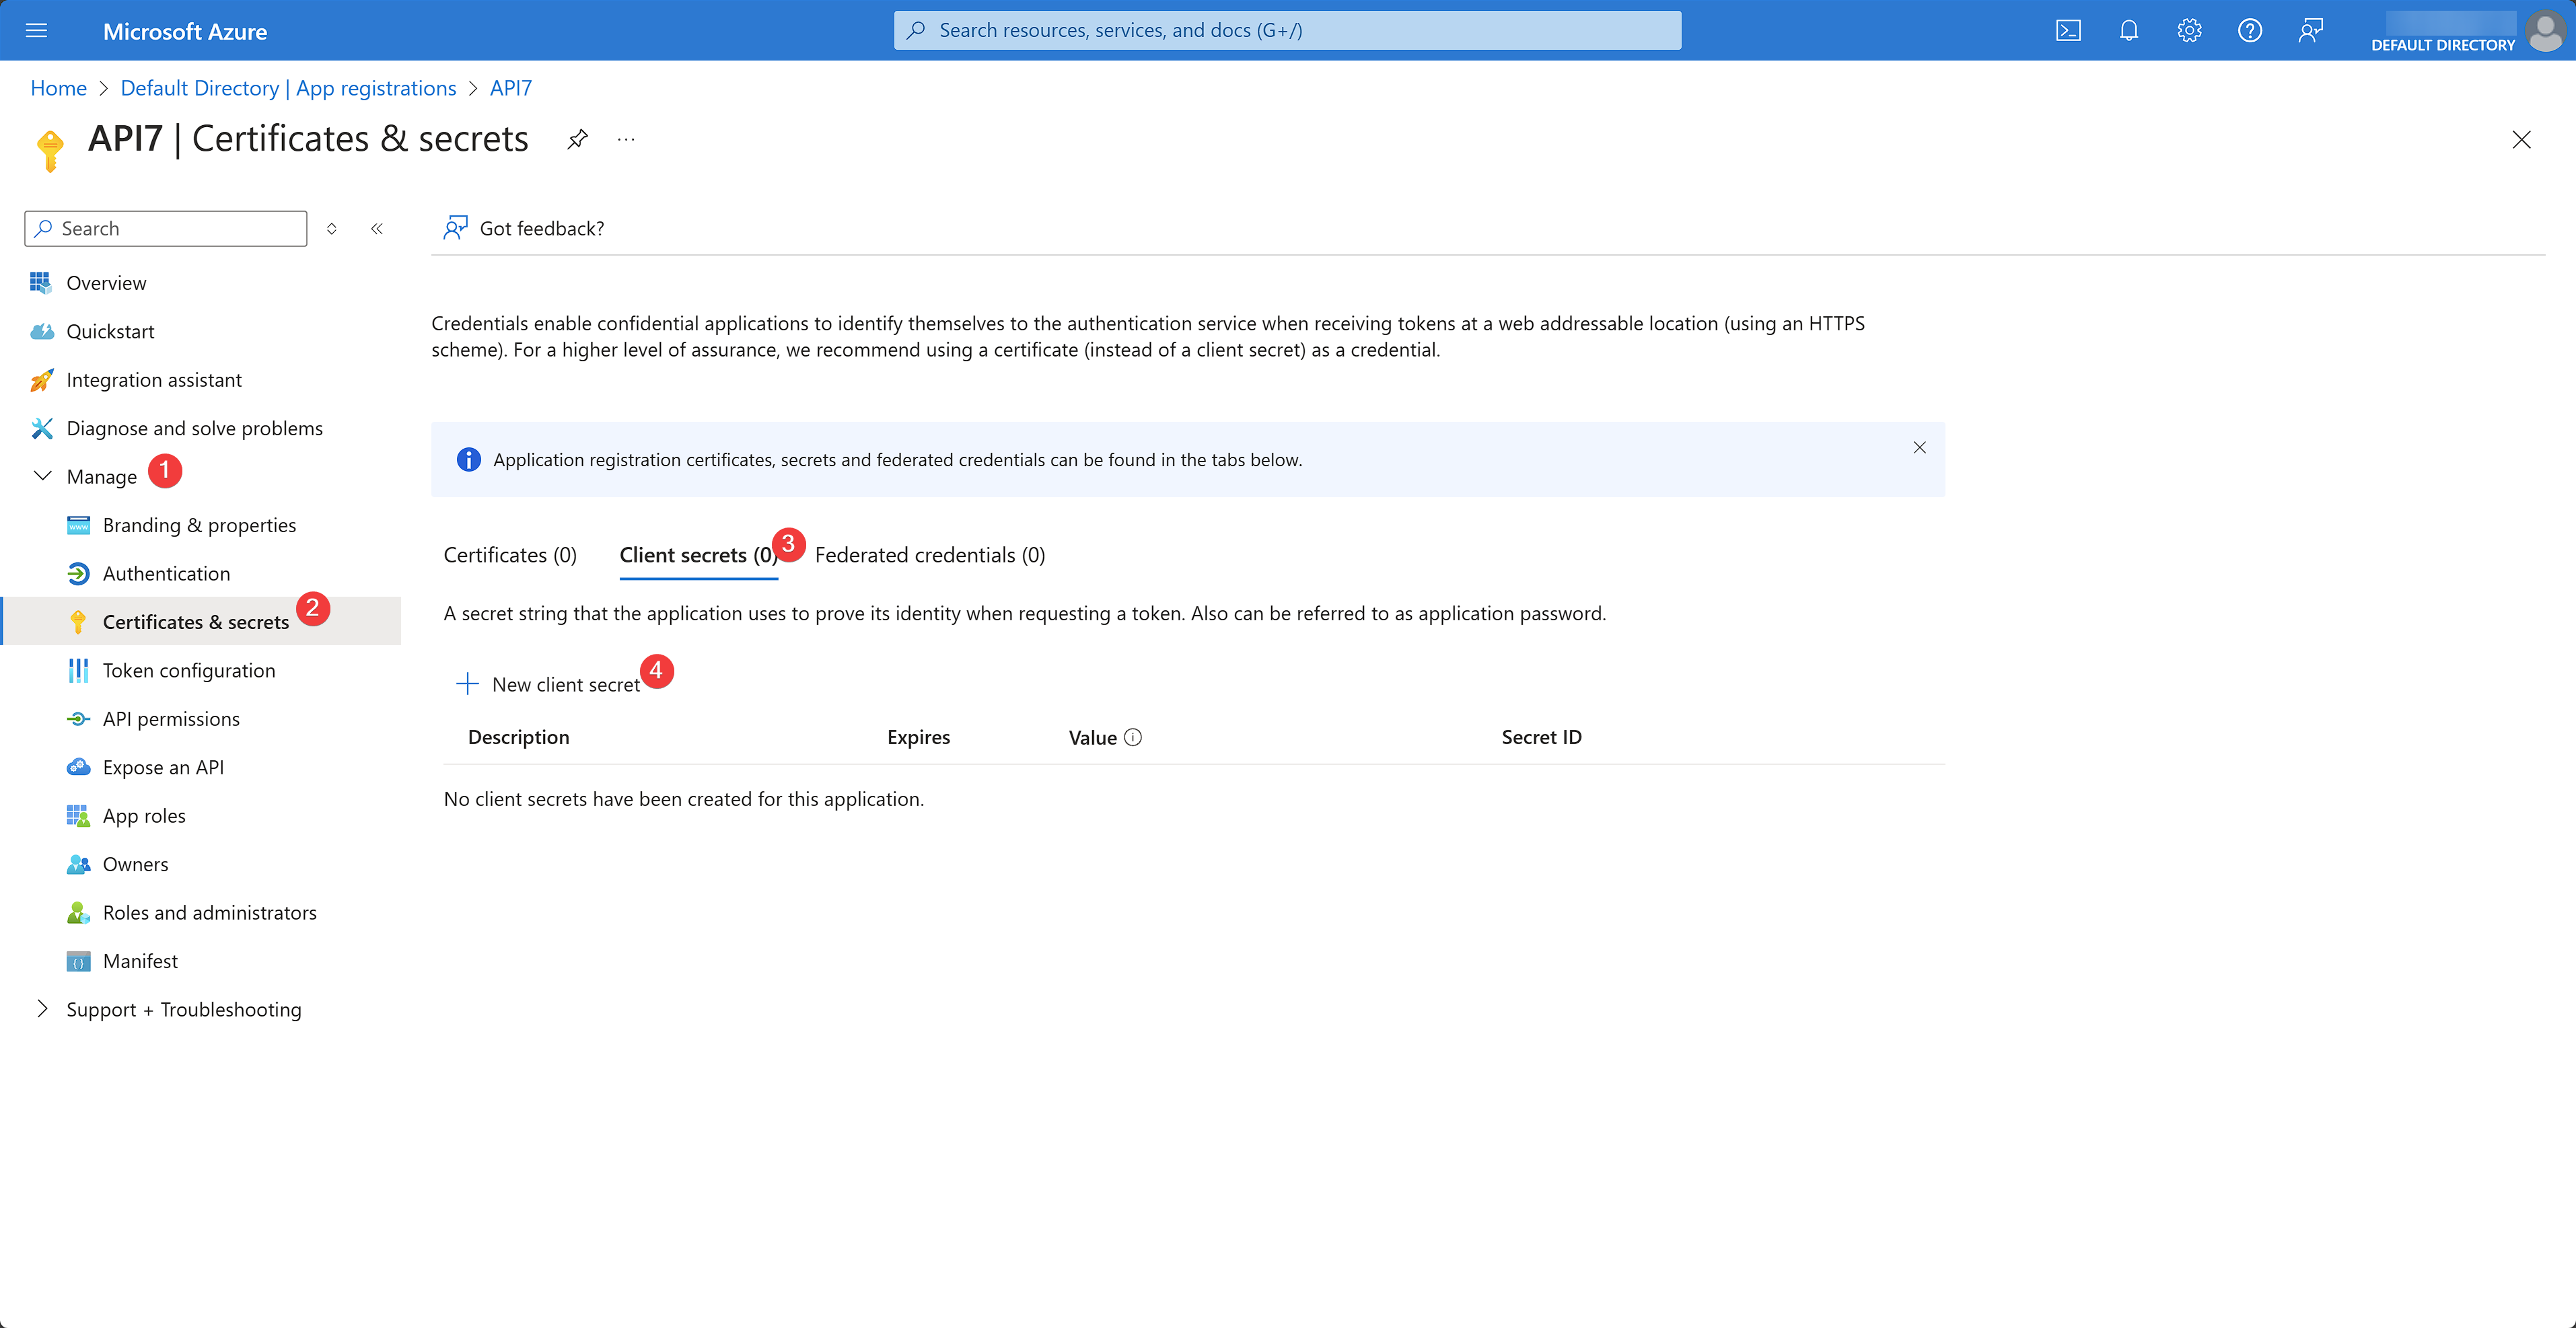
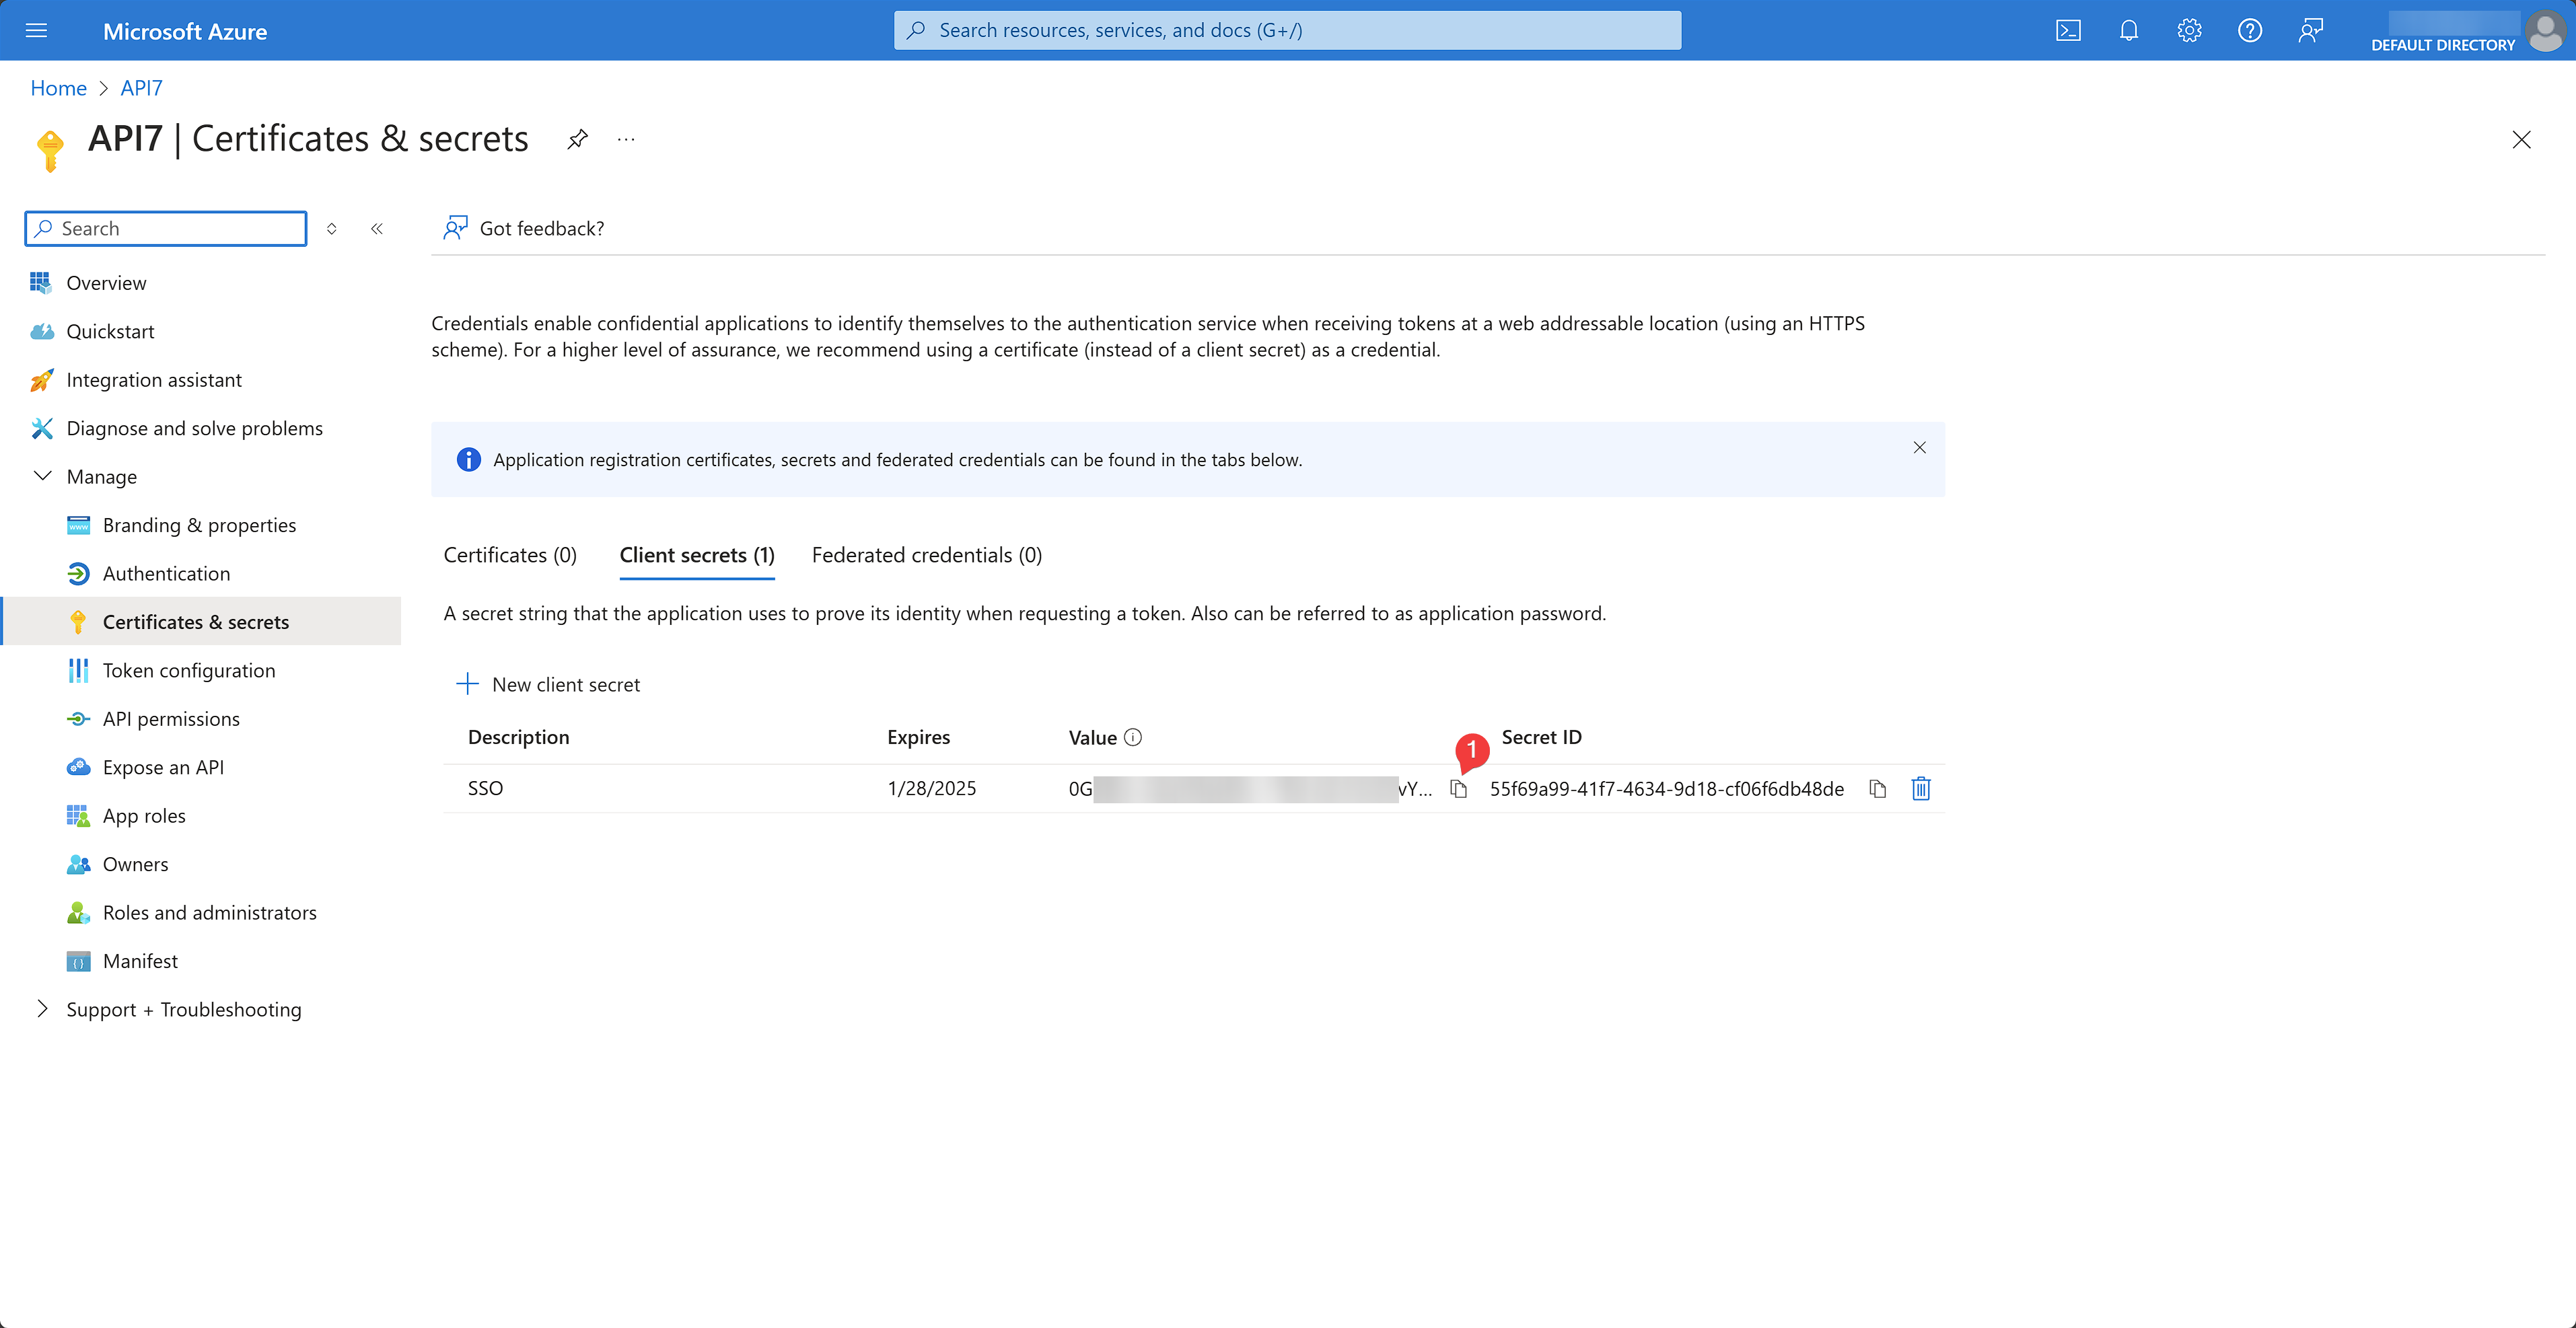
Once the app is registered, select Certificates & secrets under the Manage dropdown to create a client secret:
Fill out the client secret details and click Add:
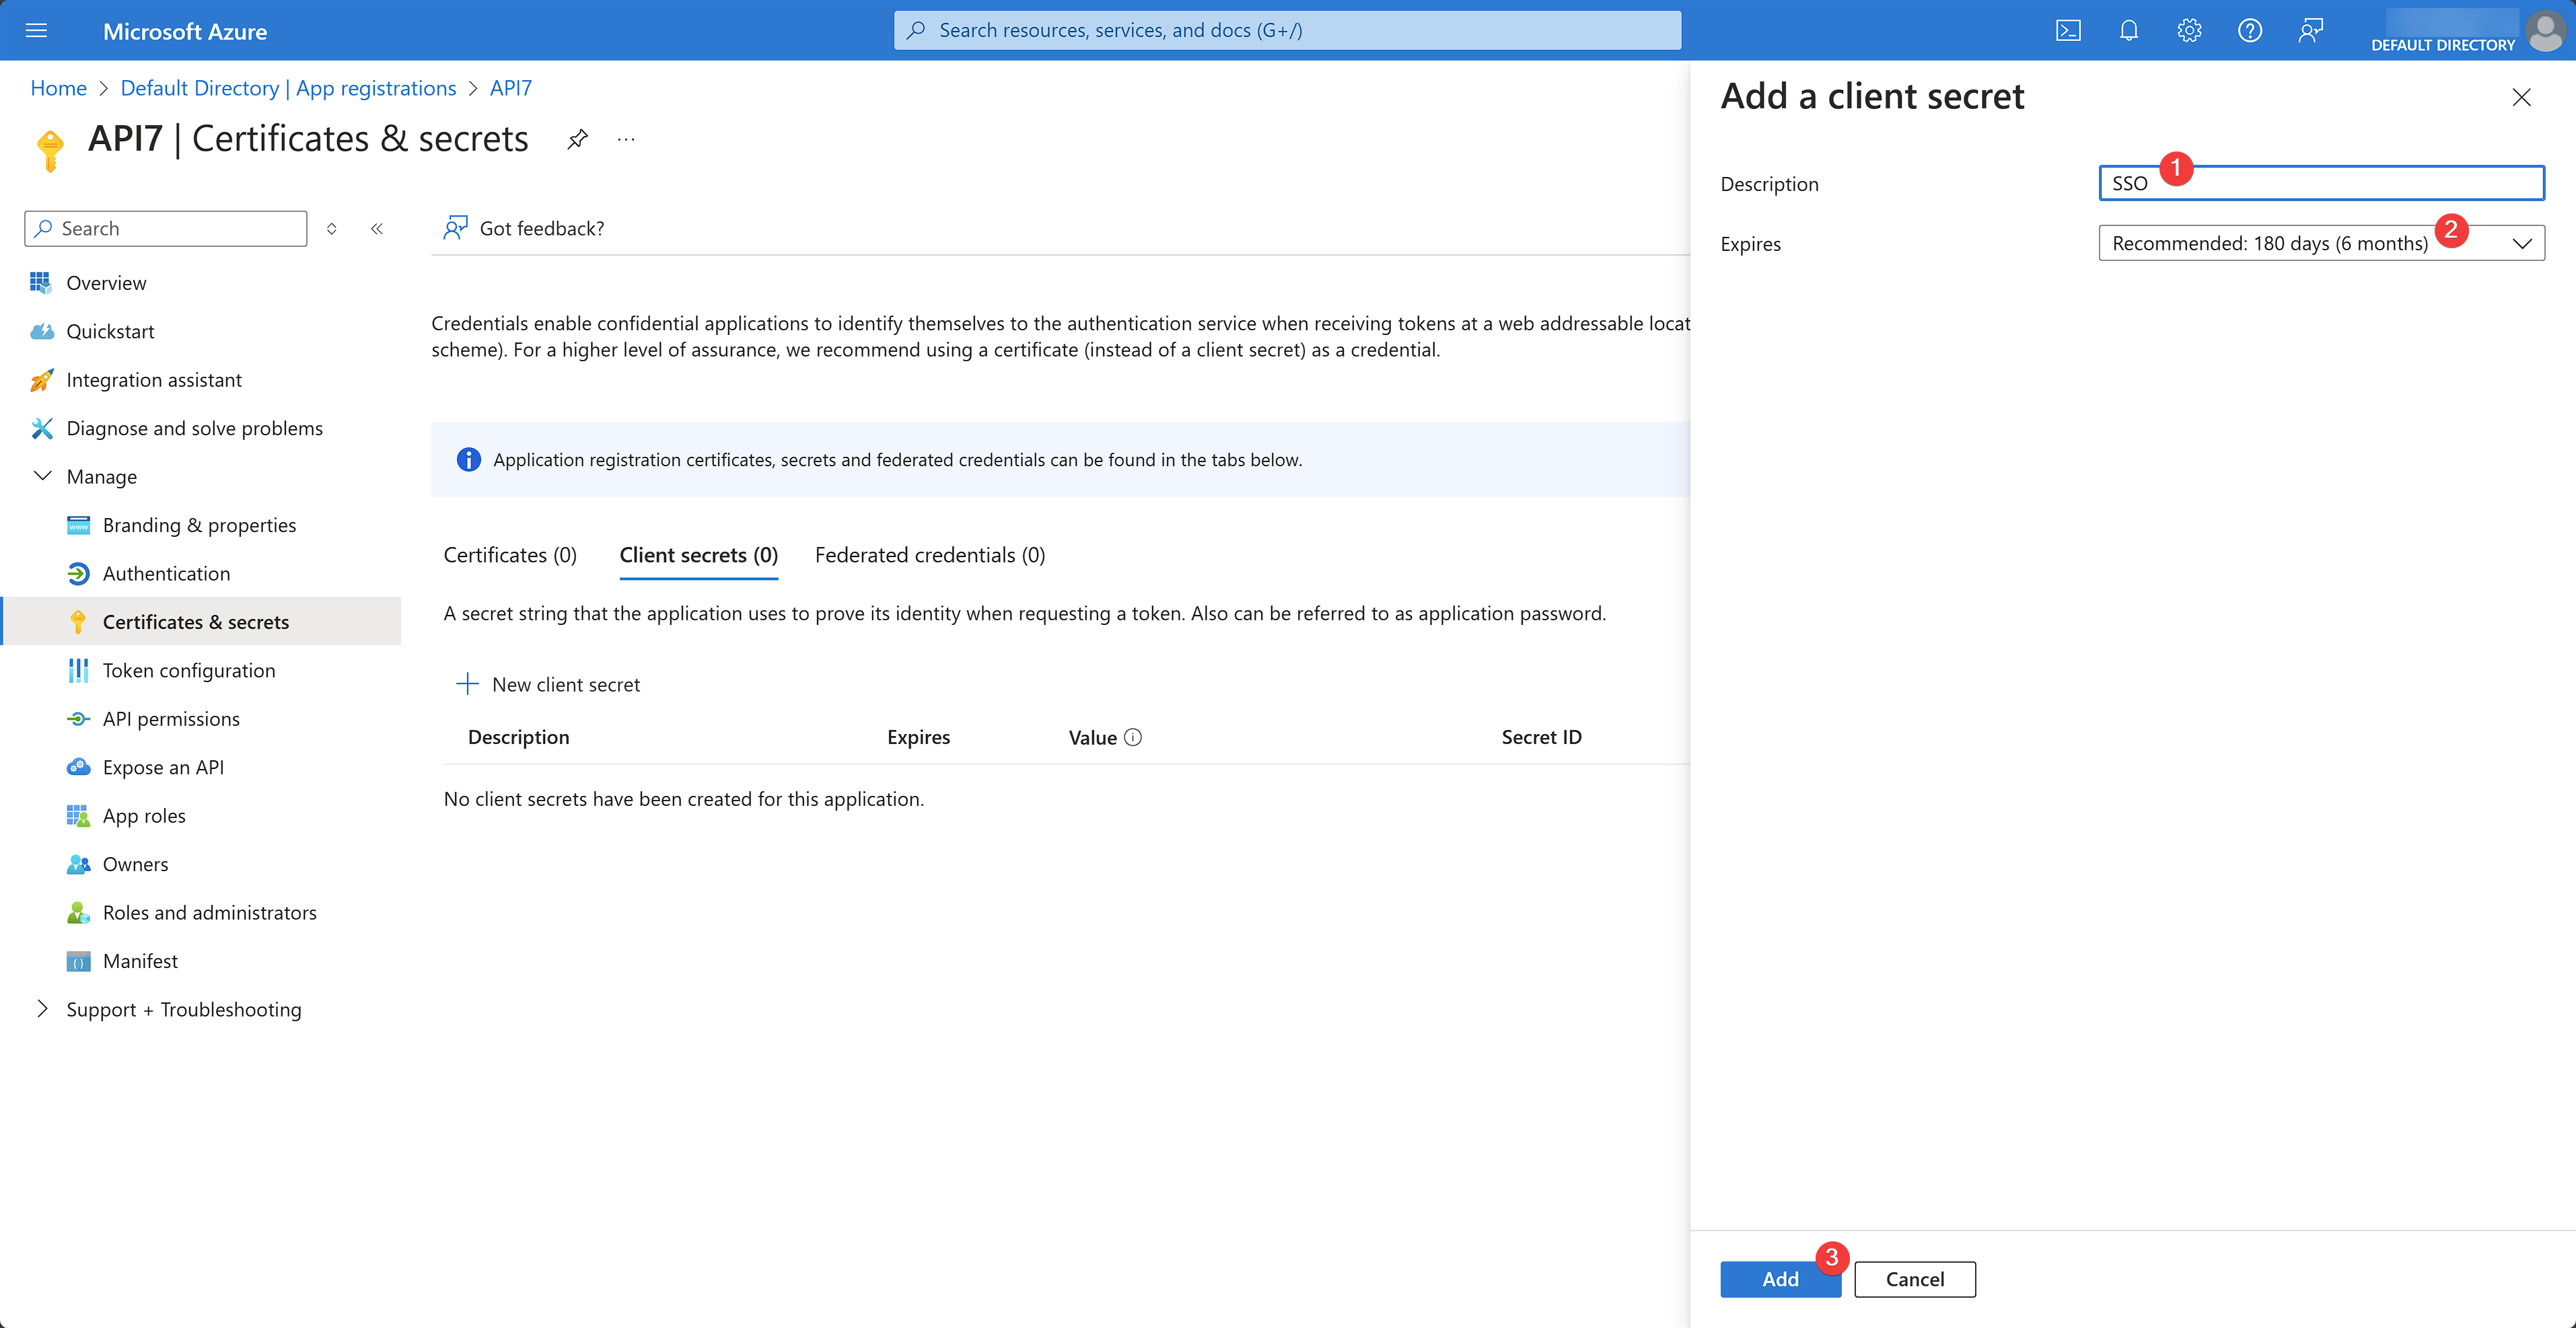
The client secret should now be generated. Save the secret to a secure location so that you can refer to it later for API7 Enterprise configuration. Note that you can only view the secret once.
Create an App Role
Select App roles under the Manage dropdown to create a new SuperAdmin app role. Fill out the role details and click Apply:
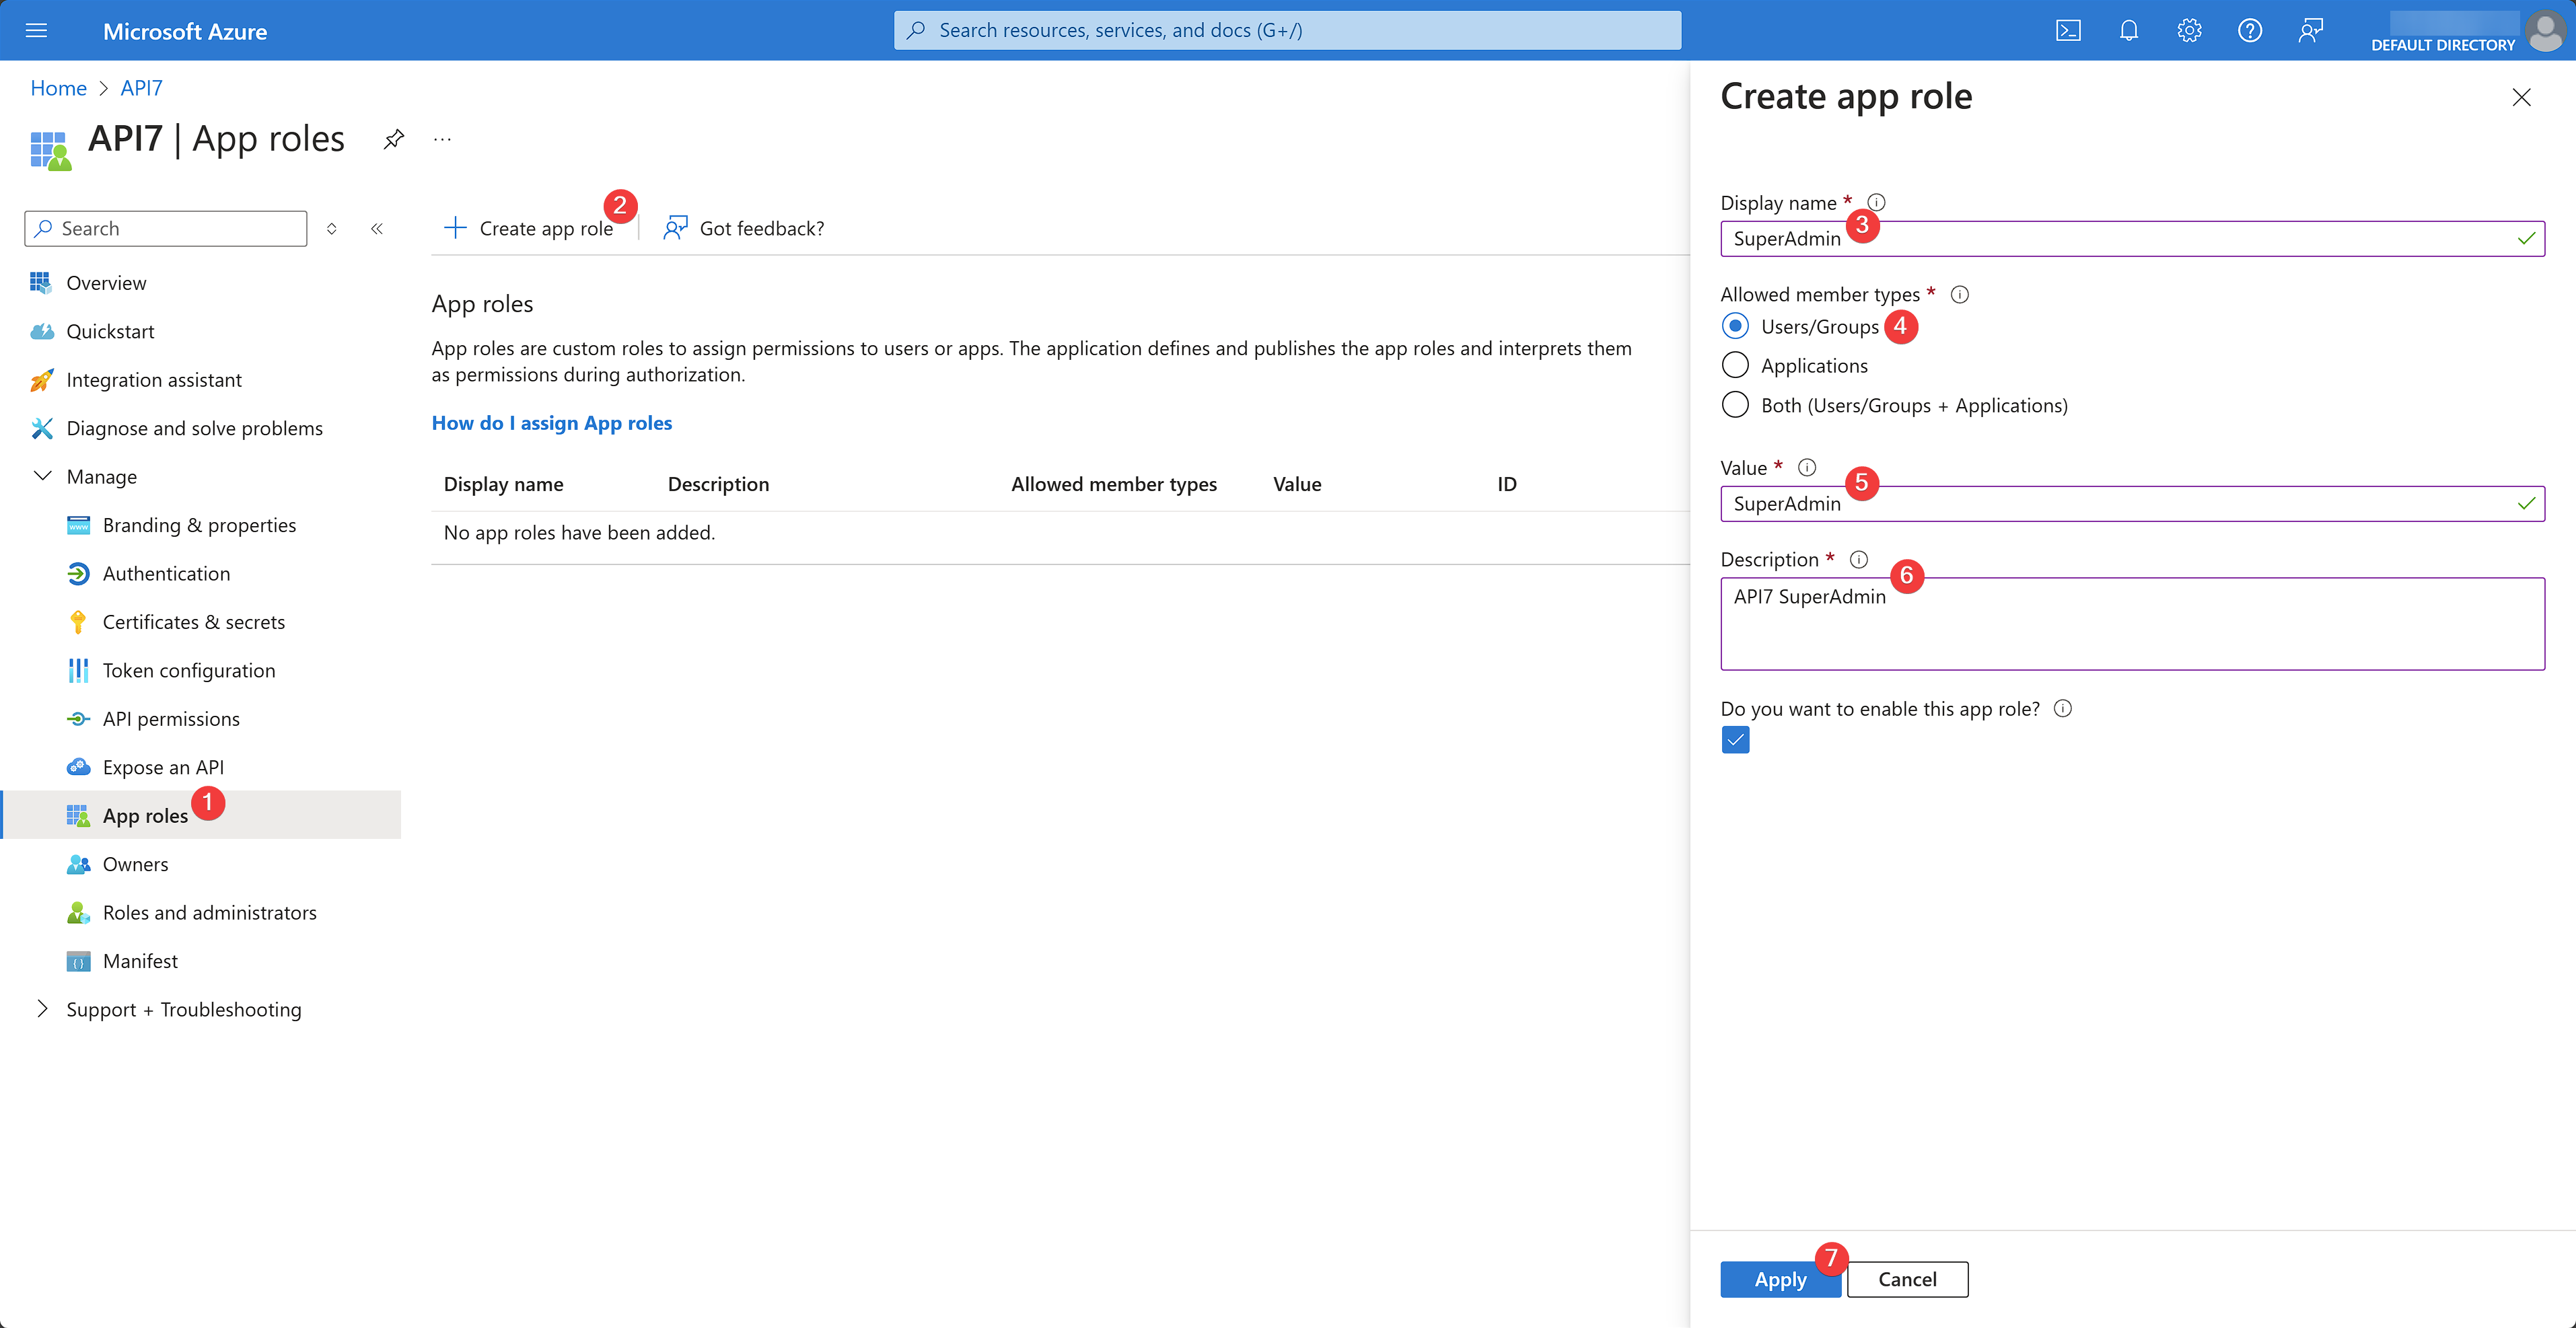
You should see the role created and enabled.
Assign the App Role to User
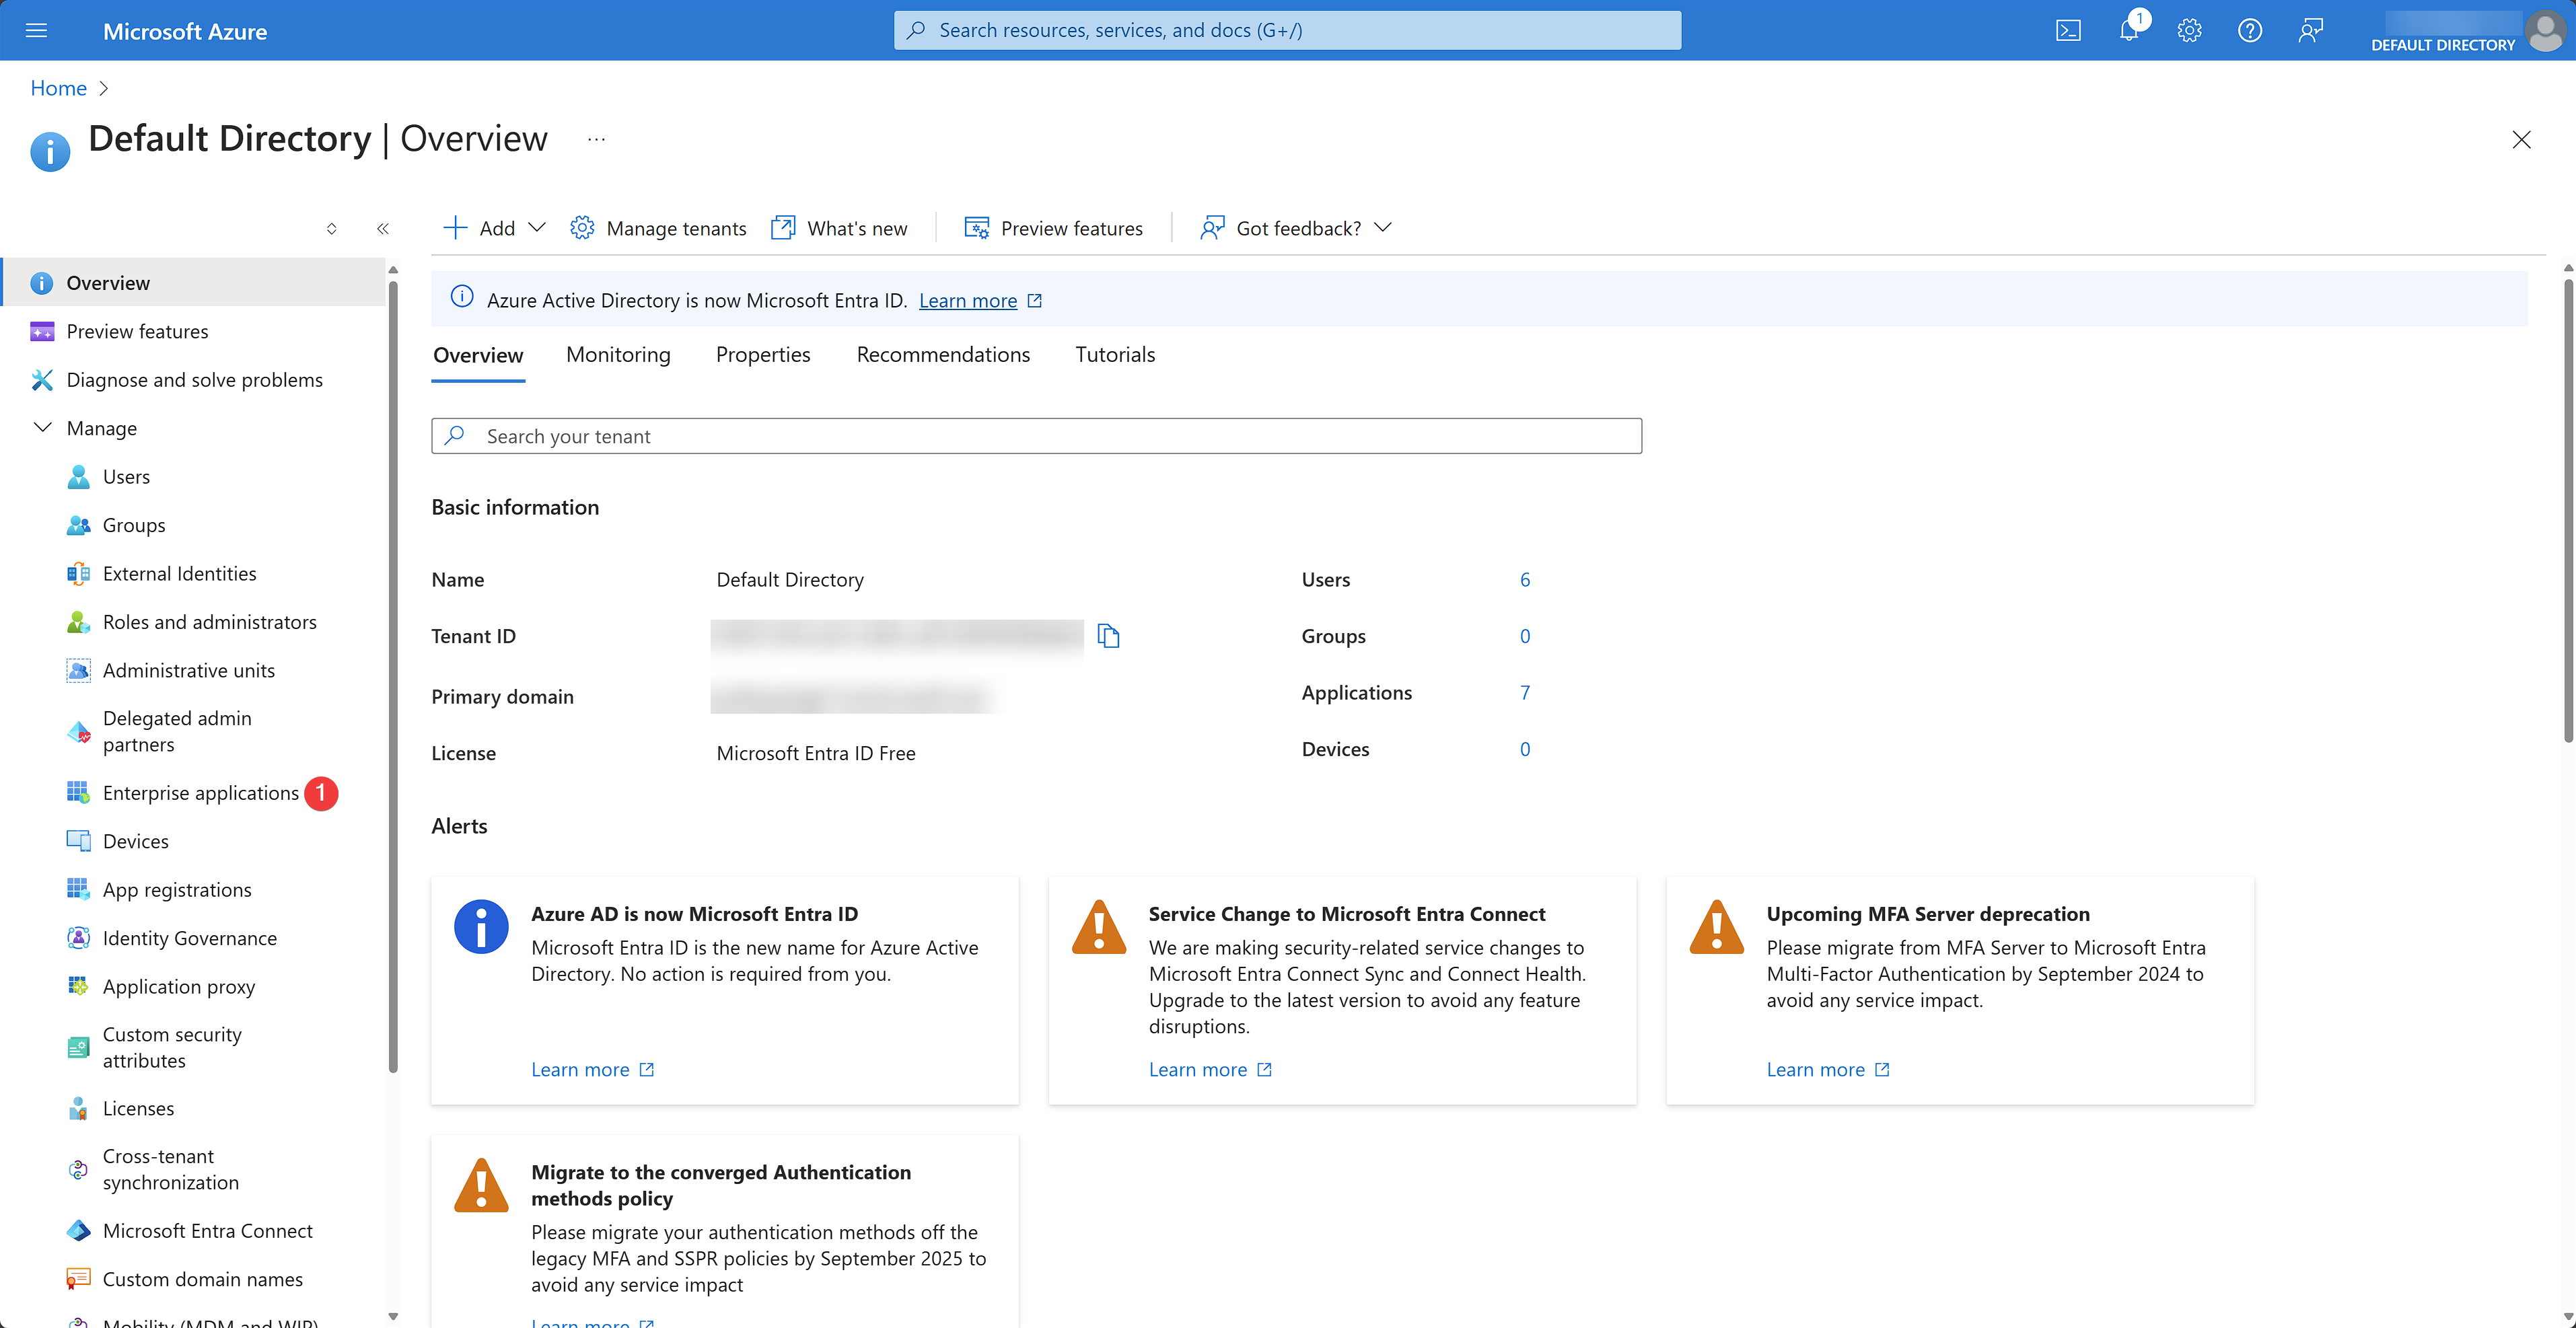
Select Enterprise applications under the Manage dropdown:
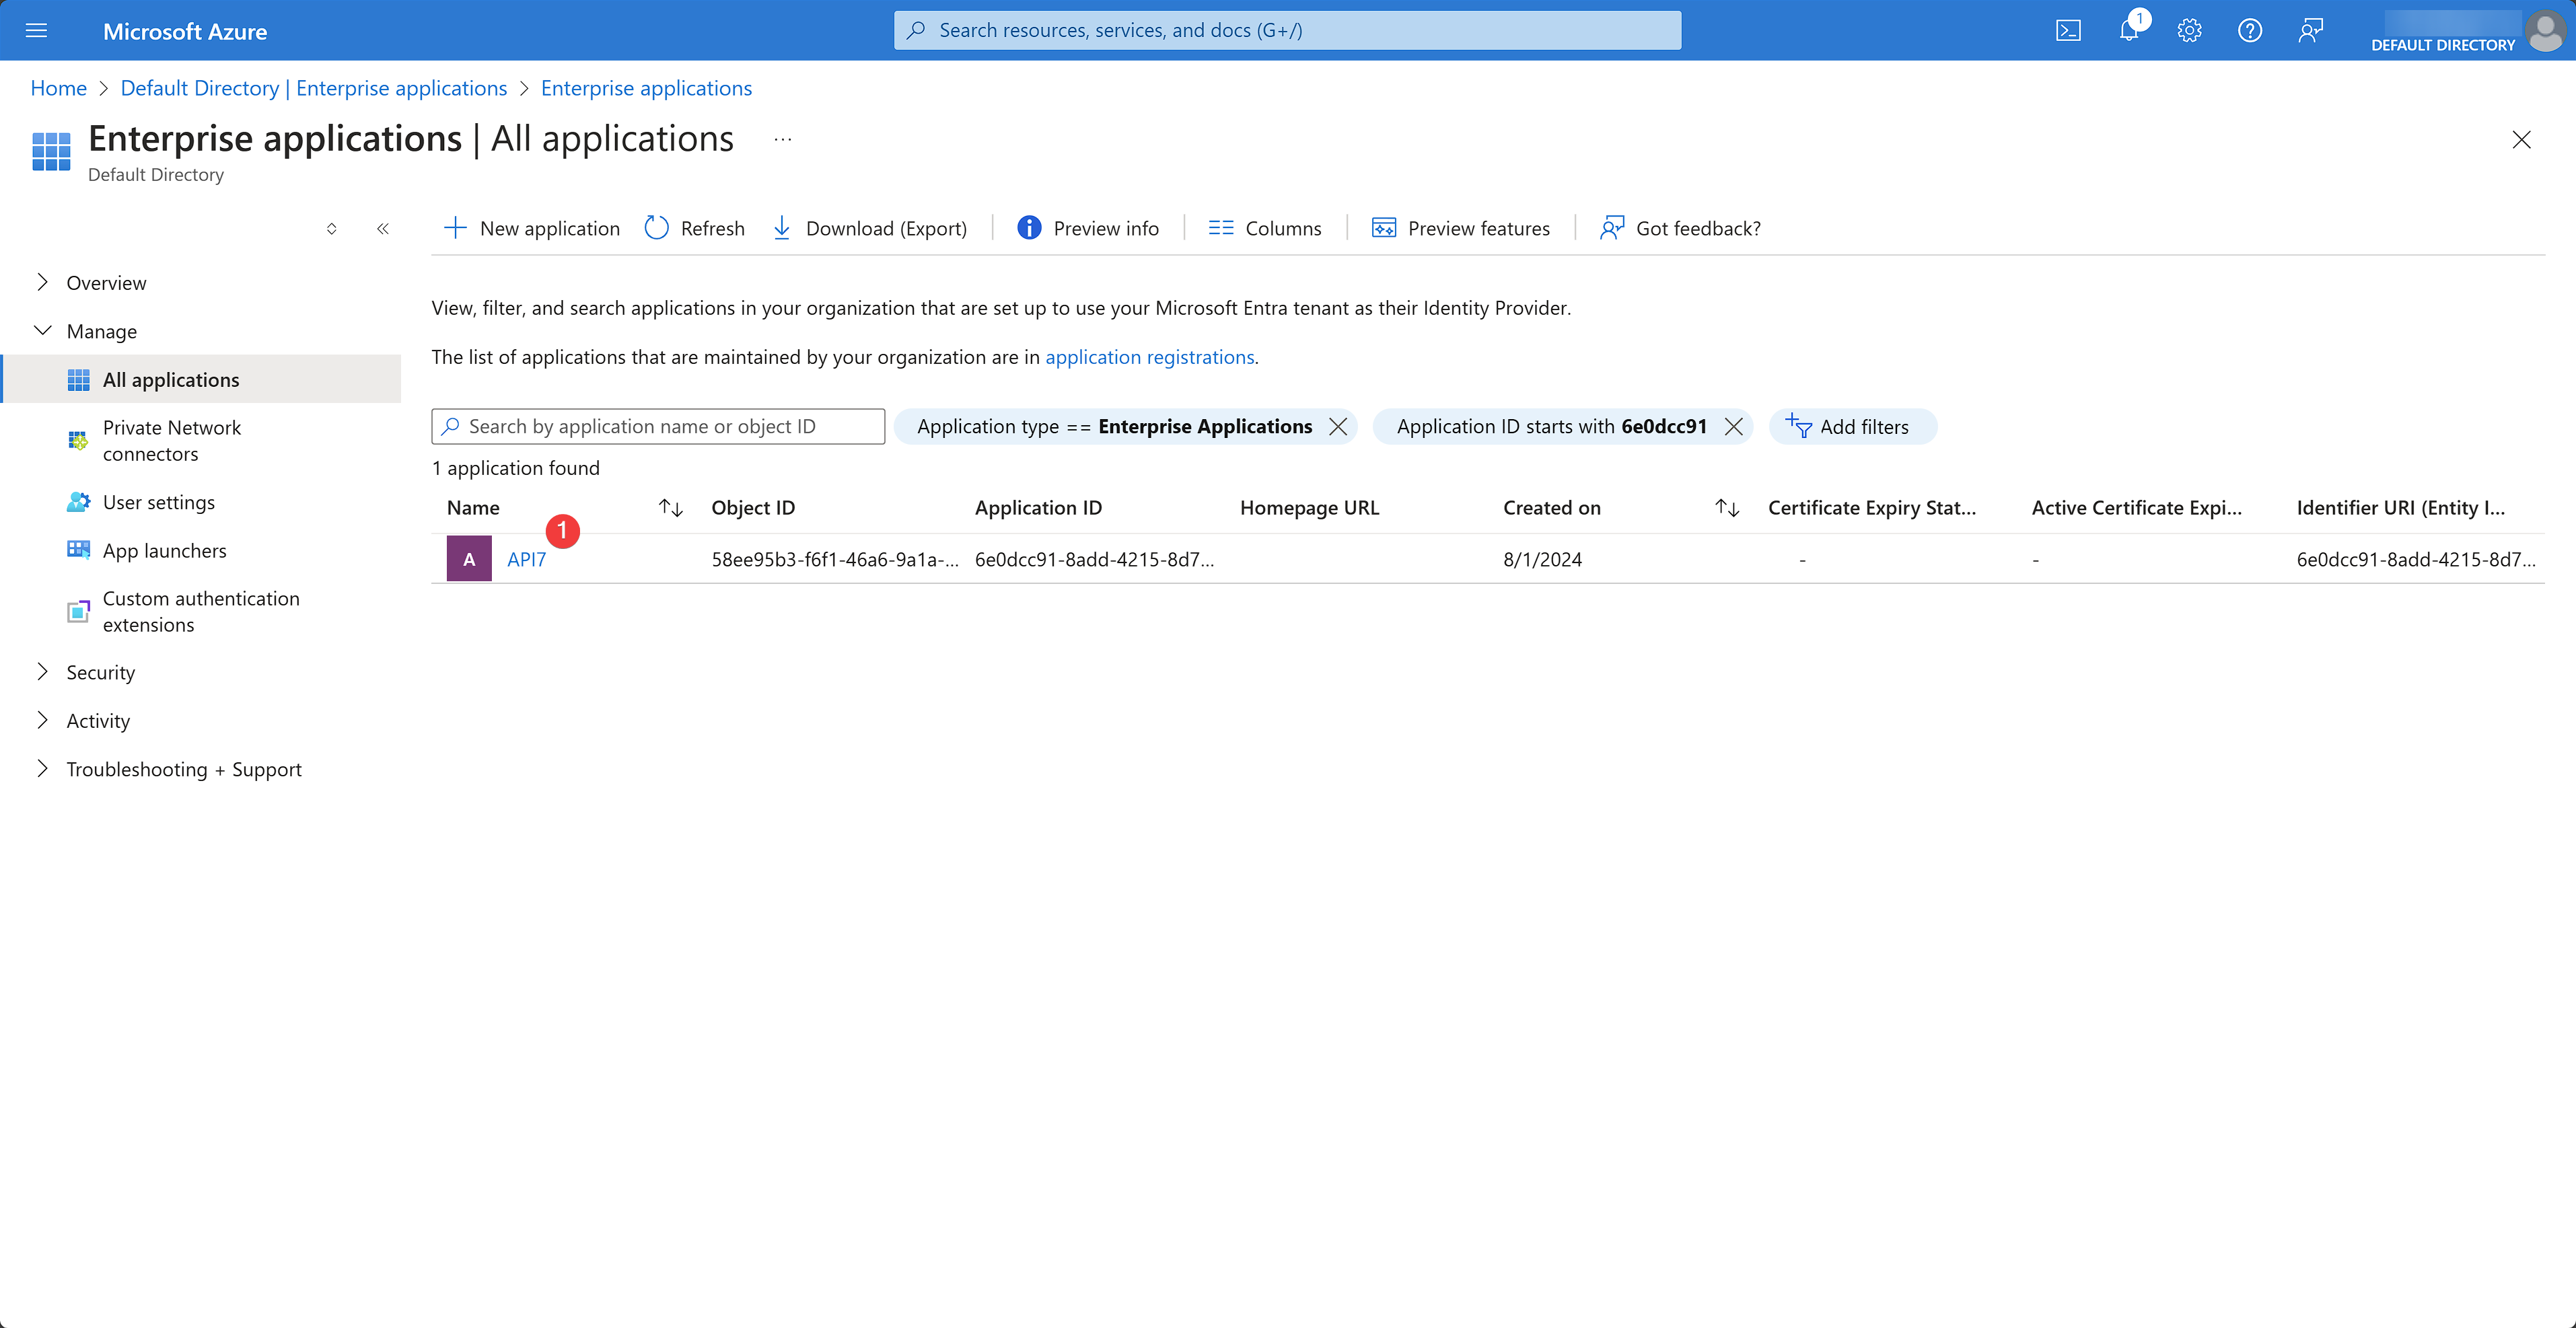
You should now be redirected to a page showing all apps. Select the app created earlier:
You should now be redirected to the app overview page. Select Users and groups under the Manage dropdown and click Add user/group:
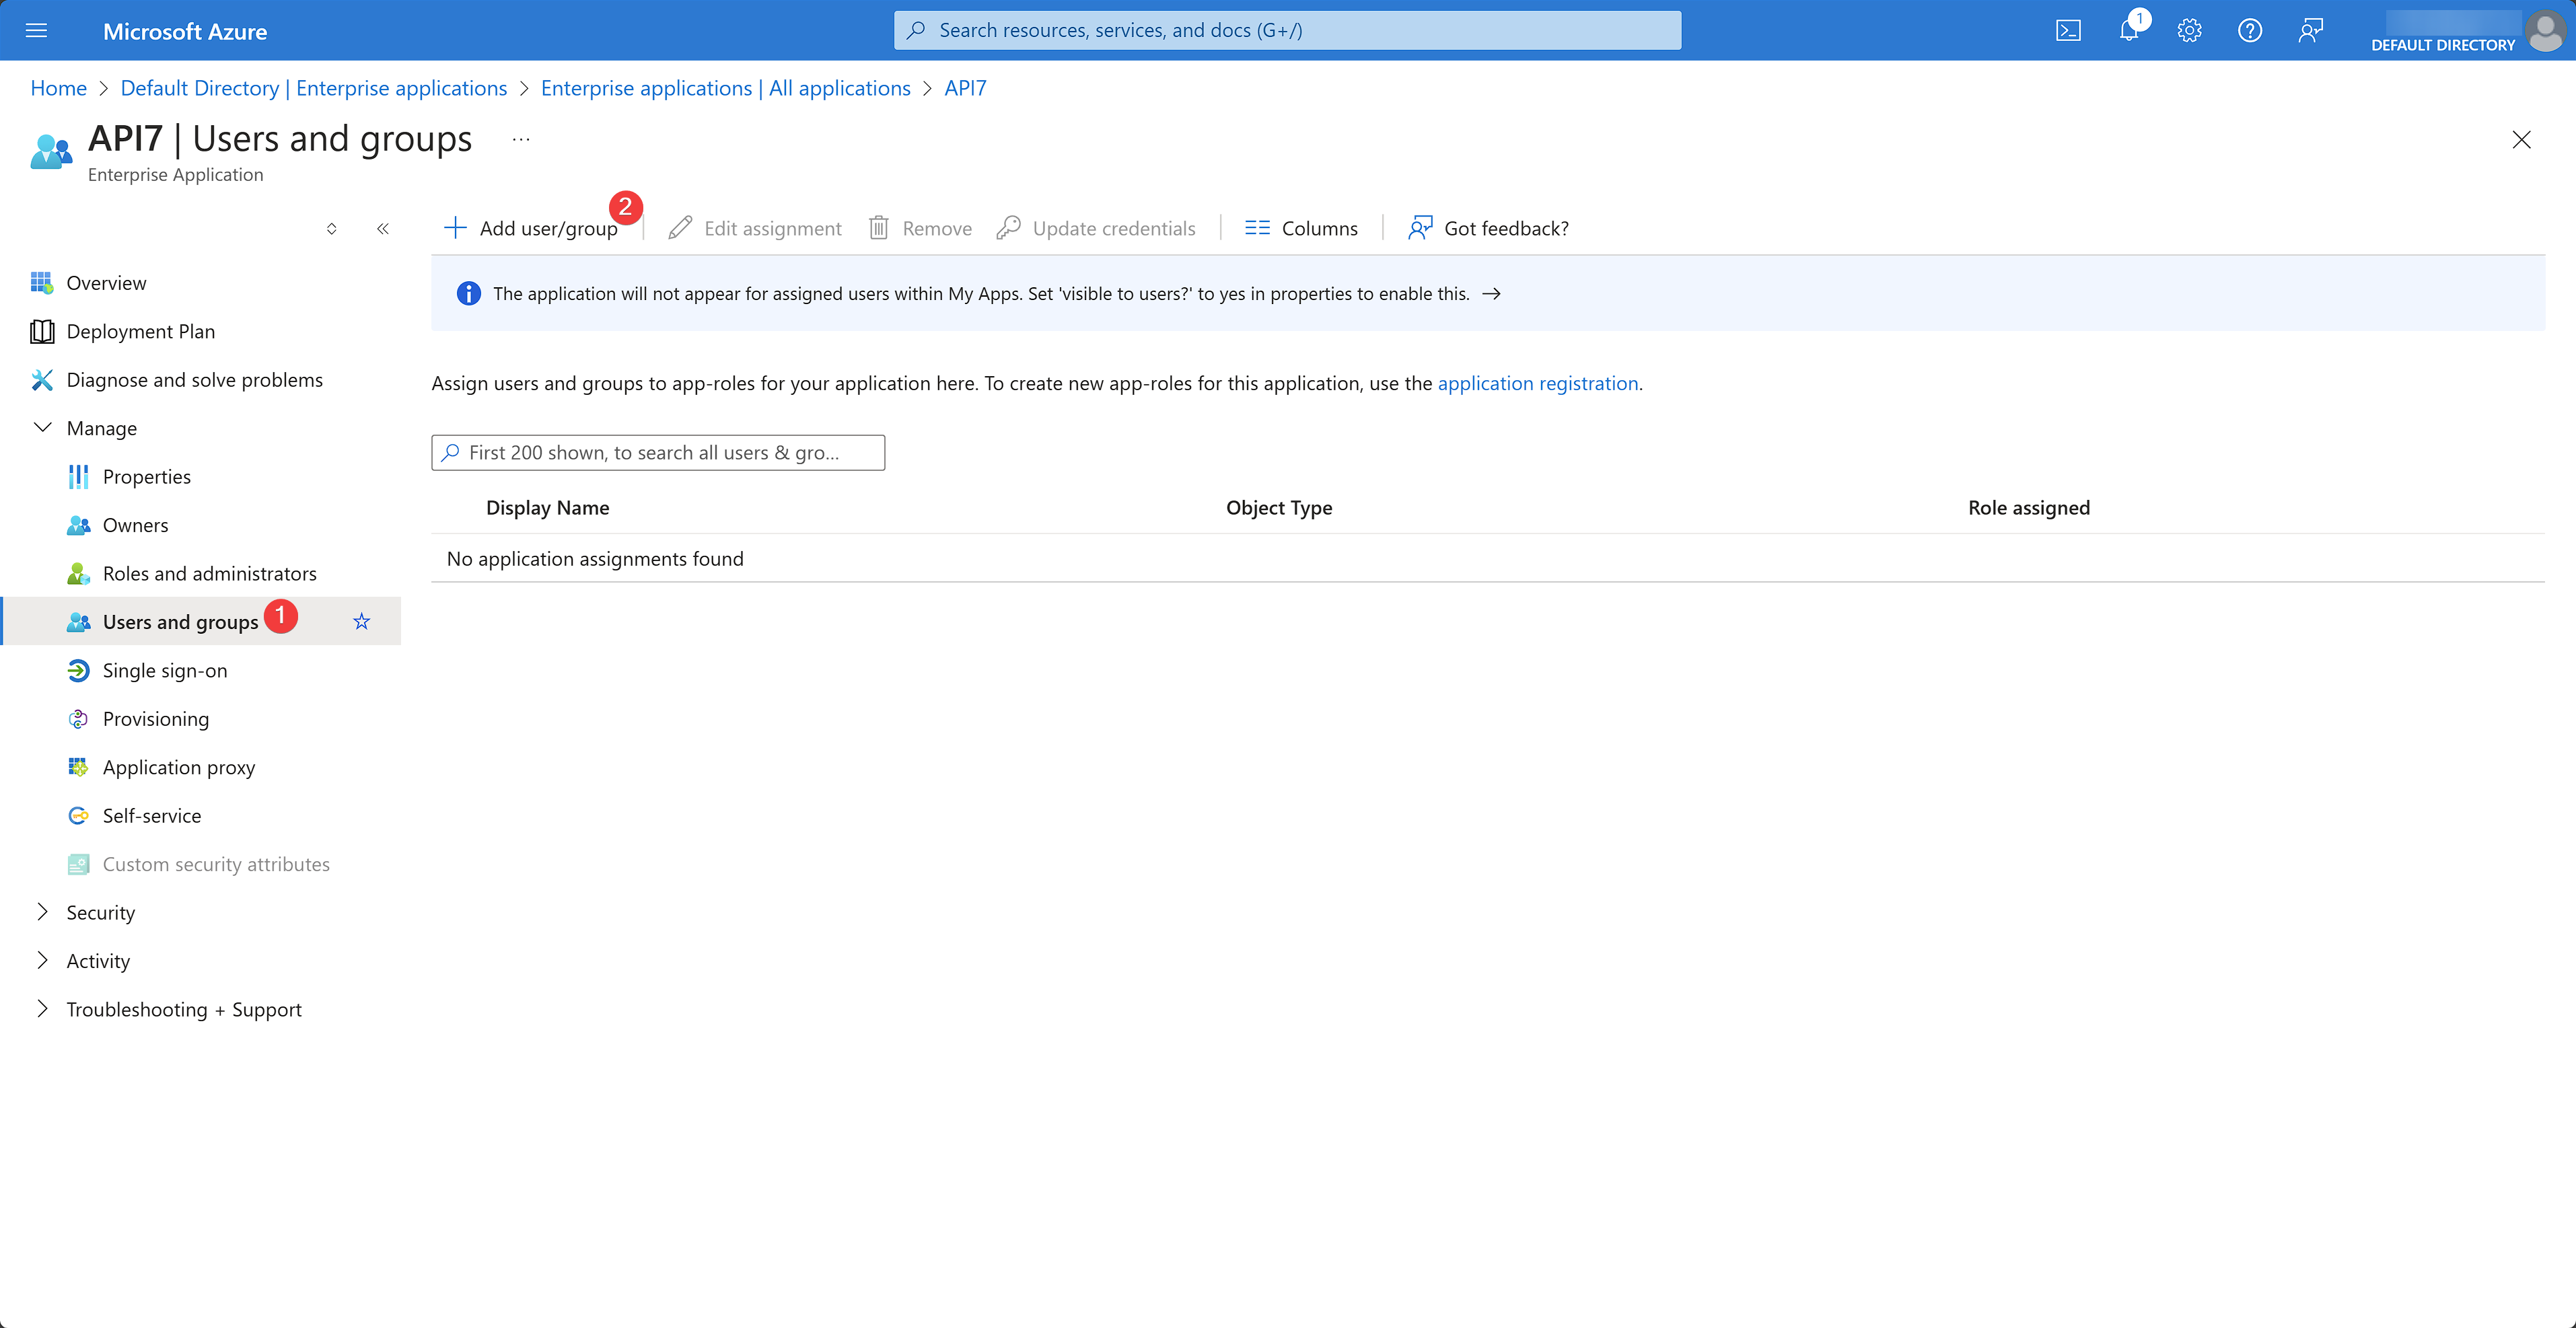
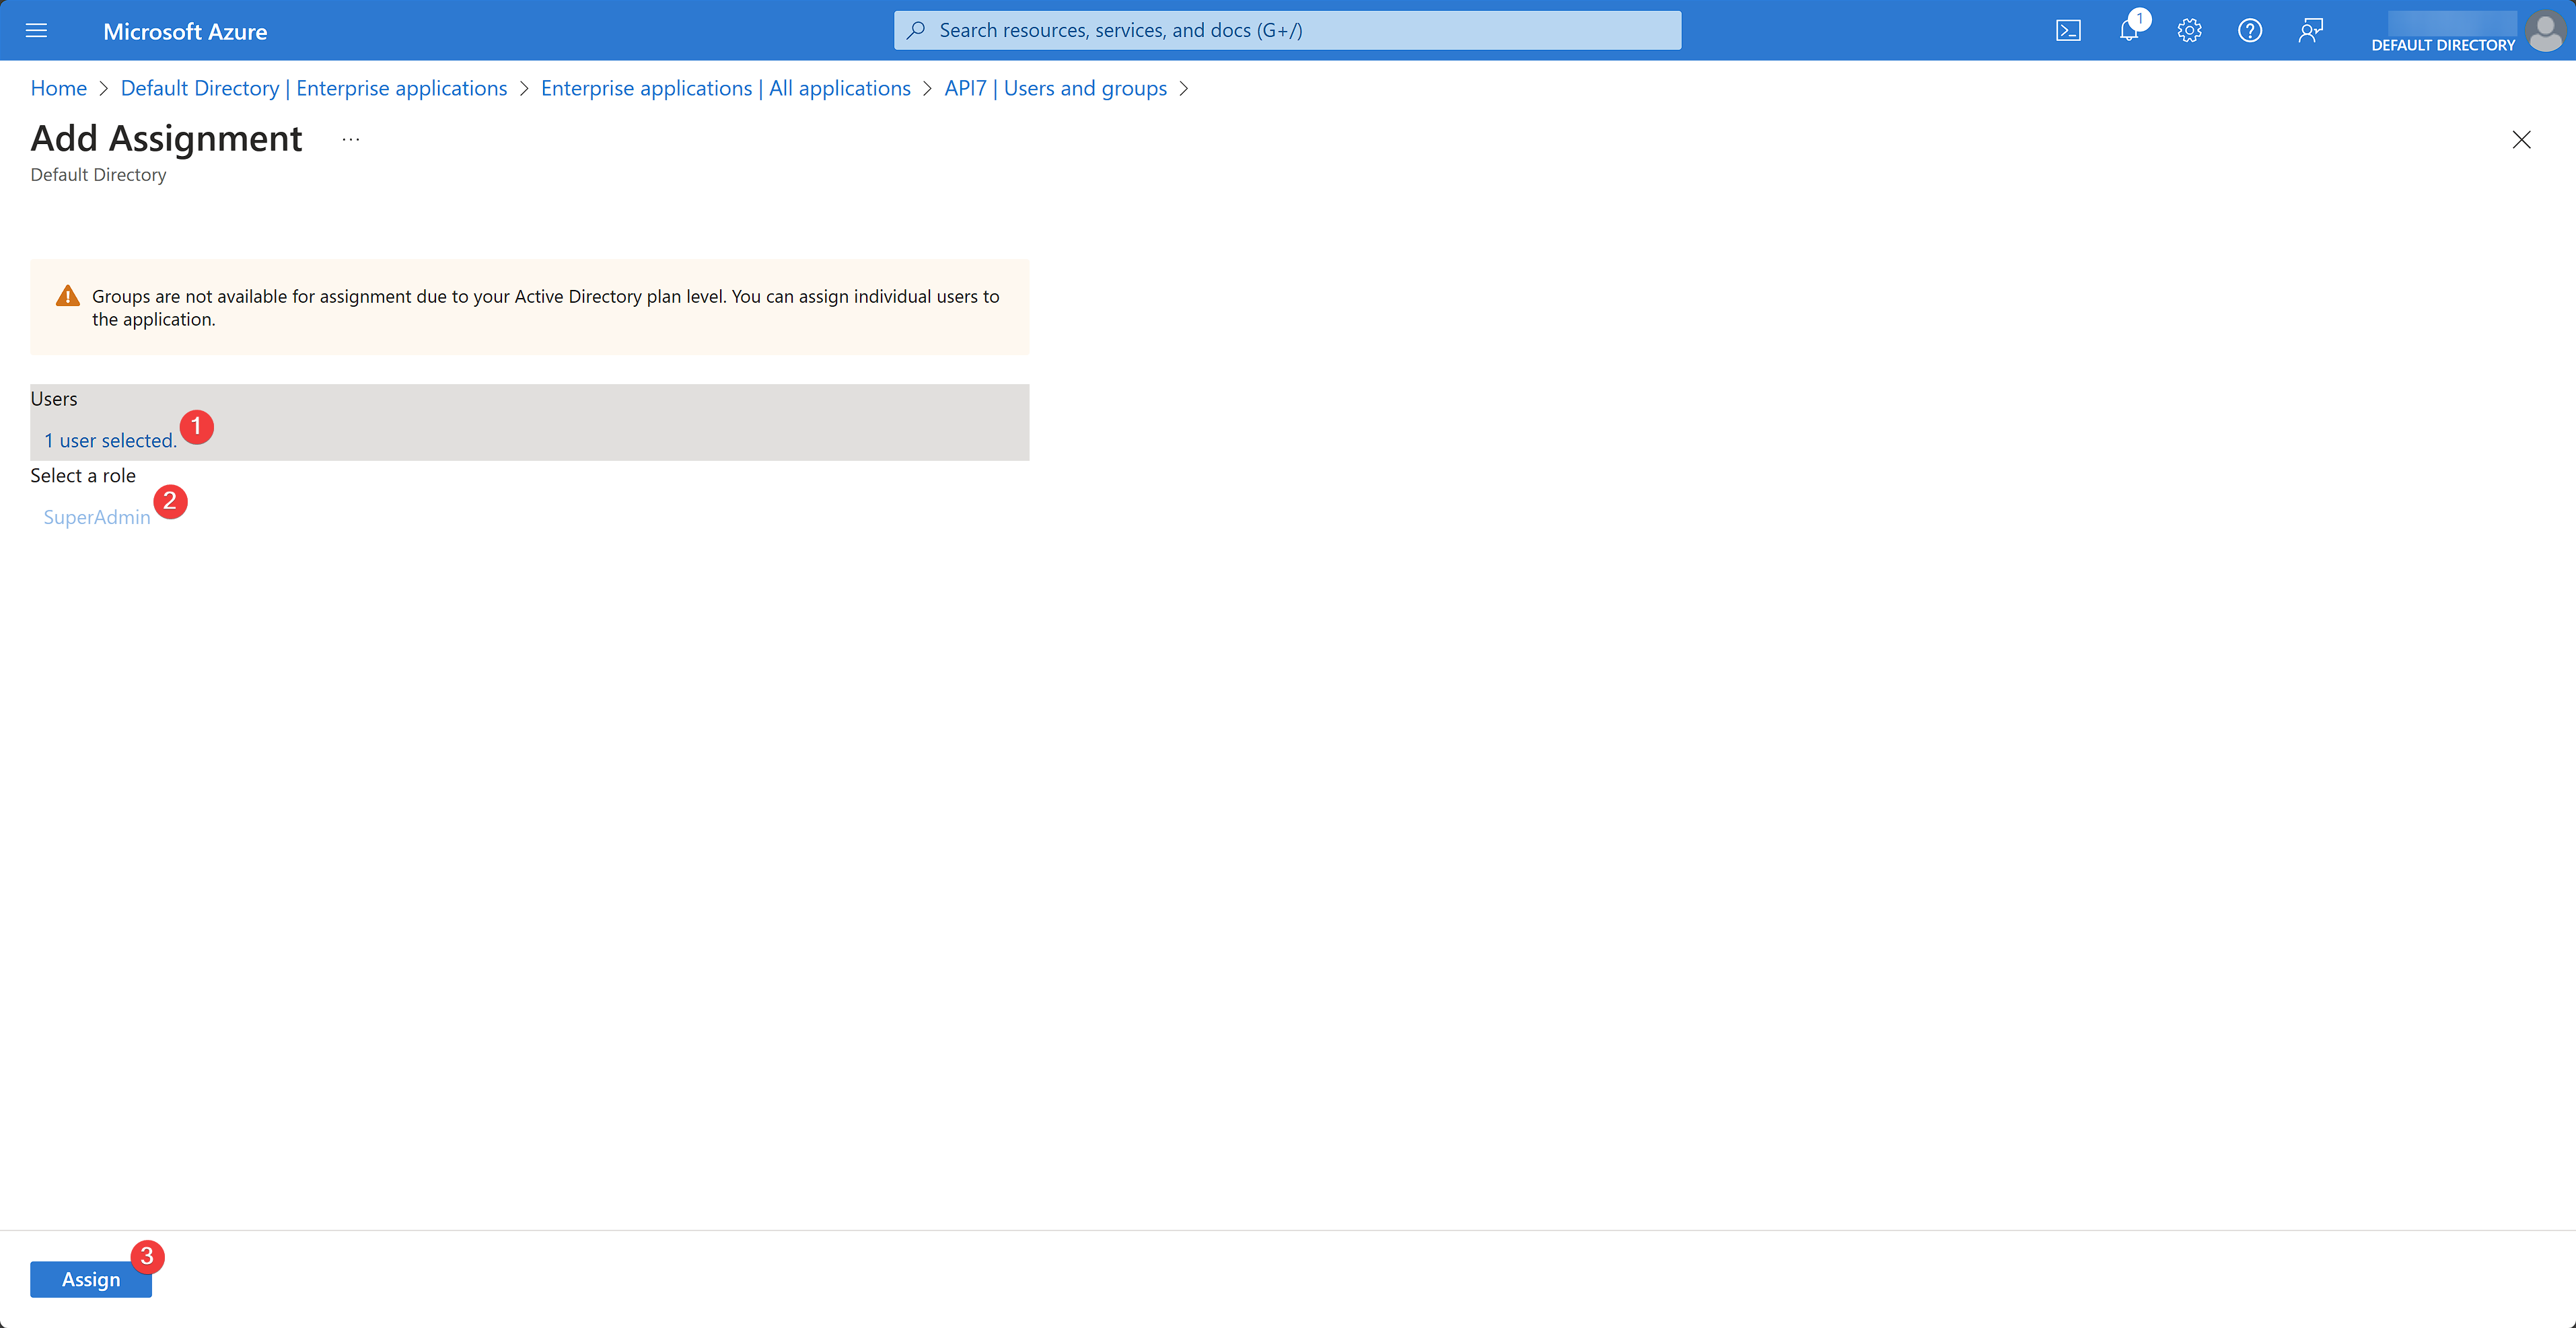
Select the appropriate IAM user to be allowed to sign into API7 Dashboard as the super admin and assign the SuperAdmin role created earlier. Click Assign:
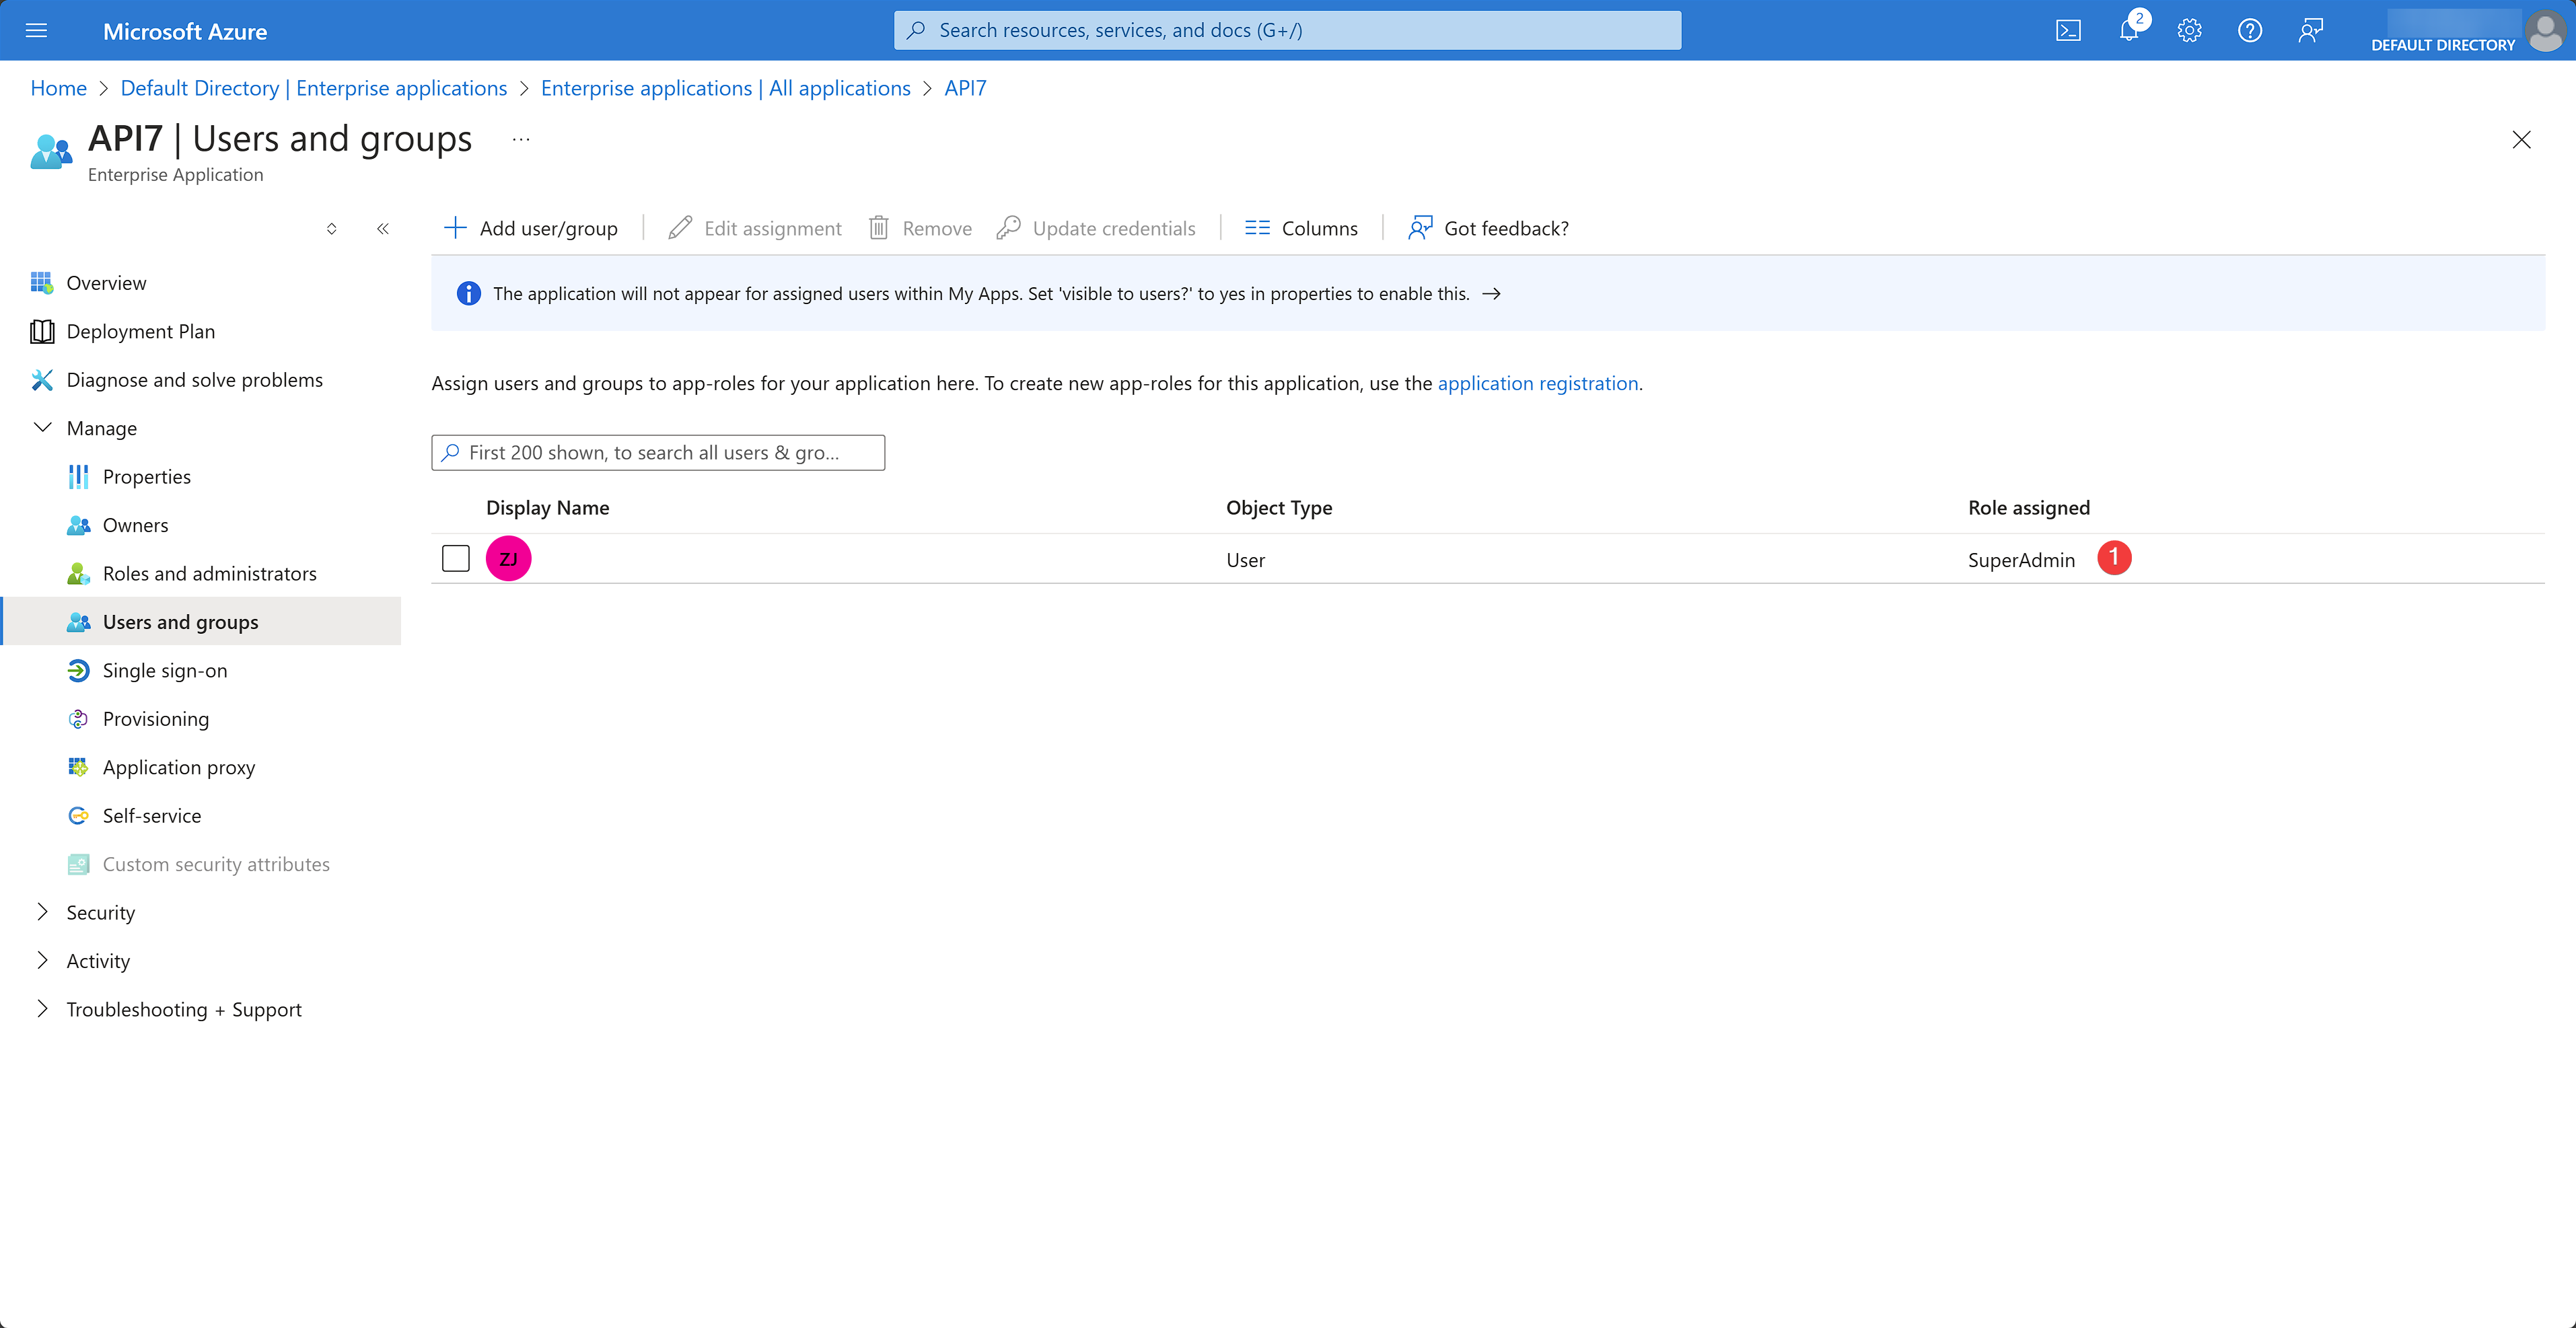
You should see the role assigned:
Configure API7
Log into the API7 Dashboard using an account with admin rights.
Add Login Option
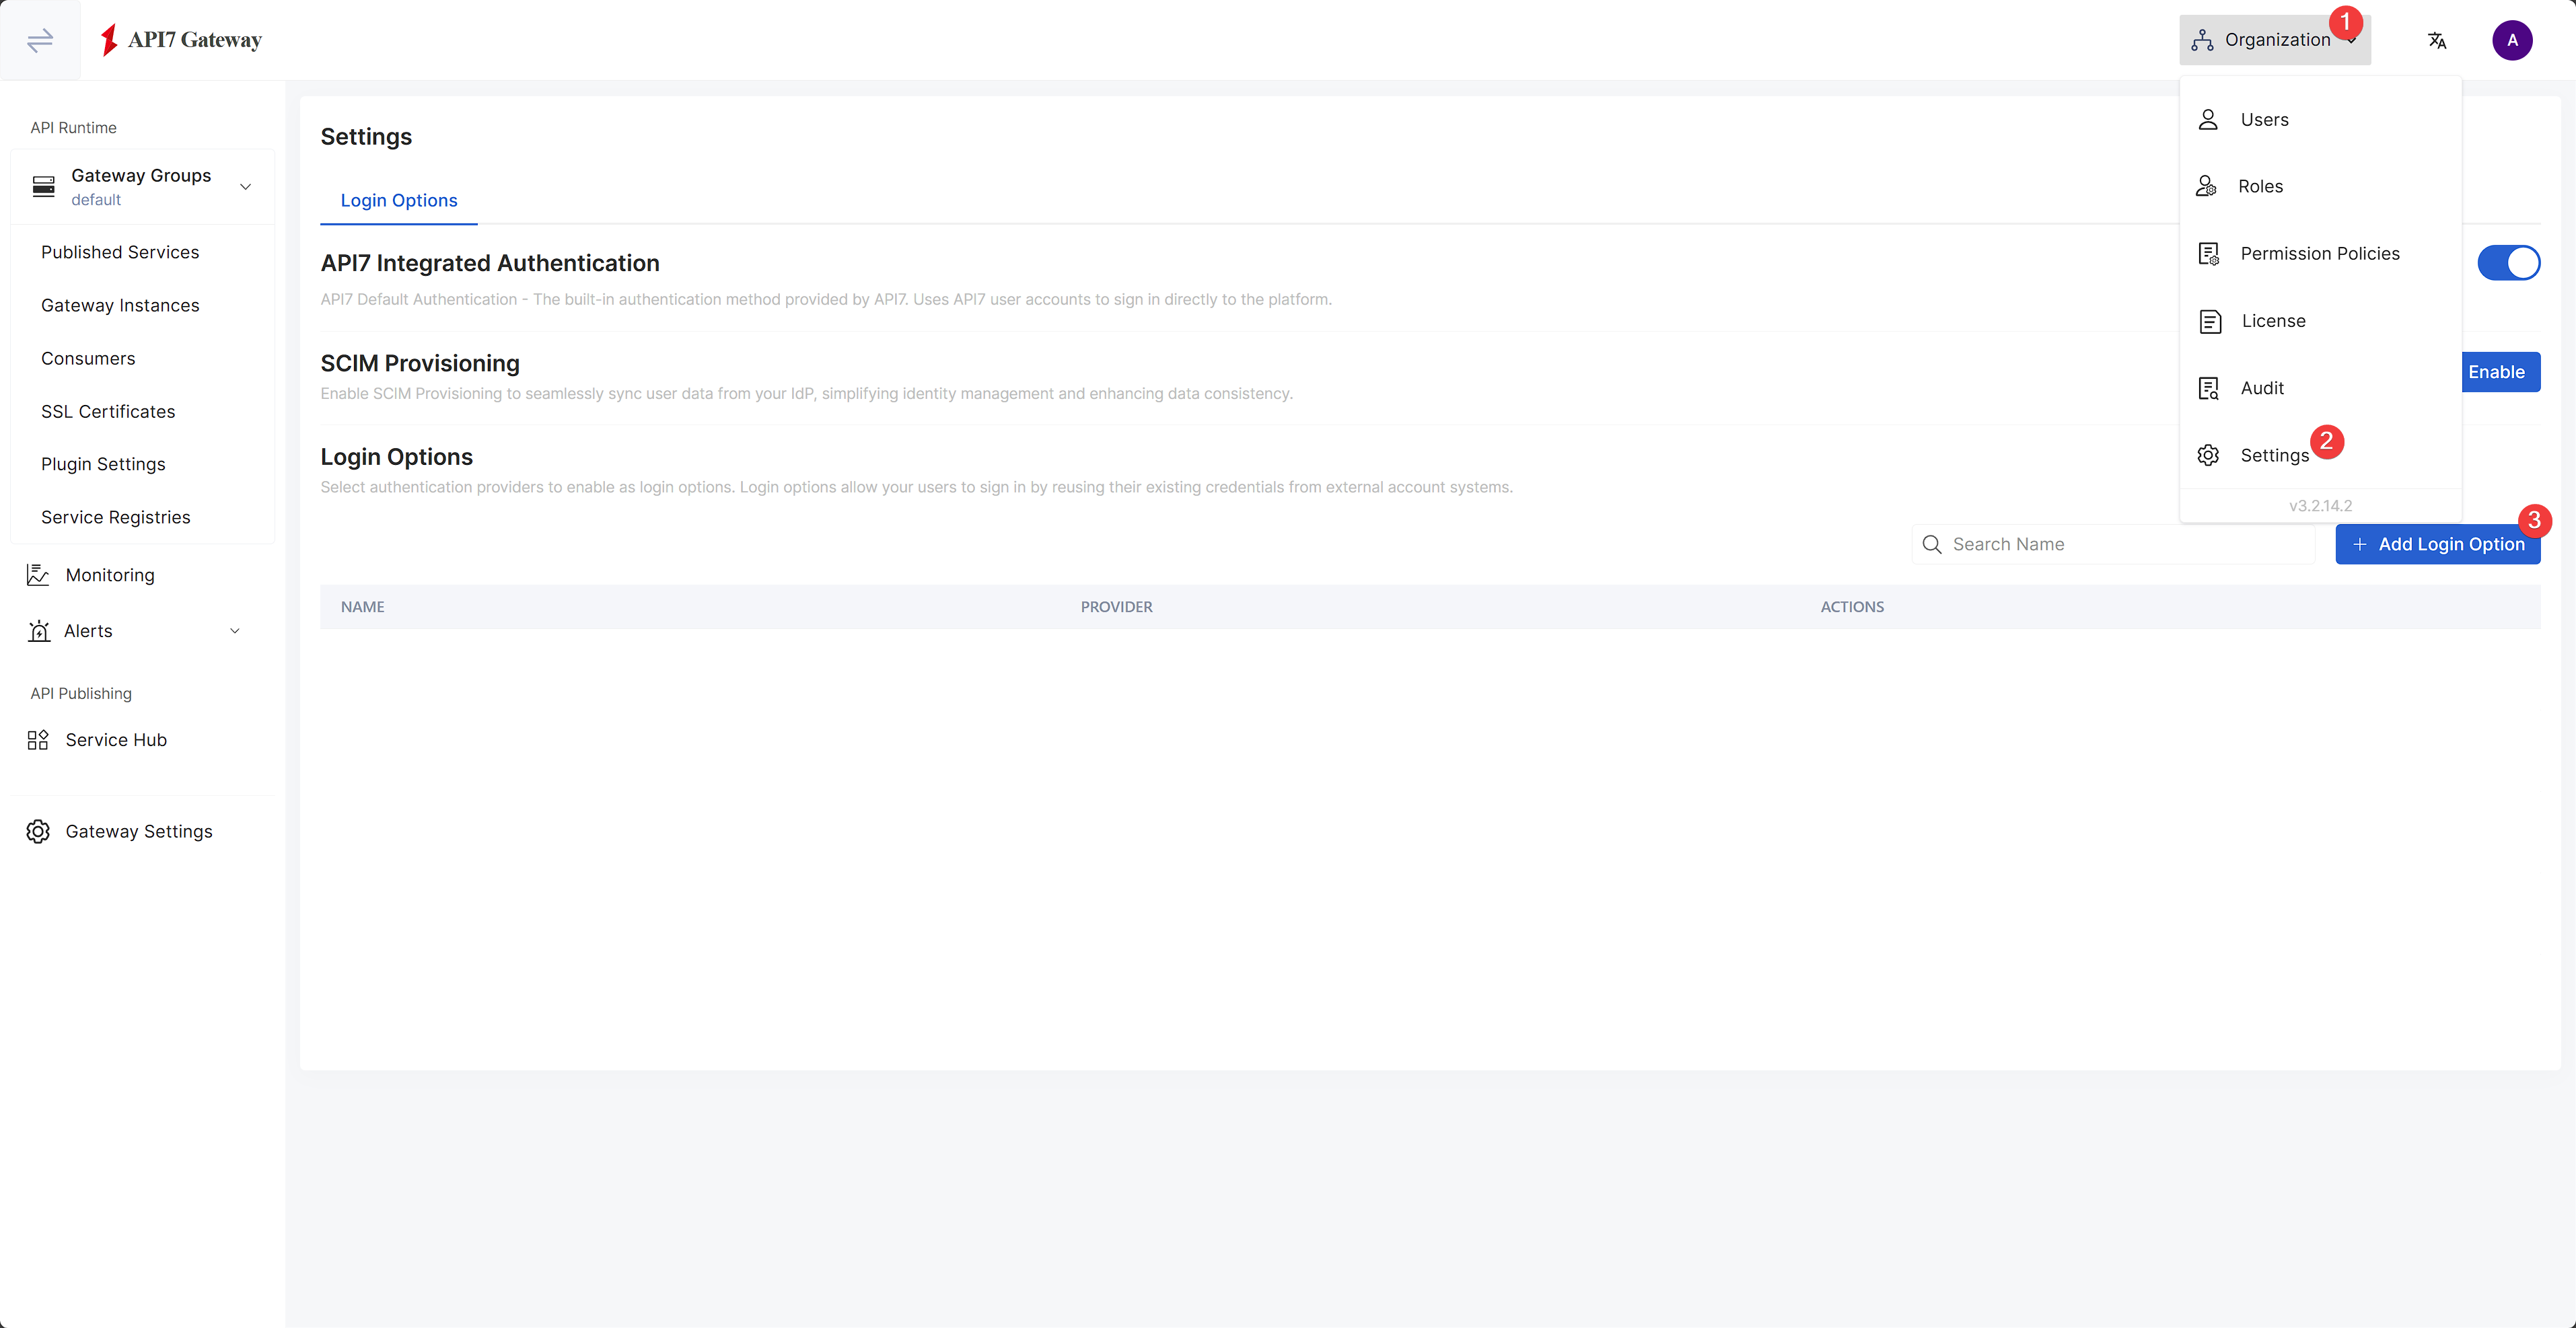
Under Organization dropdown, click Settings, and select Add Login Option:
Fill out the Name, select OIDC as the provider, and populate Issuer and Client ID based on the app information:
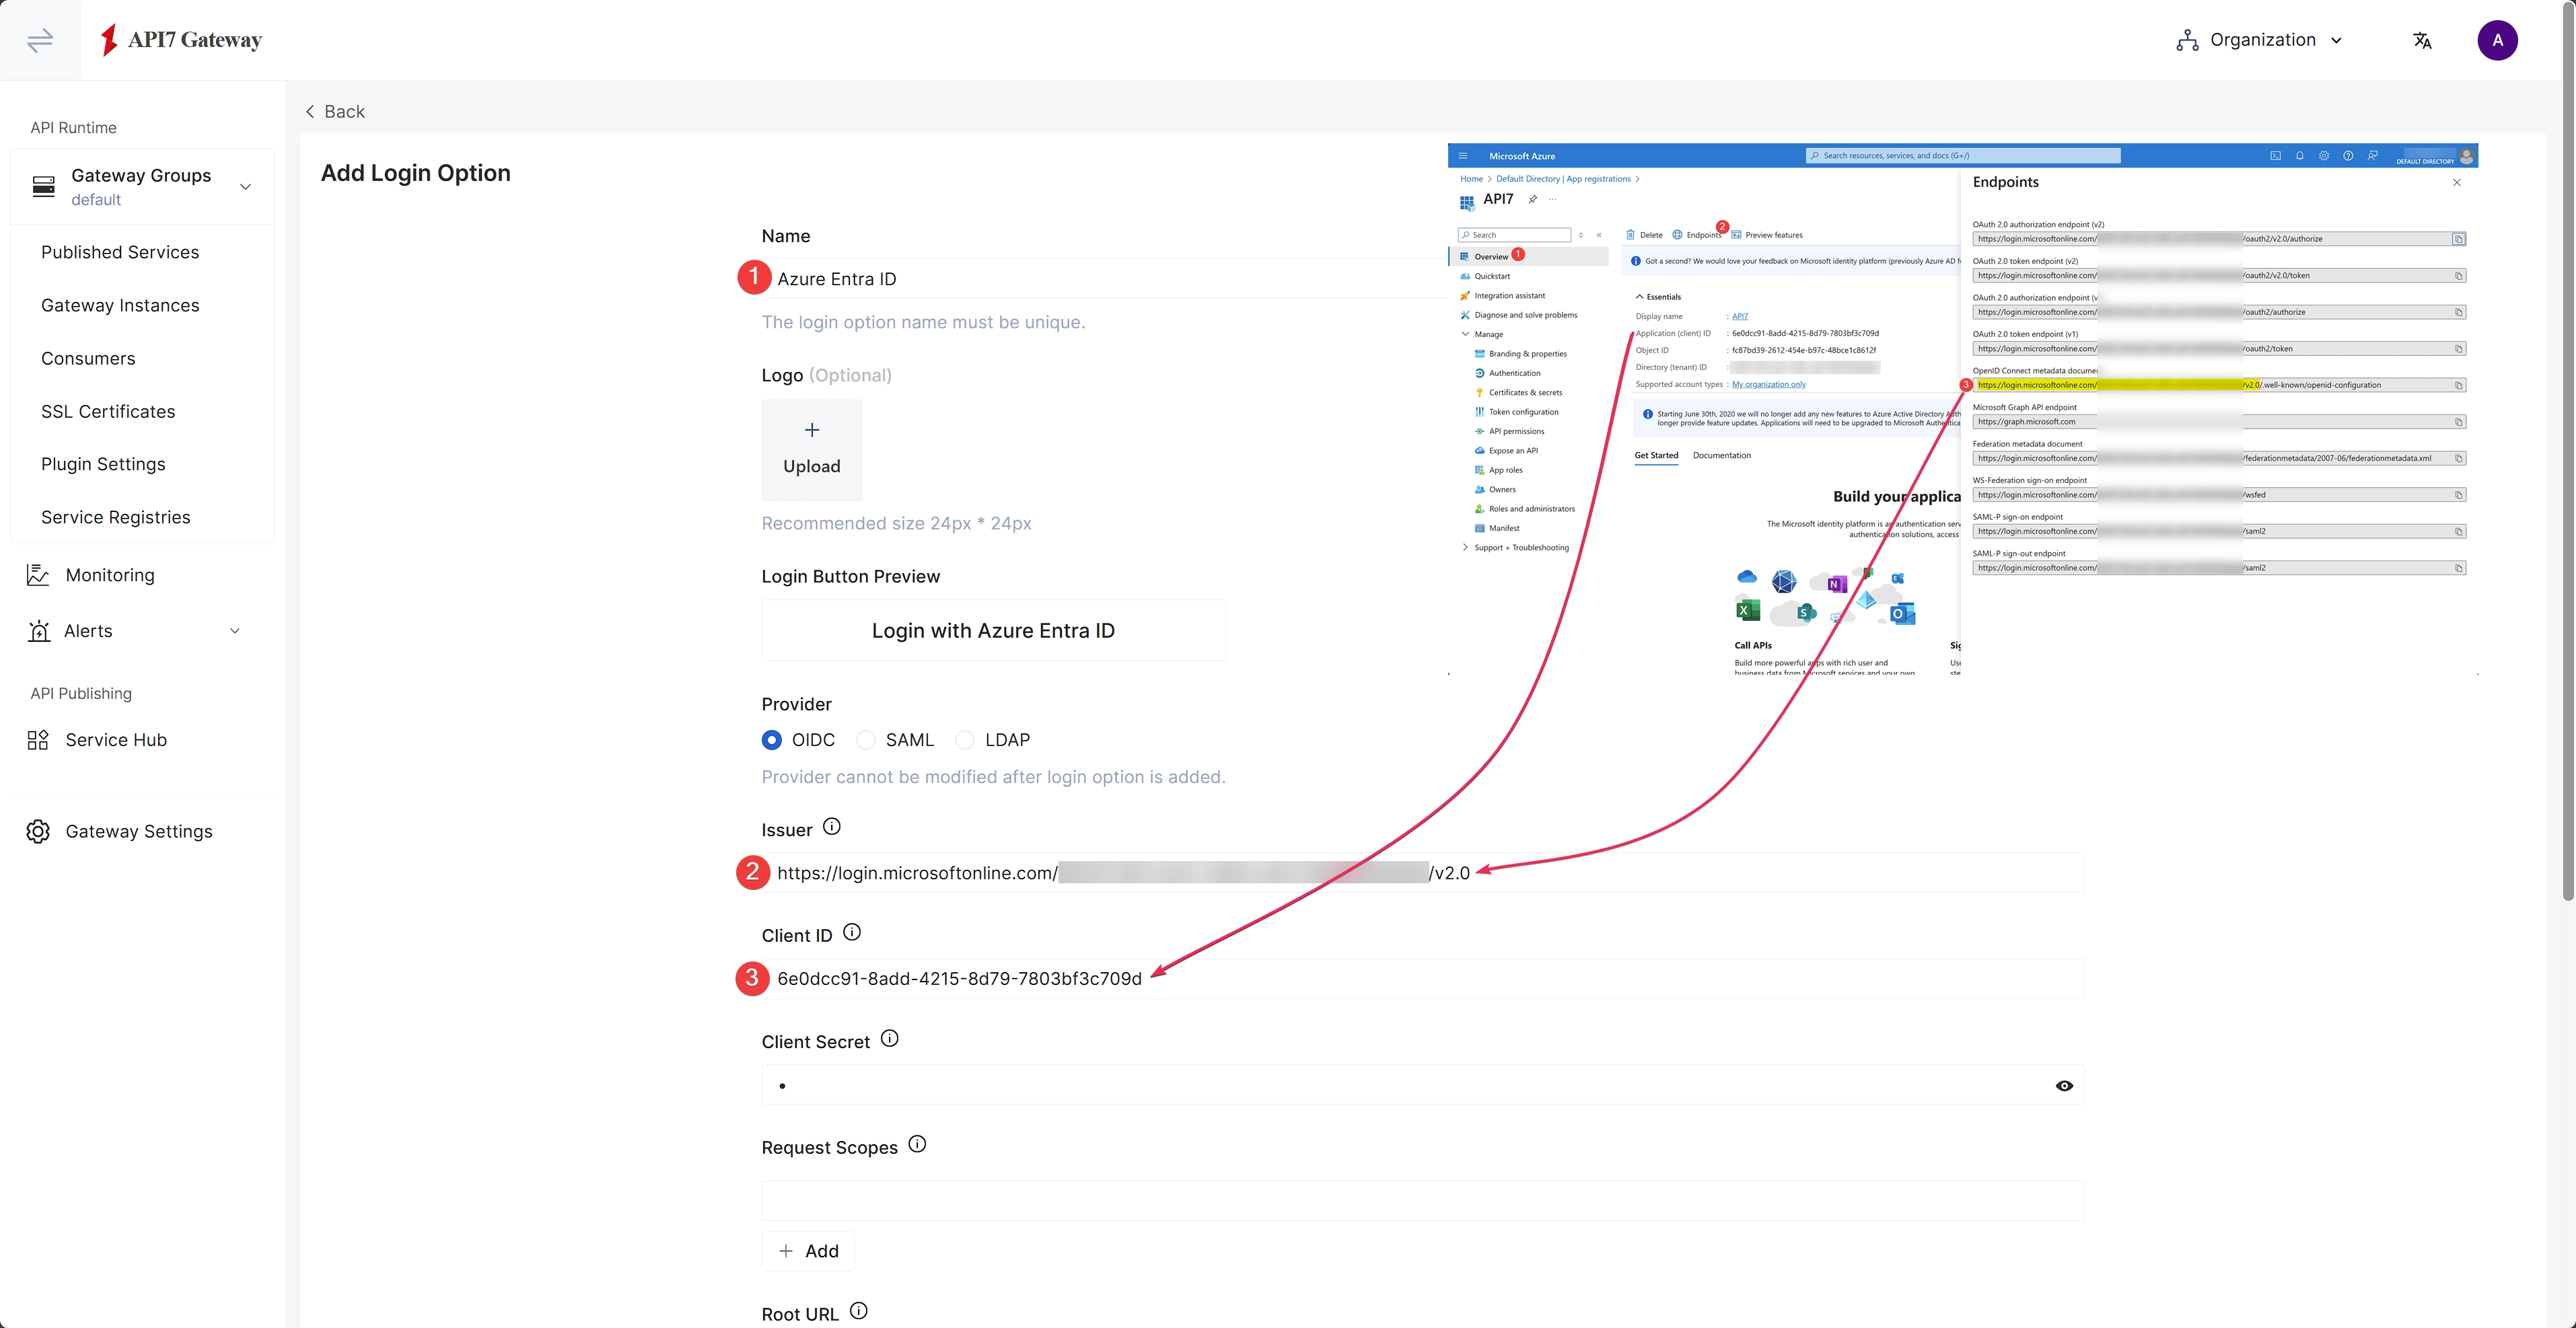
The issuer URL should not include /.well-known/openid-configuration.
Continue to fill out the Client Secret previously saved:
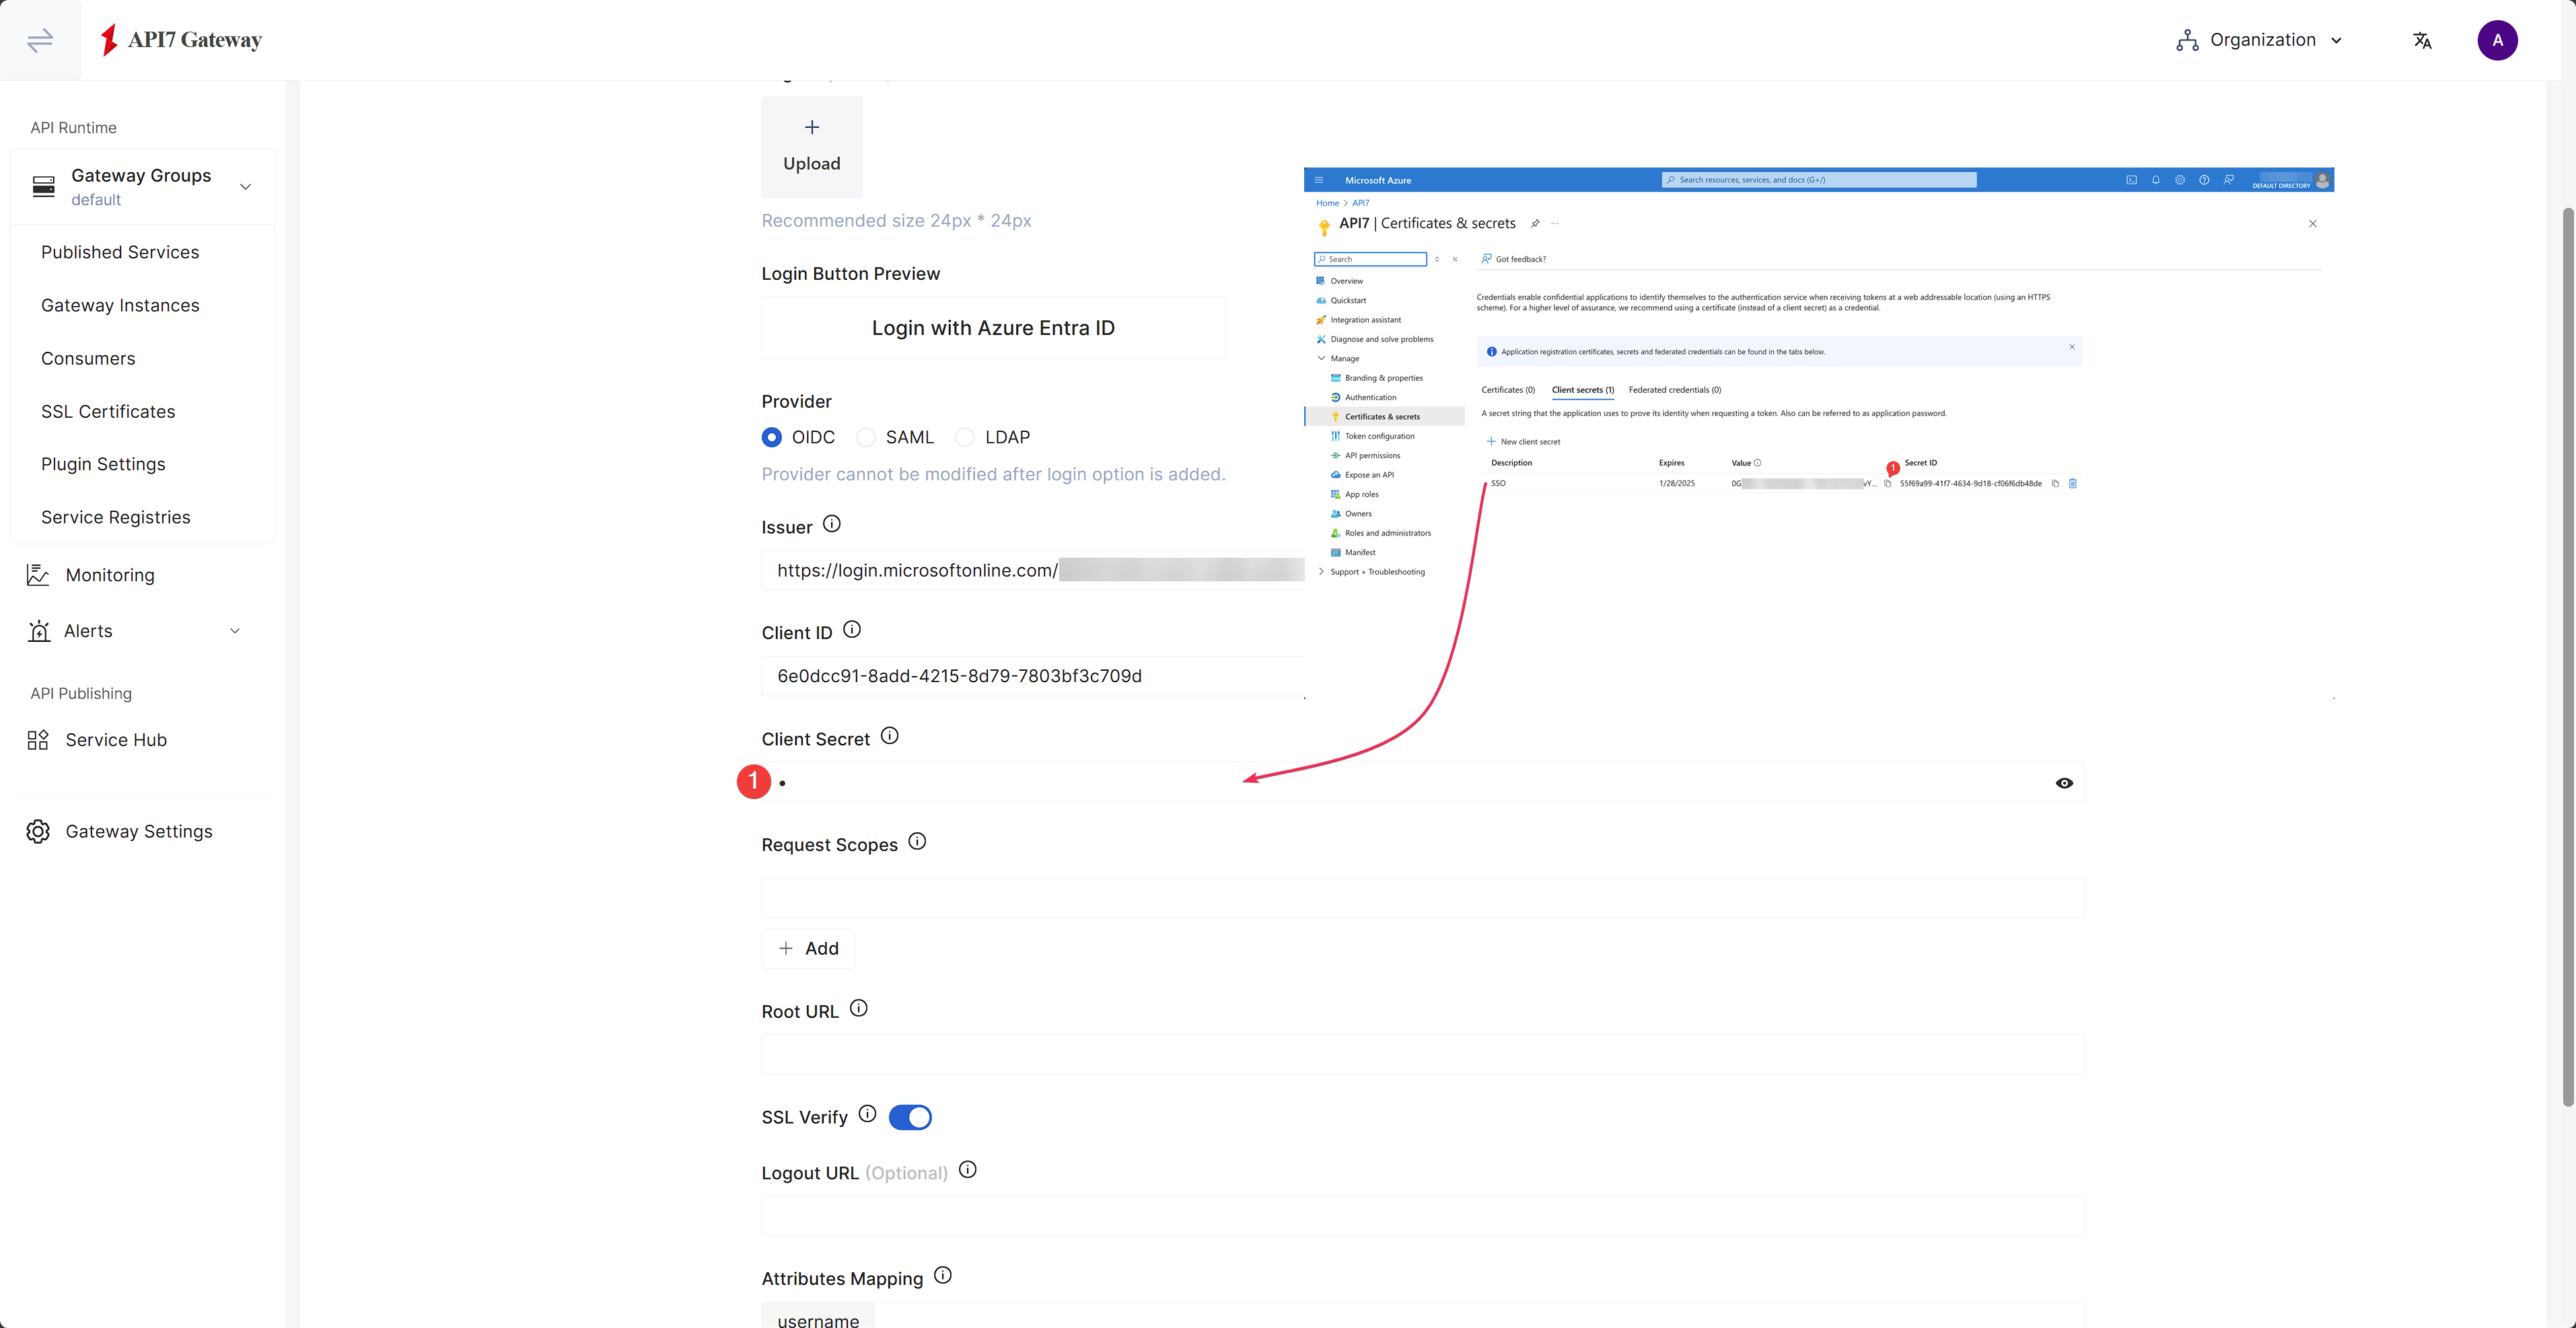
as well as the rest of information:
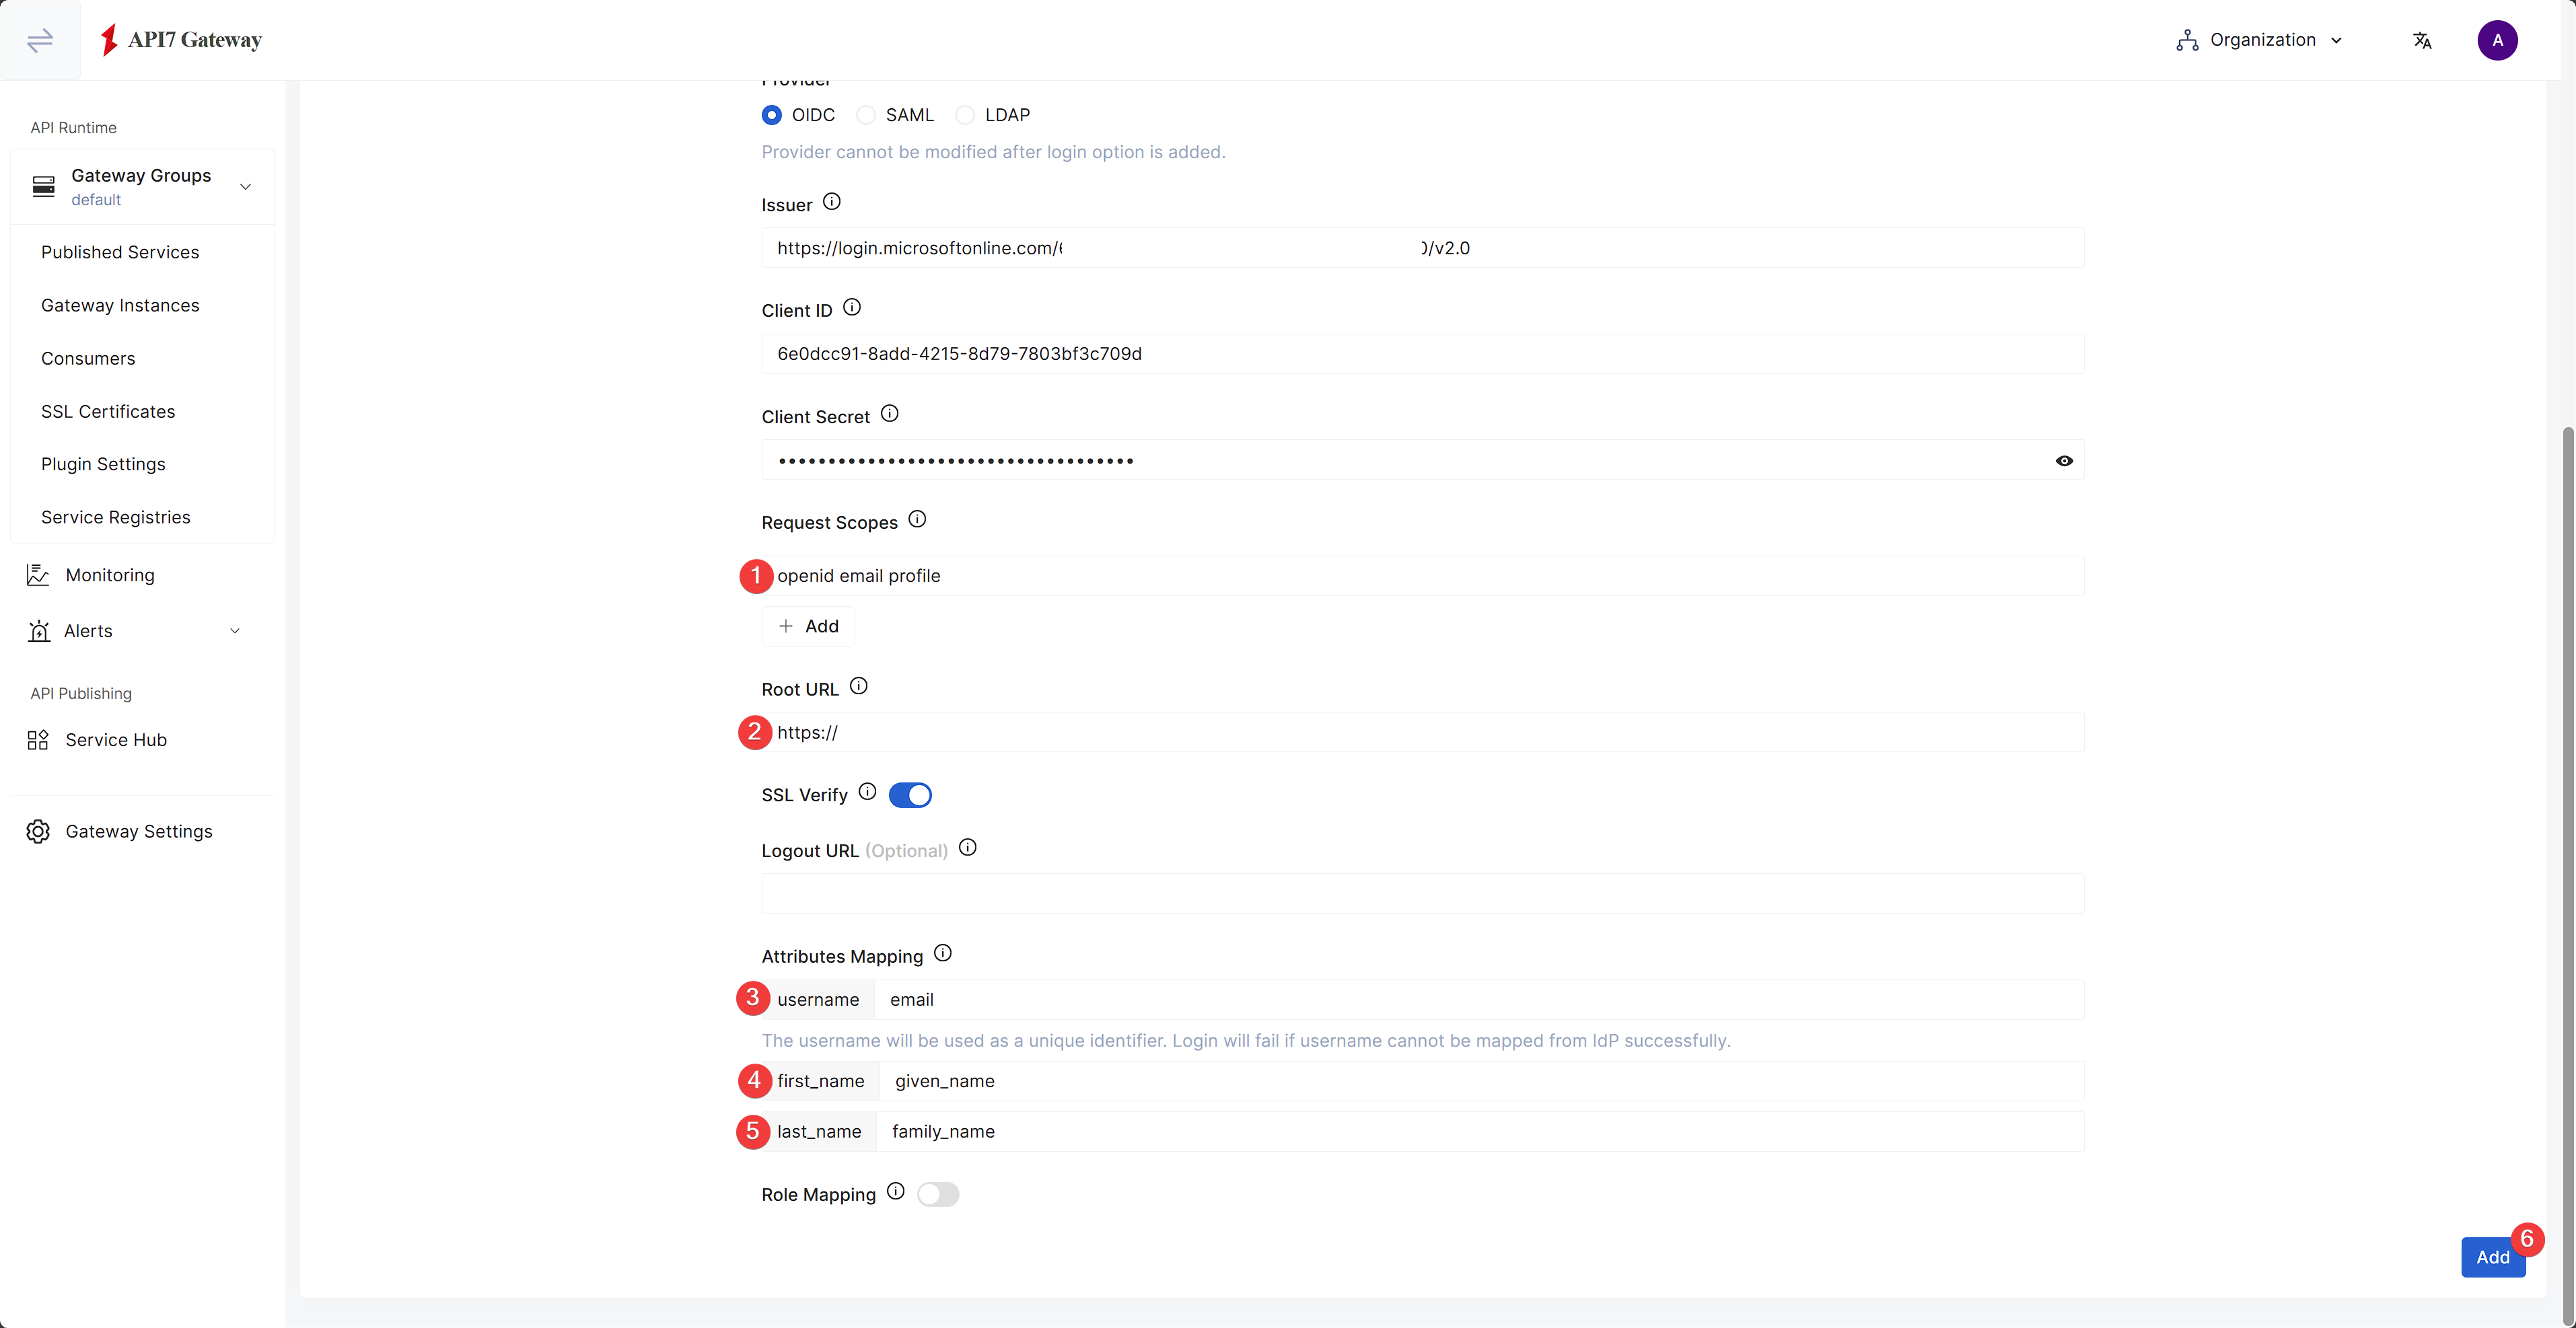
Once finished, click Add. You should see the login provider successfully provisioned.
Enable Role Mapping
Enable Role Mapping for the newly created login provider:
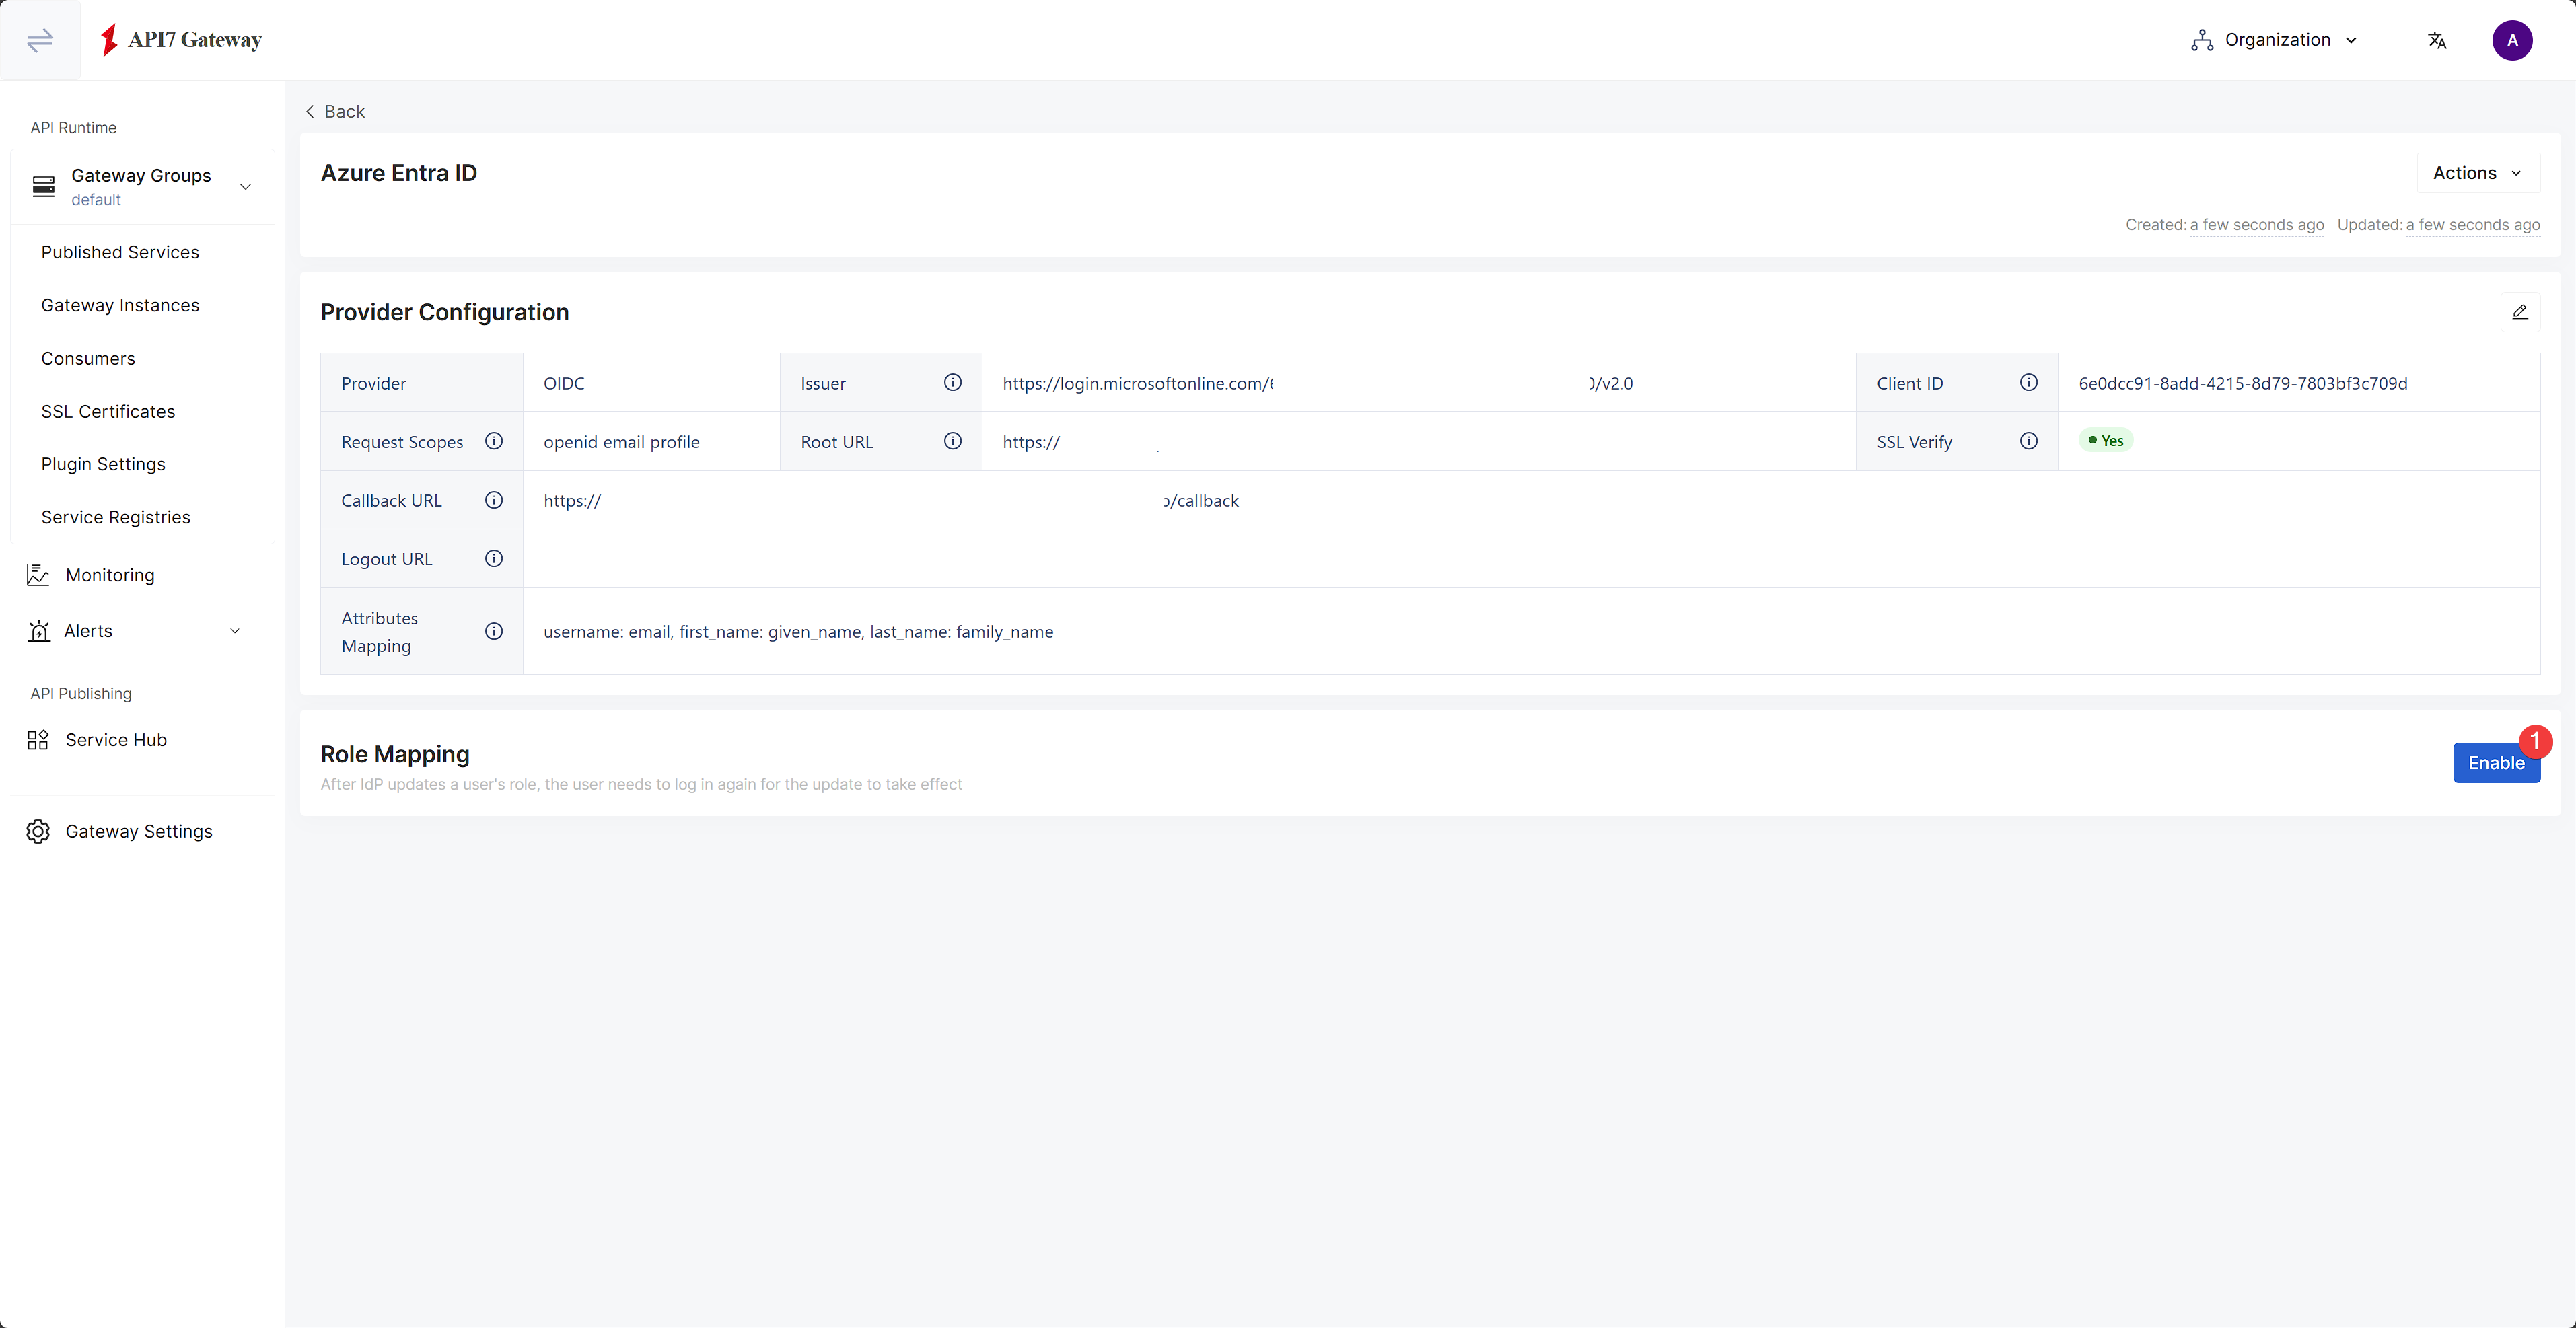
Fill out the details and click Enable:
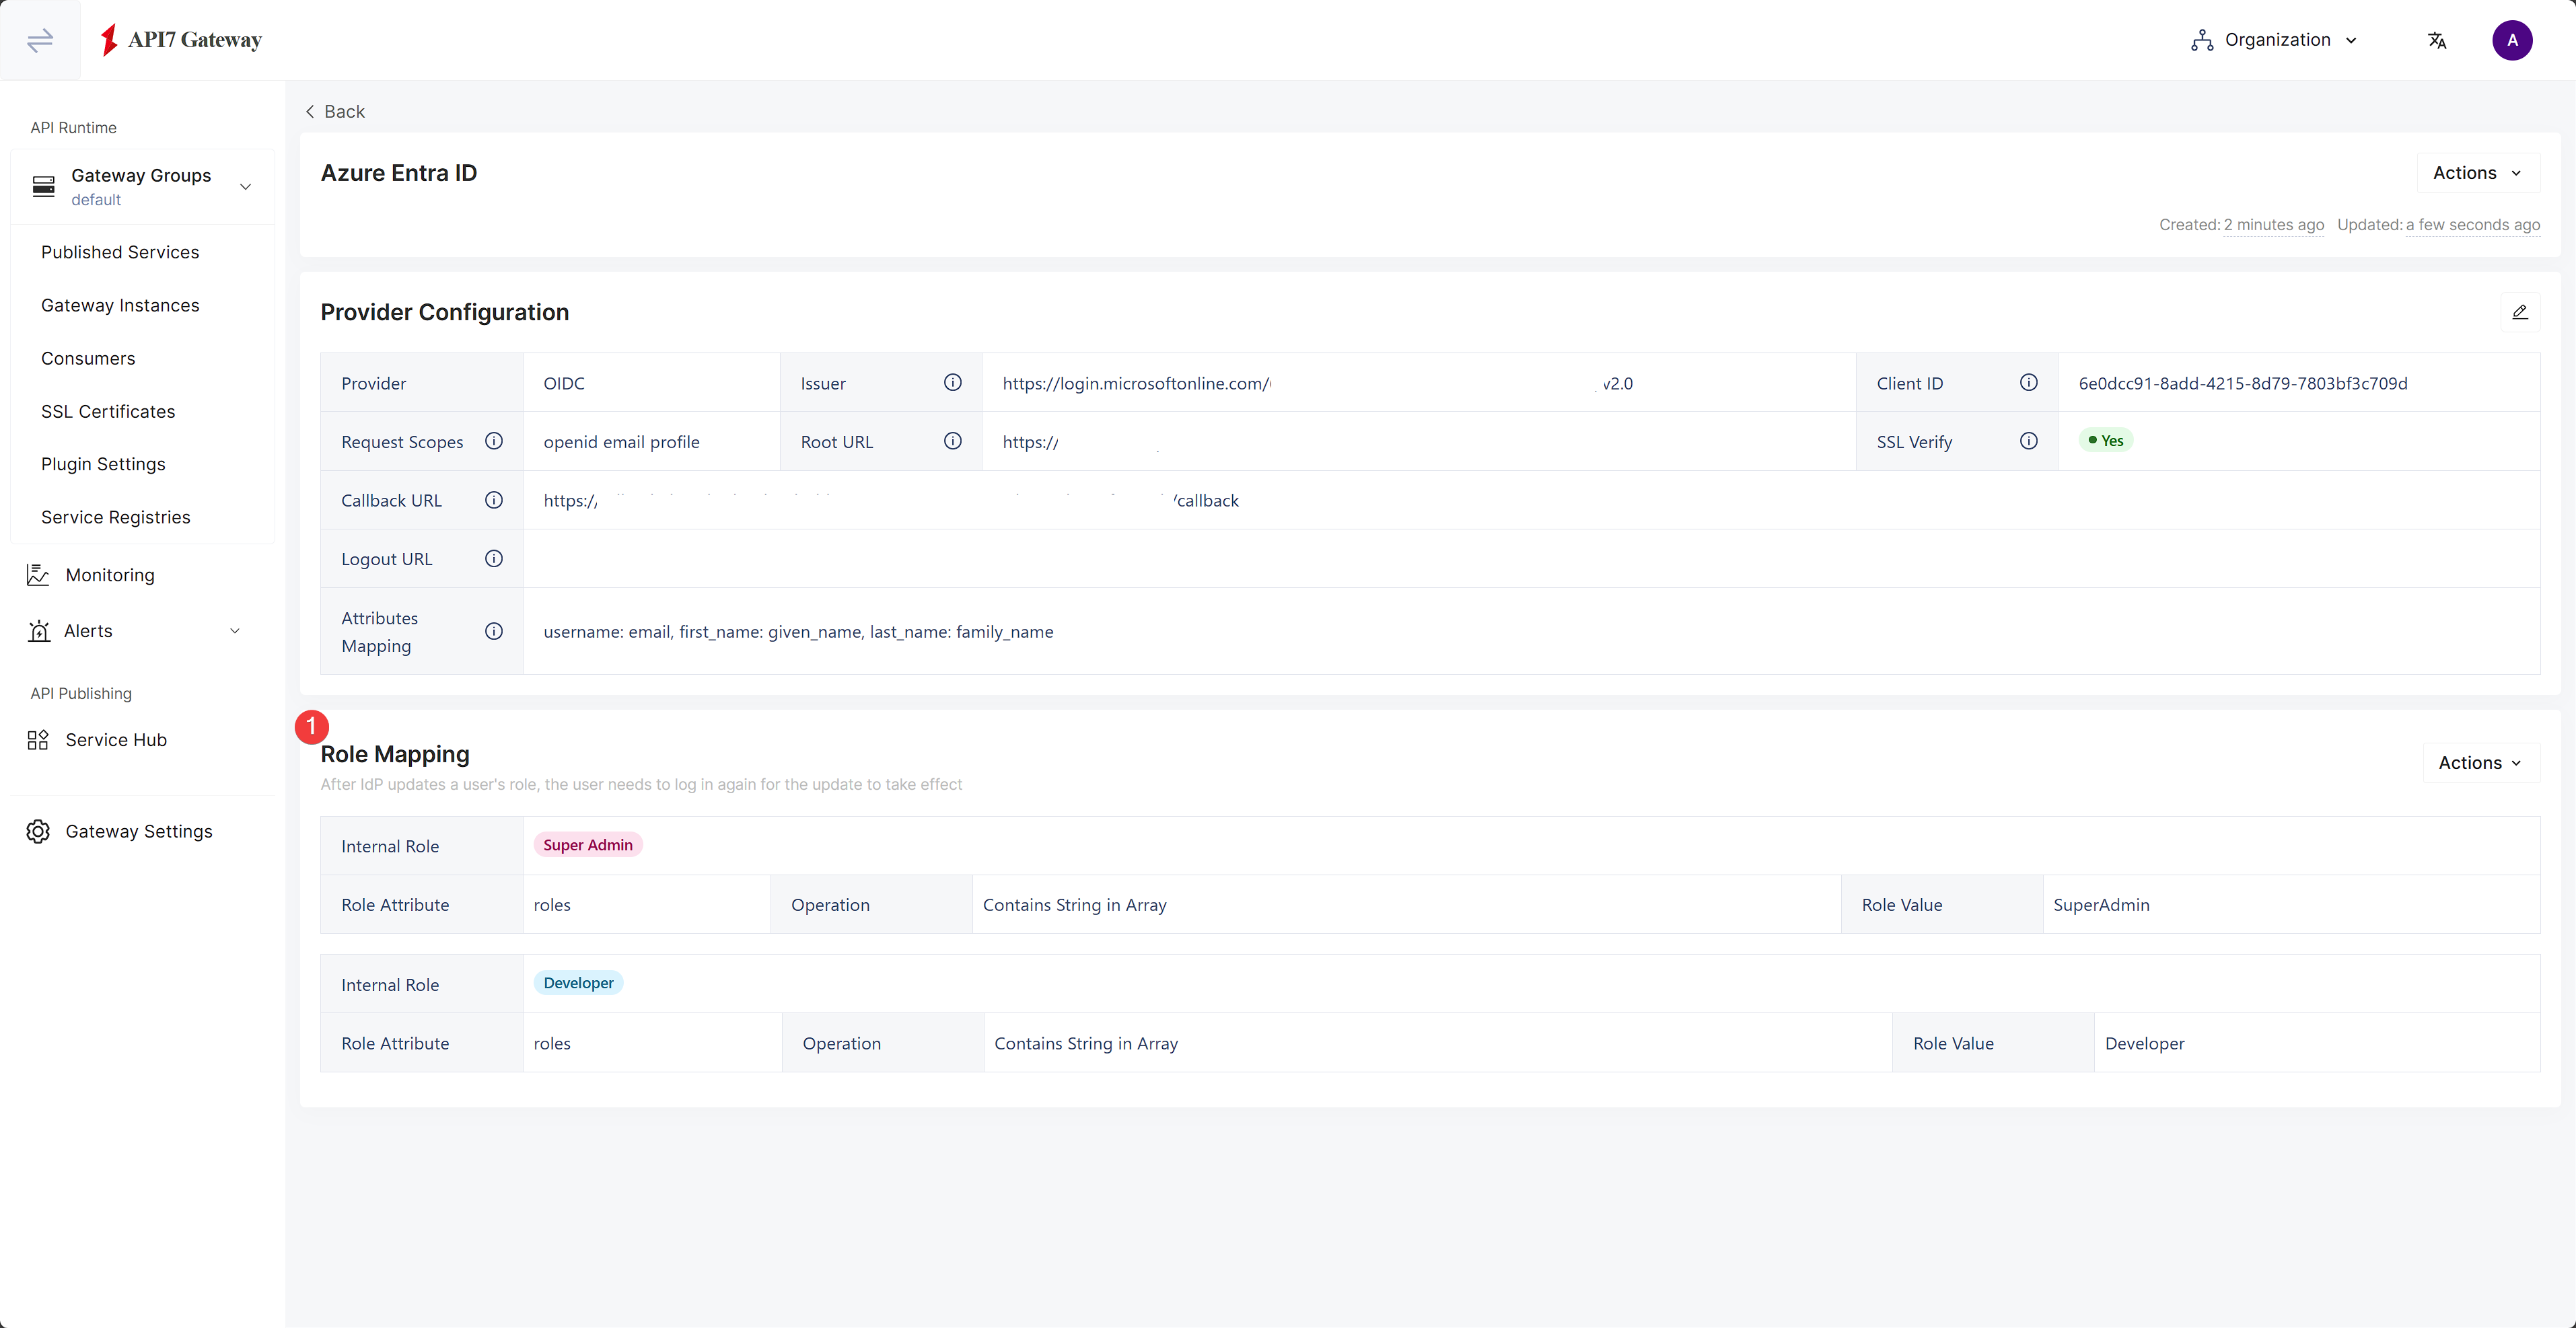
The roles should now have been updated.
Update Callback URL
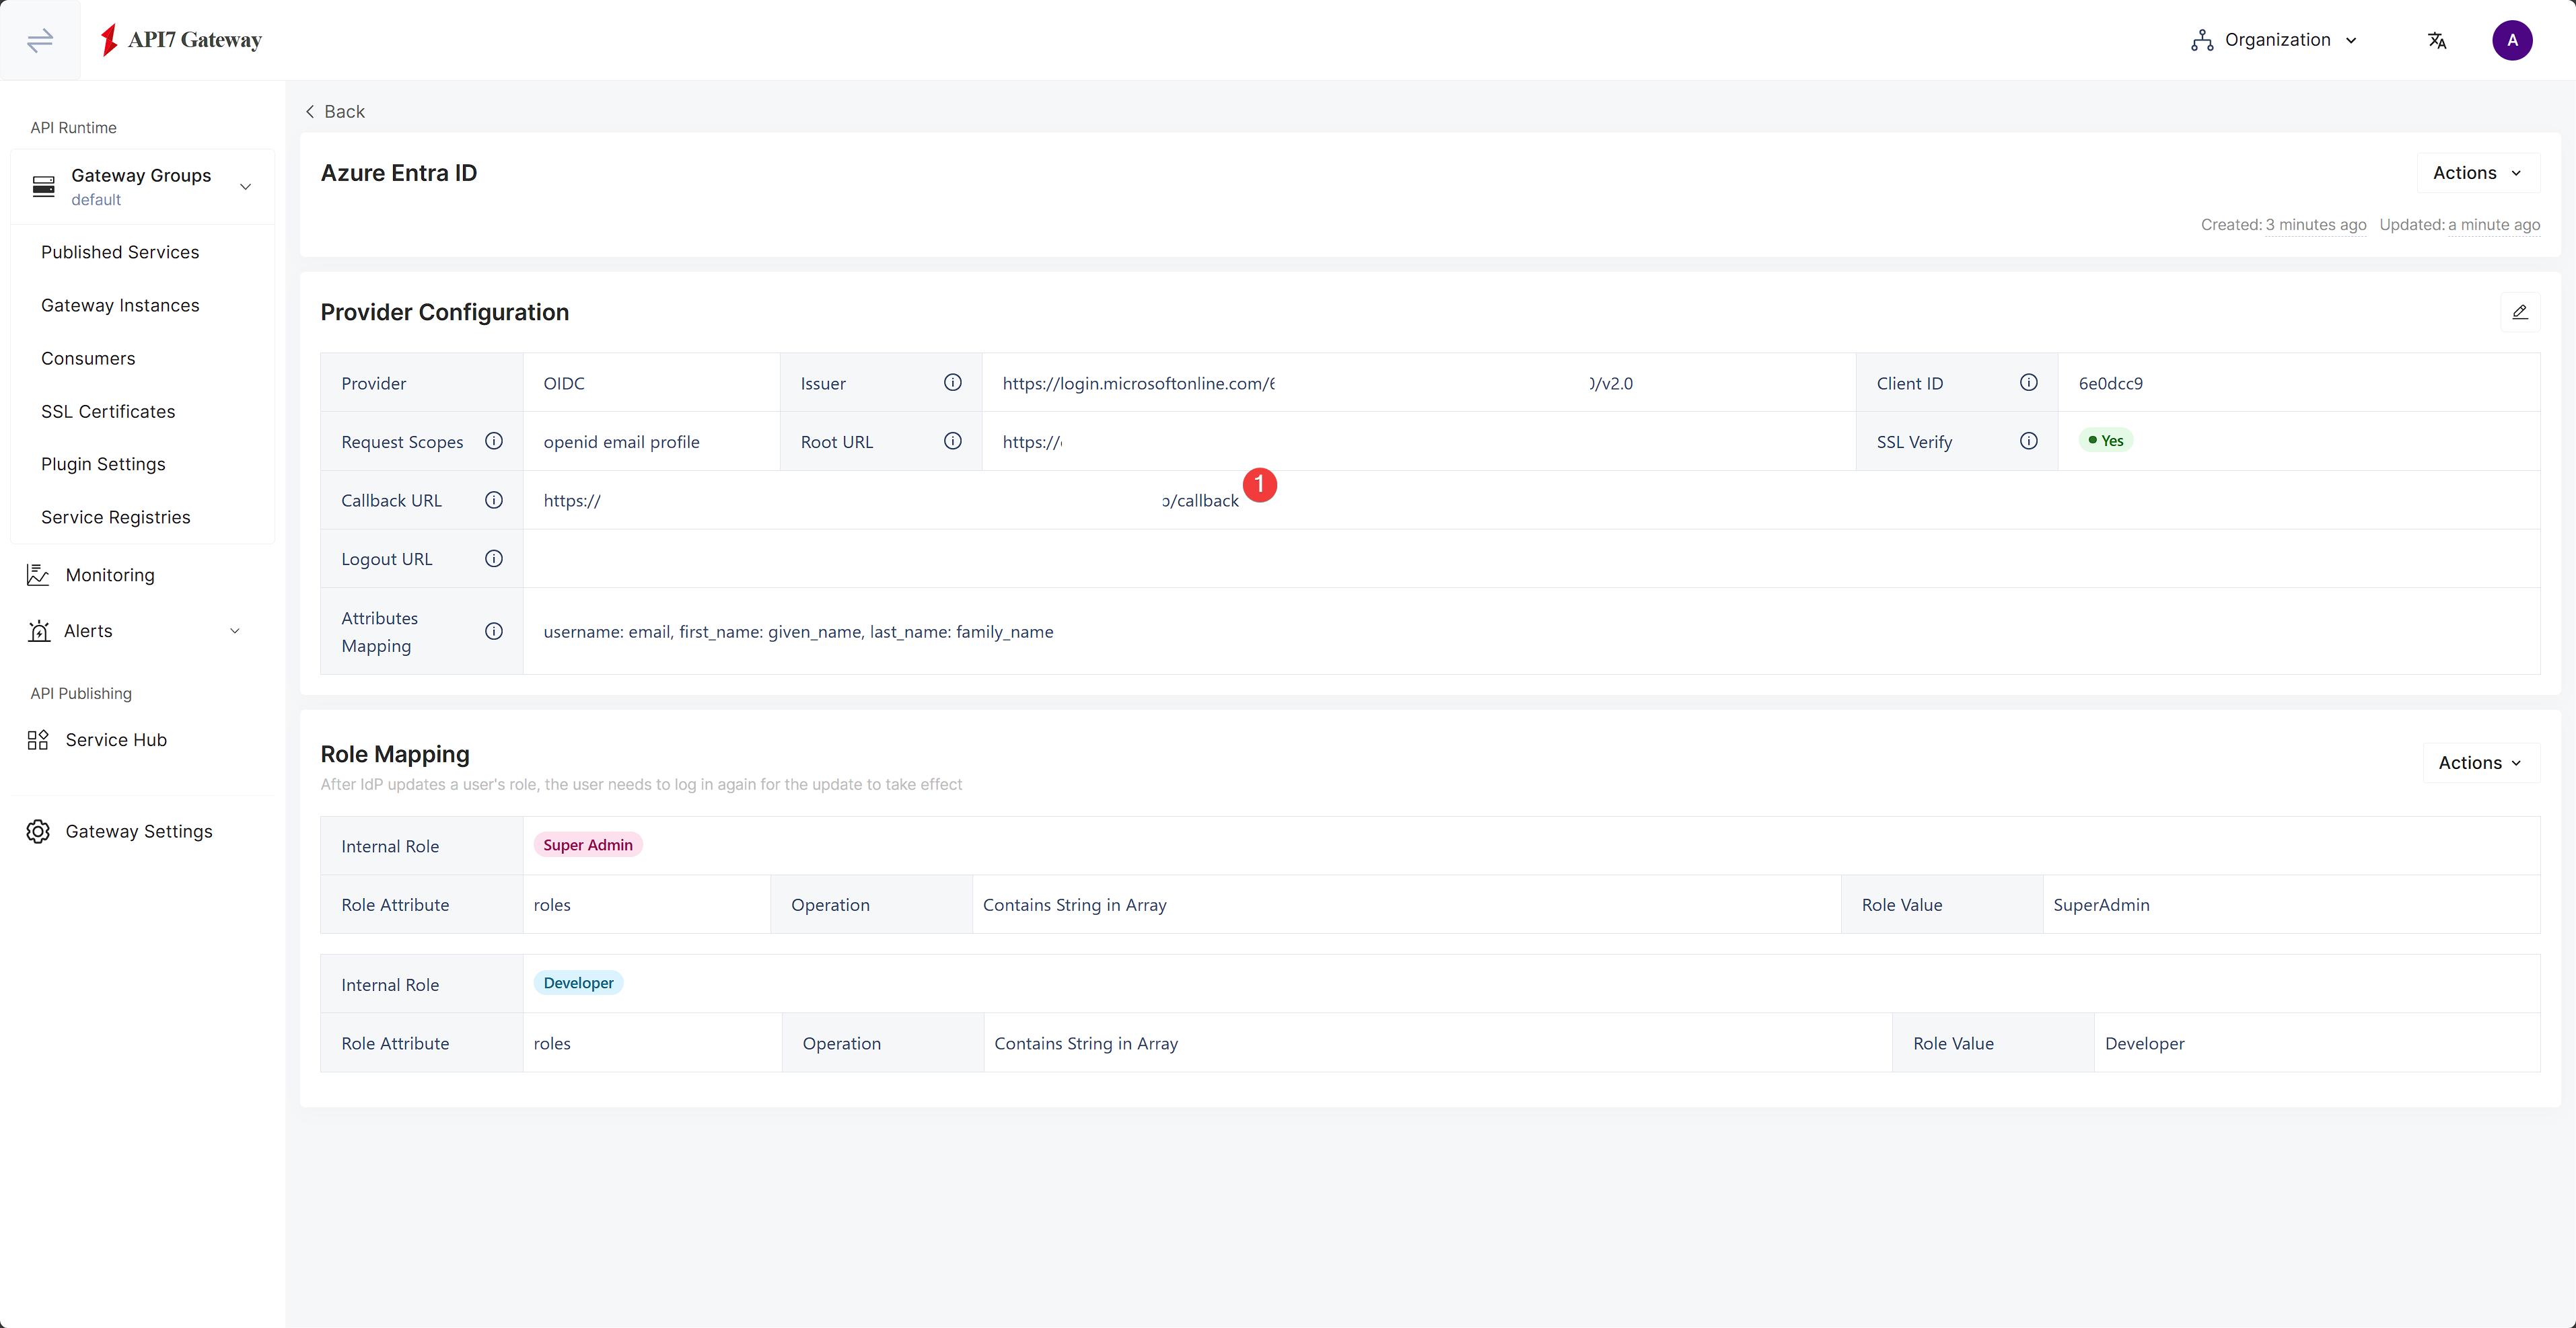
The callback URL is the address that the application redirects users to upon a successful authentication with Microsoft Entra ID.
Find the callback URL in the provider configuration:
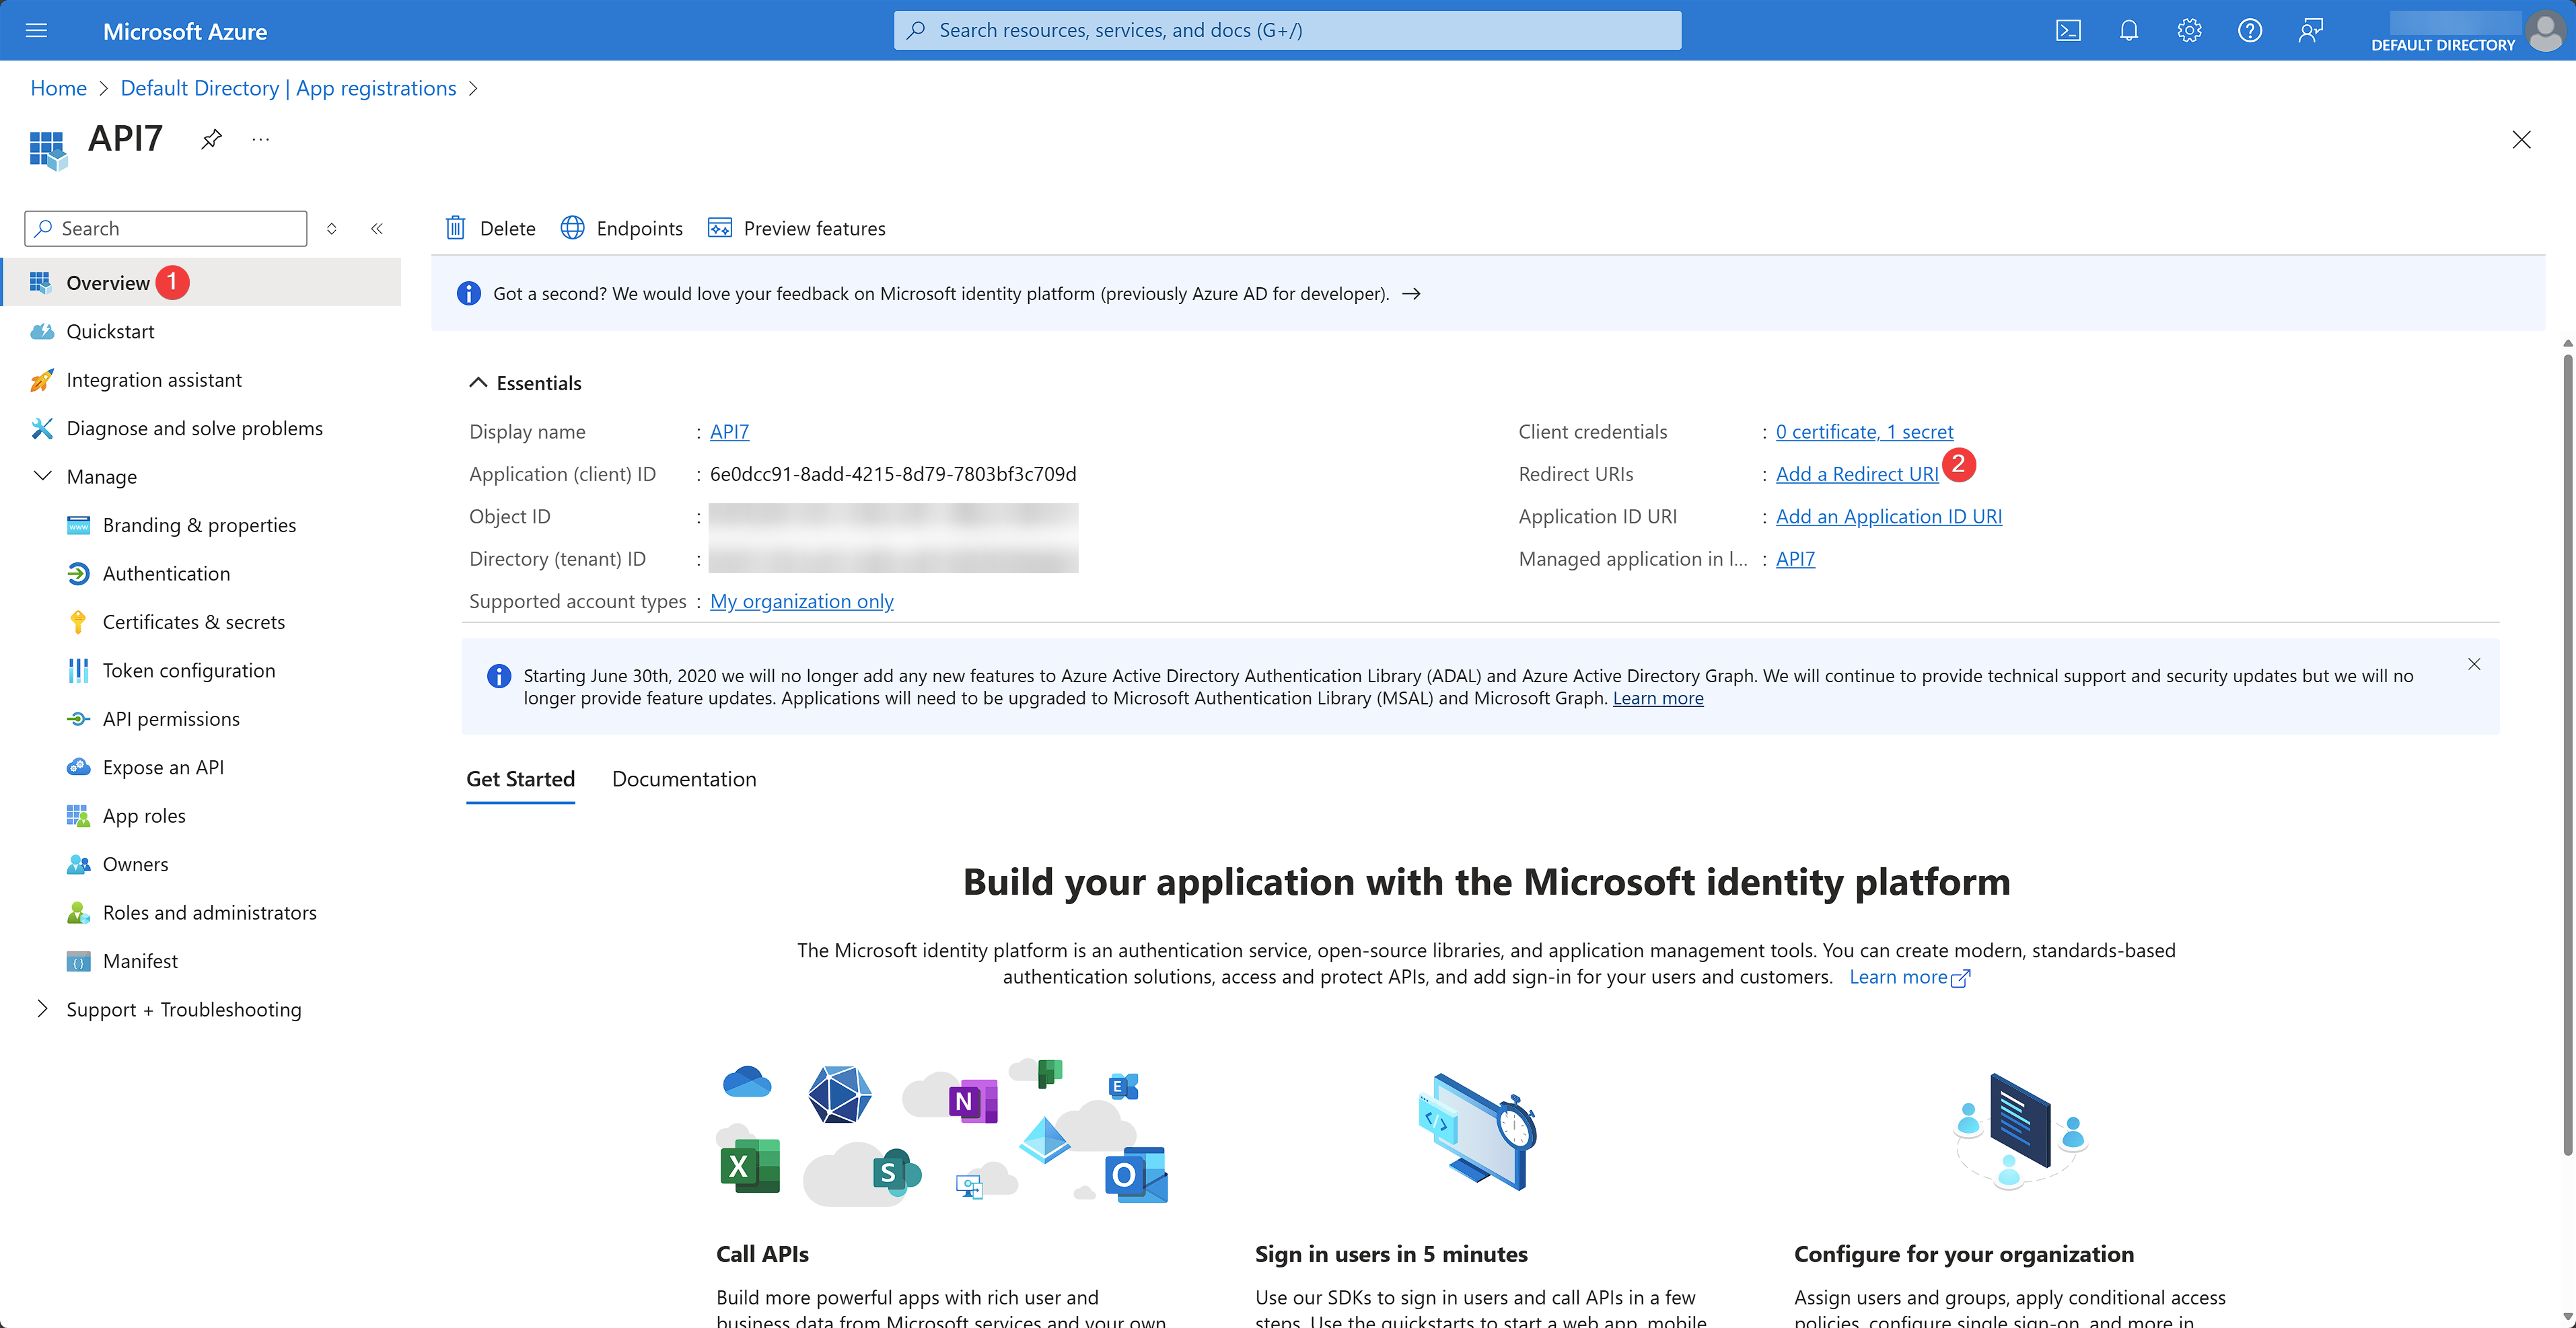
In Azure portal, navigate to the app overview and click Add a Redirect URI:
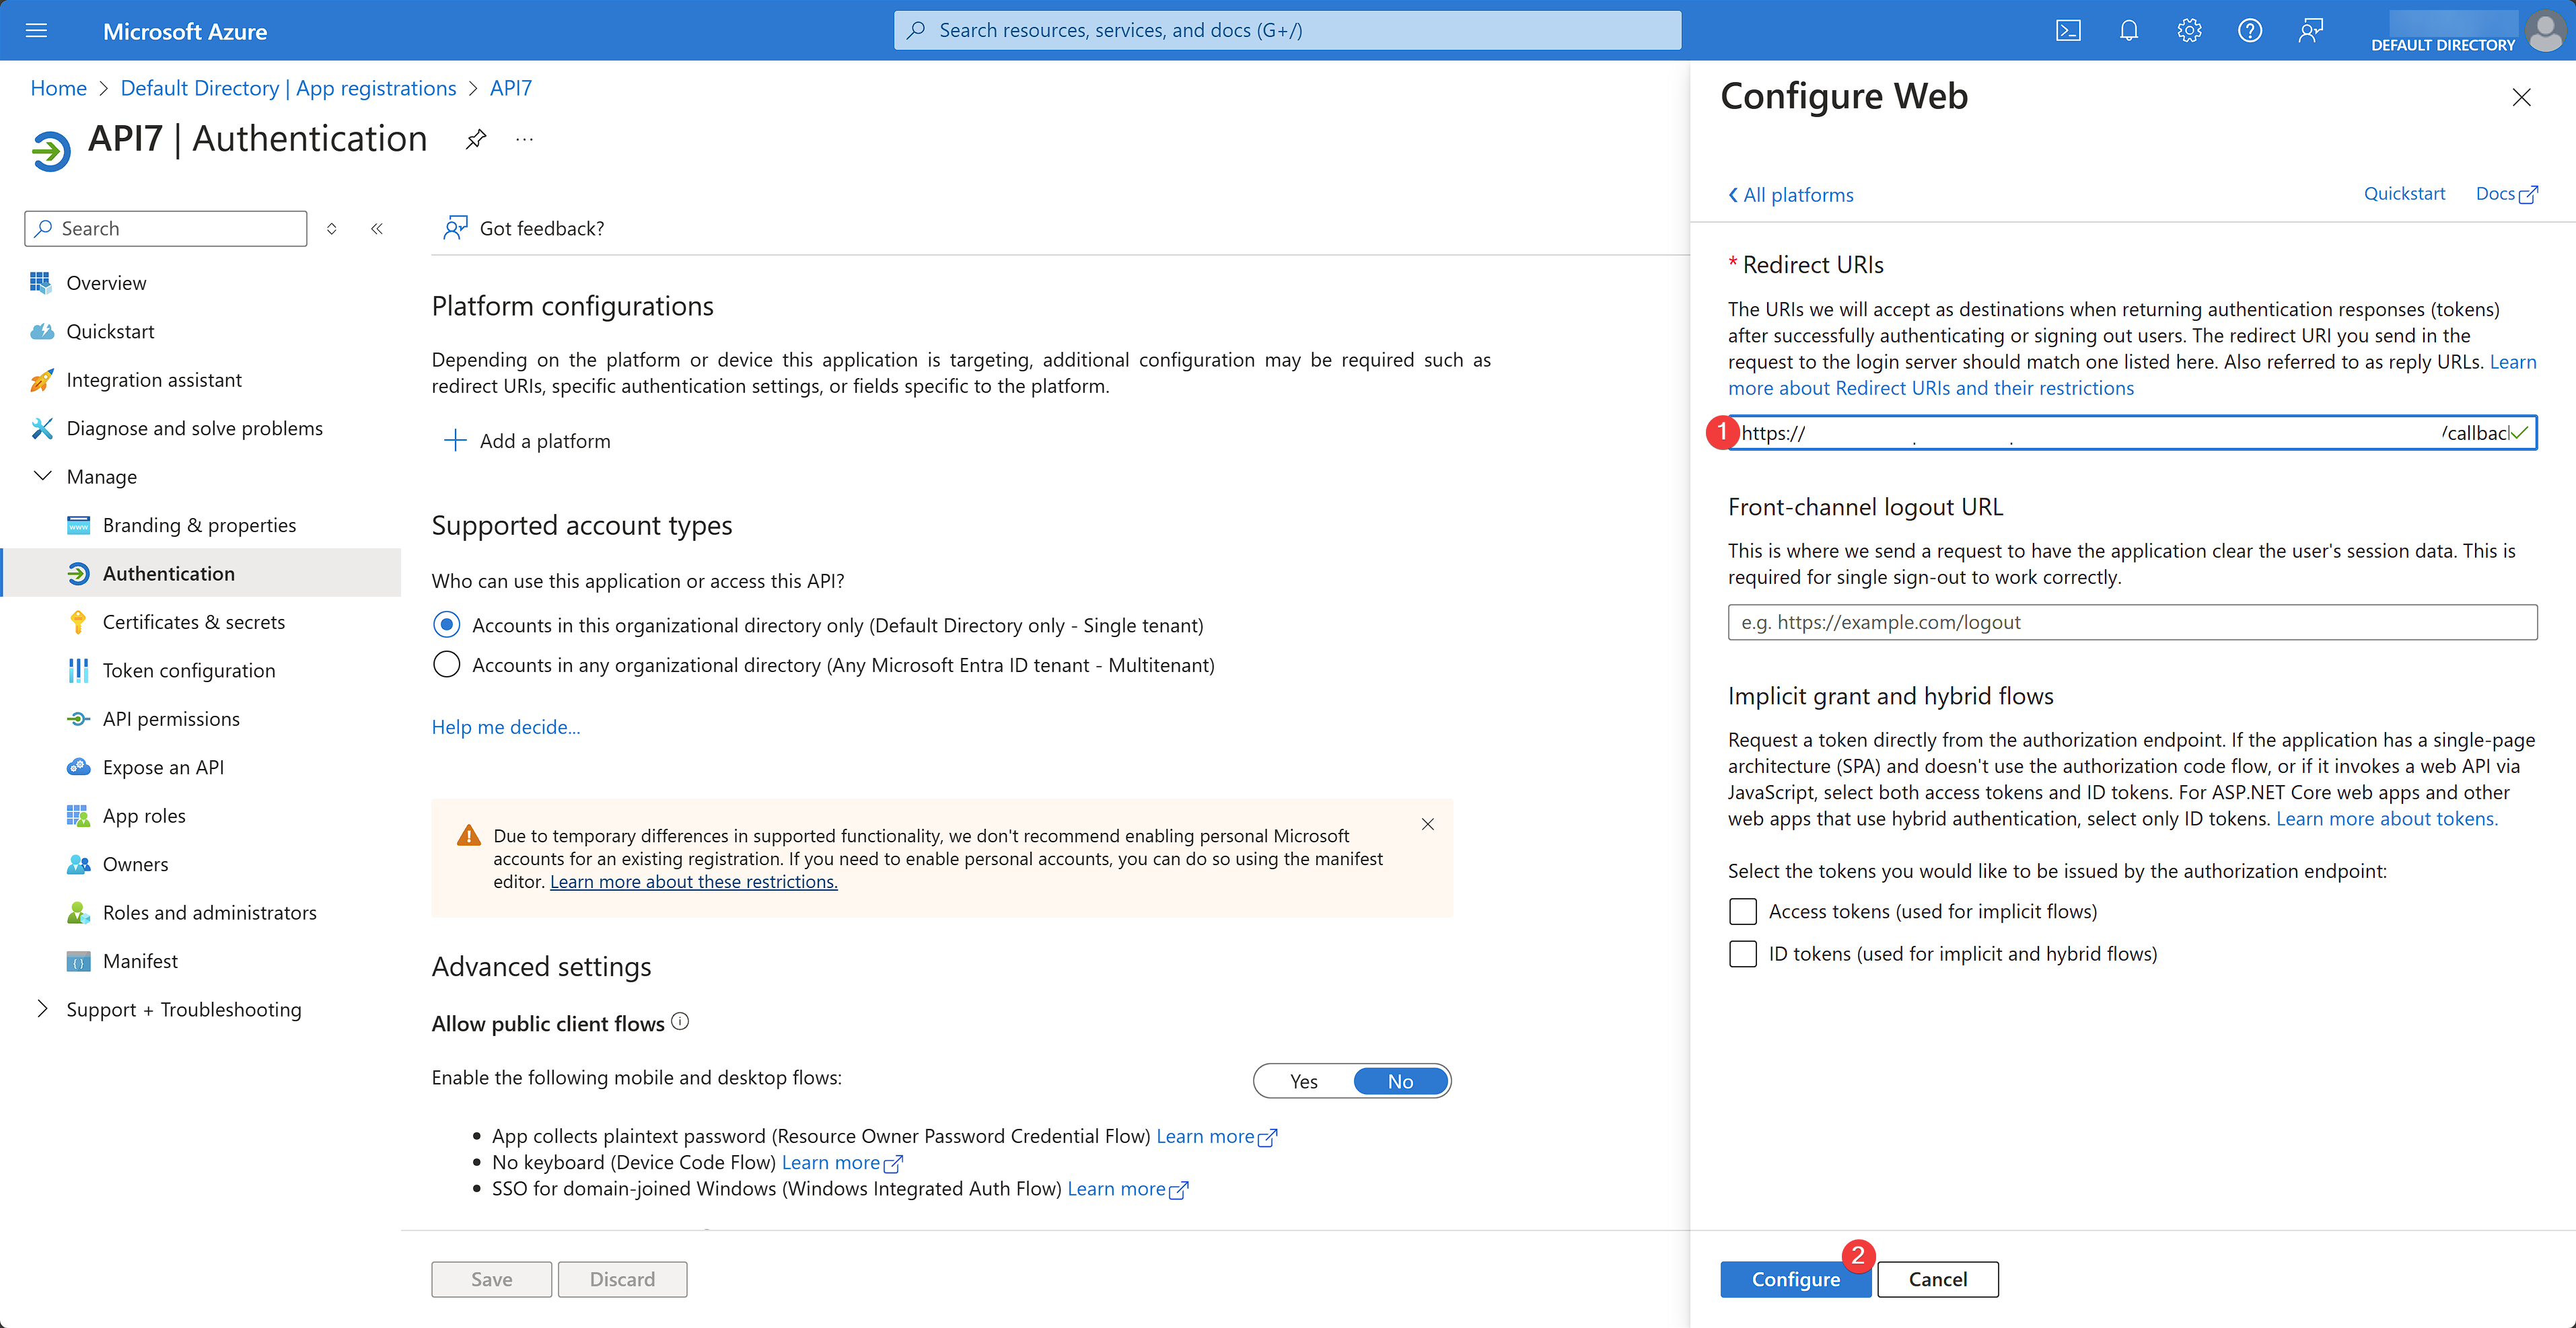
Click on the Authentication tab and click on Add a platform. Choose Web application type and enter the redirect URI:
Verify SSO
Sign out from the API7 Dashboard and visit the login page again, you should now see an option to log in with Microsoft Entra ID:
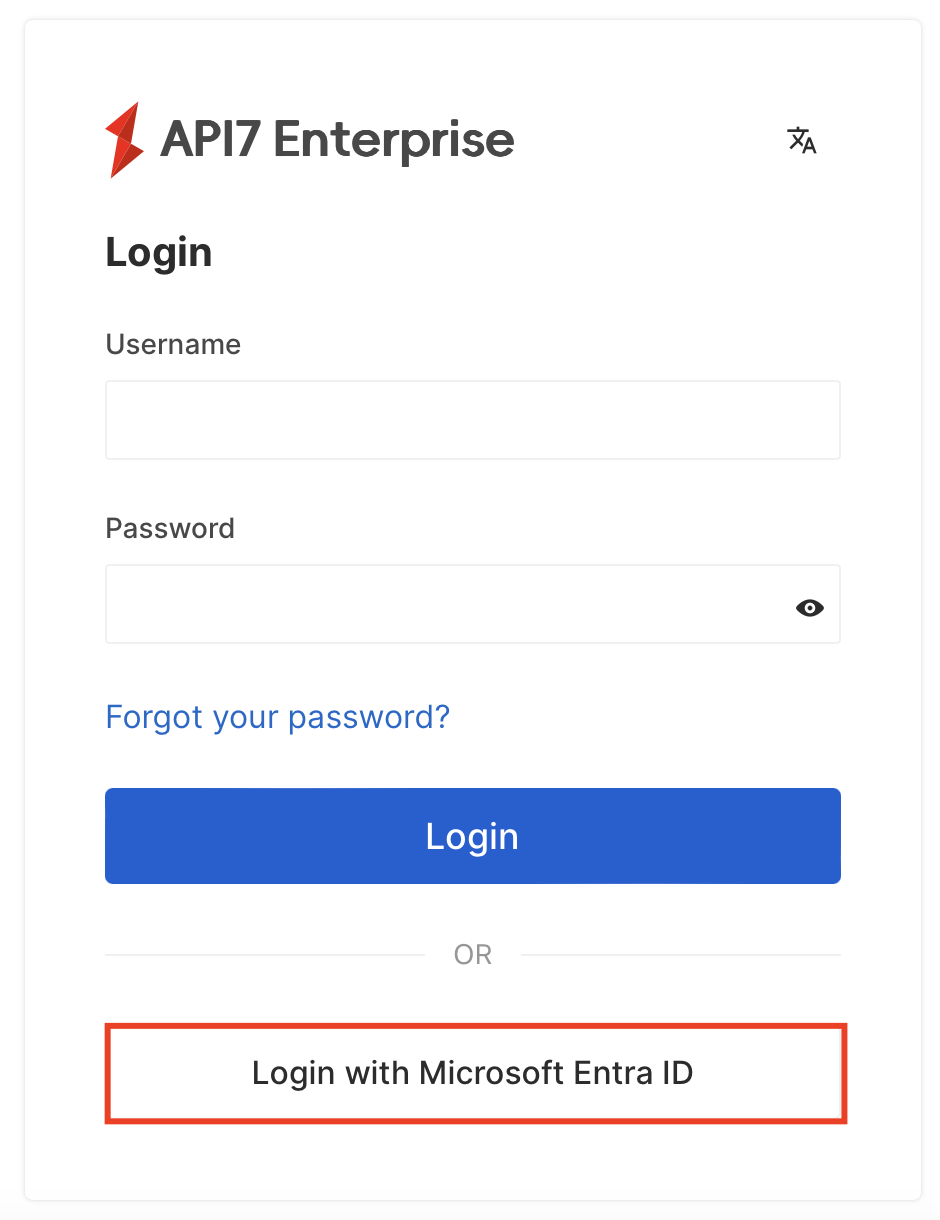
You should now be able to sign in with your Microsoft account.
Additional Resources
- Key Concepts
- Getting Started
- Reference