Prepare the Testing Environment (AWS EKS)
You can also visit the publicly accessible performance benchmark repository. This repository documents in detail all the resource deployment configurations used for testing as well as the specific configuration information for each test scenario.
Prerequisites
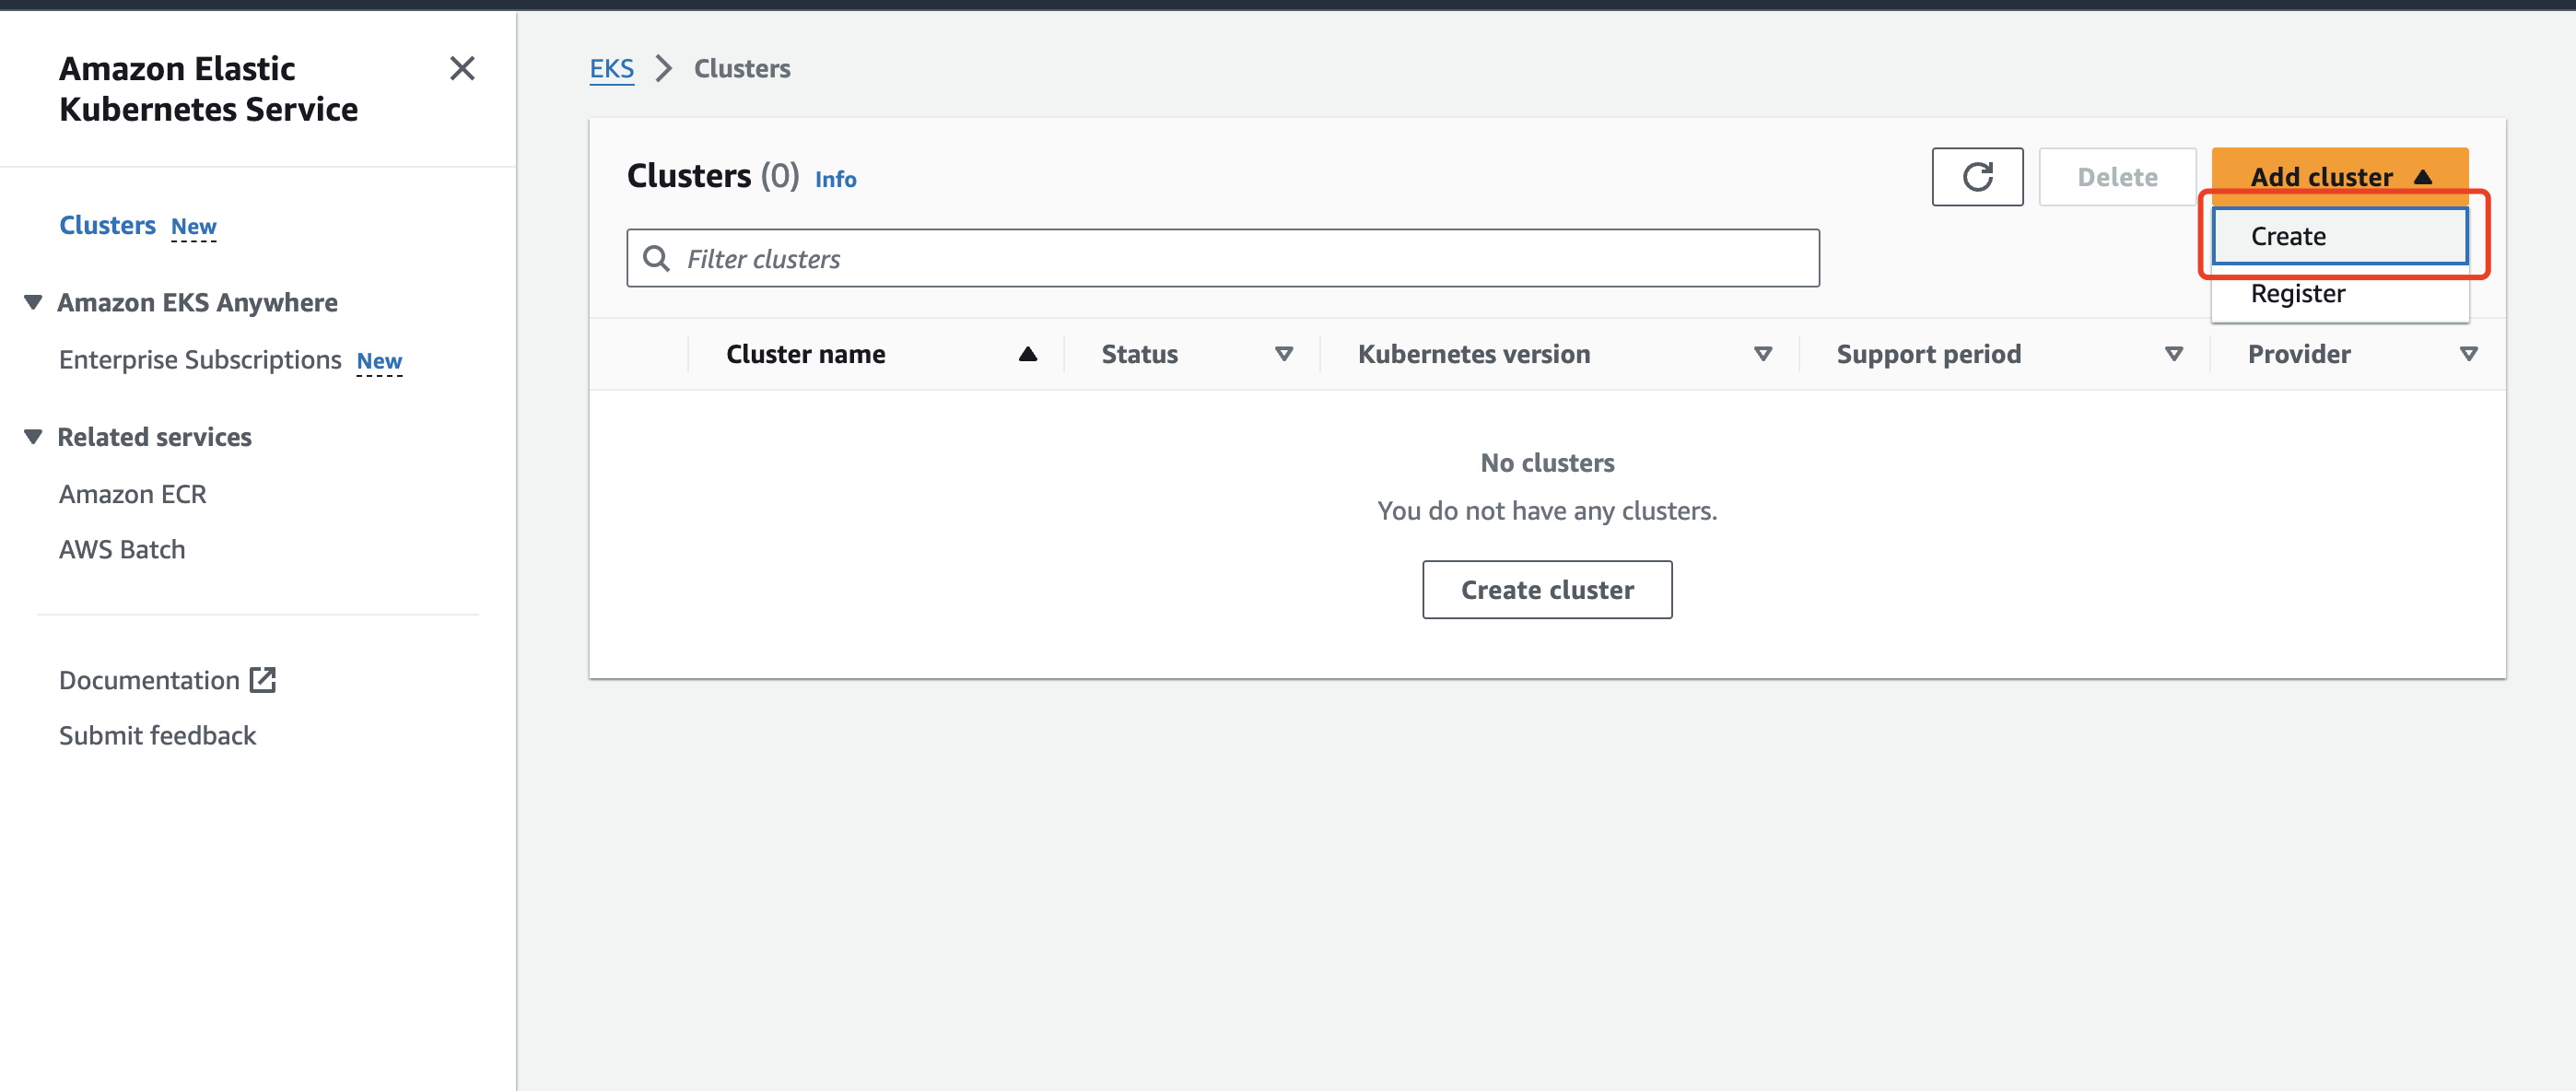
Create Cluster
- Add a new cluster in AWS EKS:
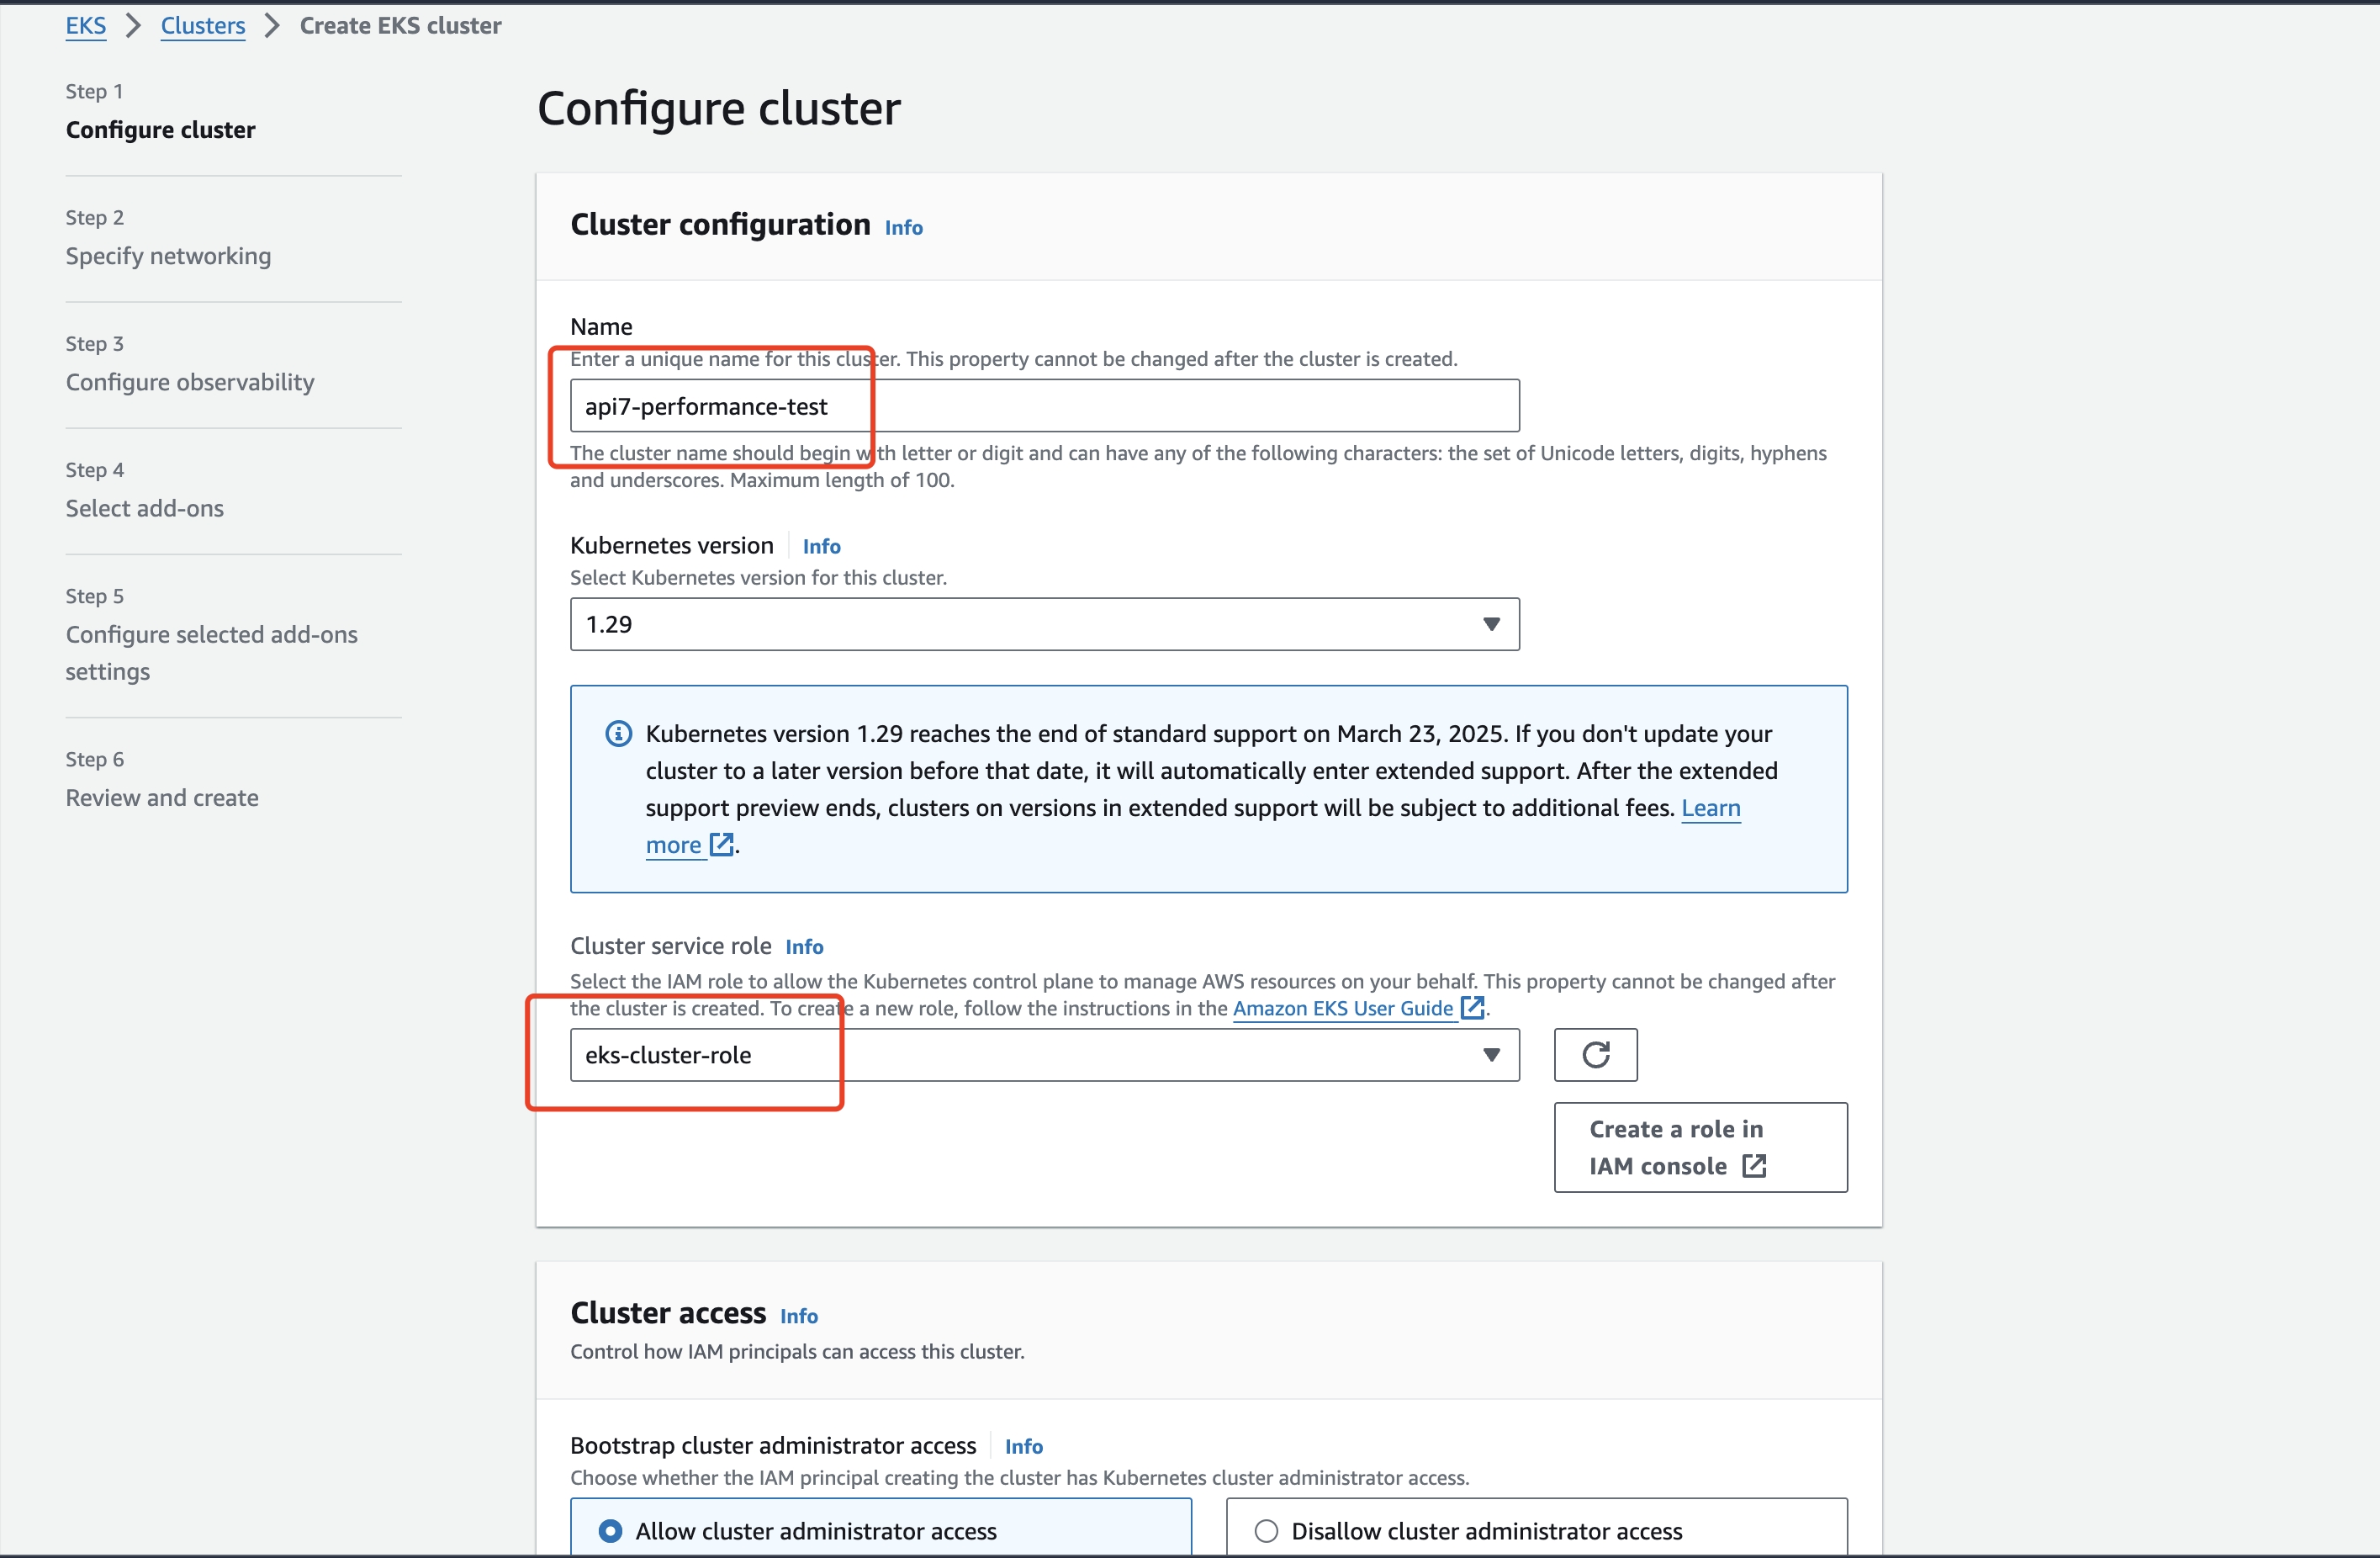
- Configure the cluster. If you have not used the EKS service to configure a cluster service role before, you can create an EKS cluster role according to the document.
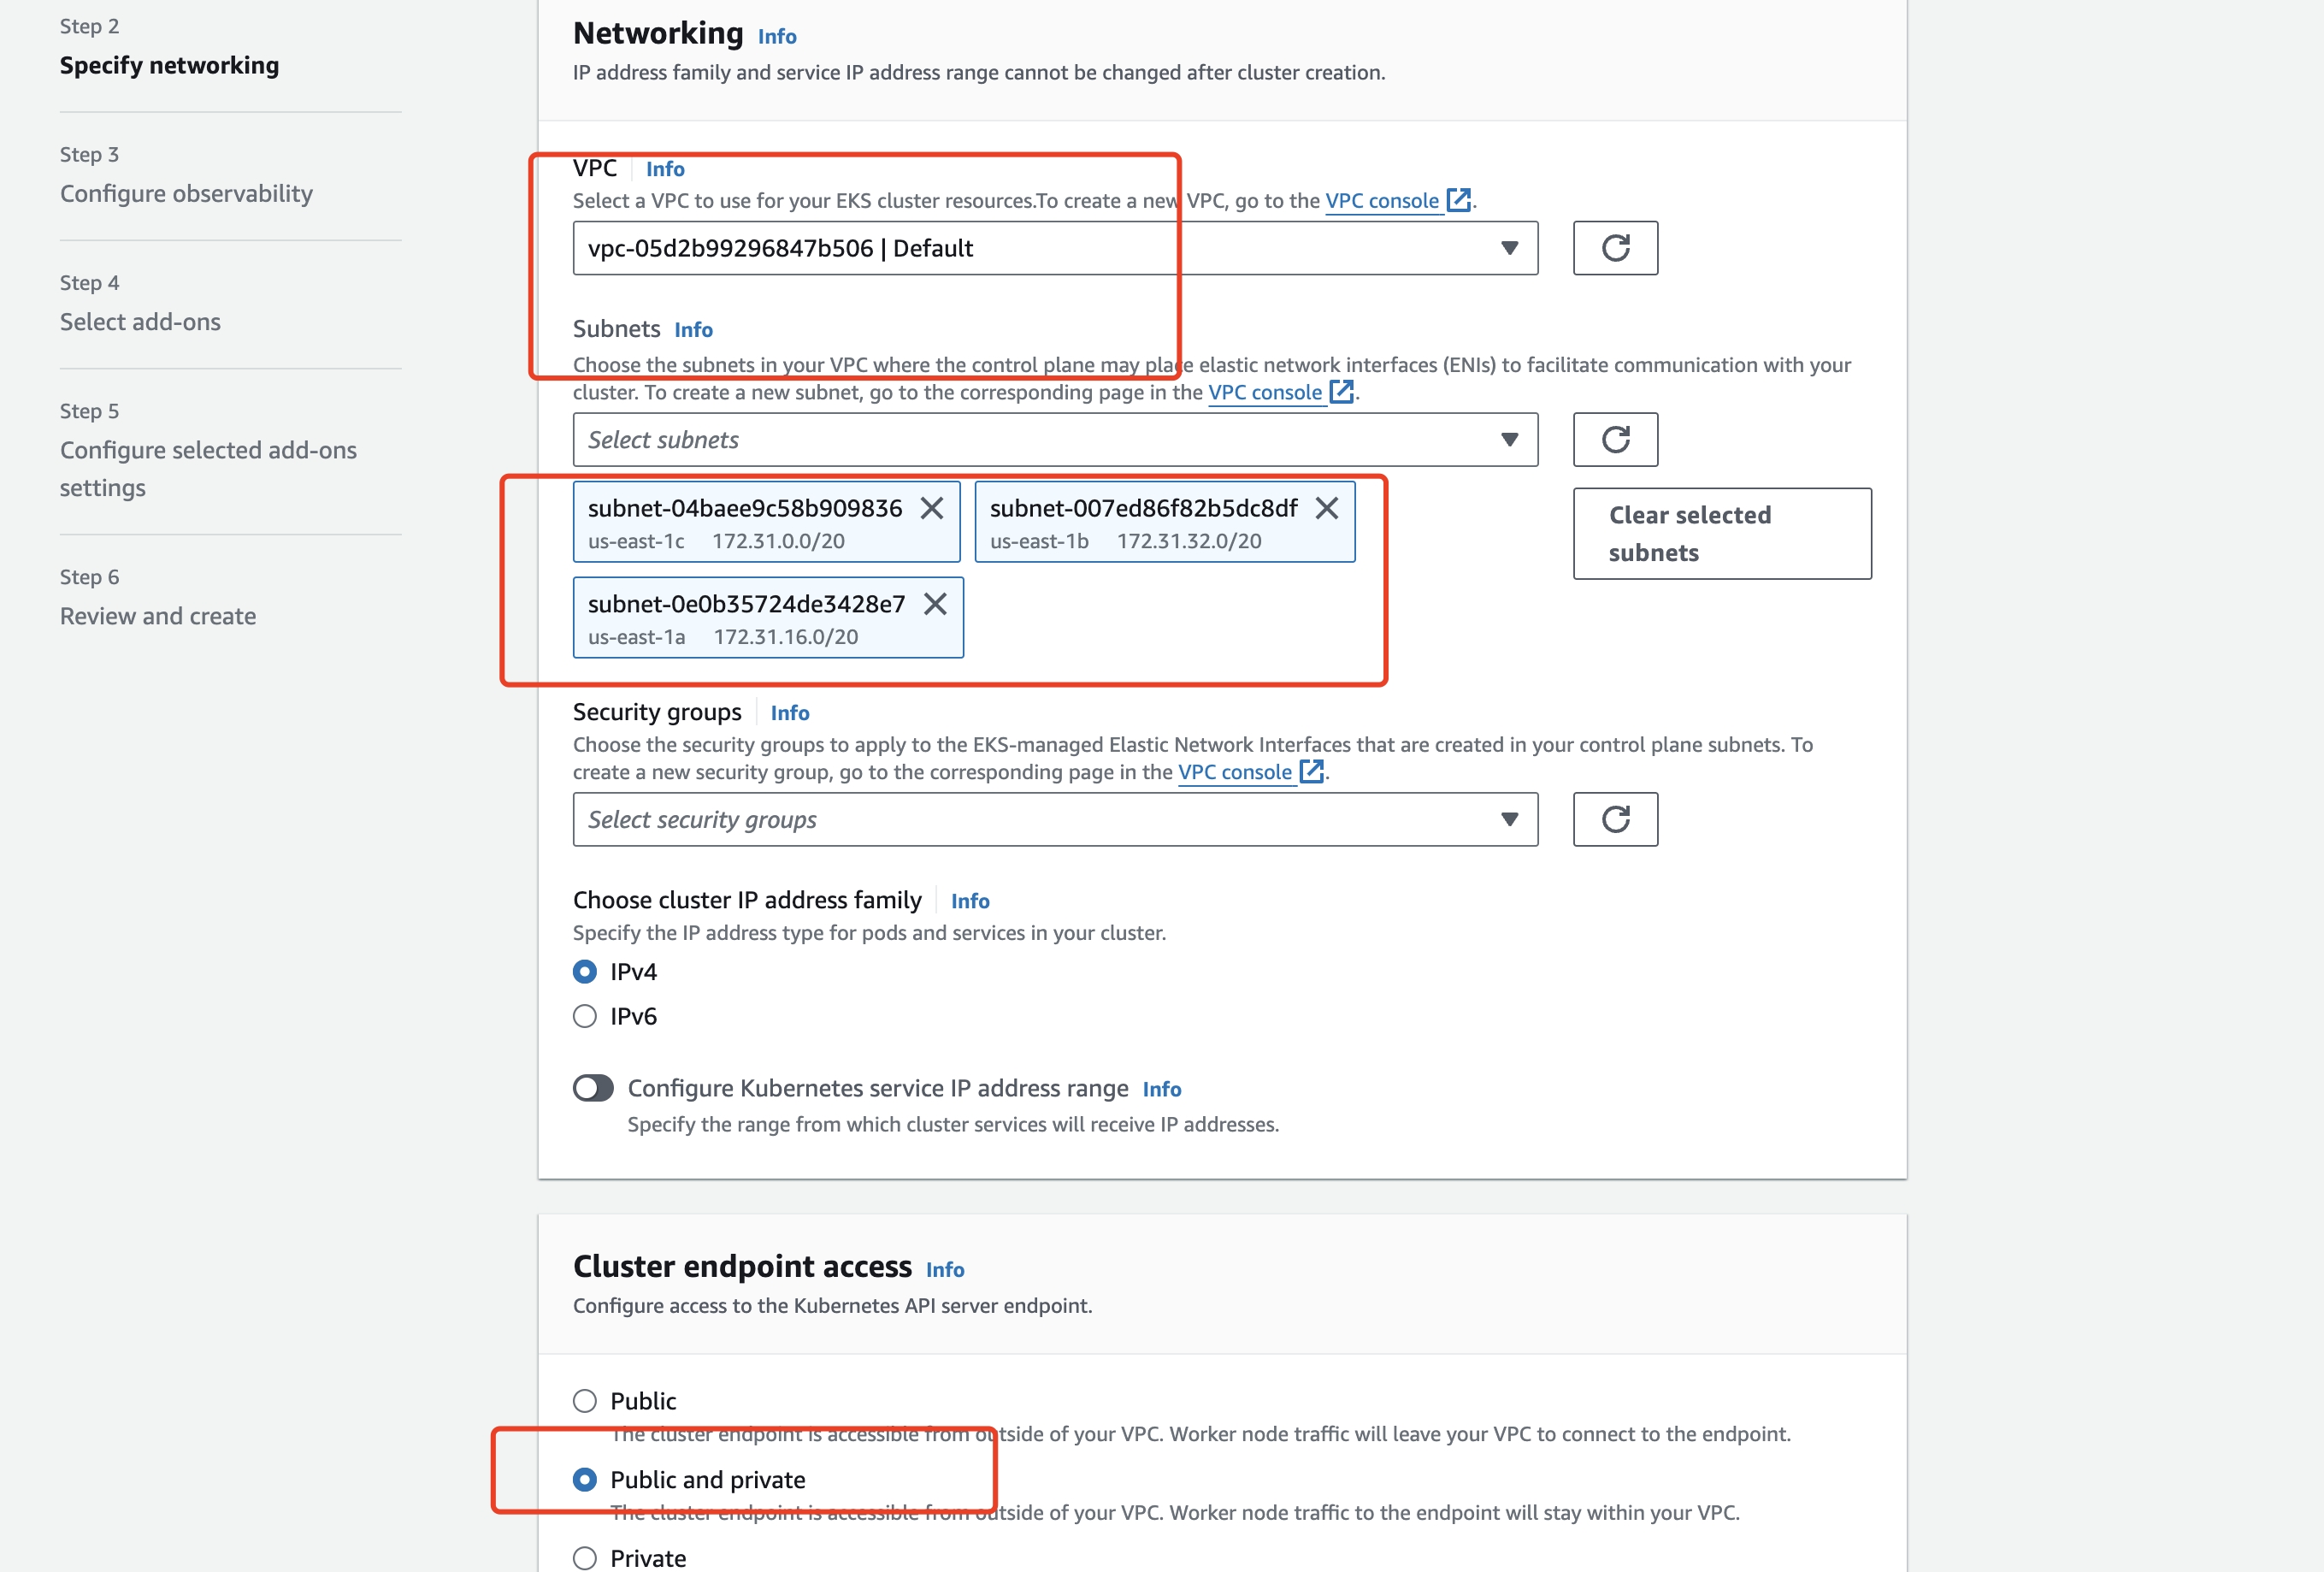
- Configure network:
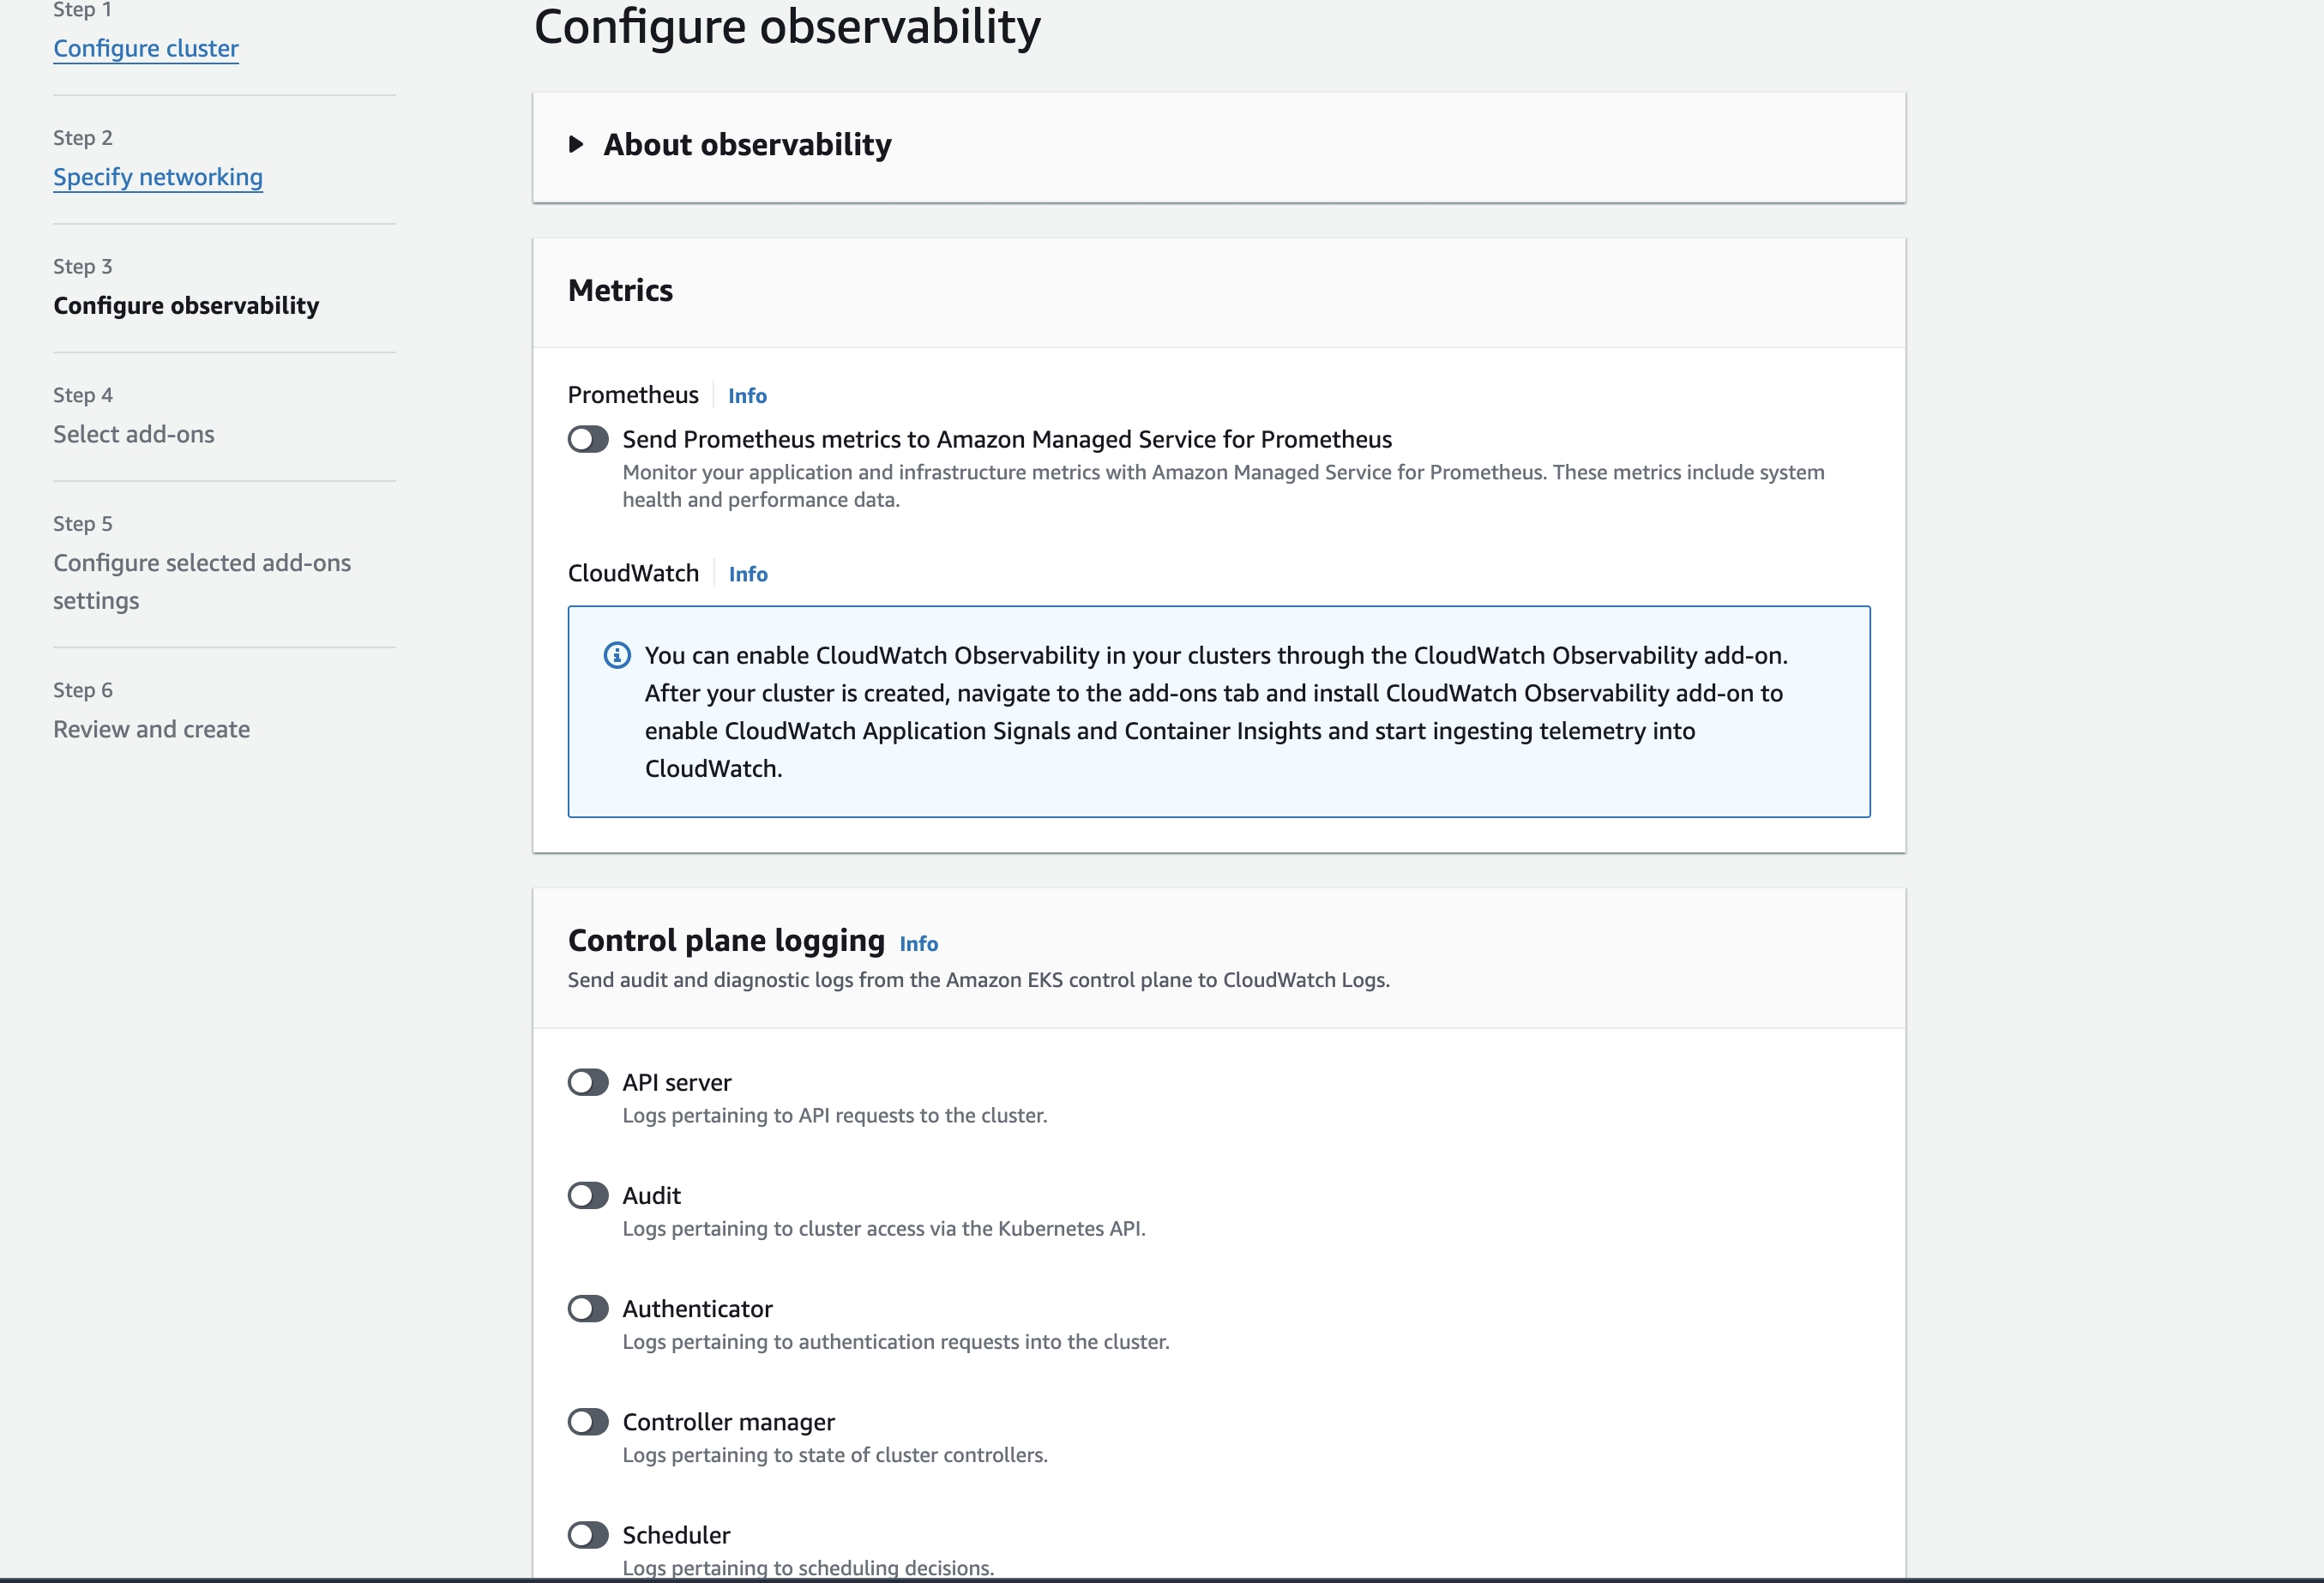
- Configure observability:
- Configure plugin:
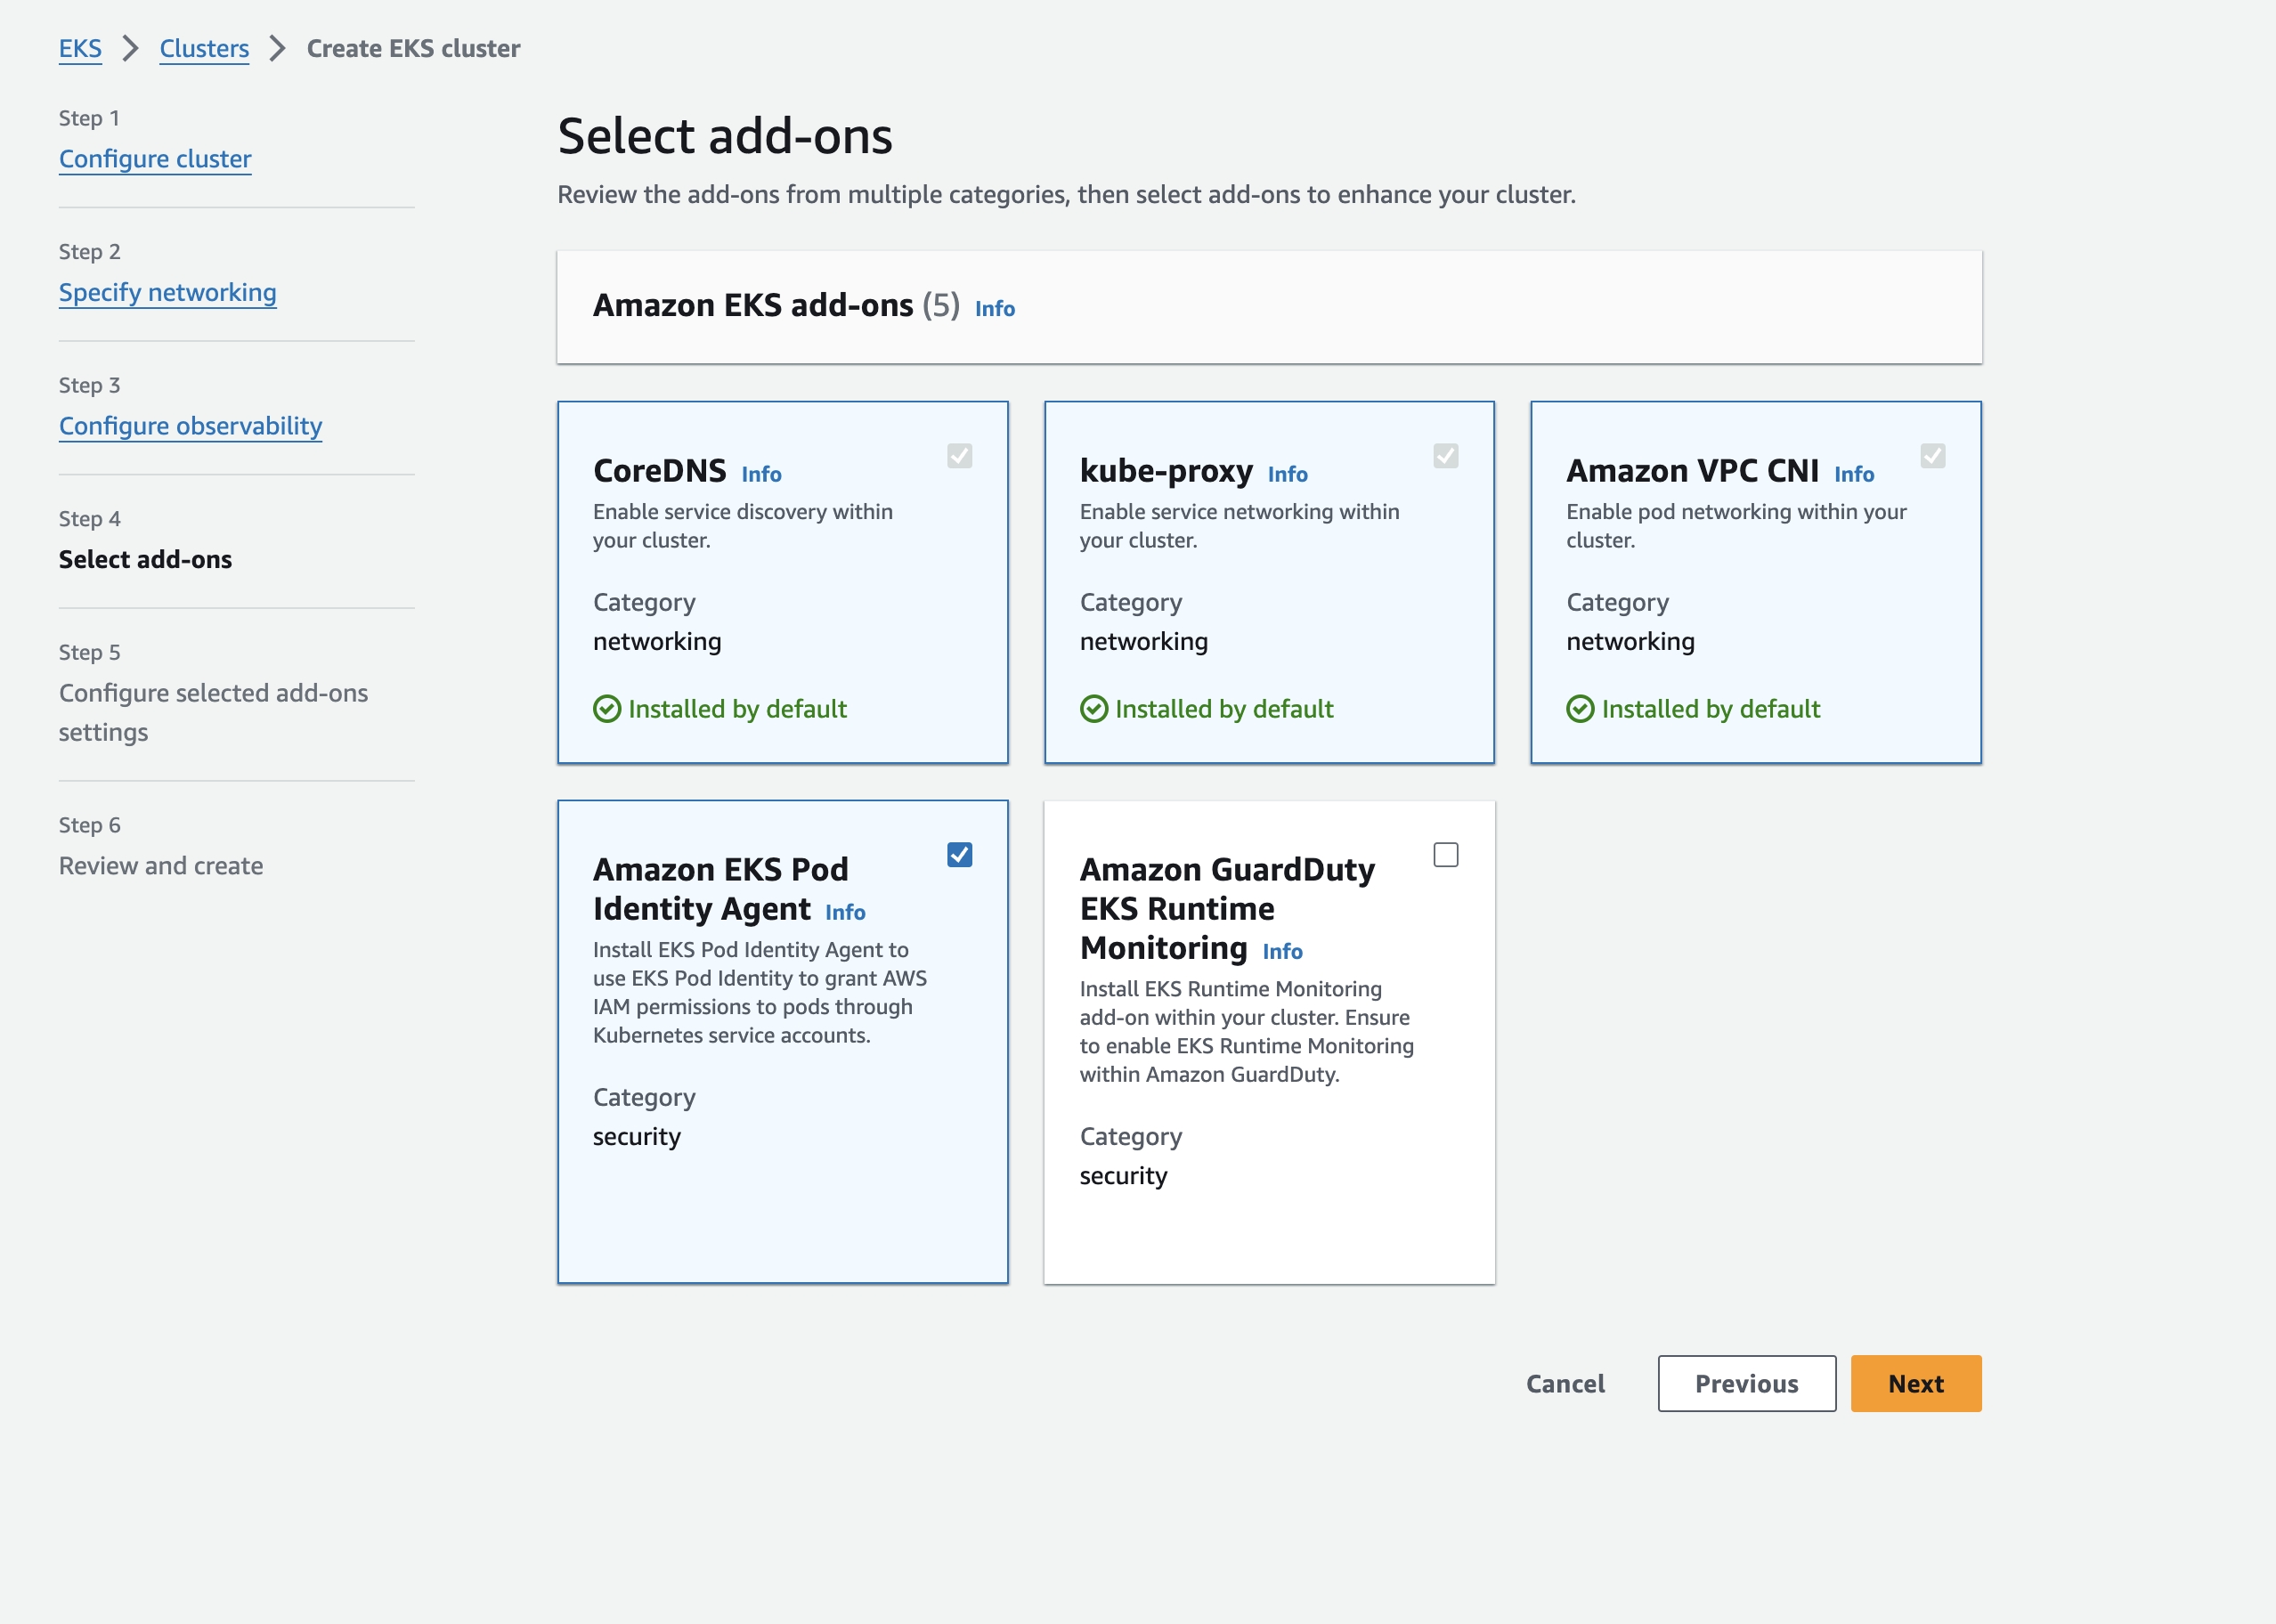
- Create cluster:

Add Node
Create Key Pairs (Optional)
After configuring Key Pairs in the node, you can log in to the node directly. If you already have Key Pairs, you can skip the step of creating key pairs.
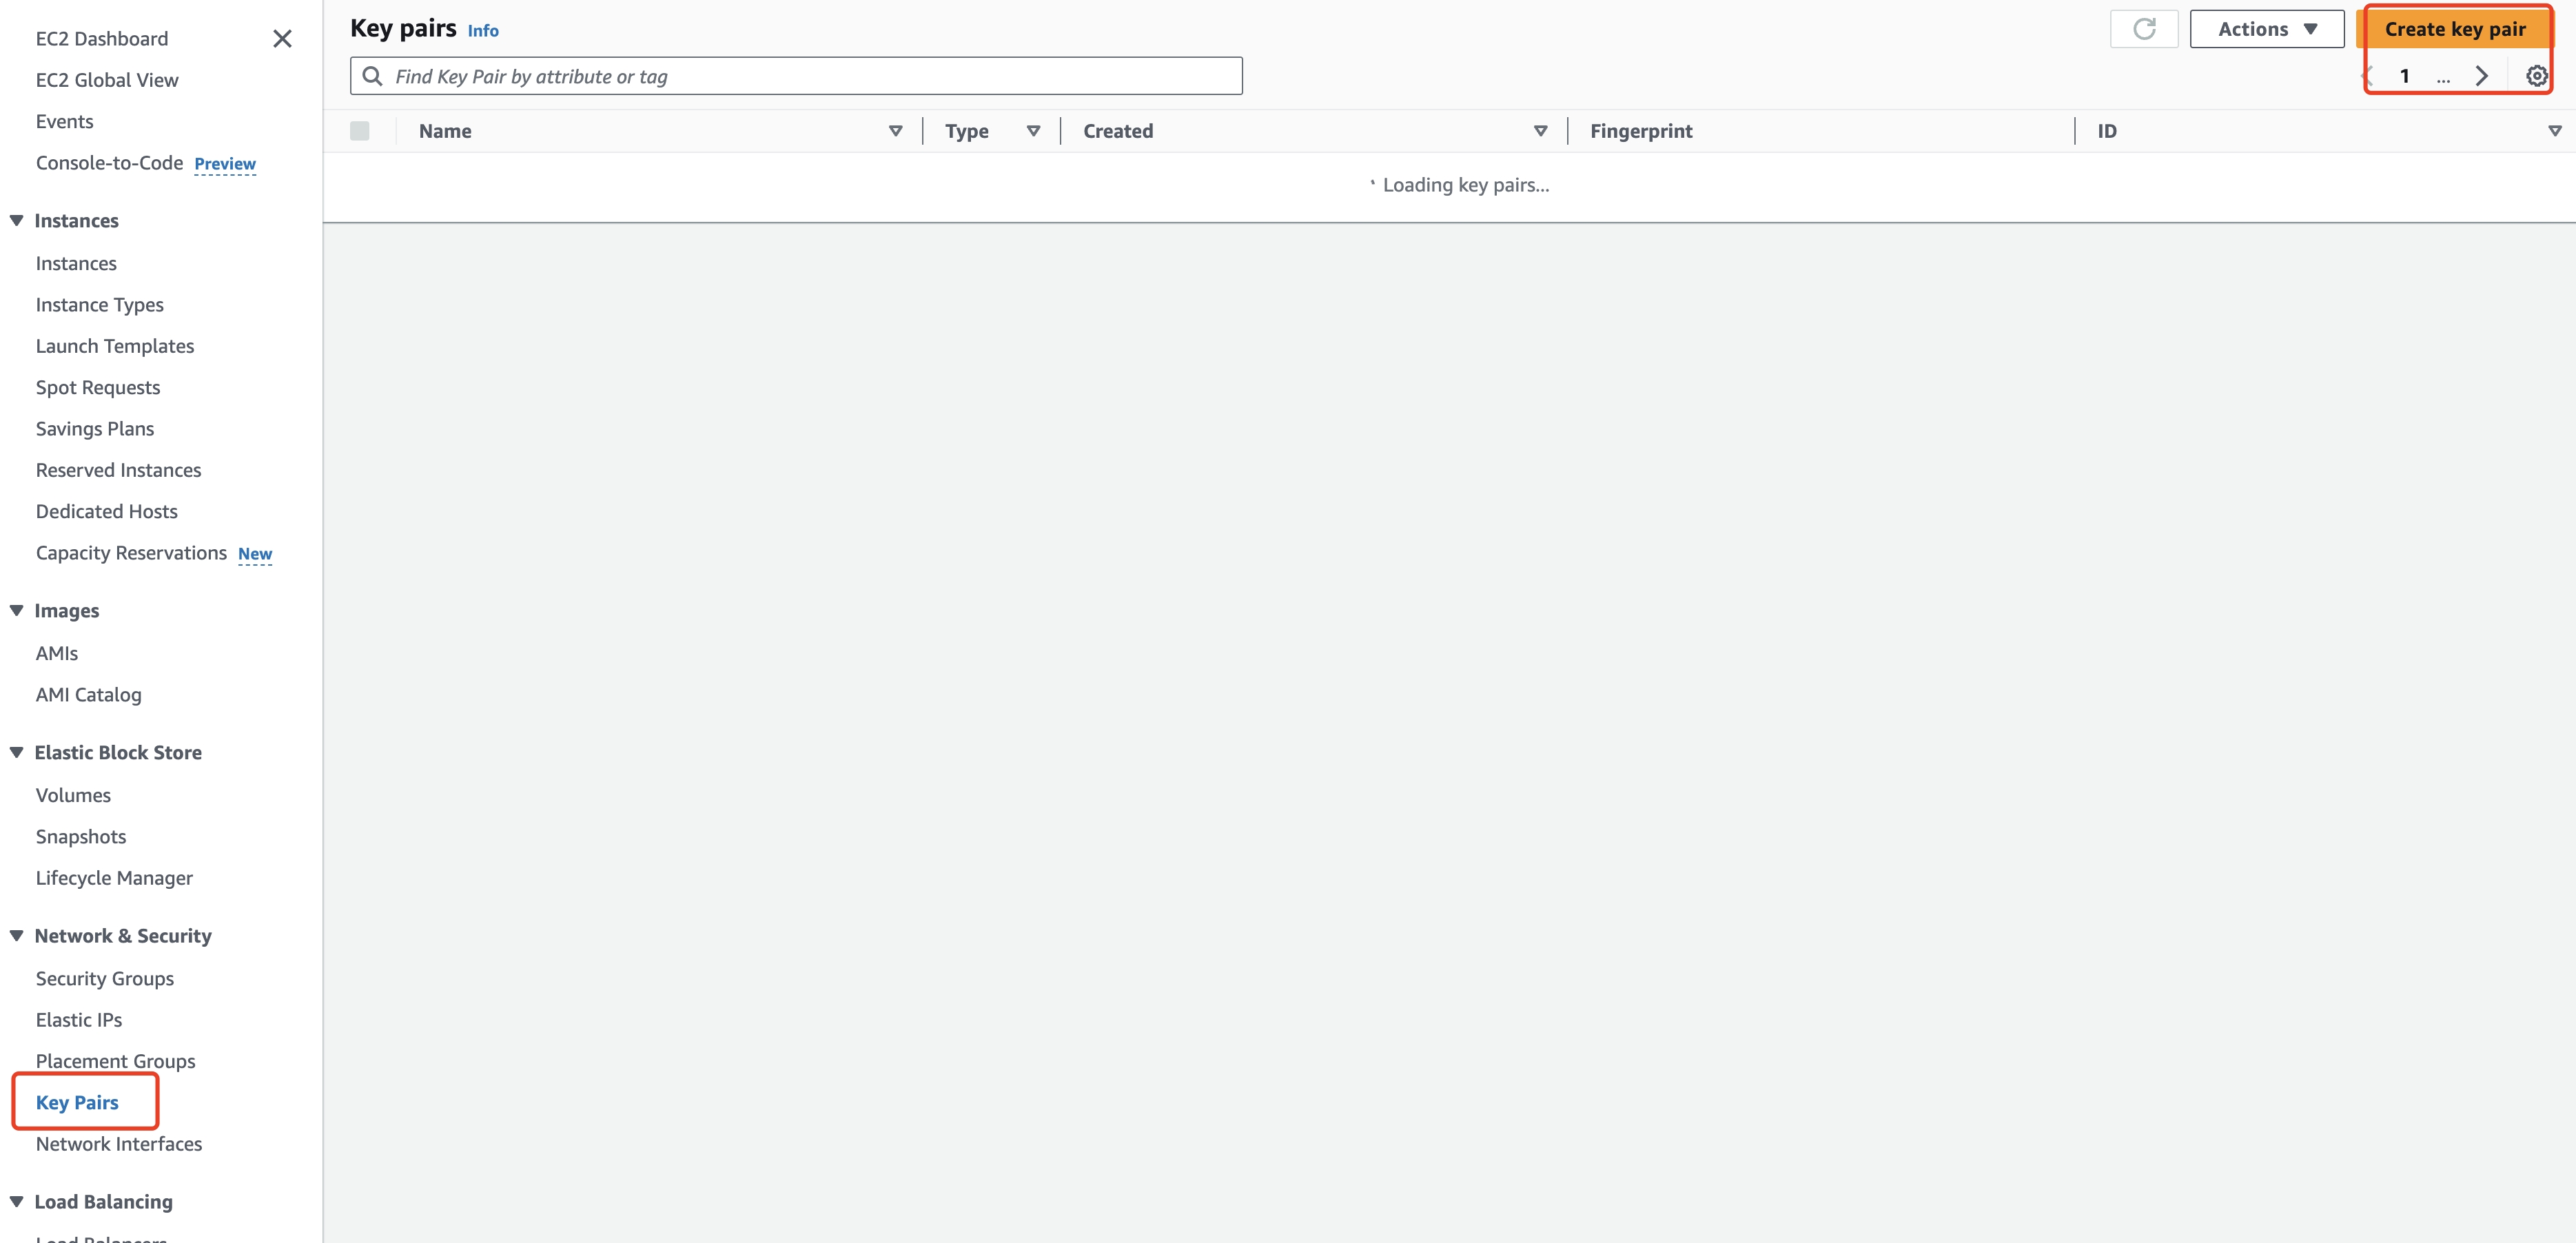
- Select "EC2" in the AWS console, enter the EC2 interface, click "Key Pairs" on the left, and click "Create key pair" on the right.
- Set key pairs name:
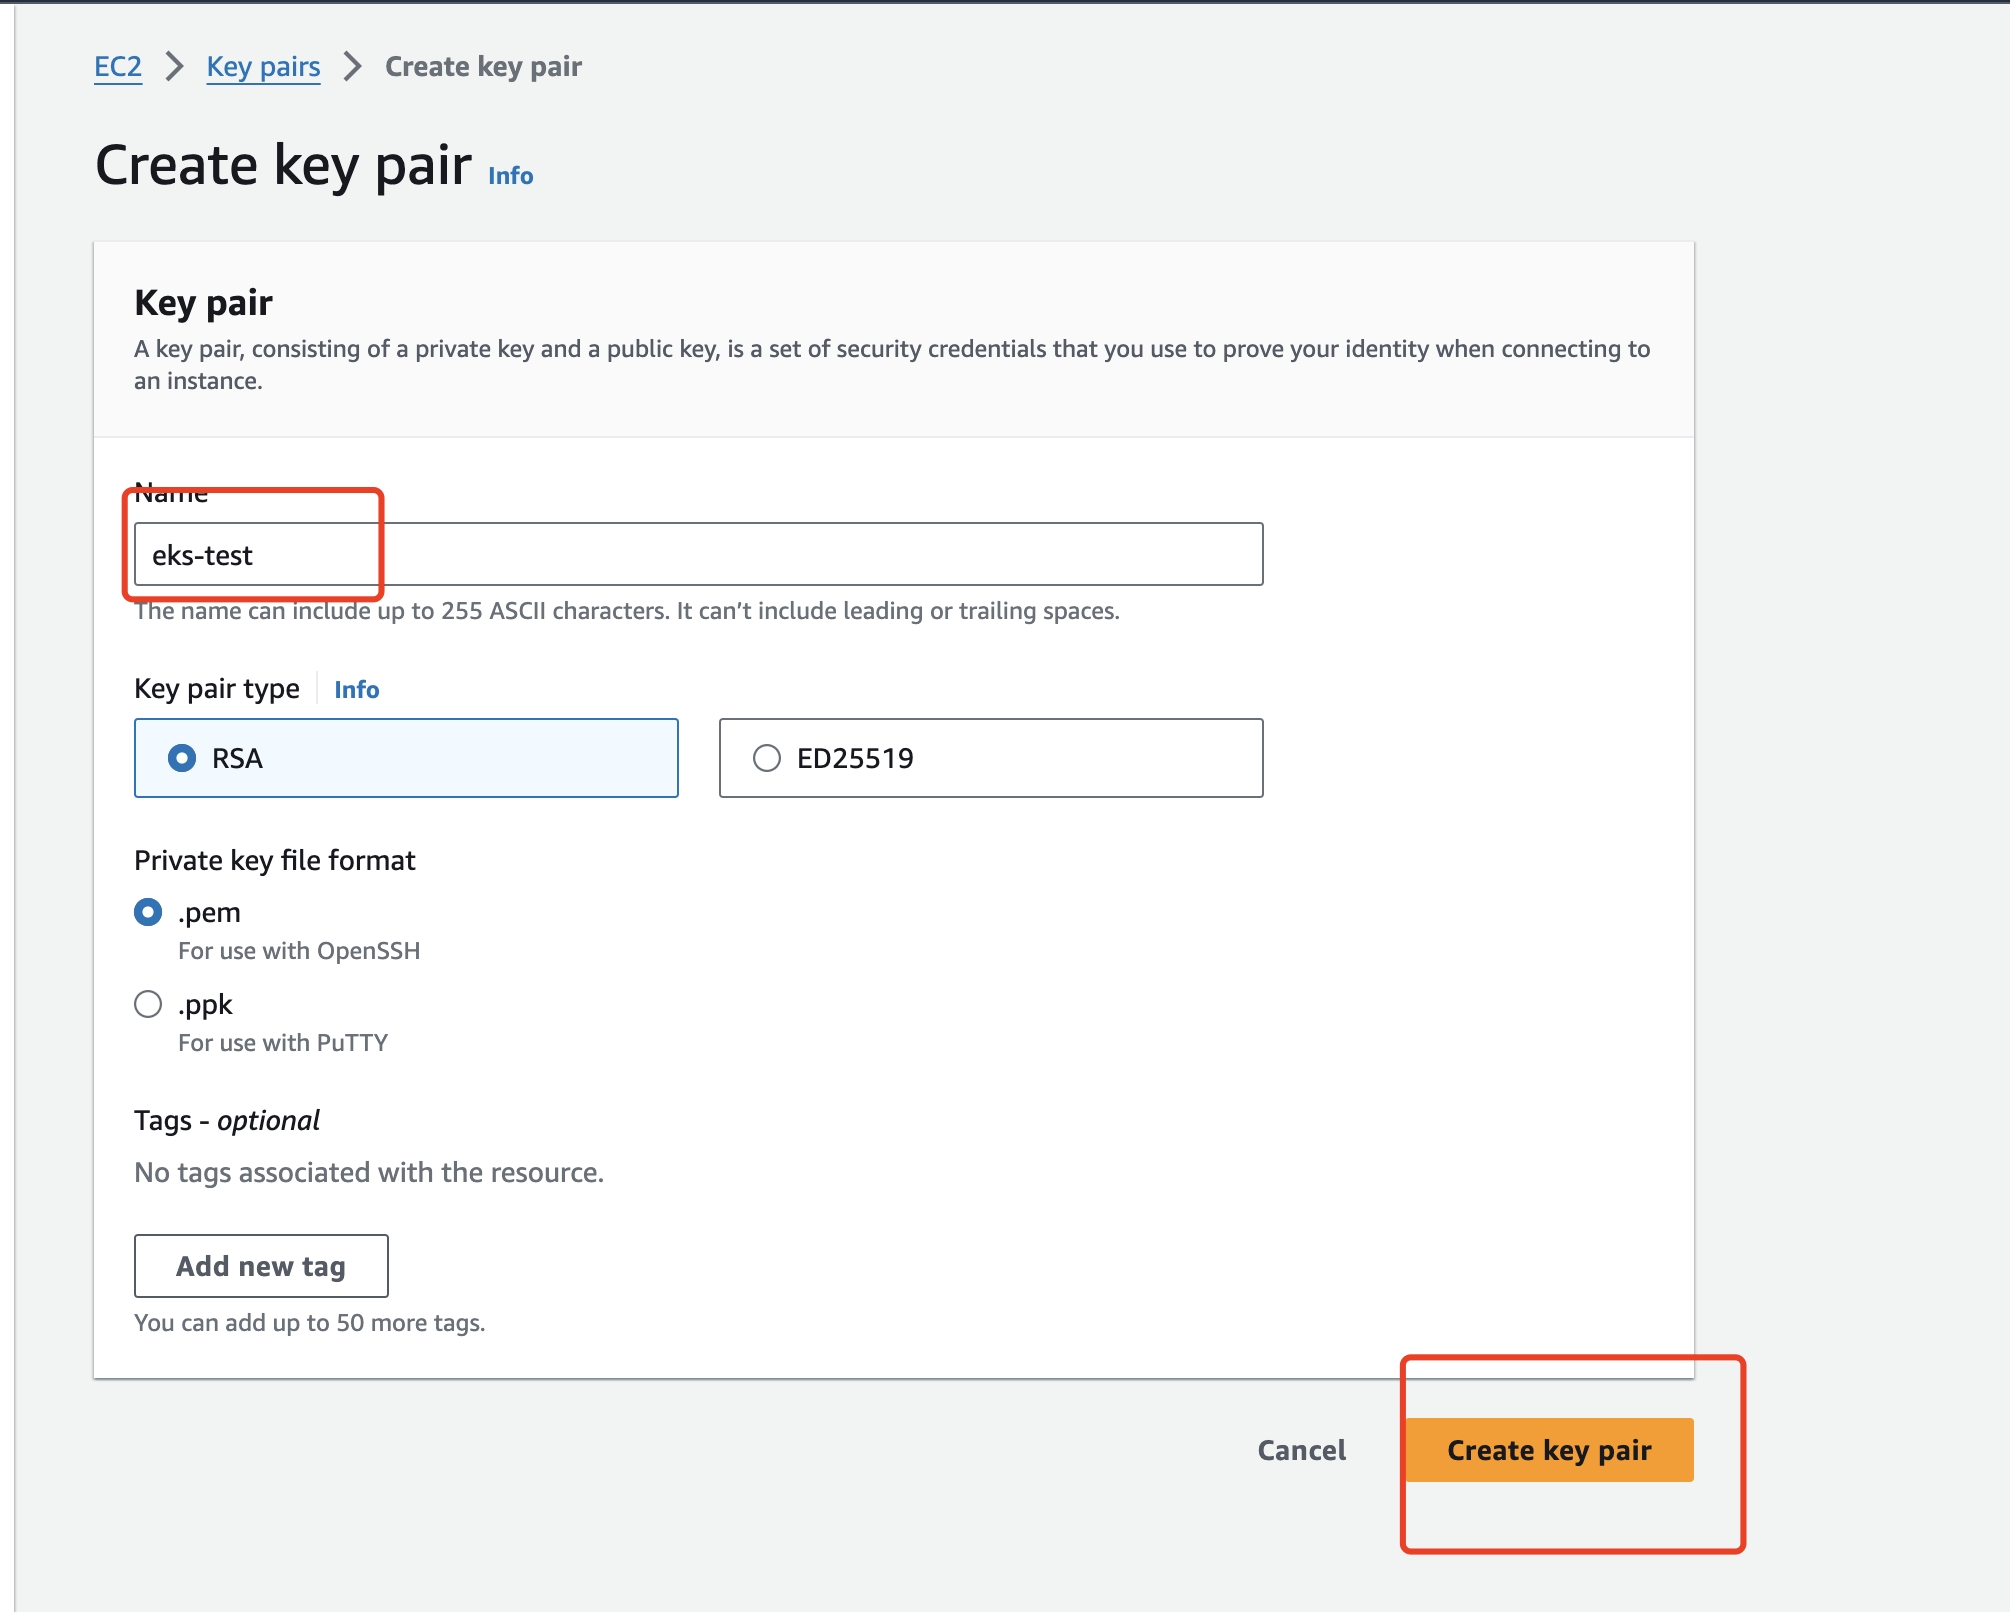
- Create a key pair. At this time, the browser will automatically download the key pair. This should be saved so that you can use the command to log in to node later.

Create Node Groups
You will be adding 3 node groups, in which you will deploy API7 EE, NGINX upstream, and wrk2 to different node groups respectively.
Note: If you have not created an EKS Node Role before, you need to create it first. The steps are similar to the process of creating a cluster service role in EKS. See Amazon EKS node IAM role for more details.
- Select Compute and click Add node group.
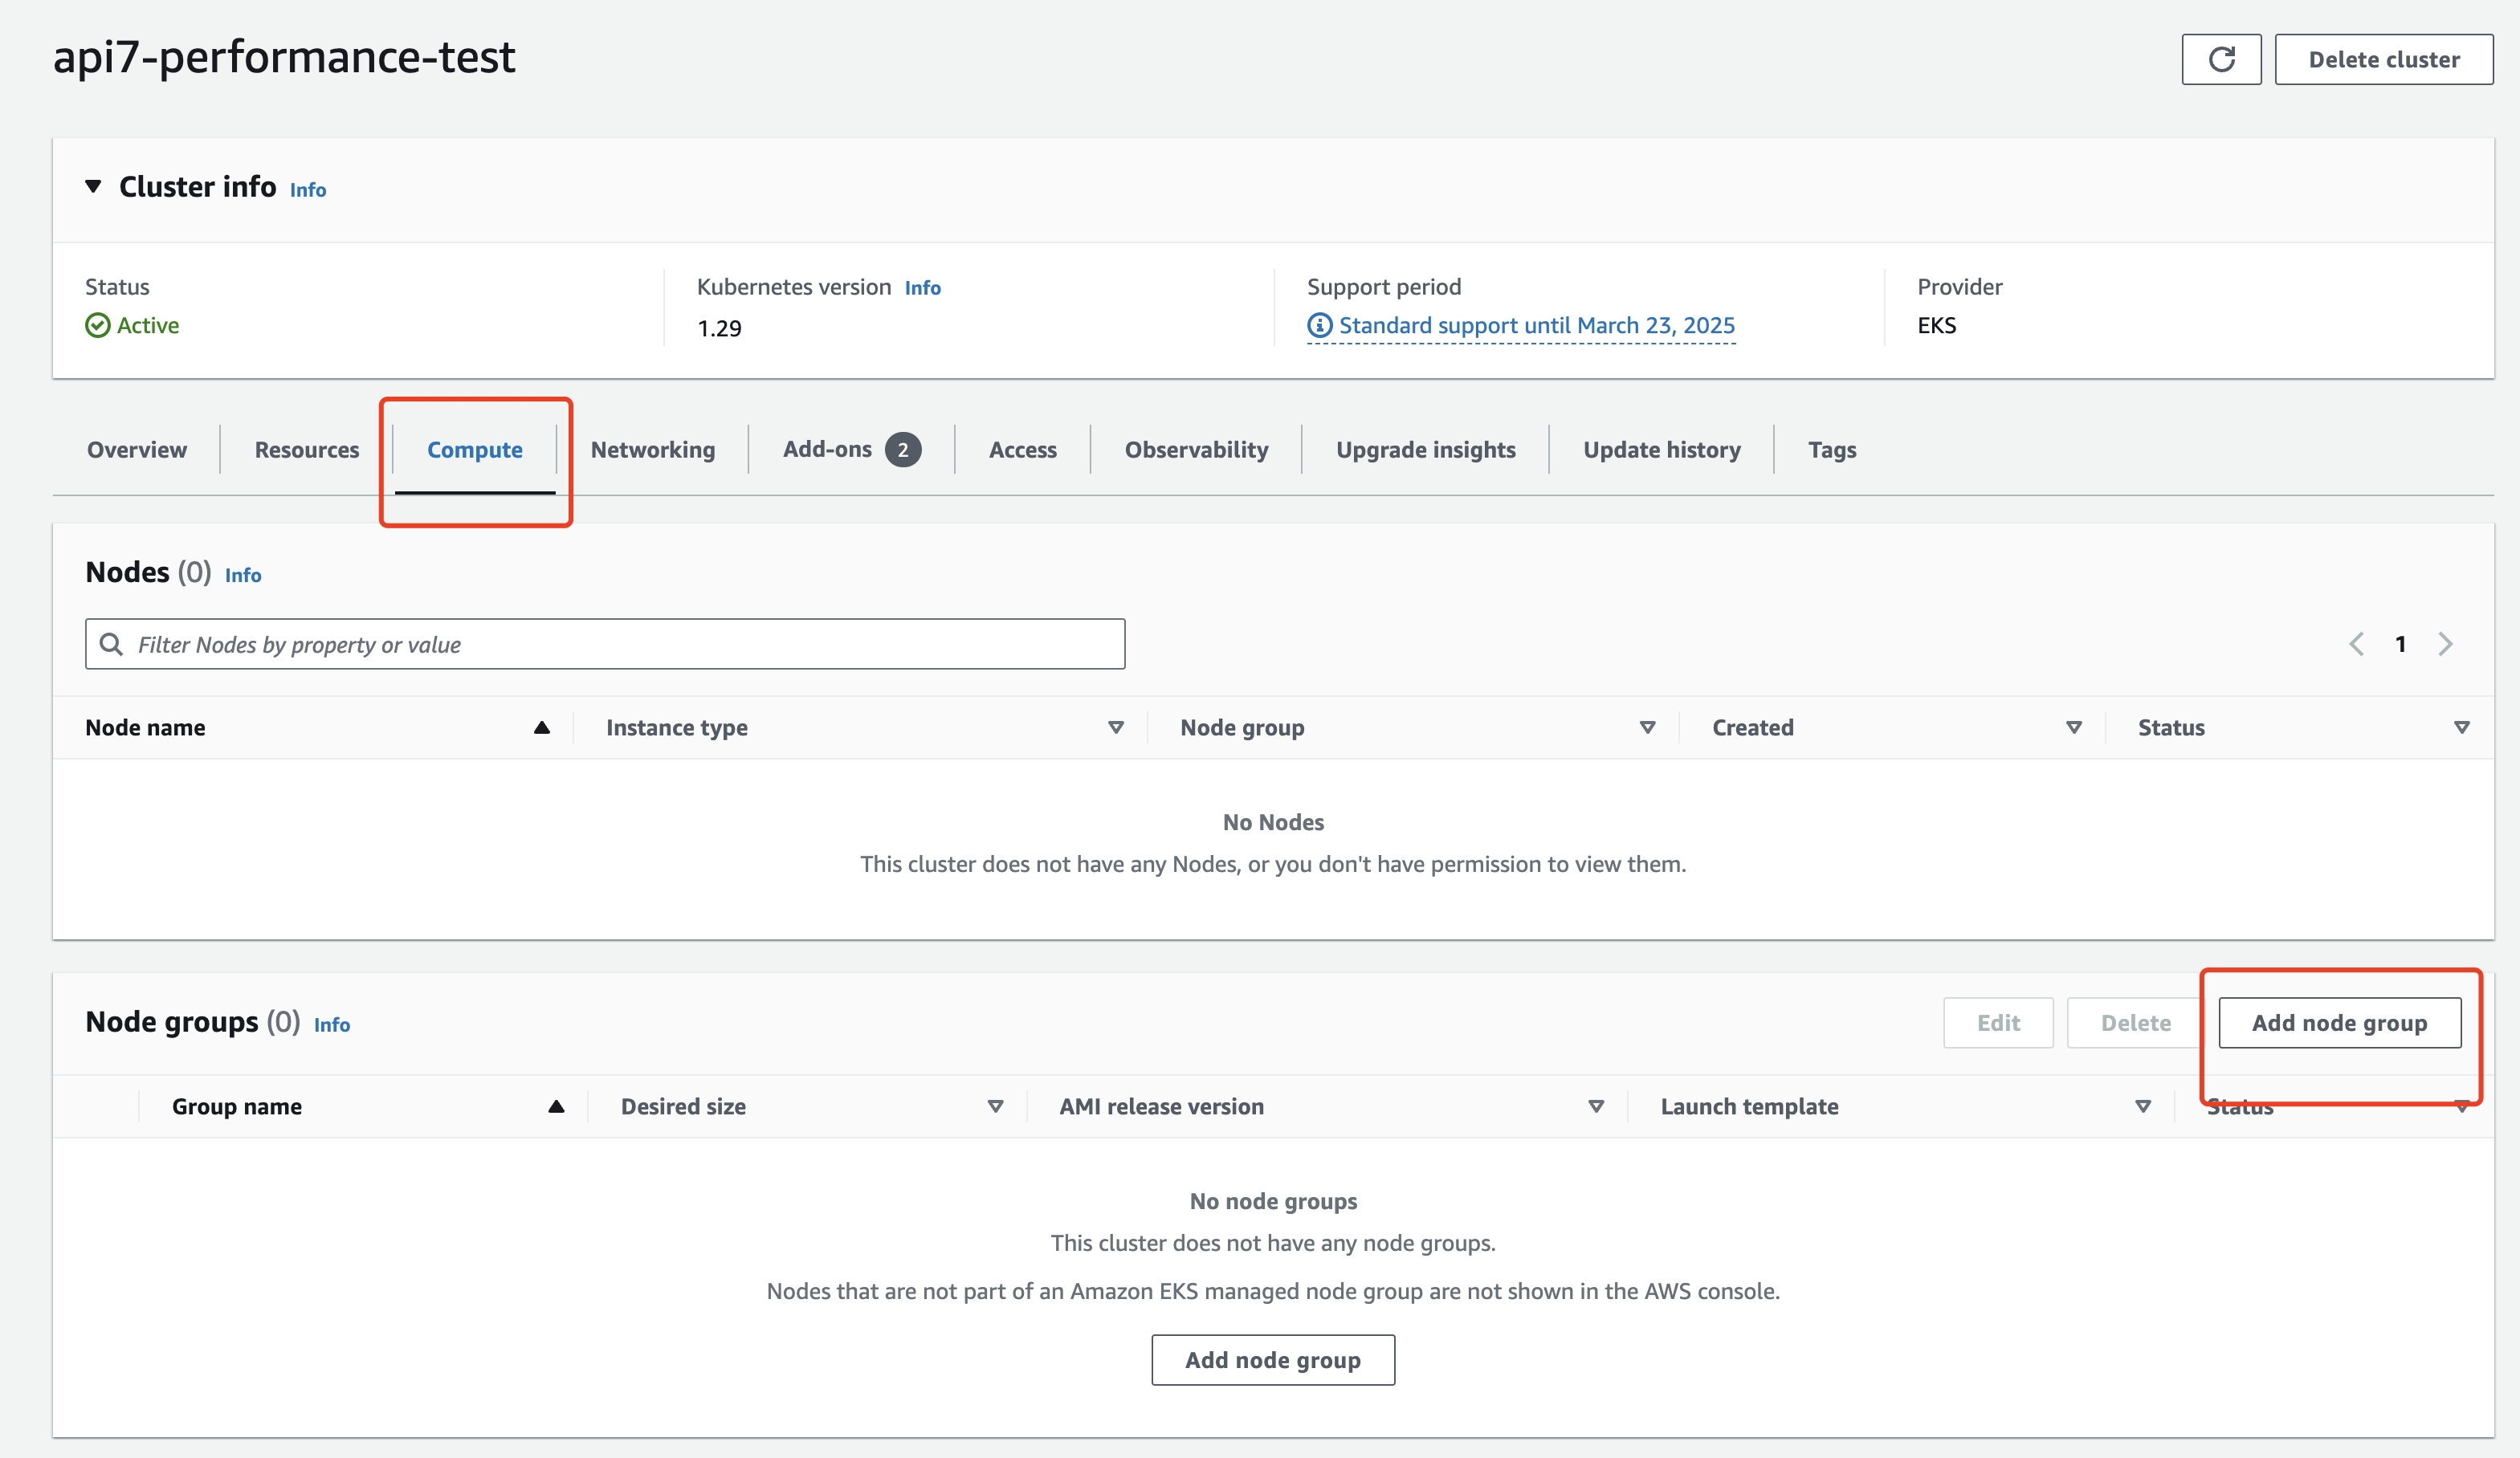
- Configure node group details, such as name and node IAM role.
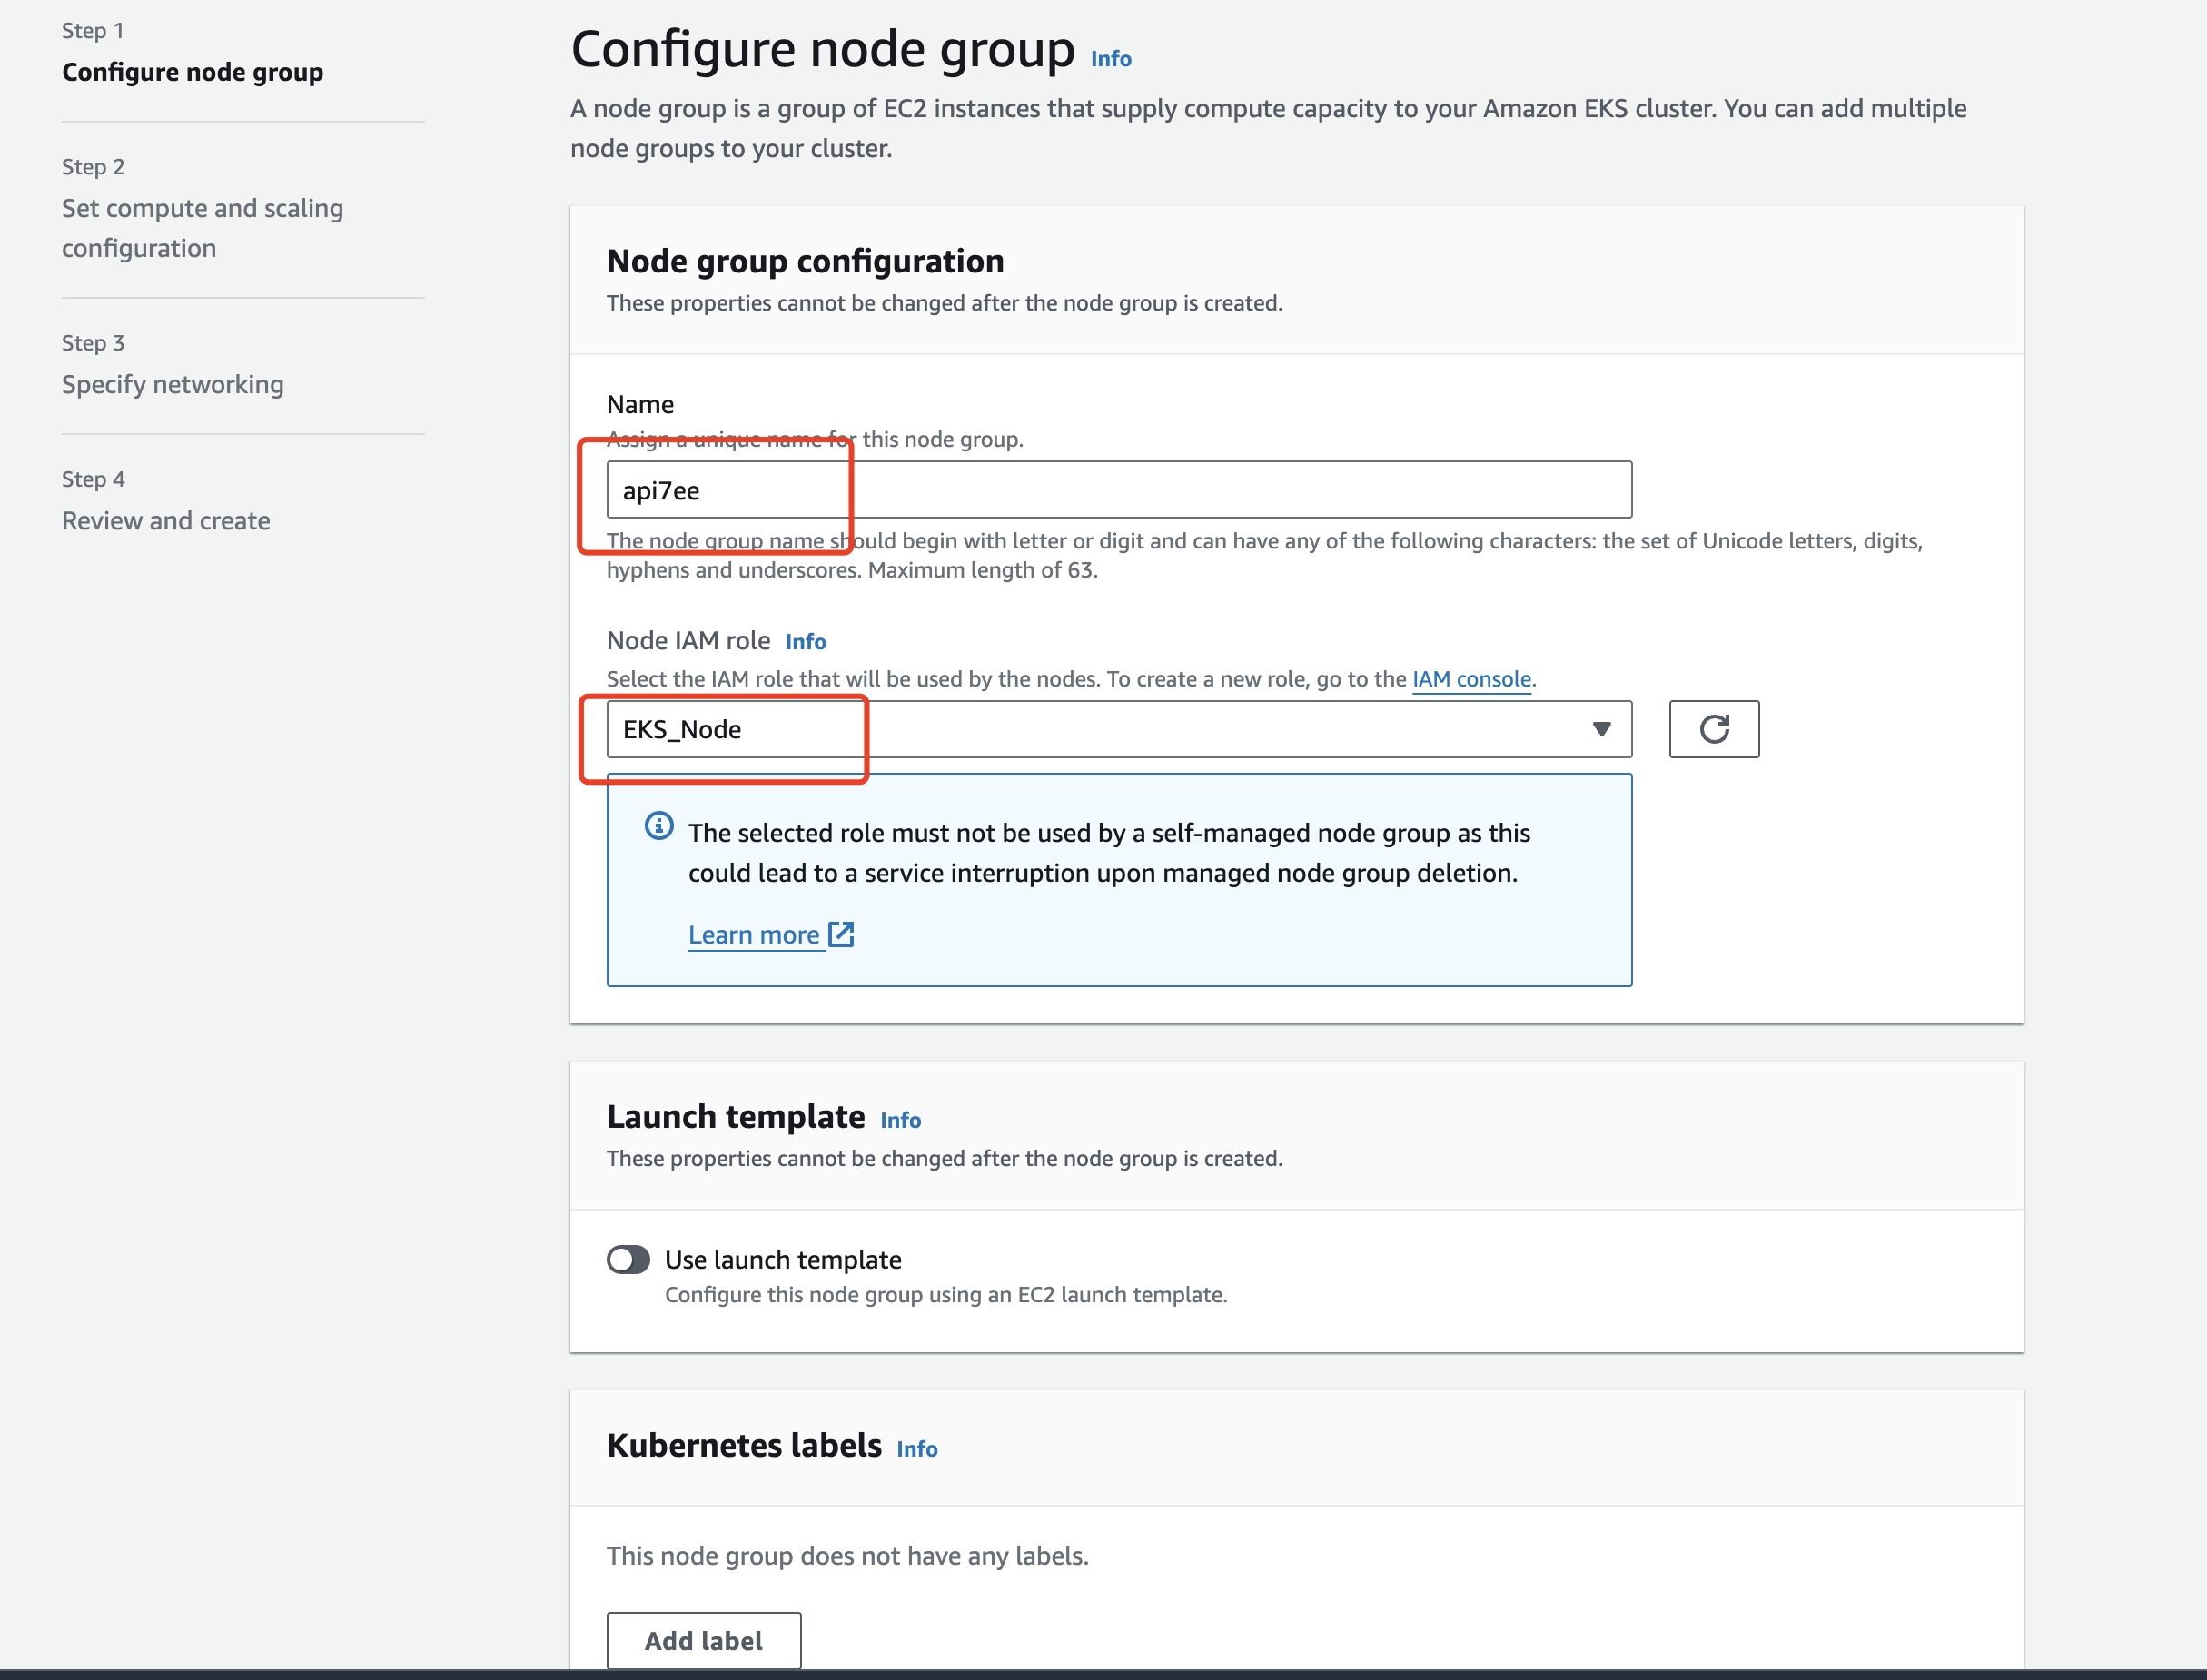
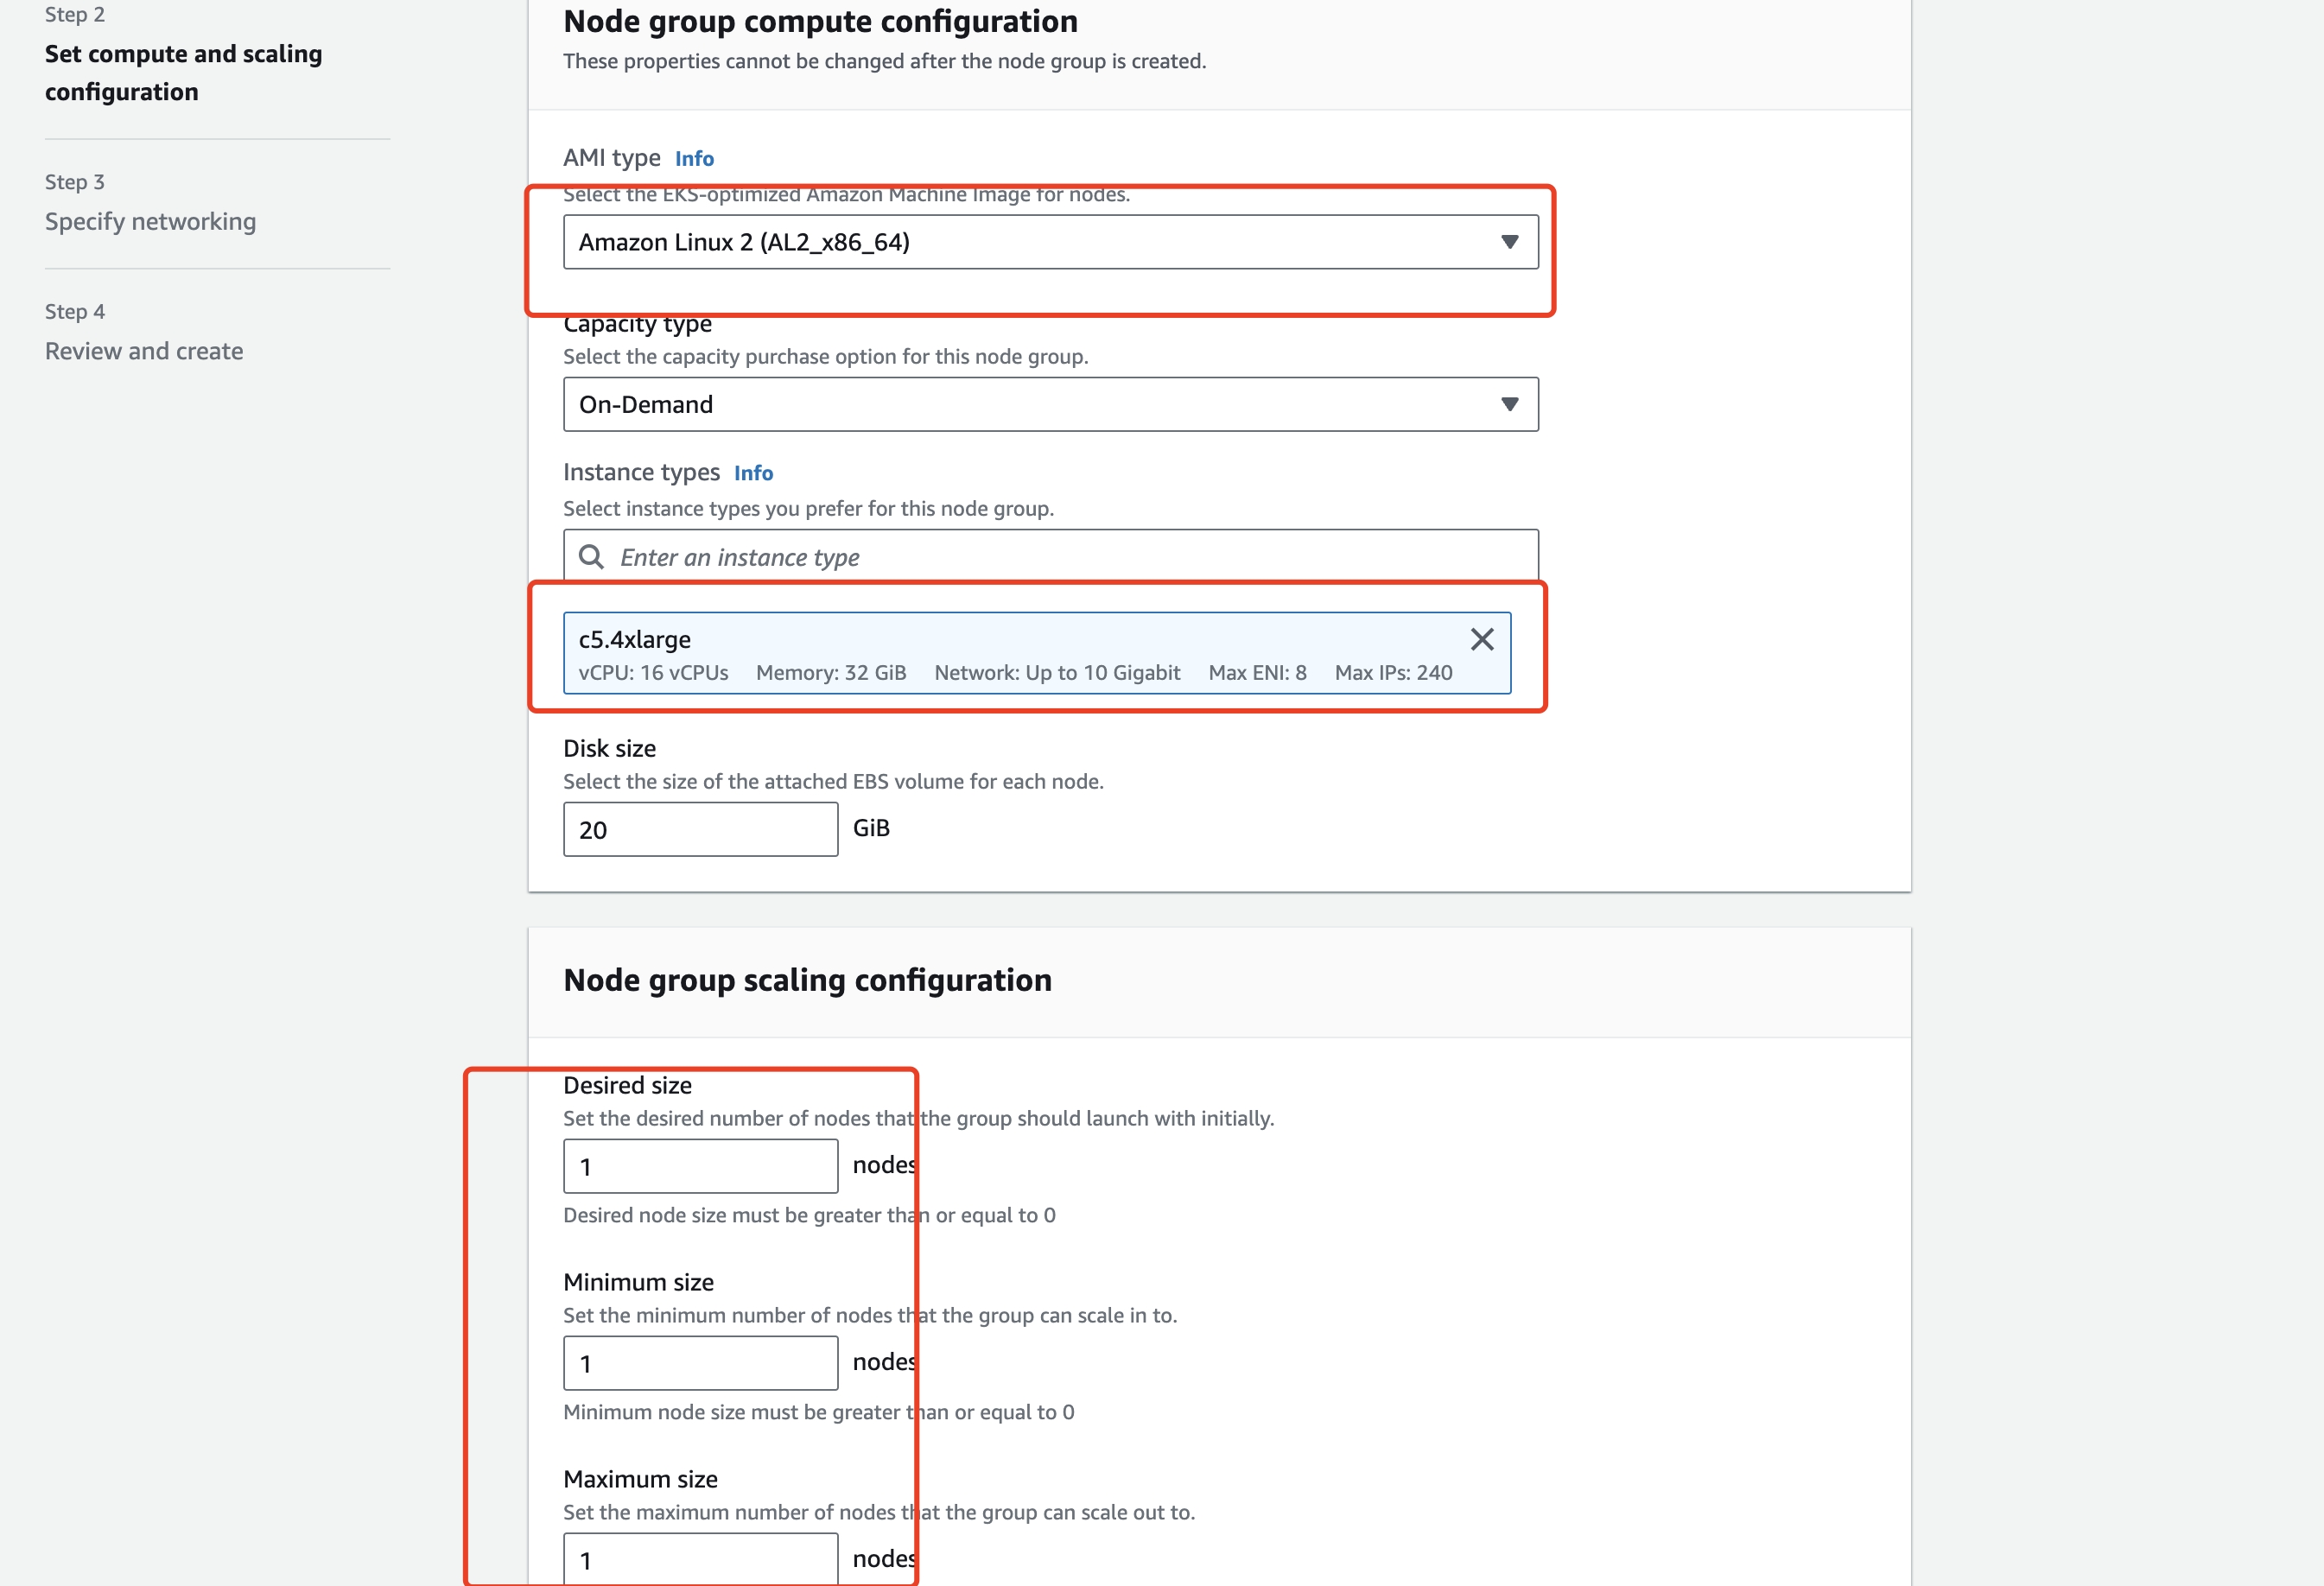
- Select
Amazon Linux2 (AL2_x86_64)as the AMI type andc5.4xlargeas the instance type.
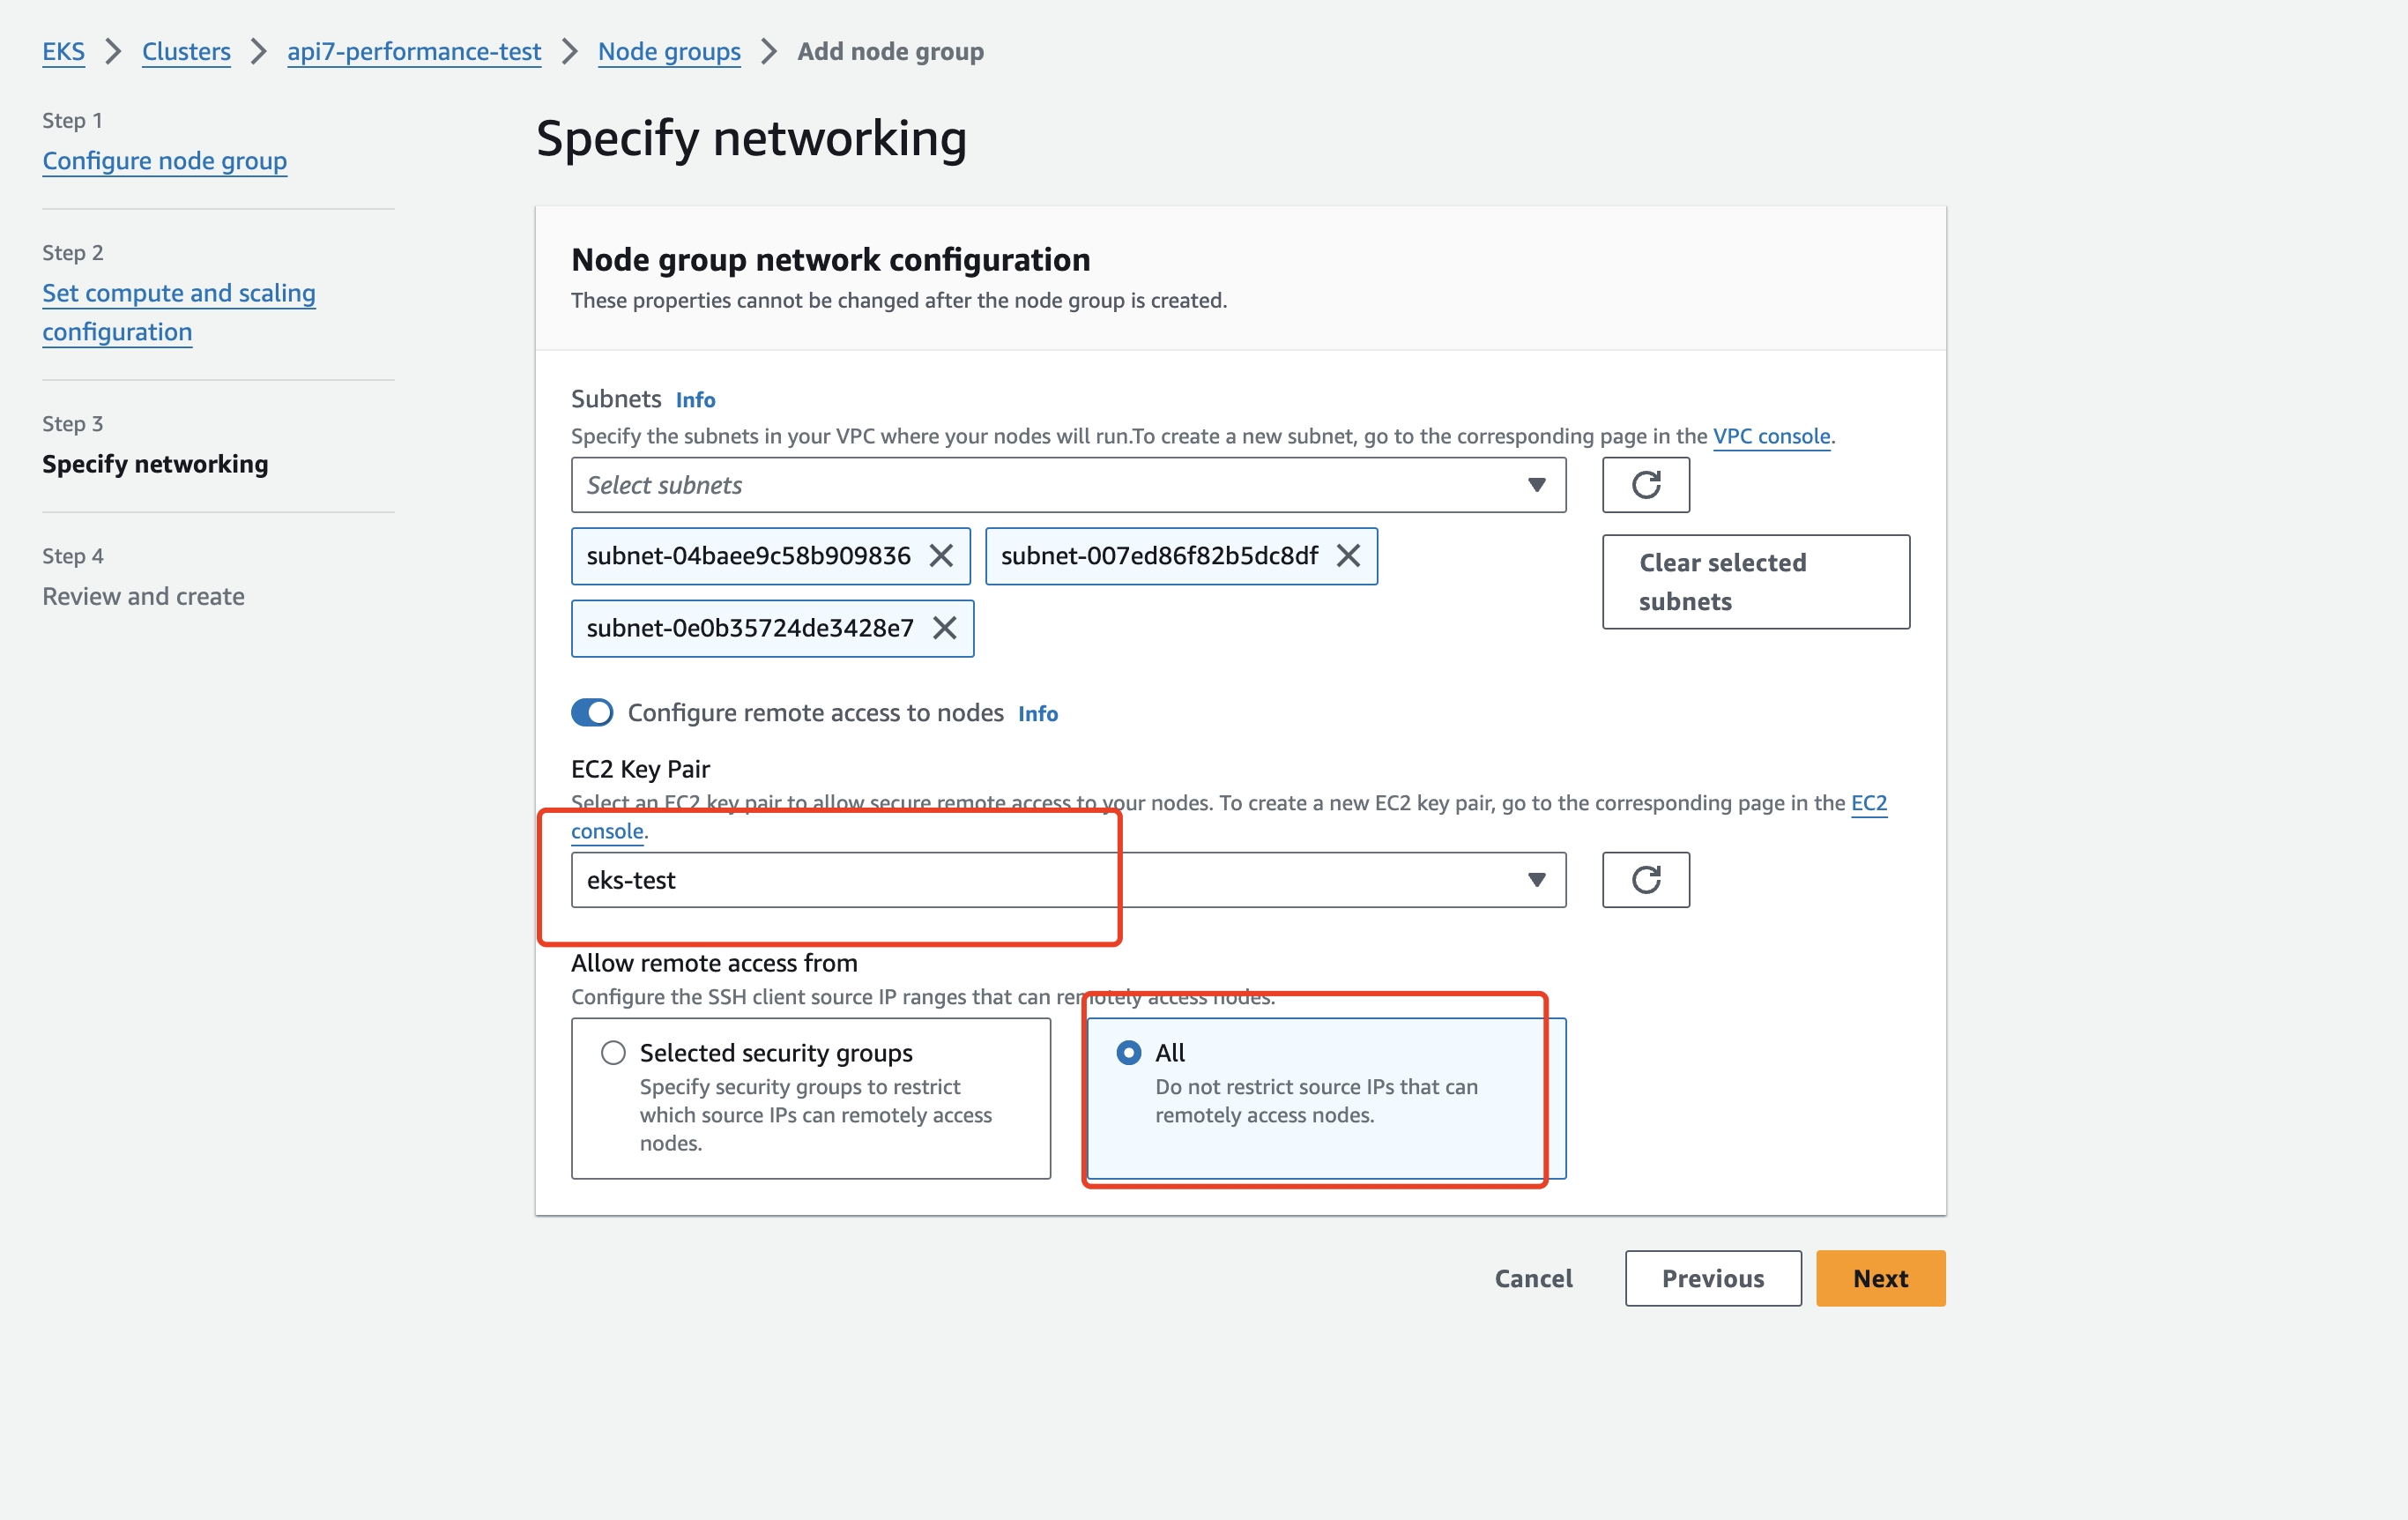
- Configure network. If you need to SSH into to the node, configure the node remote access control accordingly.
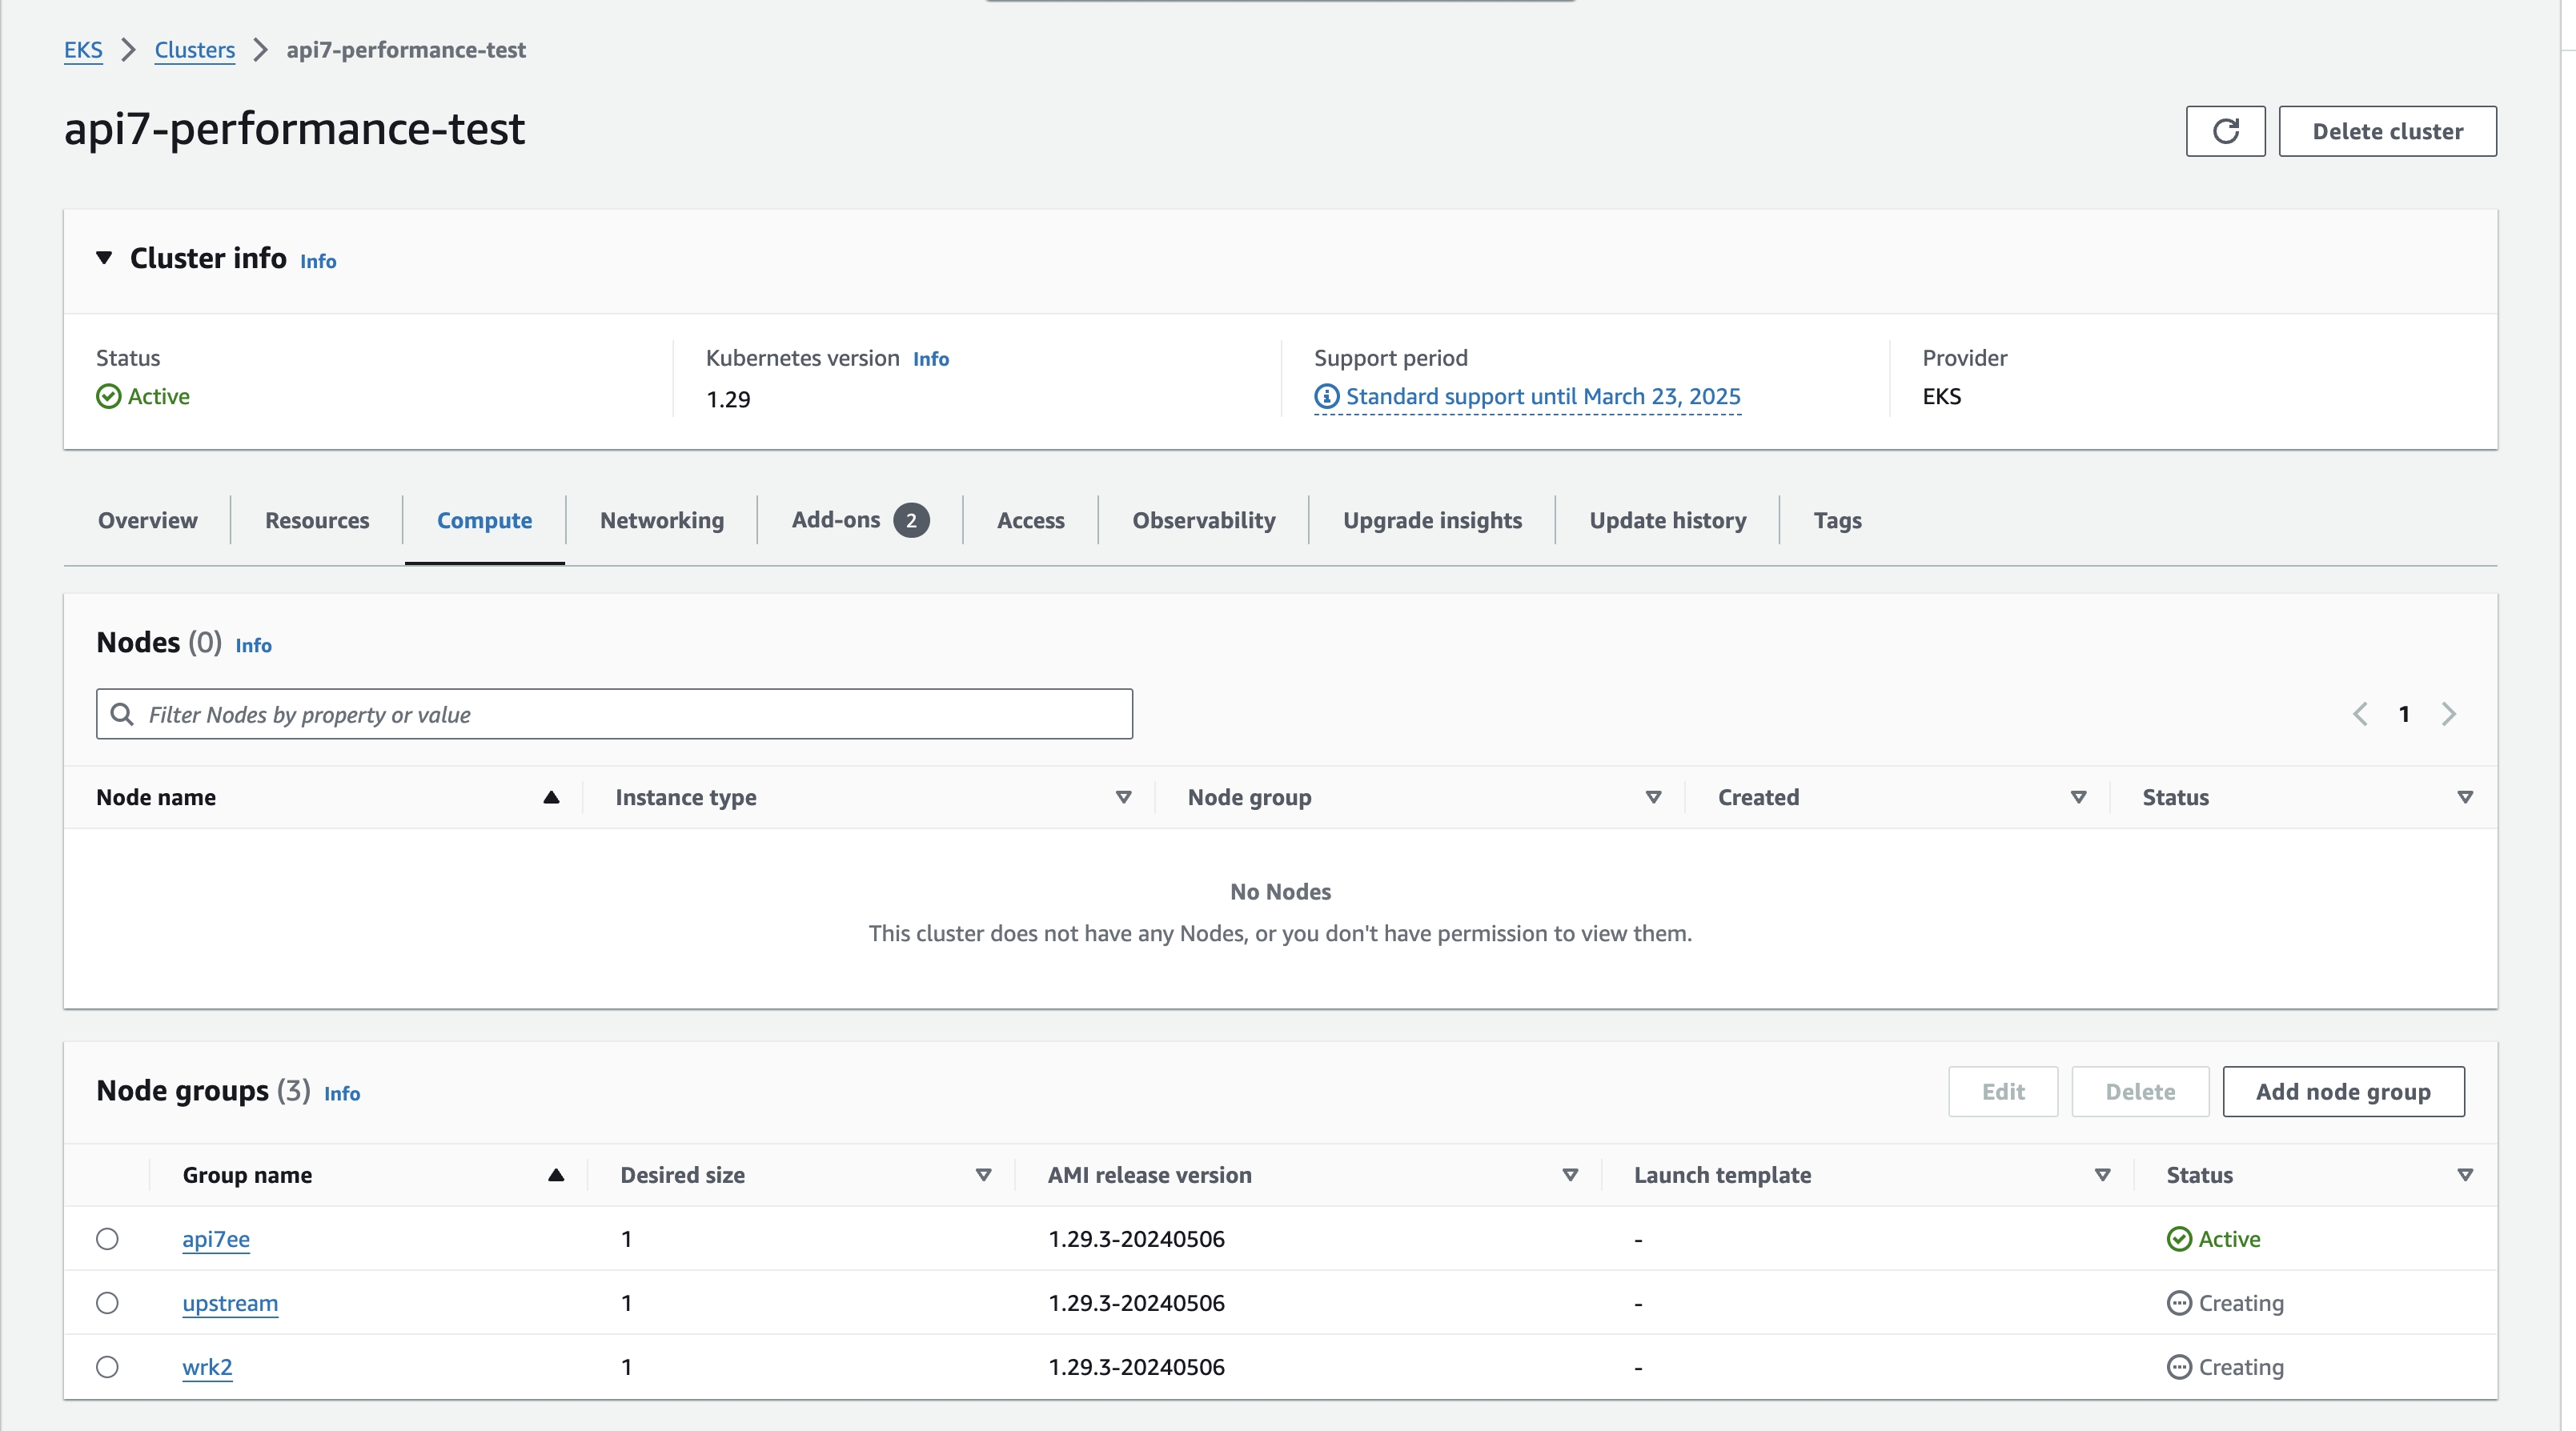
- Repeat the above steps to create 3 Nodes named: api7ee, upstream,
wrk2
Configure AWS CLI
- Enable
kubectlto communicate with the cluster previously created by adding a new context to thekubectlconfigfile. See Creating an Amazon EKS cluster for more details.
aws eks update-kubeconfig --region region-code --name my-cluster
- Run
kubectl get svcto verify successful communication with the cluster.
NAME         TYPE        CLUSTER-IP   EXTERNAL-IP   PORT(S)   AGE
kubernetes   ClusterIP   10.100.0.1   <none>        443/TCP   39m
Configure K8s Cluster Node Label
Label the nodes:
kubectl label nodes <your-node-name> <label_key=label_value>

# example
kubectl label nodes <your-node1-name> nodeName=api7ee
kubectl label nodes <your-node2-name> nodeName=upstream
kubectl label nodes <your-node3-name> nodeName=wrk2
Install
Install API7 EE
Control Plane
- Create a new namespace:
kubectl create namespace api7
- Install API7 Control Plane:
helm repo add api7 https://charts.api7.ai
helm repo update
# Specify the Node for the api7ee installation (the label we set for the Node earlier).
helm install api7ee3 api7/api7ee3 --set nodeSelector."nodeName"=api7ee --set postgresql.primary.nodeSelector."nodeName"=api7ee --set prometheus.server.nodeSelector."nodeName"=api7ee -n api7
By default PostgreSQL and Prometheus enable persistent storage and you may receive some errors if you do not configure StorageClass for your cluster.
You can also temporarily disable persistent storage with the command below, but be careful not to disable it in a production environment or the data will be lost after the Pod restarts.
helm install api7ee3 api7/api7ee3 --set nodeSelector."nodeName"=api7ee --set postgresql.primary.nodeSelector."nodeName"=api7ee --set prometheus.server.nodeSelector."nodeName"=api7ee --set postgresql.primary.persistence.enabled=false --set prometheus.server.persistence.enabled=false -n api7
- Check deployment status:
kubectl get svc -owide -l app.kubernetes.io/name=api7ee3 -n api7

NAME                 TYPE        CLUSTER-IP      EXTERNAL-IP   PORT(S)             AGE   SELECTOR
api7ee3-dashboard    ClusterIP   10.100.25.236   <none>        7080/TCP            18s   app.kubernetes.io/component=dashboard,app.kubernetes.io/instance=api7ee3,app.kubernetes.io/name=api7ee3
api7ee3-dp-manager   ClusterIP   10.100.239.32   <none>        7900/TCP,7943/TCP   18s   app.kubernetes.io/component=dp-manager,app.kubernetes.io/instance=api7ee3,app.kubernetes.io/name=api7ee3
- Forward the dashboard port to the local machine, log in to the console, and upload the licence:
kubectl -n api7 port-forward svc/api7ee3-dashboard 7443:7443
- Set the Control Plane address:
Log in to the dashboard and configure the "Control Plane Address" in the Gateway Settings: https://api7ee3-dp-manager:7943

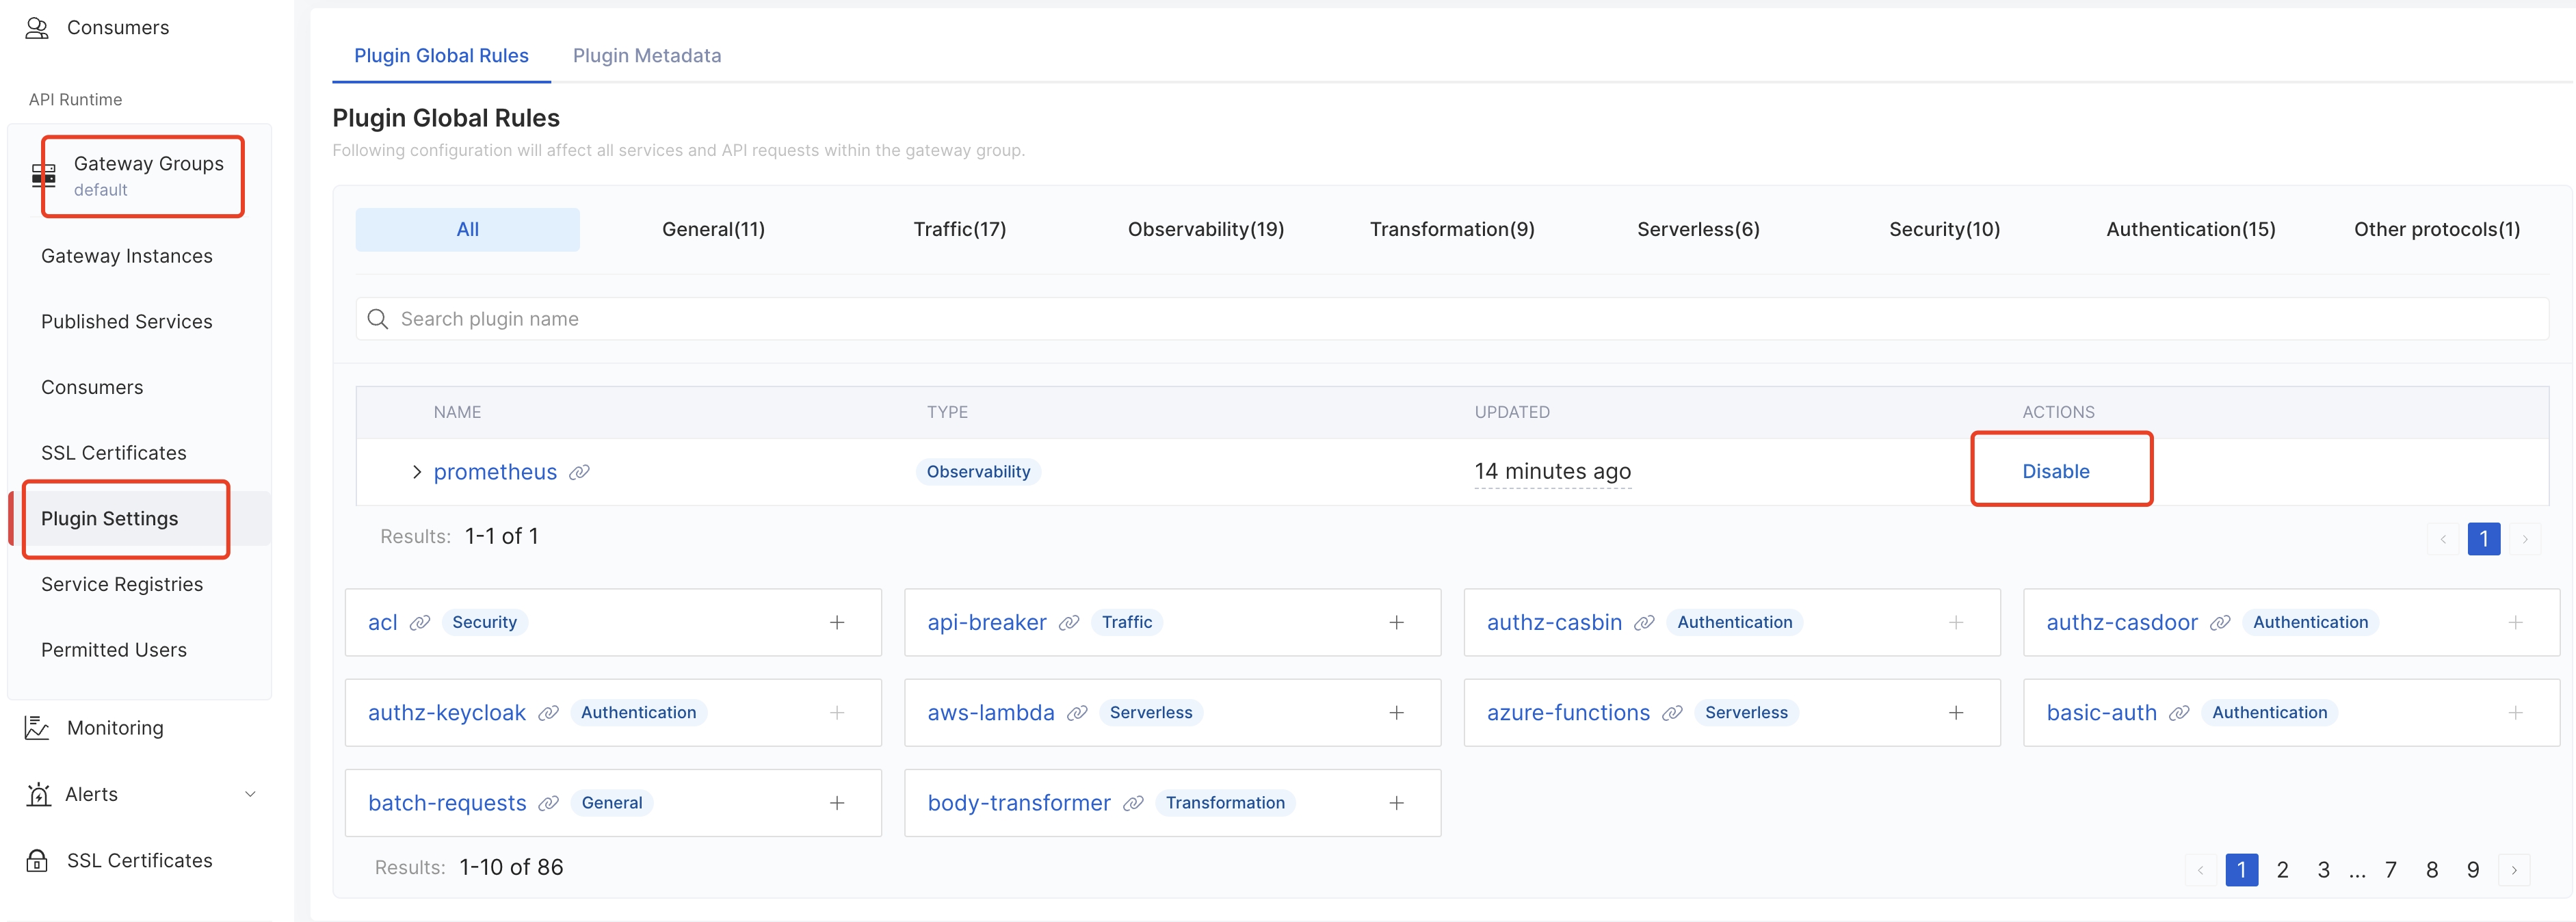
Disable Global Plugin prometheus
API7 Gateway (Data Plane)
- Click the Add Gateway Instance button:
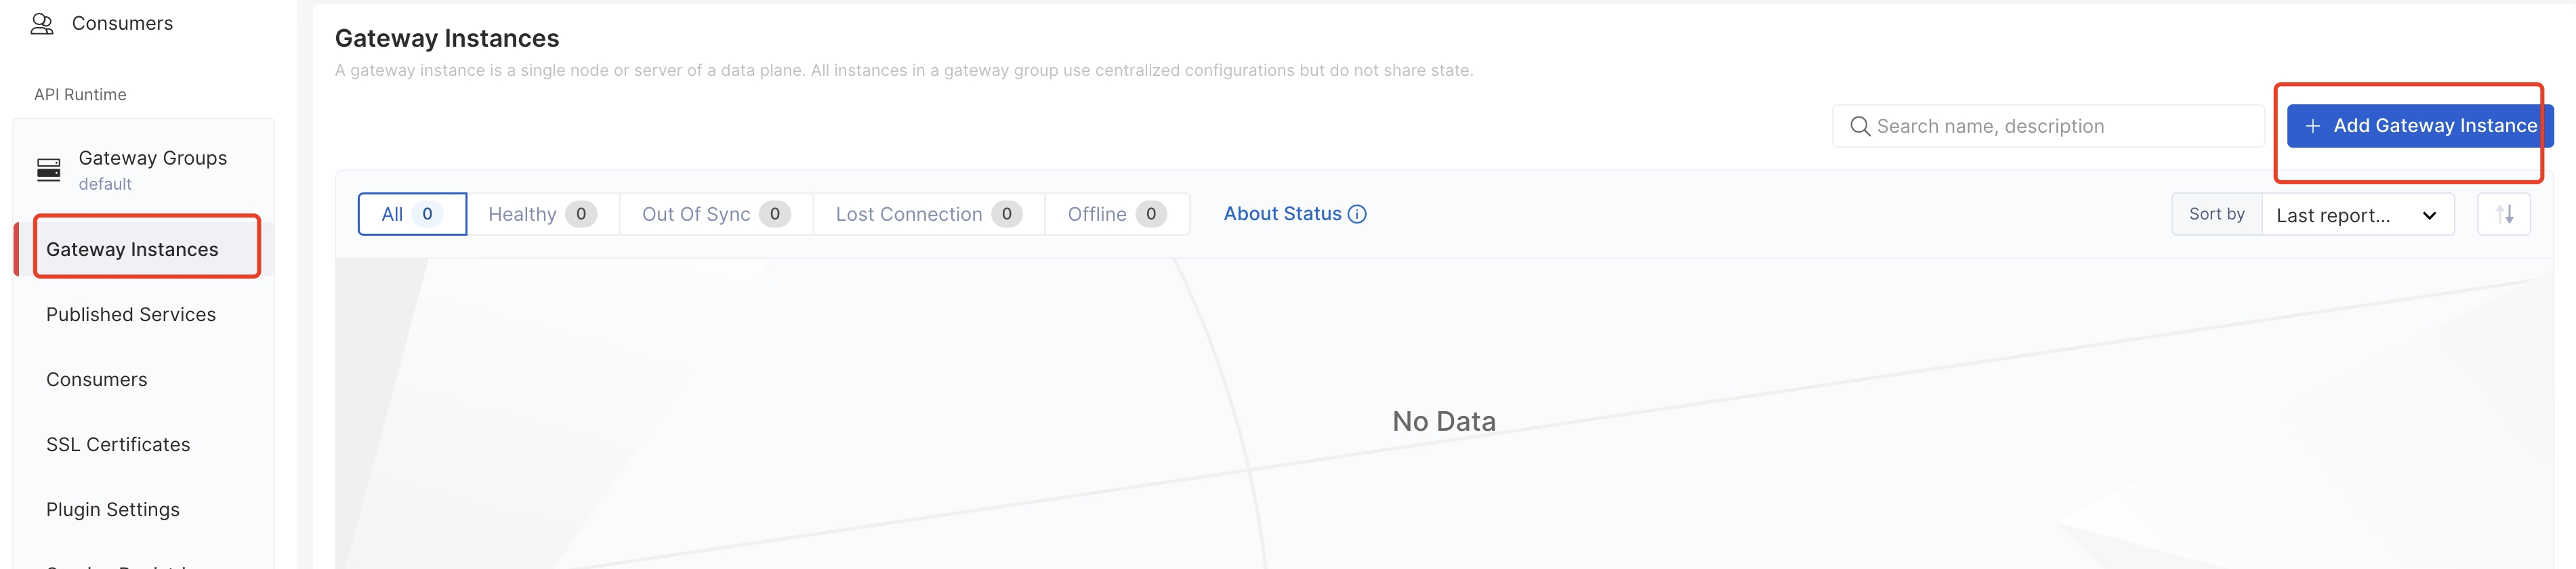
- Select the Kubernetes method:
Select the Kubernetes method and configure the "namespace" to generate an install script and run it. By default, API7 Gateway and Control Plane will authenticate with mTLS for verification. For example:
helm repo add api7 https://charts.api7.ai
helm repo update
cat > /tmp/tls.crt <<EOF
-----BEGIN CERTIFICATE-----
MIIBiDCCATqgAwIBAgICBAAwBQYDK2VwMEQxCzAJBgNVBAYTAlVTMRMwEQYDVQQI
EwpDYWxpZm9ybmlhMQ0wCwYDVQQKEwRBUEk3MREwDwYDVQQDEwhBUEk3IEluYzAe
Fw0yNDA4MDkwNjM0NDRaFw0yNTA5MDgwNjM0NDRaMDAxDTALBgNVBAoTBEFQSTcx
HzAdBgNVBAMTFmFwaTdlZTMtYXBpc2l4LWdhdGV3YXkwKjAFBgMrZXADIQA4EF9i
qogMWwWQnhrD478bCTQxxeDrT8zUUC+KC4lbLaNkMGIwDgYDVR0PAQH/BAQDAgeA
MBMGA1UdJQQMMAoGCCsGAQUFBwMCMC0GA1UdDgQmBCQzMmE2MTU3Yi0yMGFmLTQ4
NDctYWEyOC04M2M1M2ZmMTY4ZDAwDAYDVR0jBAUwA4ABMDAFBgMrZXADQQDzxx2i
QV62ZB0WOdxofuQ2J+35sh6tYCOayrjAn5KISQ5L1JMIrDZKotq5G8JLM3qMs9Nc
DZjDWzx+W1j94GAO
-----END CERTIFICATE-----
EOF
cat > /tmp/tls.key <<EOF
-----BEGIN PRIVATE KEY-----
MC4CAQAwBQYDK2VwBCIEILY+bFM98L+OLxTWd73hnl9FmYGfhGASUhuYrpt/Q0CE
-----END PRIVATE KEY-----
EOF
cat > /tmp/ca.crt <<EOF
-----BEGIN CERTIFICATE-----
MIIBdjCCASigAwIBAgIRAJDZ9s+rZMNiqiiAyT3NXpkwBQYDK2VwMEQxCzAJBgNV
BAYTAlVTMRMwEQYDVQQIEwpDYWxpZm9ybmlhMQ0wCwYDVQQKEwRBUEk3MREwDwYD
VQQDEwhBUEk3IEluYzAeFw0yNDA4MDkwNjI4MDBaFw0zNDA4MDcwNjI4MDBaMEQx
CzAJBgNVBAYTAlVTMRMwEQYDVQQIEwpDYWxpZm9ybmlhMQ0wCwYDVQQKEwRBUEk3
MREwDwYDVQQDEwhBUEk3IEluYzAqMAUGAytlcAMhAN/VCNB2ChcL4BrXVImIW/EH
YZi2oDrXVub/mXaMSr7Zoy8wLTAOBgNVHQ8BAf8EBAMCAoQwDwYDVR0TAQH/BAUw
AwEB/zAKBgNVHQ4EAwQBMDAFBgMrZXADQQCA0M1McTsw6c9LGqmFP1g/BXNyeyDI
dBnVnPlZgCwMQCDqkI9S8wyZbz4jLGGccKnqAclNhuJsSn94UGuteaIG
-----END CERTIFICATE-----
EOF
kubectl create secret generic -n api7 api7-ee-3-gateway-tls --from-file=tls.crt=/tmp/tls.crt --from-file=tls.key=/tmp/tls.key --from-file=ca.crt=/tmp/ca.crt
helm upgrade --install -n api7 --create-namespace api7-ee-3-gateway api7/gateway \
  --set "etcd.auth.tls.enabled=true" \
  --set "etcd.auth.tls.existingSecret=api7-ee-3-gateway-tls" \
  --set "etcd.auth.tls.certFilename=tls.crt" \
  --set "etcd.auth.tls.certKeyFilename=tls.key" \
  --set "etcd.auth.tls.verify=true" \
  --set "gateway.tls.existingCASecret=api7-ee-3-gateway-tls" \
  --set "gateway.tls.certCAFilename=ca.crt" \
  --set "apisix.extraEnvVars[0].name=API7_GATEWAY_GROUP_SHORT_ID" \
  --set "apisix.extraEnvVars[0].value=default" \
  --set "etcd.host[0]=https://api7ee3-dp-manager:7943" \
  --set "apisix.replicaCount=1" \
  --set "apisix.image.repository=api7/api7-ee-3-gateway" \
  --set "apisix.image.tag=3.2.14.4" \
  --set "nginx.workerProcesses"=1 \
  --set apisix.nodeSelector.nodeName=api7ee \
  --set apisix.securityContext.runAsNonRoot=false \
  --set apisix.securityContext.runAsUser=0
You should install the Gateway on a separate node and adjust the worker_processes as needed. In addition, if you want to install top and other tools in the gateway container, you can start it as root. For example:
❶ configure gateway worker_process: --set "nginx.workerProcesses"=1
❷ configure node selector: --set apisix.nodeSelector.nodeName=api7ee
❸ run as root user:
--set apisix.securityContext.runAsNonRoot=false--set apisix.securityContext.runAsUser=0
Install NGINX Upstream
- Create a nginx upstream deployment file:
---
apiVersion: v1
kind: ConfigMap
metadata:
  name: nginx-config
  namespace: api7
data:
  nginx.conf: |
    master_process on;

    worker_processes 1;
    events {
        worker_connections 4096;
    }

    http {
        resolver ipv6=off 8.8.8.8;

        #access_log logs/access.log;
        access_log off;
        server_tokens off;
        keepalive_requests 10000000;

        server {
            listen 1980;
            server_name _;

            location / {
                proxy_set_header Connection "";
                return 200 "hello world\n";
            }
        }
    }
---
apiVersion: apps/v1
kind: Deployment
metadata:
  name: nginx-deployment
  namespace: api7
spec:
  replicas: 1
  selector:
    matchLabels:
      app: nginx
  template:
    metadata:
      labels:
        app: nginx
    spec:
      containers:
      - name: nginx
        image: nginx
        volumeMounts:
        - name: nginx-config-volume
          mountPath: /etc/nginx/nginx.conf
          subPath: nginx.conf
      nodeSelector:
        nodeName: upstream
      volumes:
      - name: nginx-config-volume
        configMap:
          name: nginx-config
---
- Deploy nginx upstream
kubectl apply -f nginx-upstream.yaml
Install wrk2
- Create a
wrk2deployment file:
apiVersion: apps/v1
kind: Deployment
metadata:
  name: wrk2-deployment
  namespace: api7
spec:
  replicas: 1
  selector:
    matchLabels:
      app: wrk2
  template:
    metadata:
      labels:
        app: wrk2
    spec:
      containers:
      - name: wrk2
        image: bootjp/wrk2
      nodeSelector:
        nodeName: wrk2
- Deploy
wrk2
kubectl apply -f wrk2.yaml
Configurations
You can find the configuration for each test scenario in the public performance benchmark repository and create the configuration for each scenario directly using the ADC tool.
- One route without plugins
- One route with
limit-countplugin - One route with
key-authandlimit-countplugin - One route and one consumer with
key-authplugin - 100 routes without plugins
- 100 routes with
limit-countplugin - 100 routes and 100 consumers with
key-authandlimit-countplugin - 100 routes and 100 consumers with
key-authplugin