Install API7 Enterprise on OpenShift
This guide walks you through how to deploy API7 Enterprise on a OpenShift cluster.
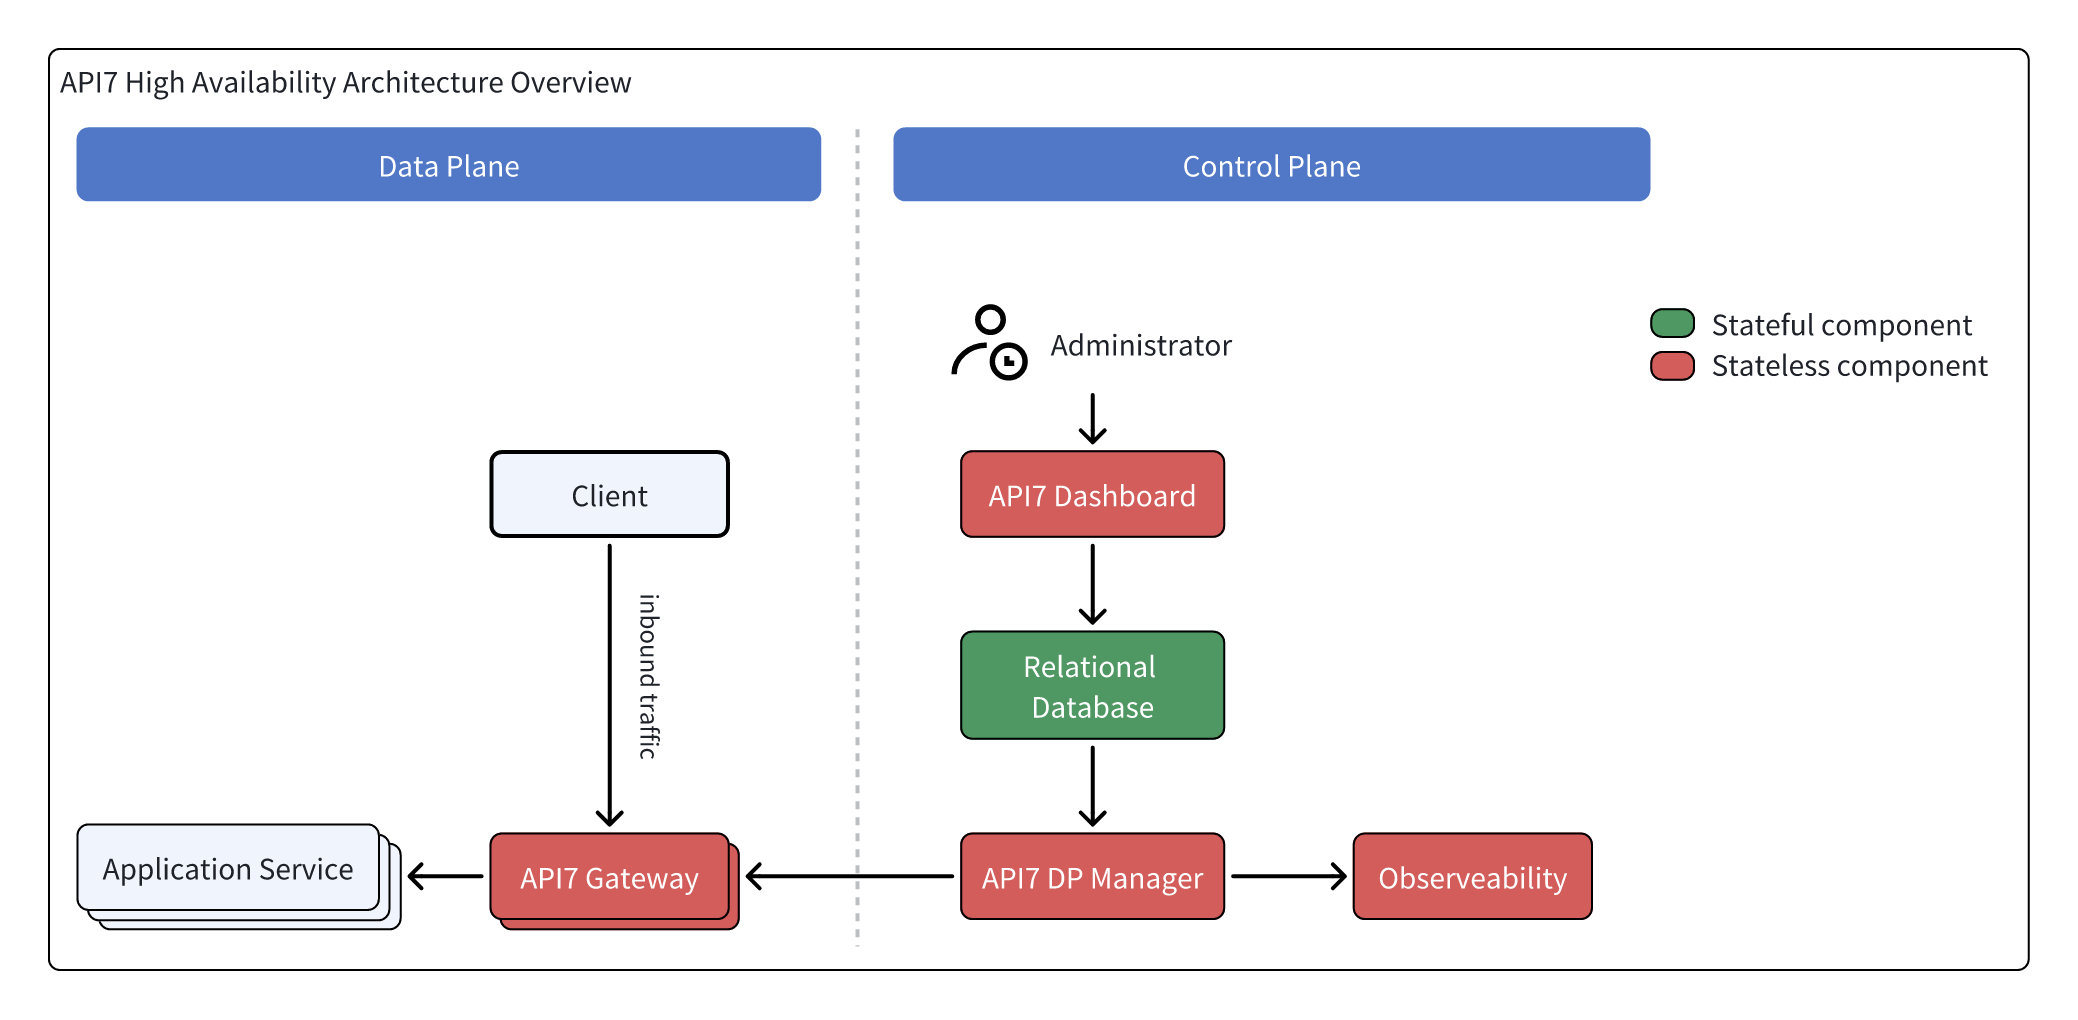
Architecture
Overview
API7 Enterprise includes two sets of components:
- Control Plane: API7 Dashboard, API7 DP Manager, Database (can use RDS instead), Other Components.
- Data Plane: API7 Gateway
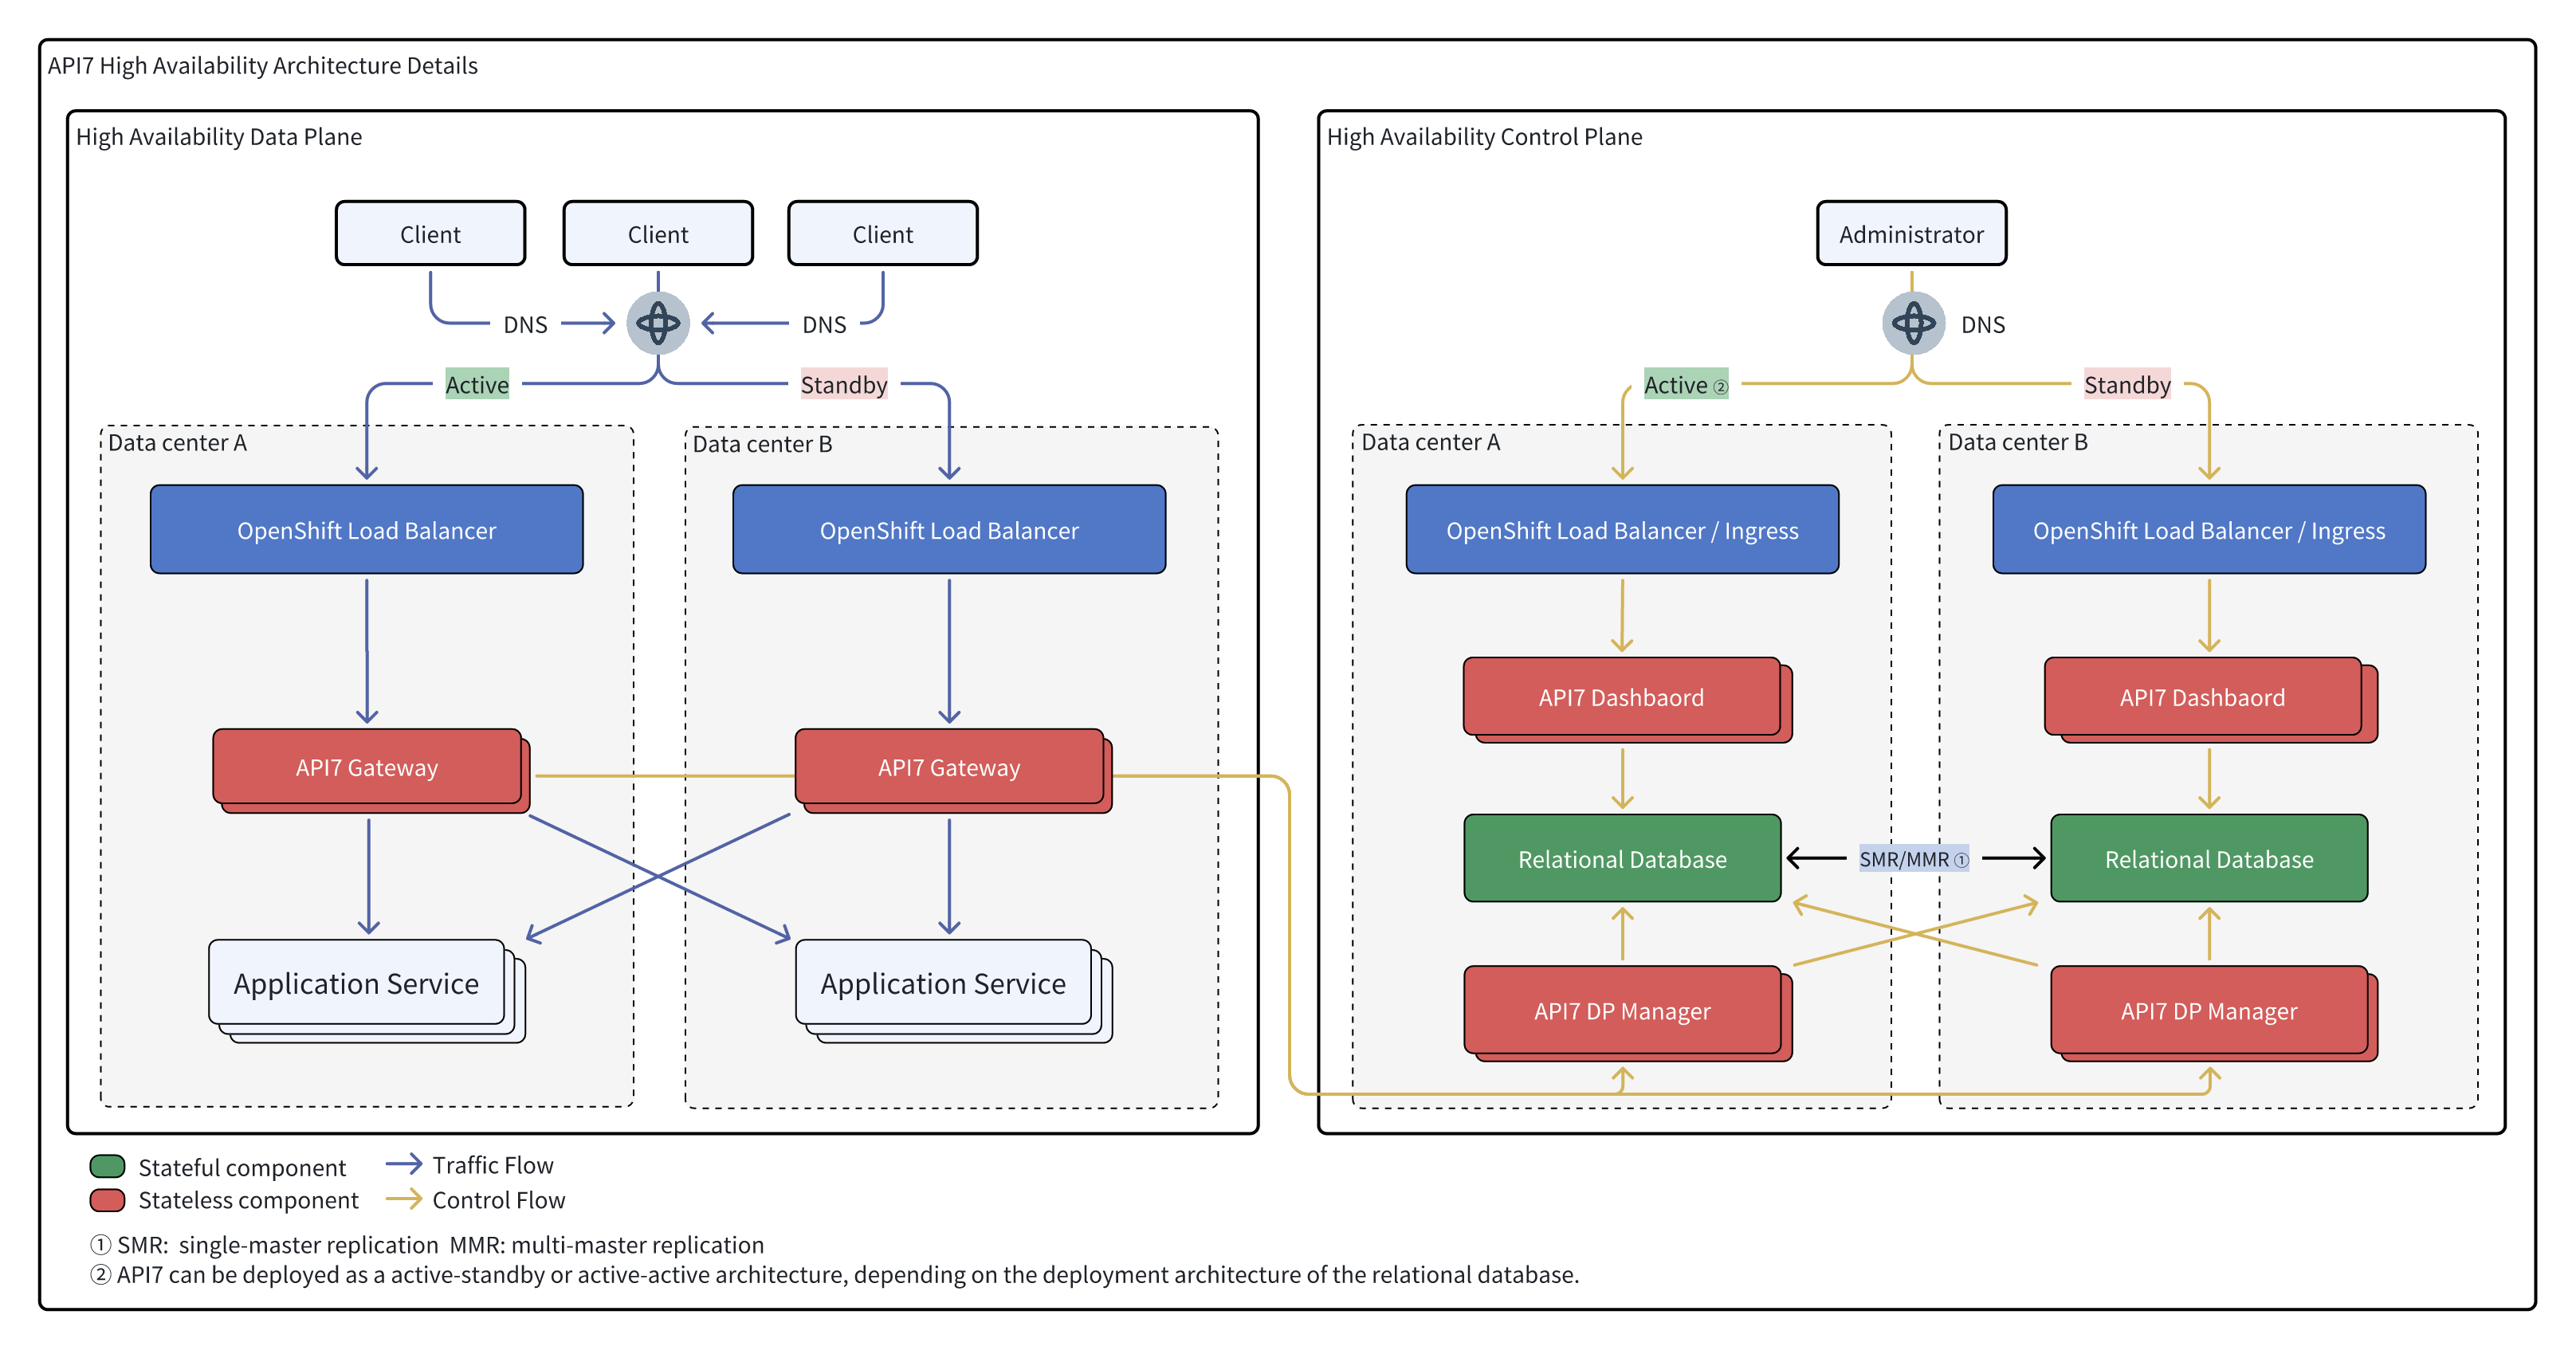
High Availability Deployment Pattern
Prerequisites
Deploy a OpenShift Cluster
Have a running OpenShift Cluster:
Manage Security Context Constraints (SCCs)
Security Context Constraints (SCCs) are a set of APIs on OpenShift used to manage security policy constraints for pods.
The SCCs enabled by default in OpenShift is extremely strict and requires the process in the container to be read-only for the file system. Follow the managing security context constraints doc to use a more flexible SCC nonroot-v2 for API7 Enterprise.
Configure OpenShift CLI
Install OpenShift CLI (oc) or download it from the console:
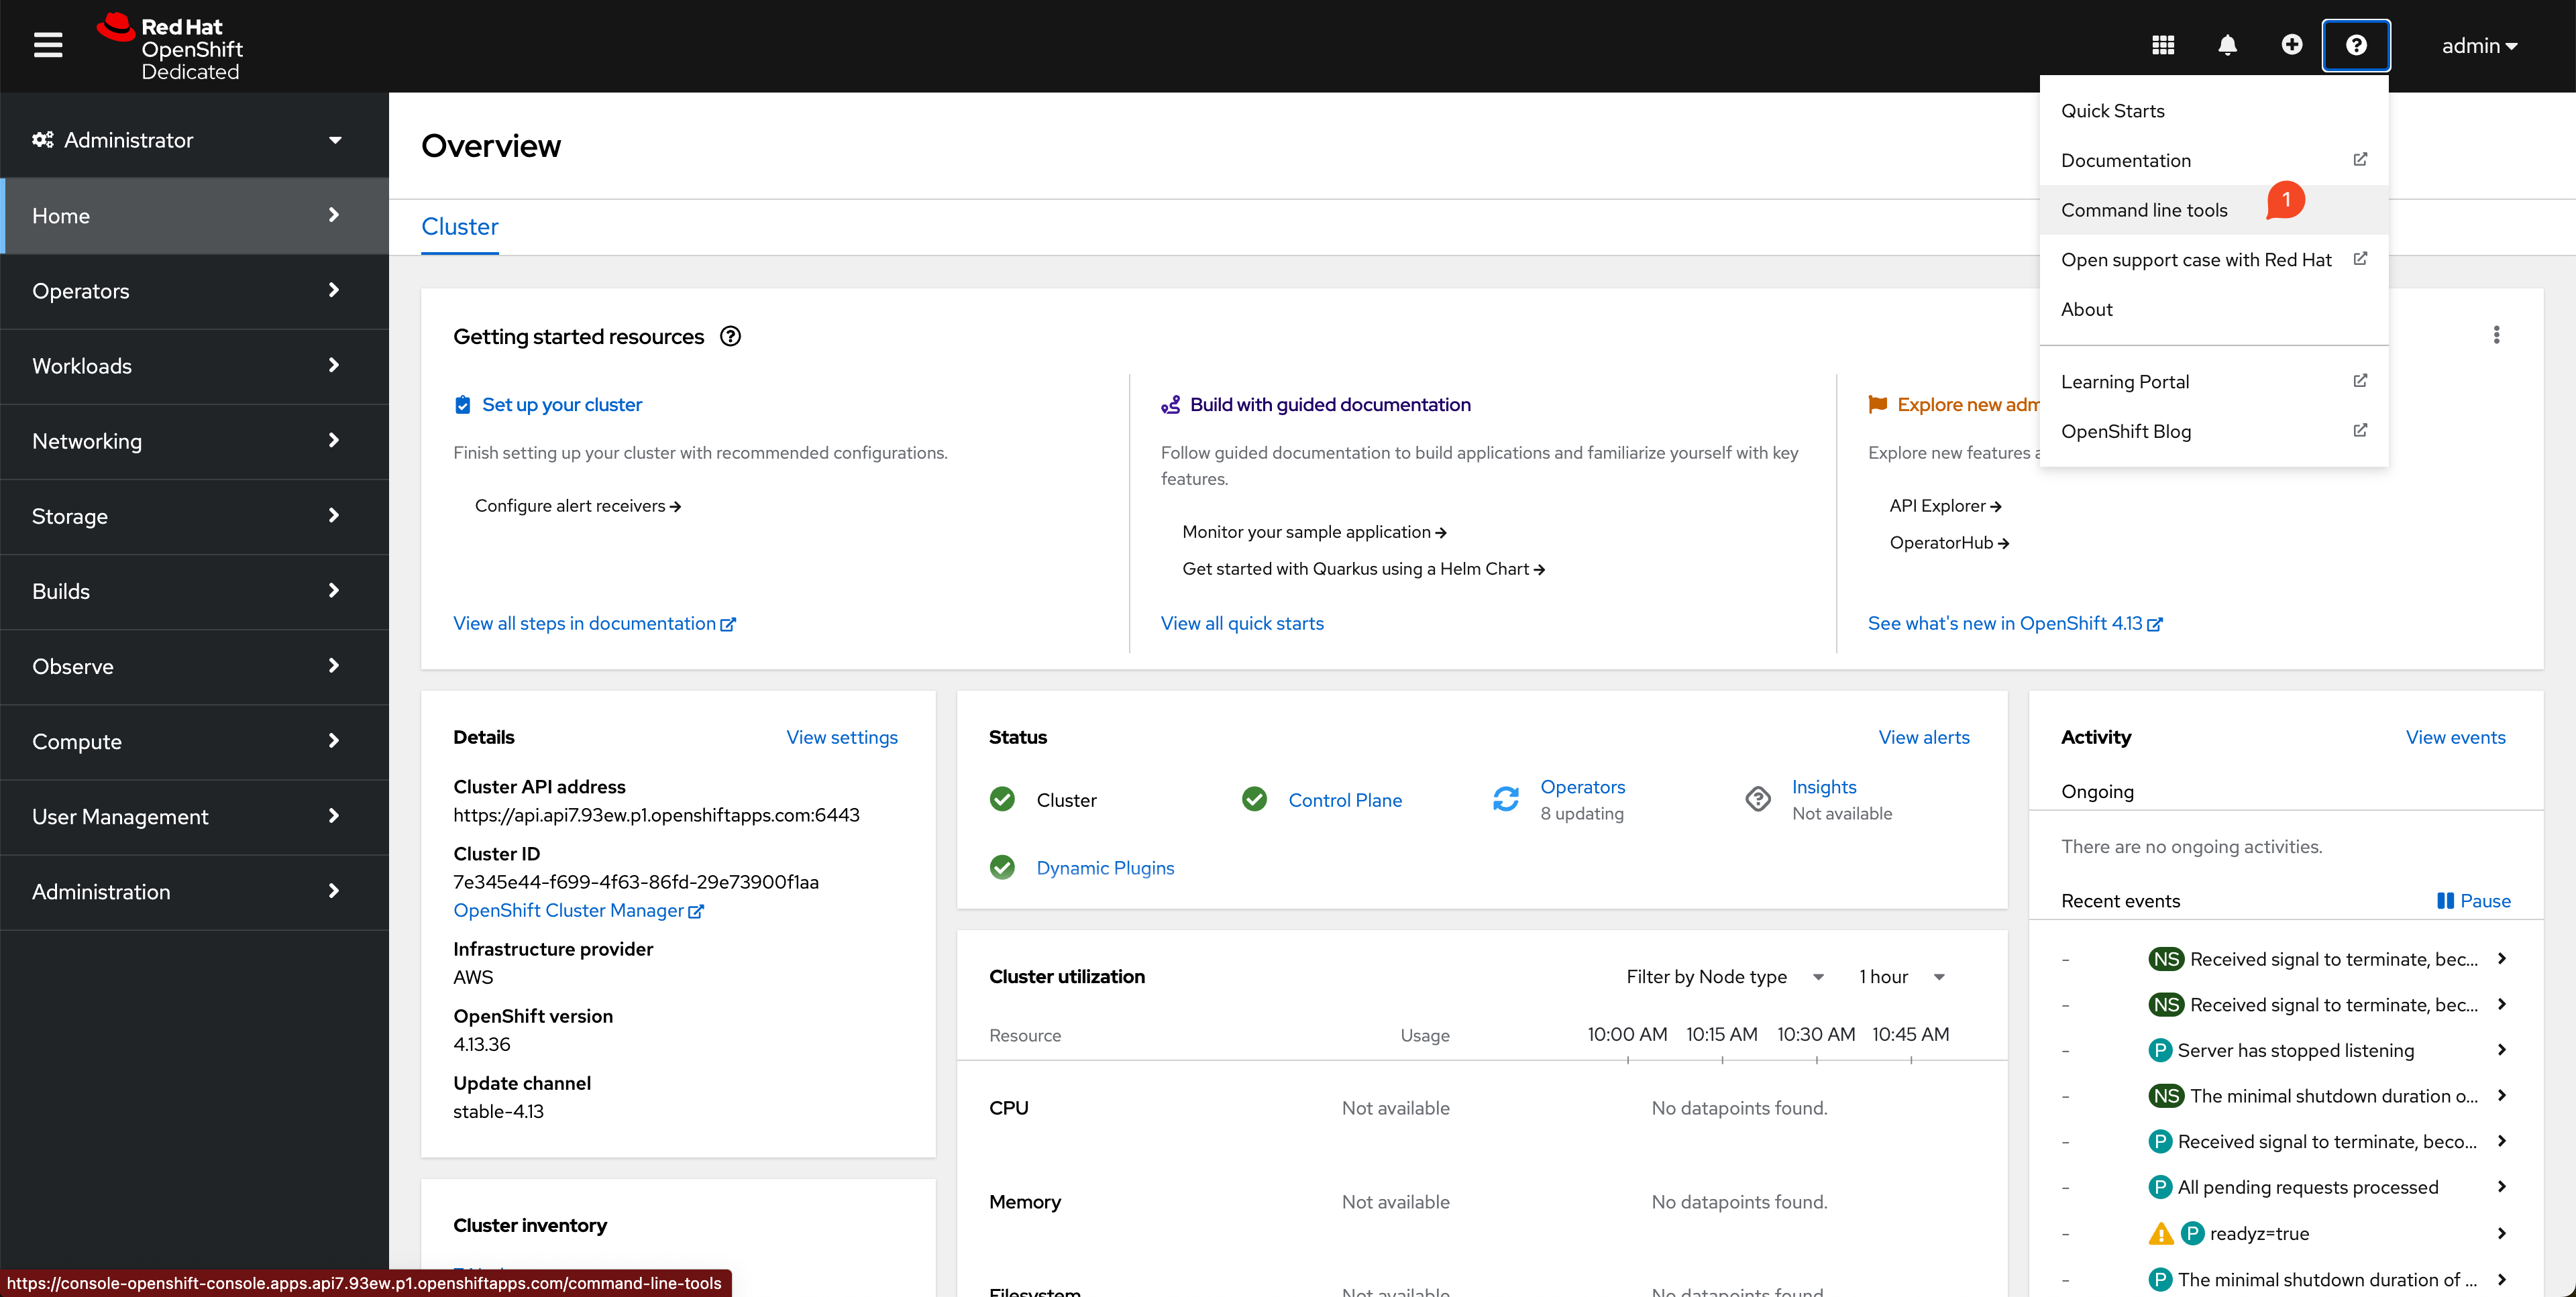
Find the login command on the console:
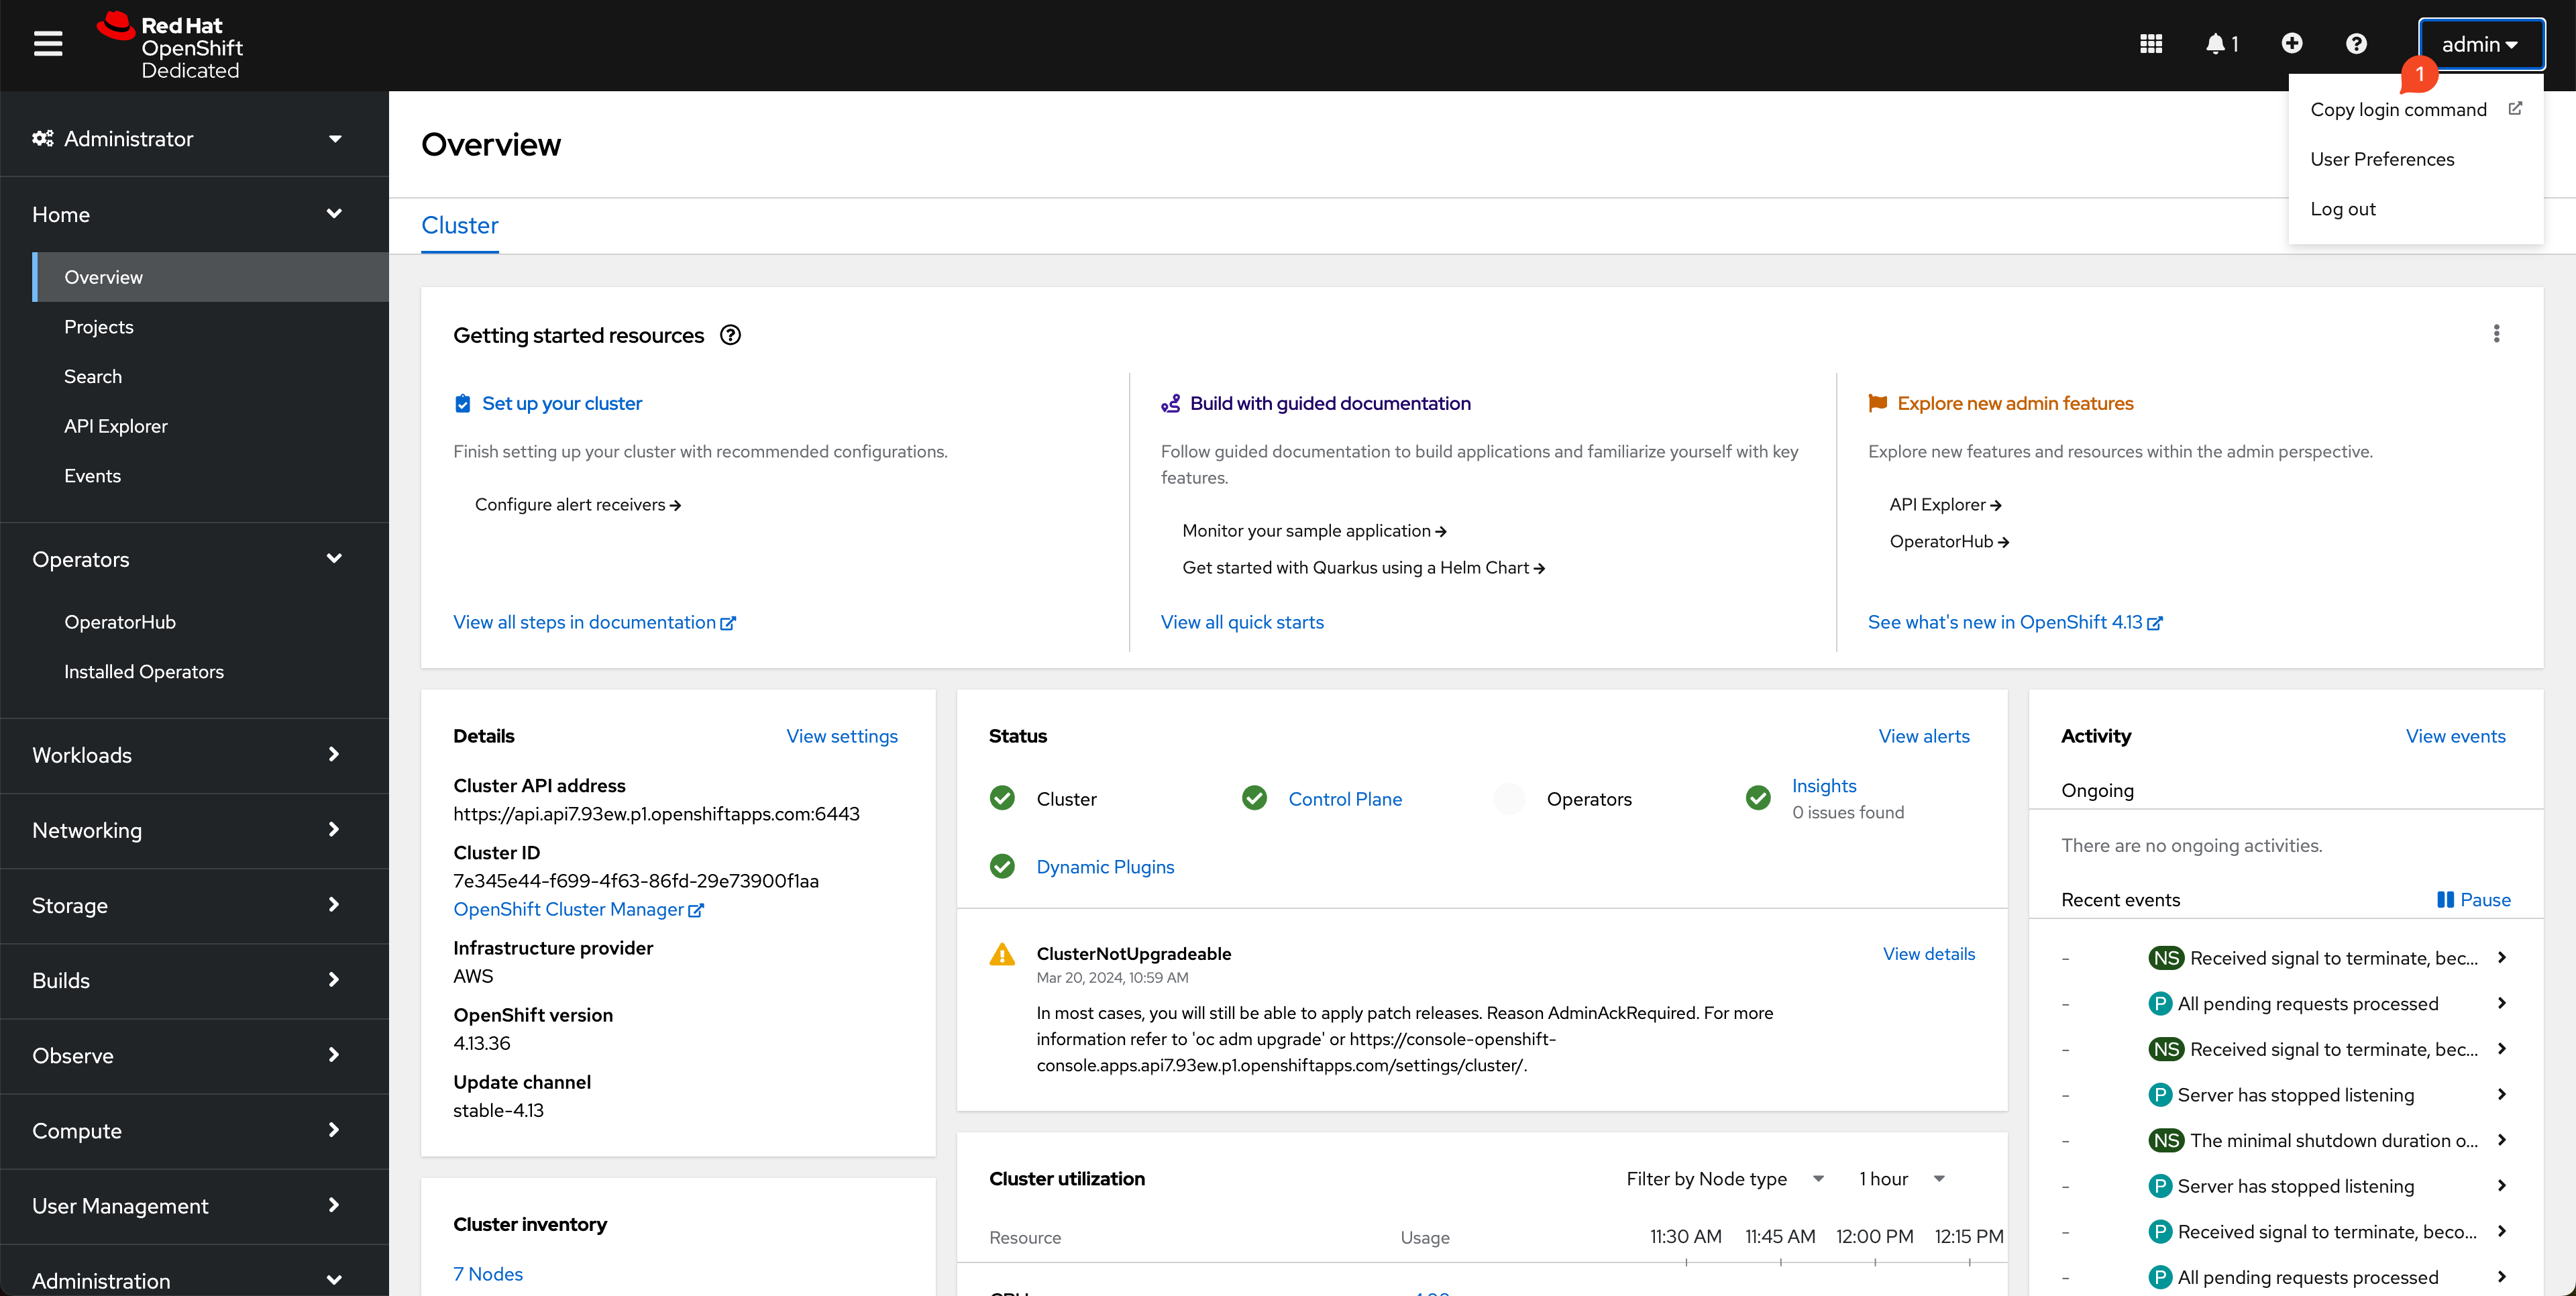
Log in to the OpenShift Cluster with your token and server address:
oc login \
  --token=sha256~pesd0RAyKiKJLkkKJ4Oh2lmy4KSX9b5J6Fc24FYM2EQ \
  --server=https://api.api7.93ew.p1.openshiftapps.com:6443
Make sure that your user account has the cluster-admin role to perform cluster management.
You should see a response similar to the following:
Logged into "https://api.api7.93ew.p1.openshiftapps.com:6443" as "admin" using the token provided.

You have access to 102 projects, the list has been suppressed. You can list all projects with 'oc projects'

Using project "default".
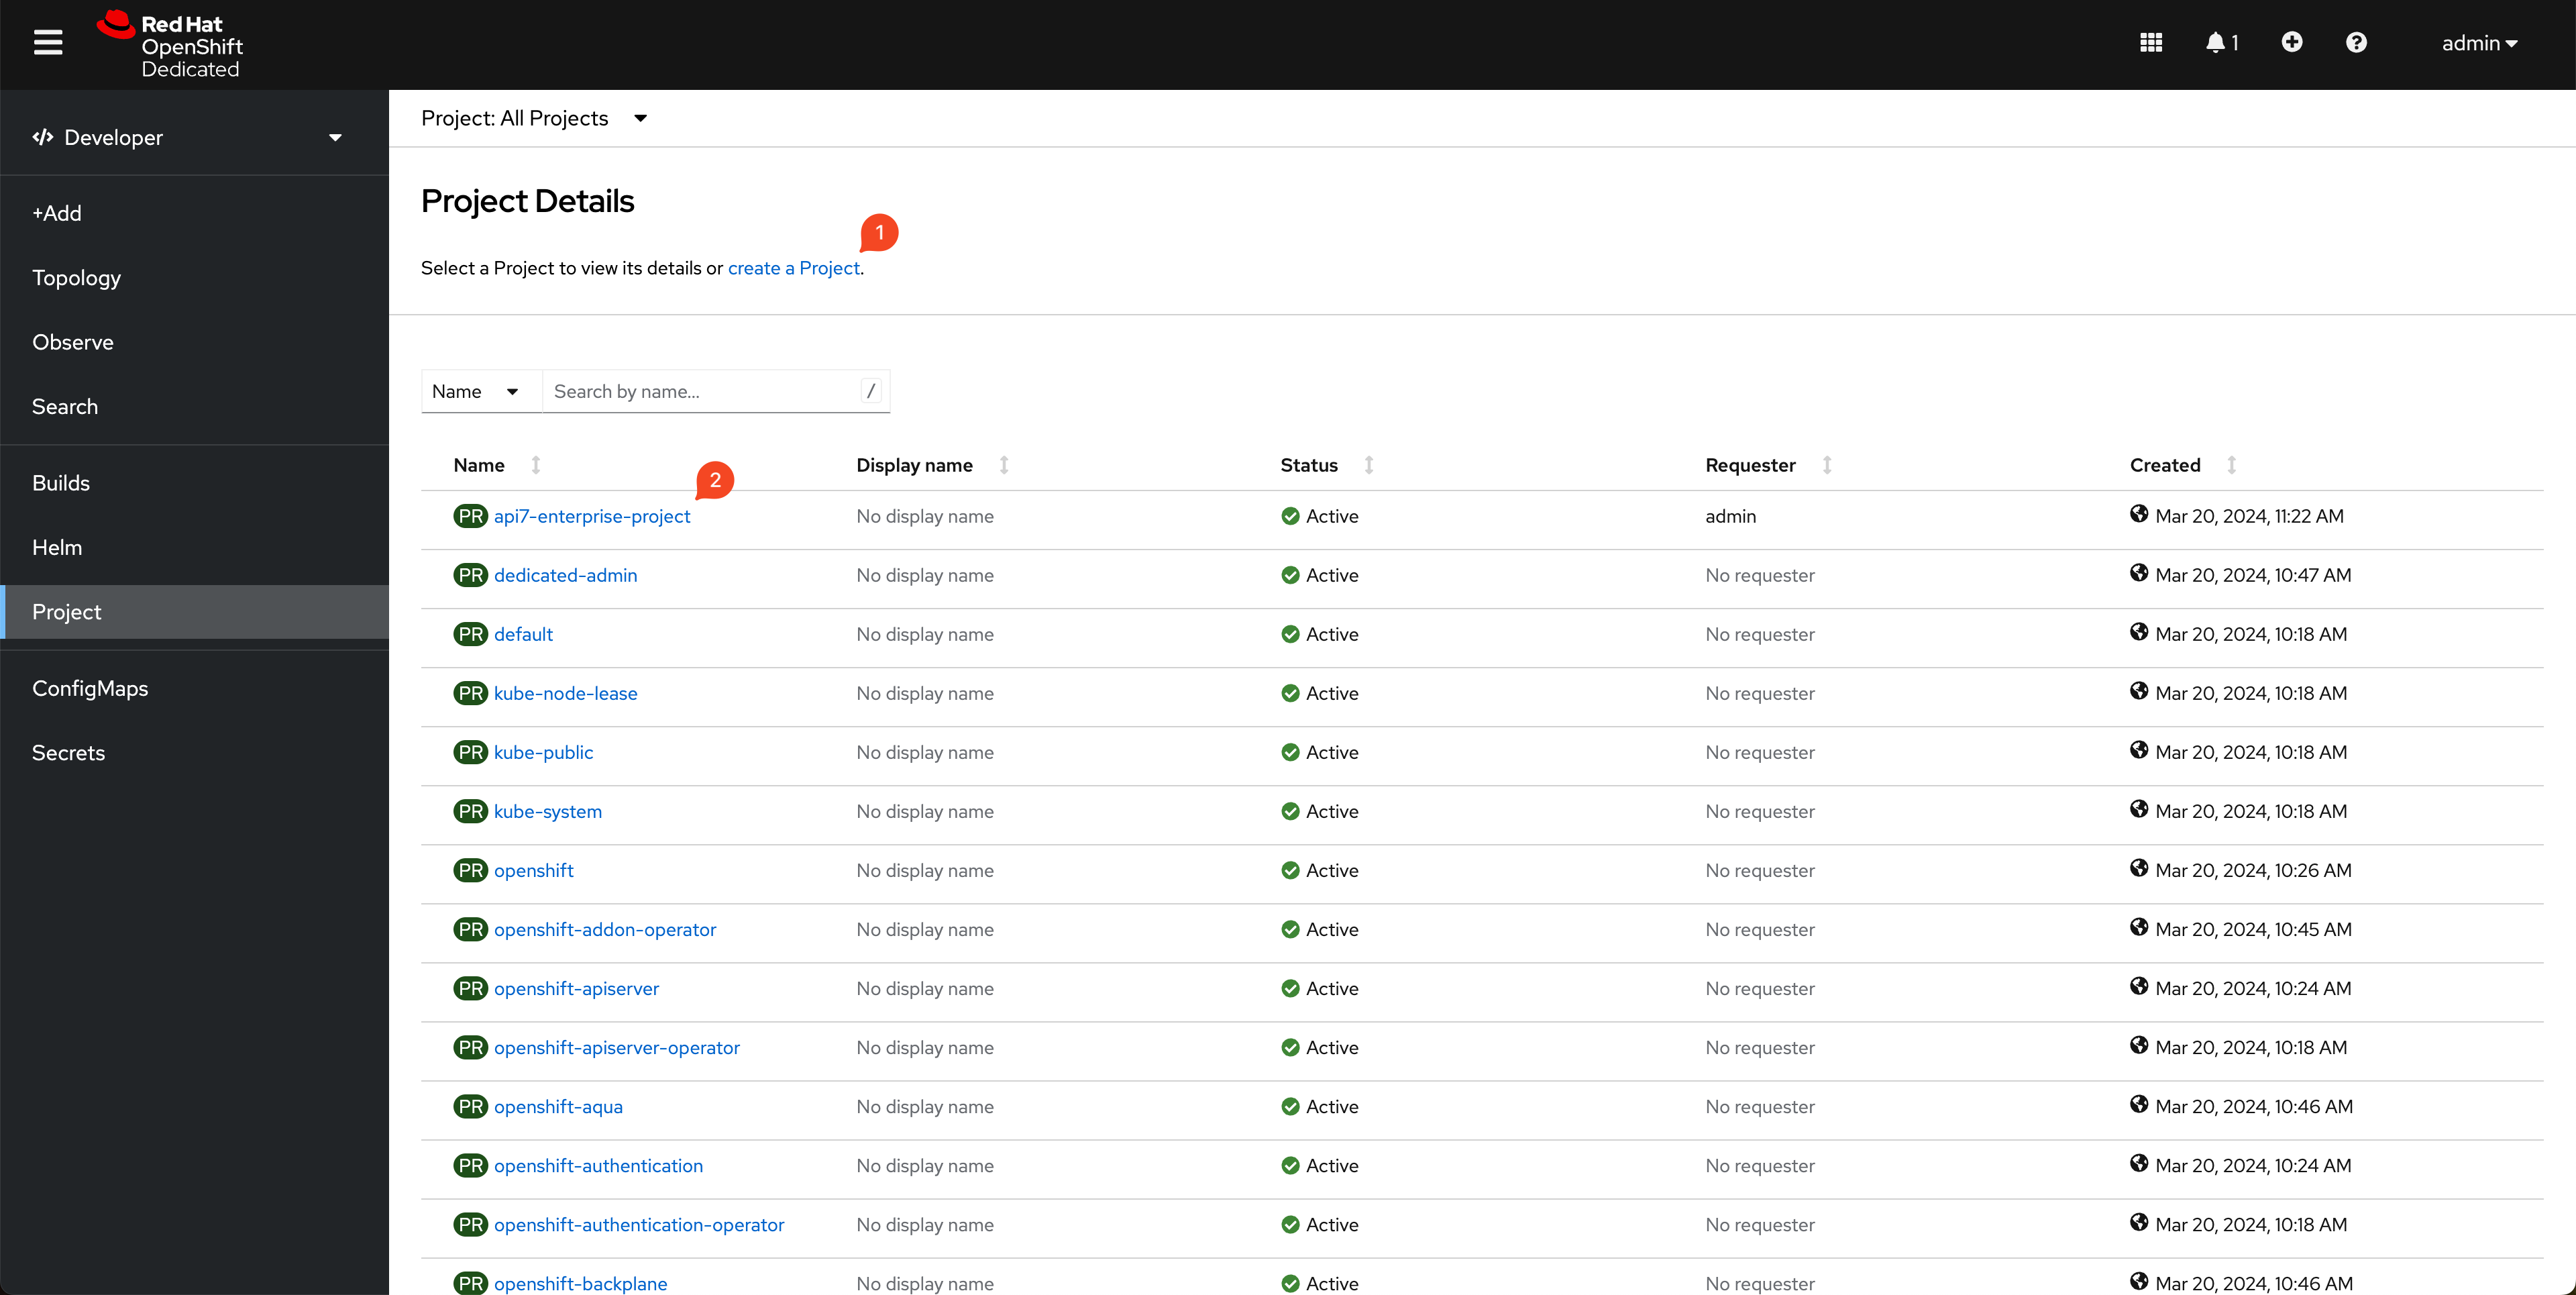
Create a Project
Create a project in the console:
Alternatively, you can create a project using the CLI:
oc new-project api7-enterprise-project
The project name will be used as the Kubernetes namespace.
Switch the default project to api7-enterprise-project:
oc project api7-enterprise-project
Install API7 Enterprise
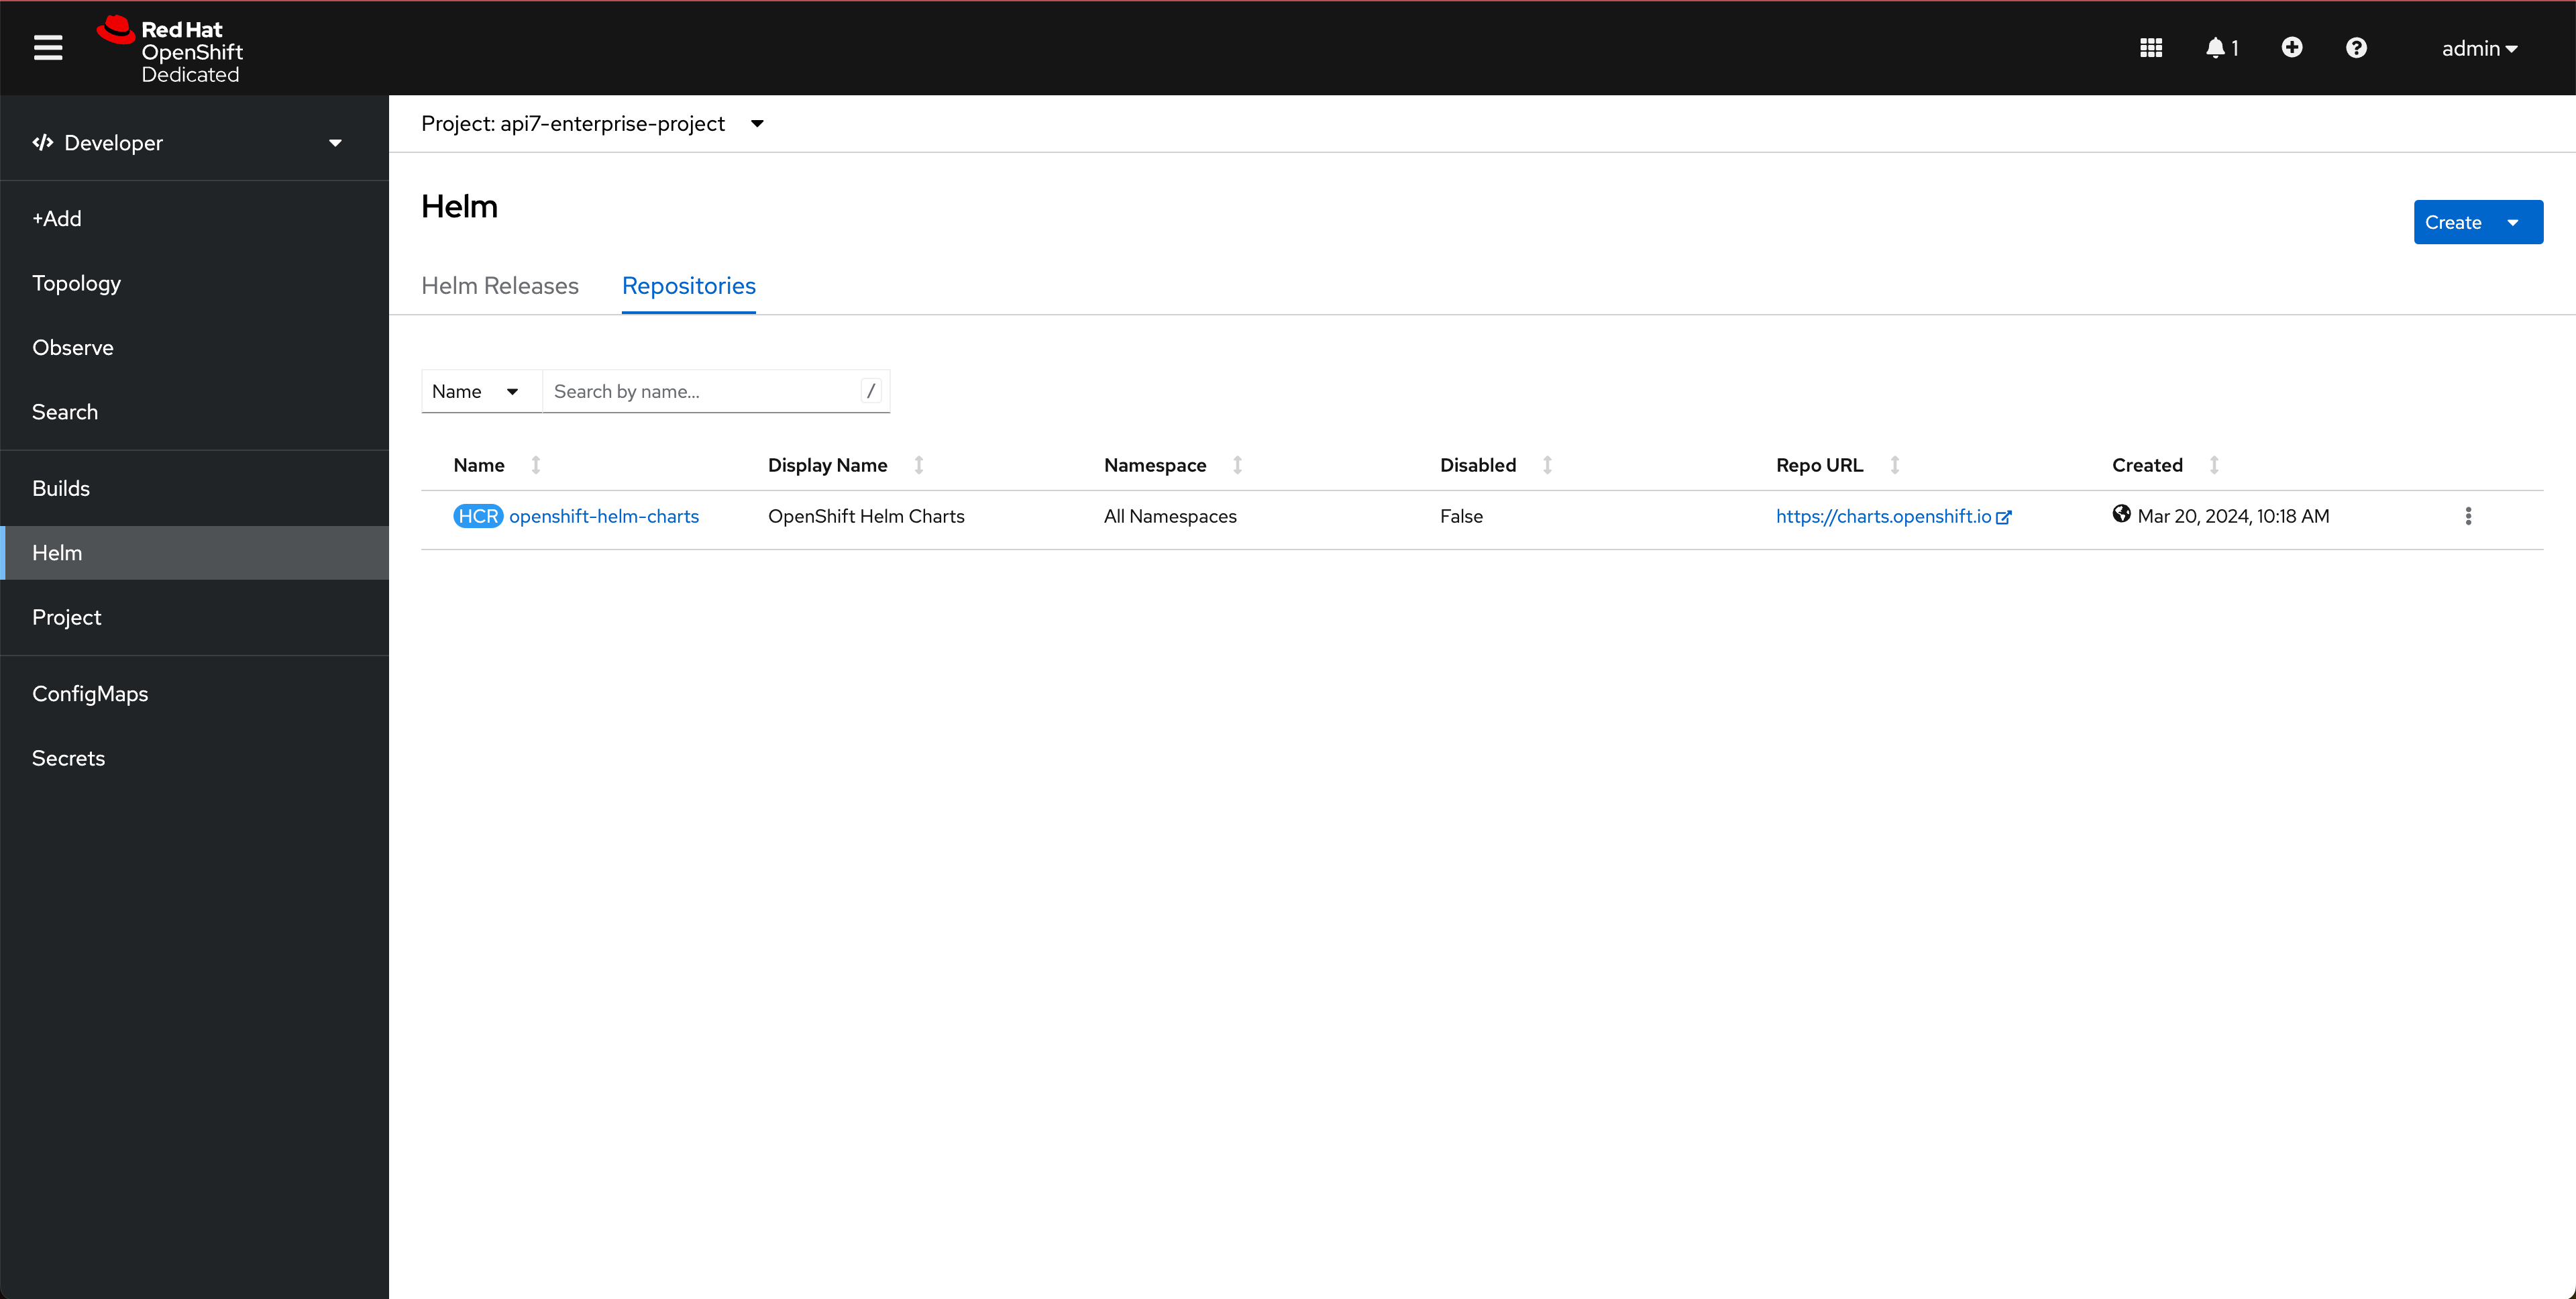
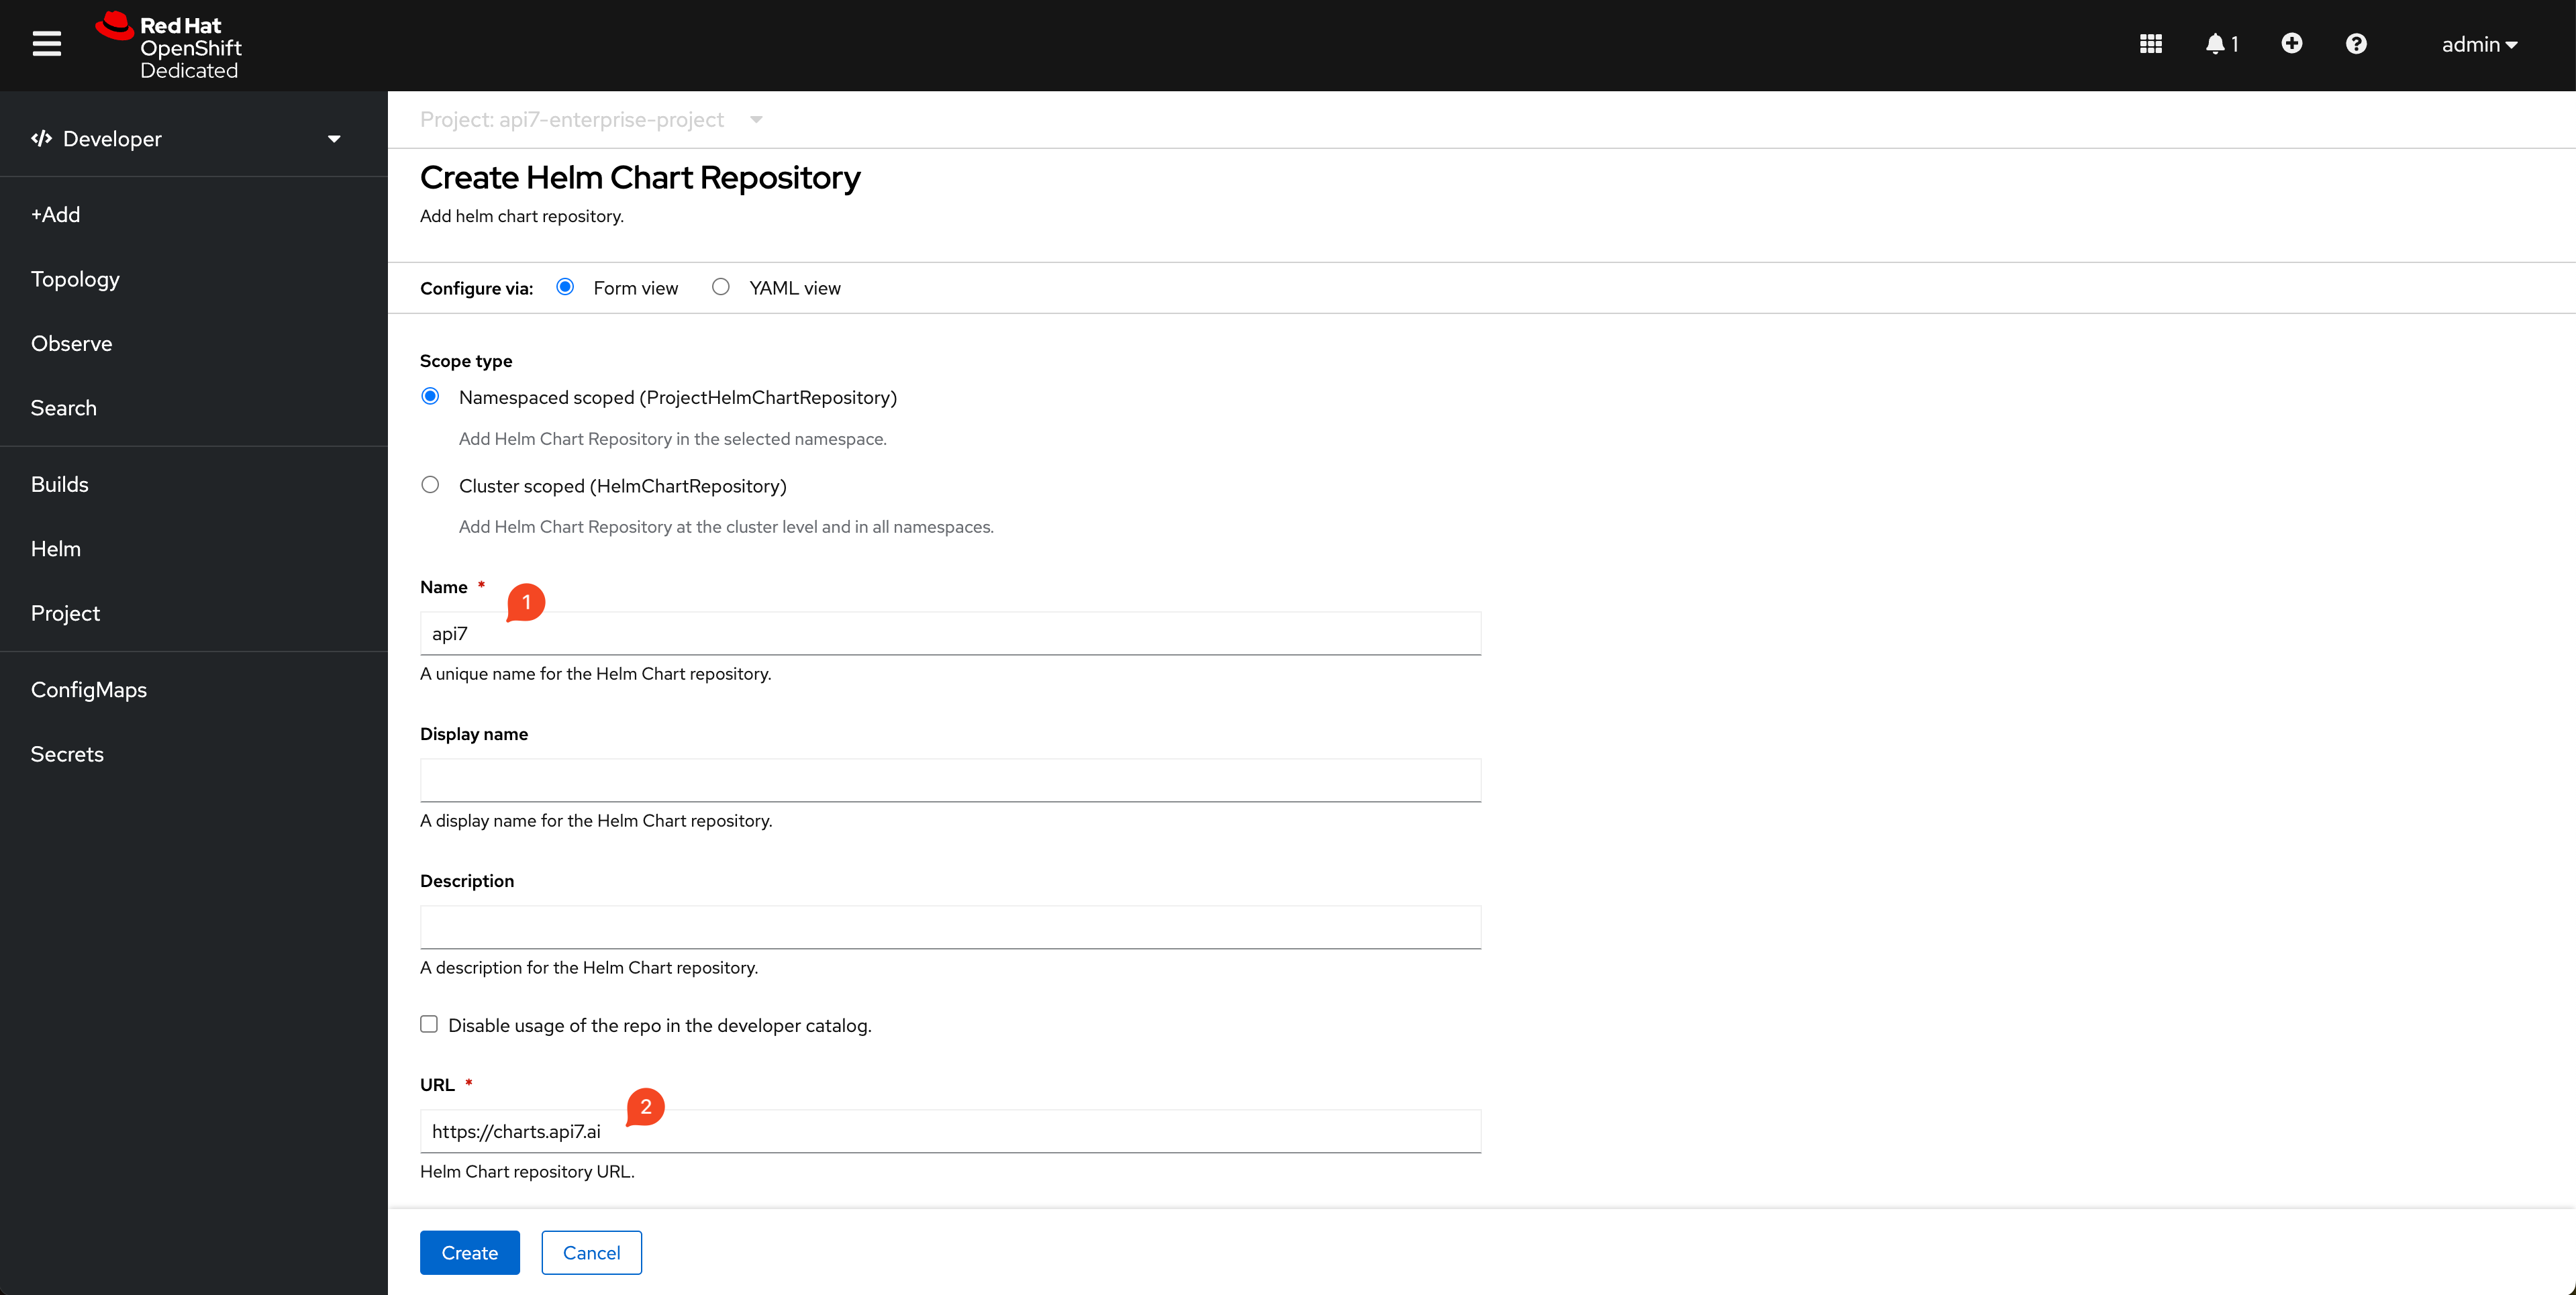
Add API7 Helm Chart Repository
Add the API7 repository https://charts.api7.ai:
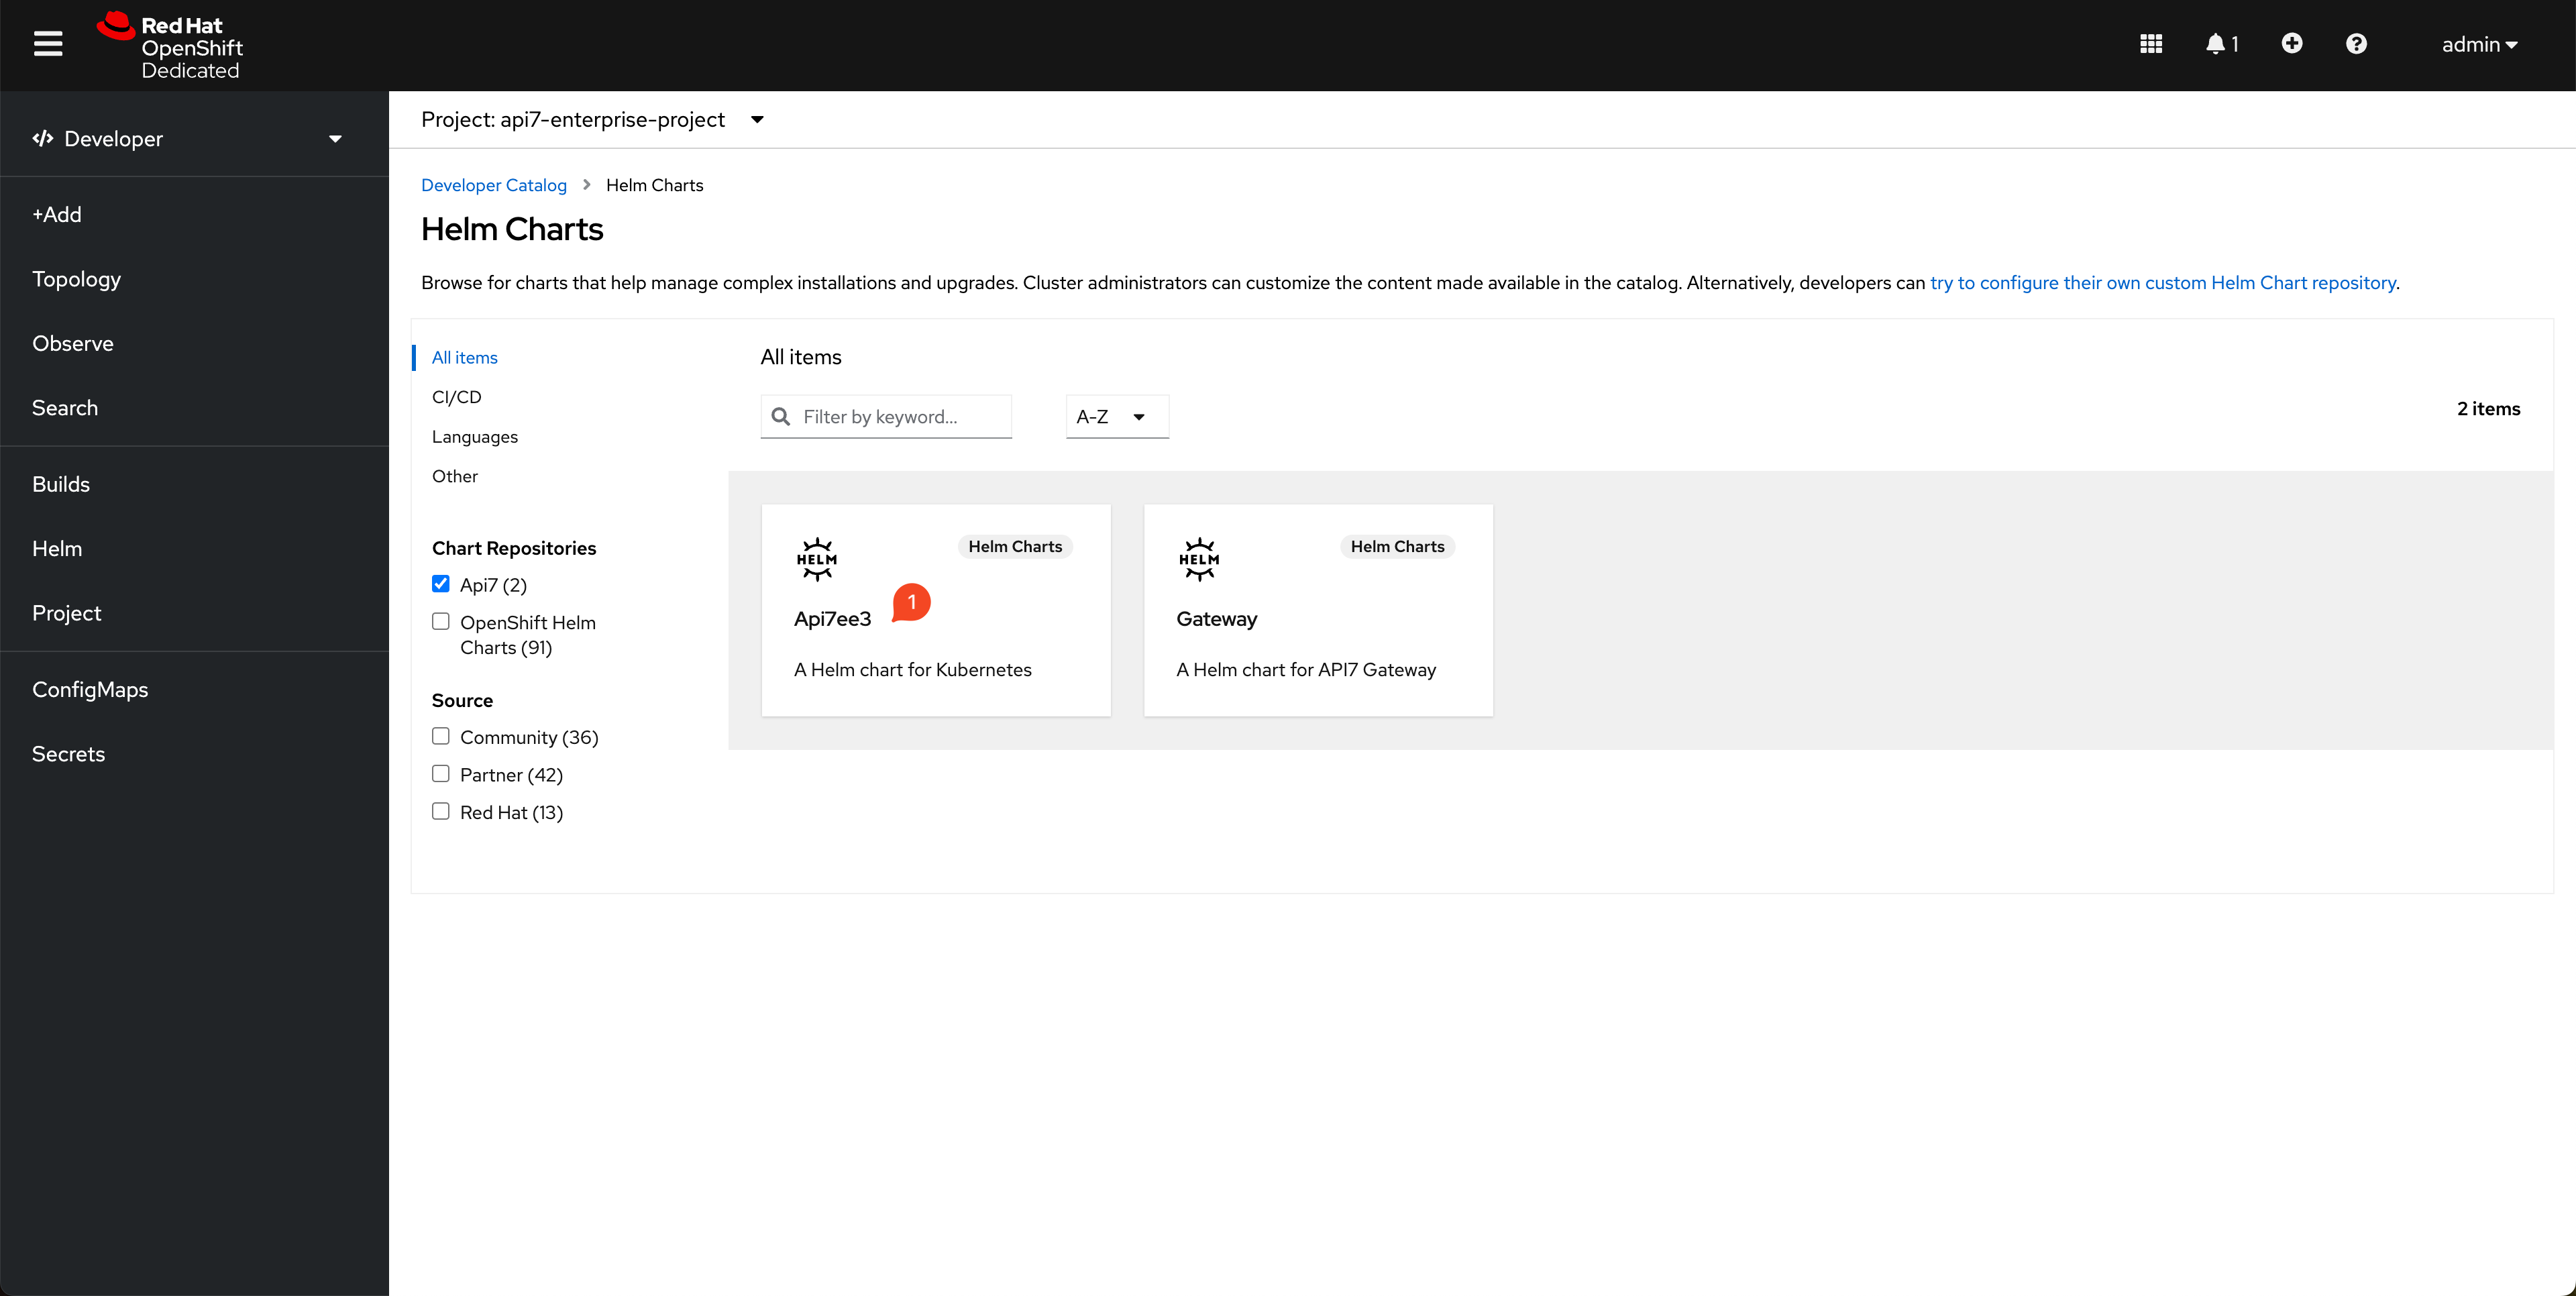
Install Control Plane
Select Api7ee3 Helm chart and create:
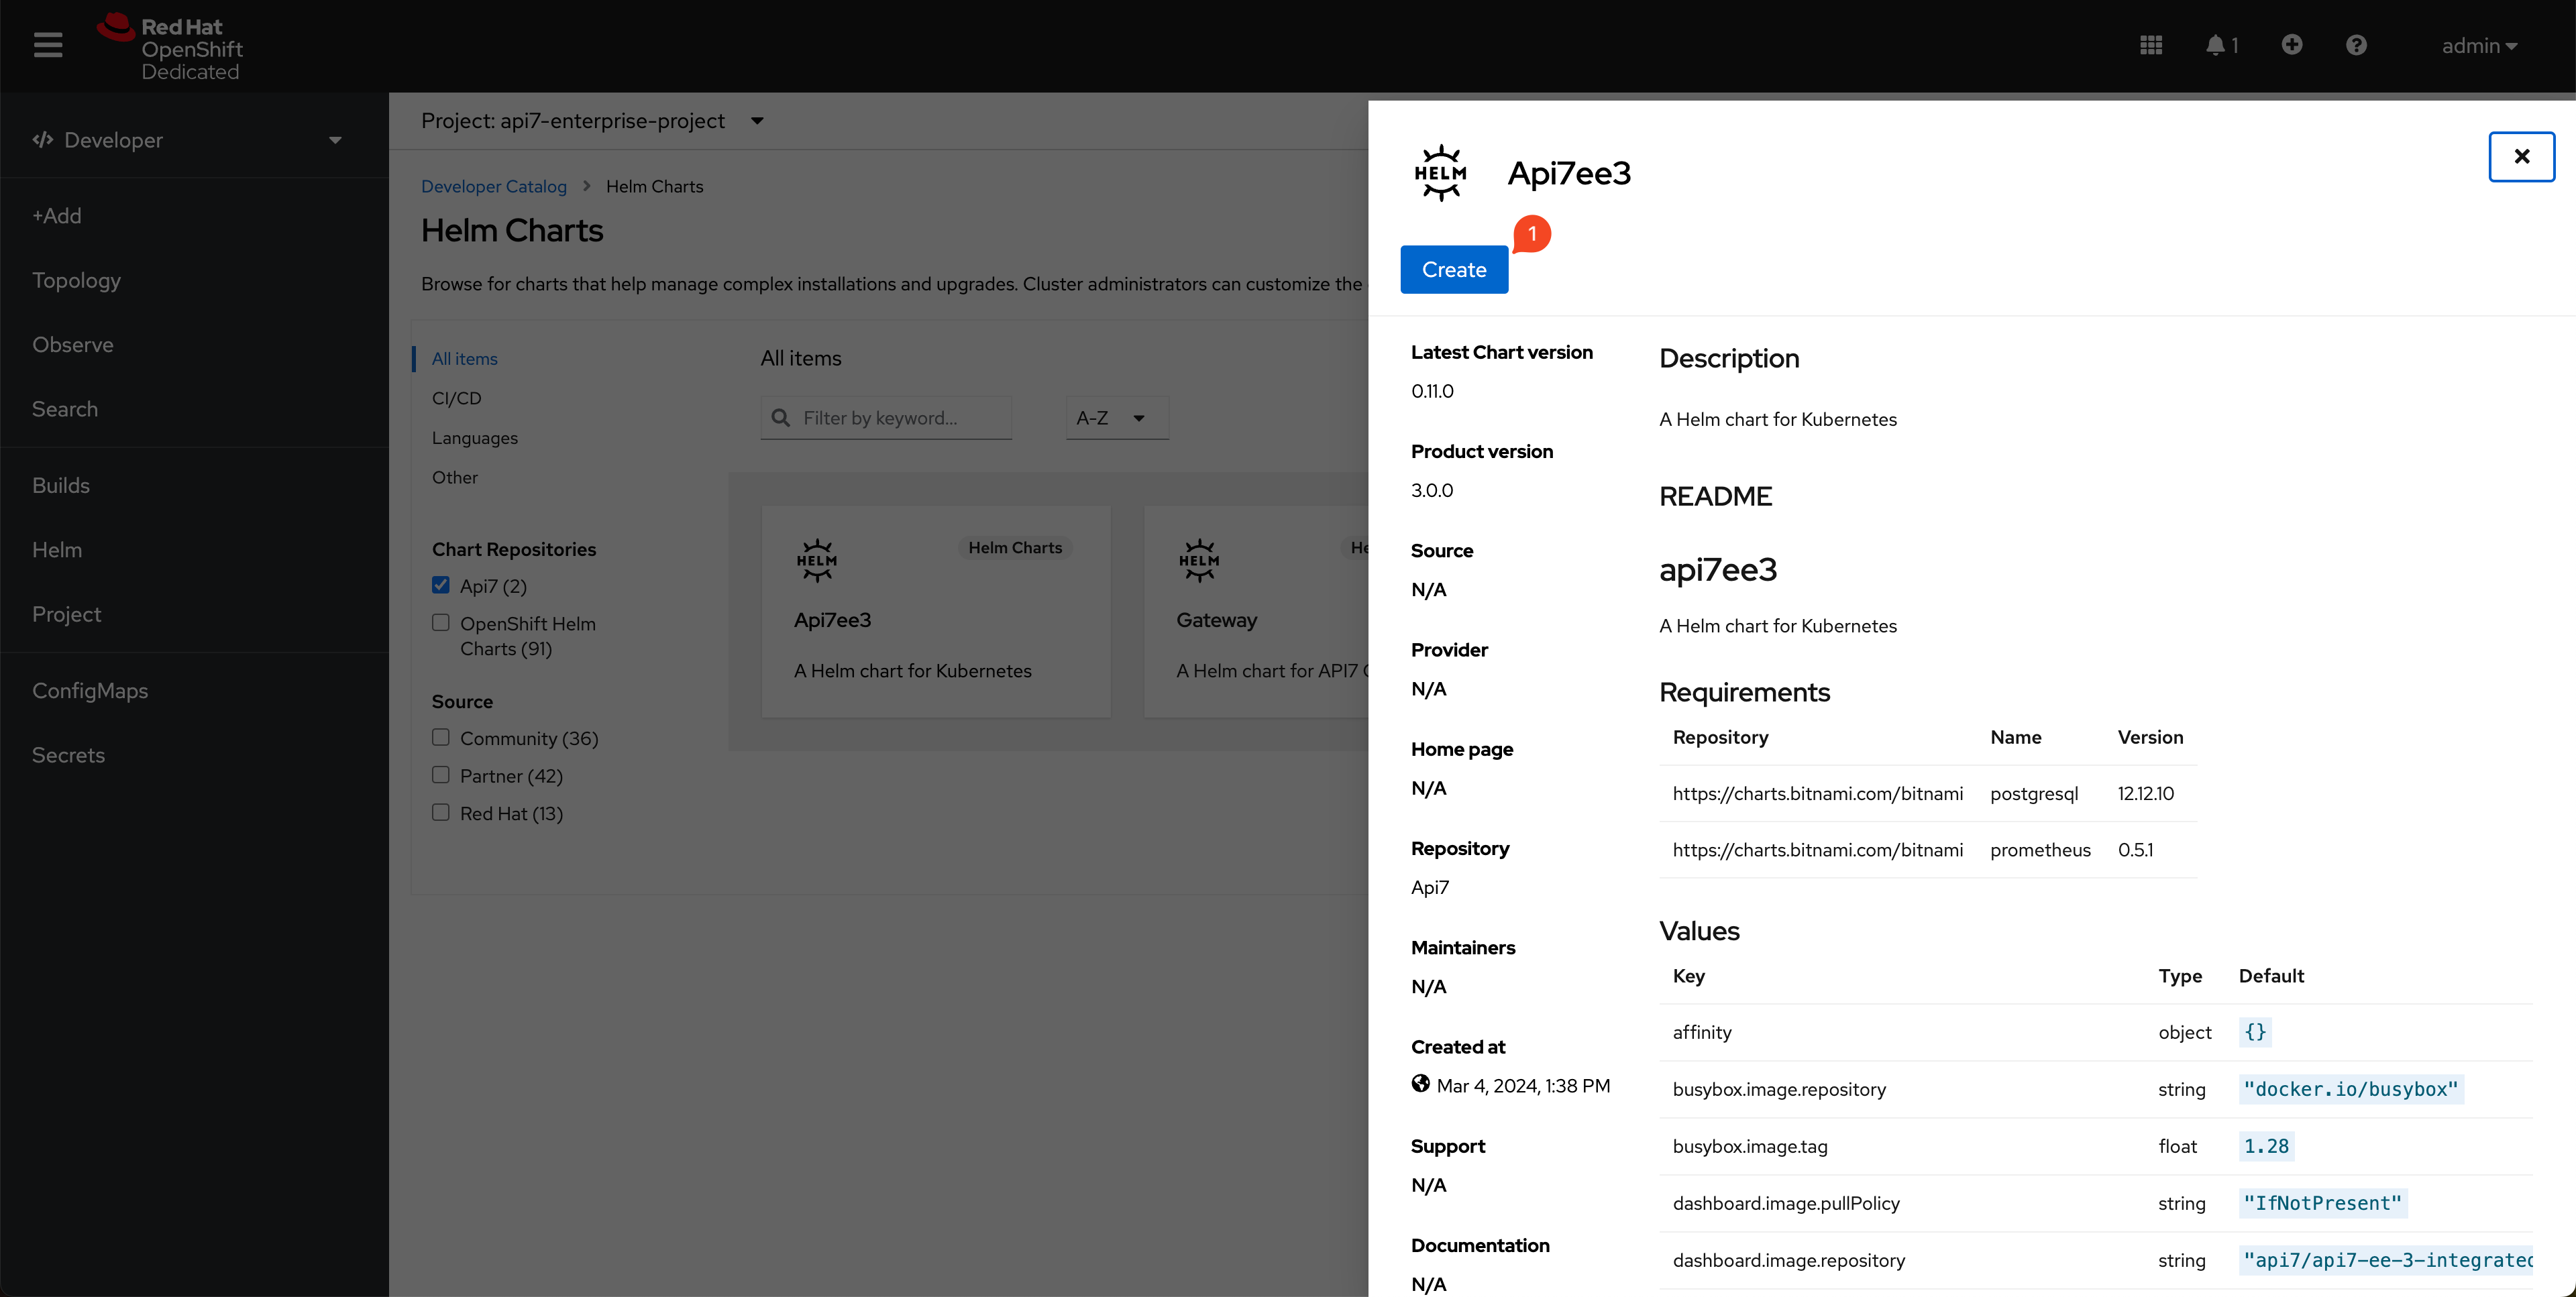
Select the chart version v0.12.2:
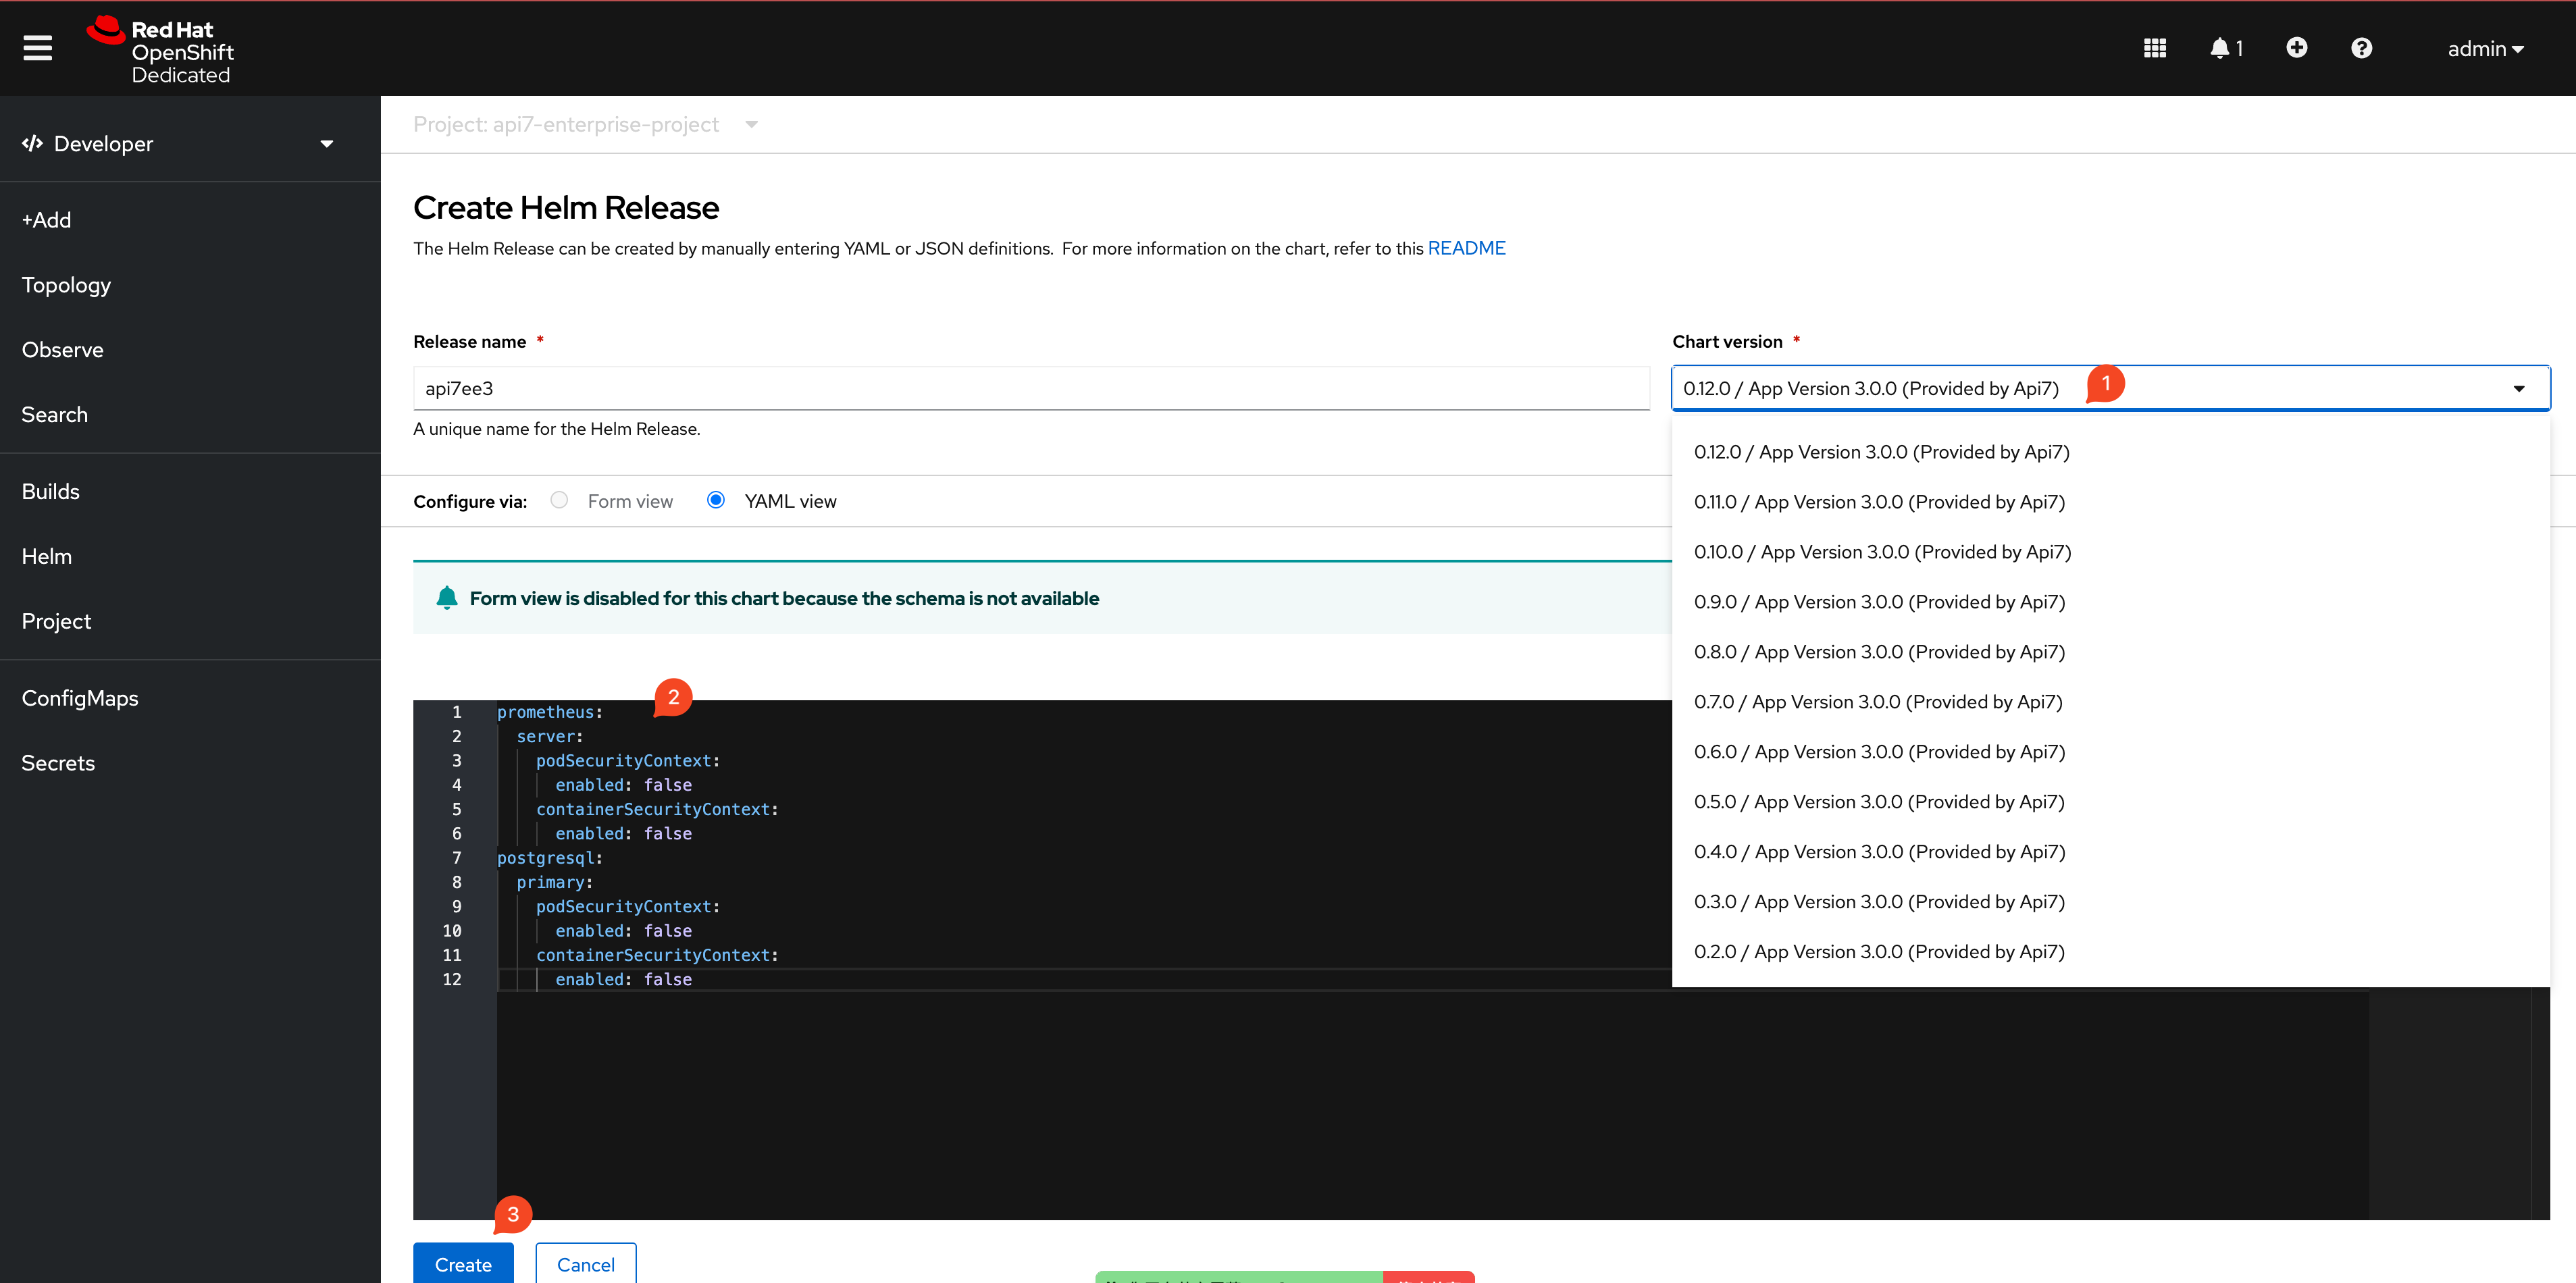
Paste the following snippet to replace the default values:
# adjust the values if needed for additional customizations
postgresql:
  primary:
    podSecurityContext:
      fsGroup: 1001020000
    containerSecurityContext:
      runAsUser: 1001020000
prometheus:
  server:
    podSecurityContext:
      fsGroup: 1001020000
    containerSecurityContext:
      runAsUser: 1001020000
Finish by clicking Create. You should see the components installed:
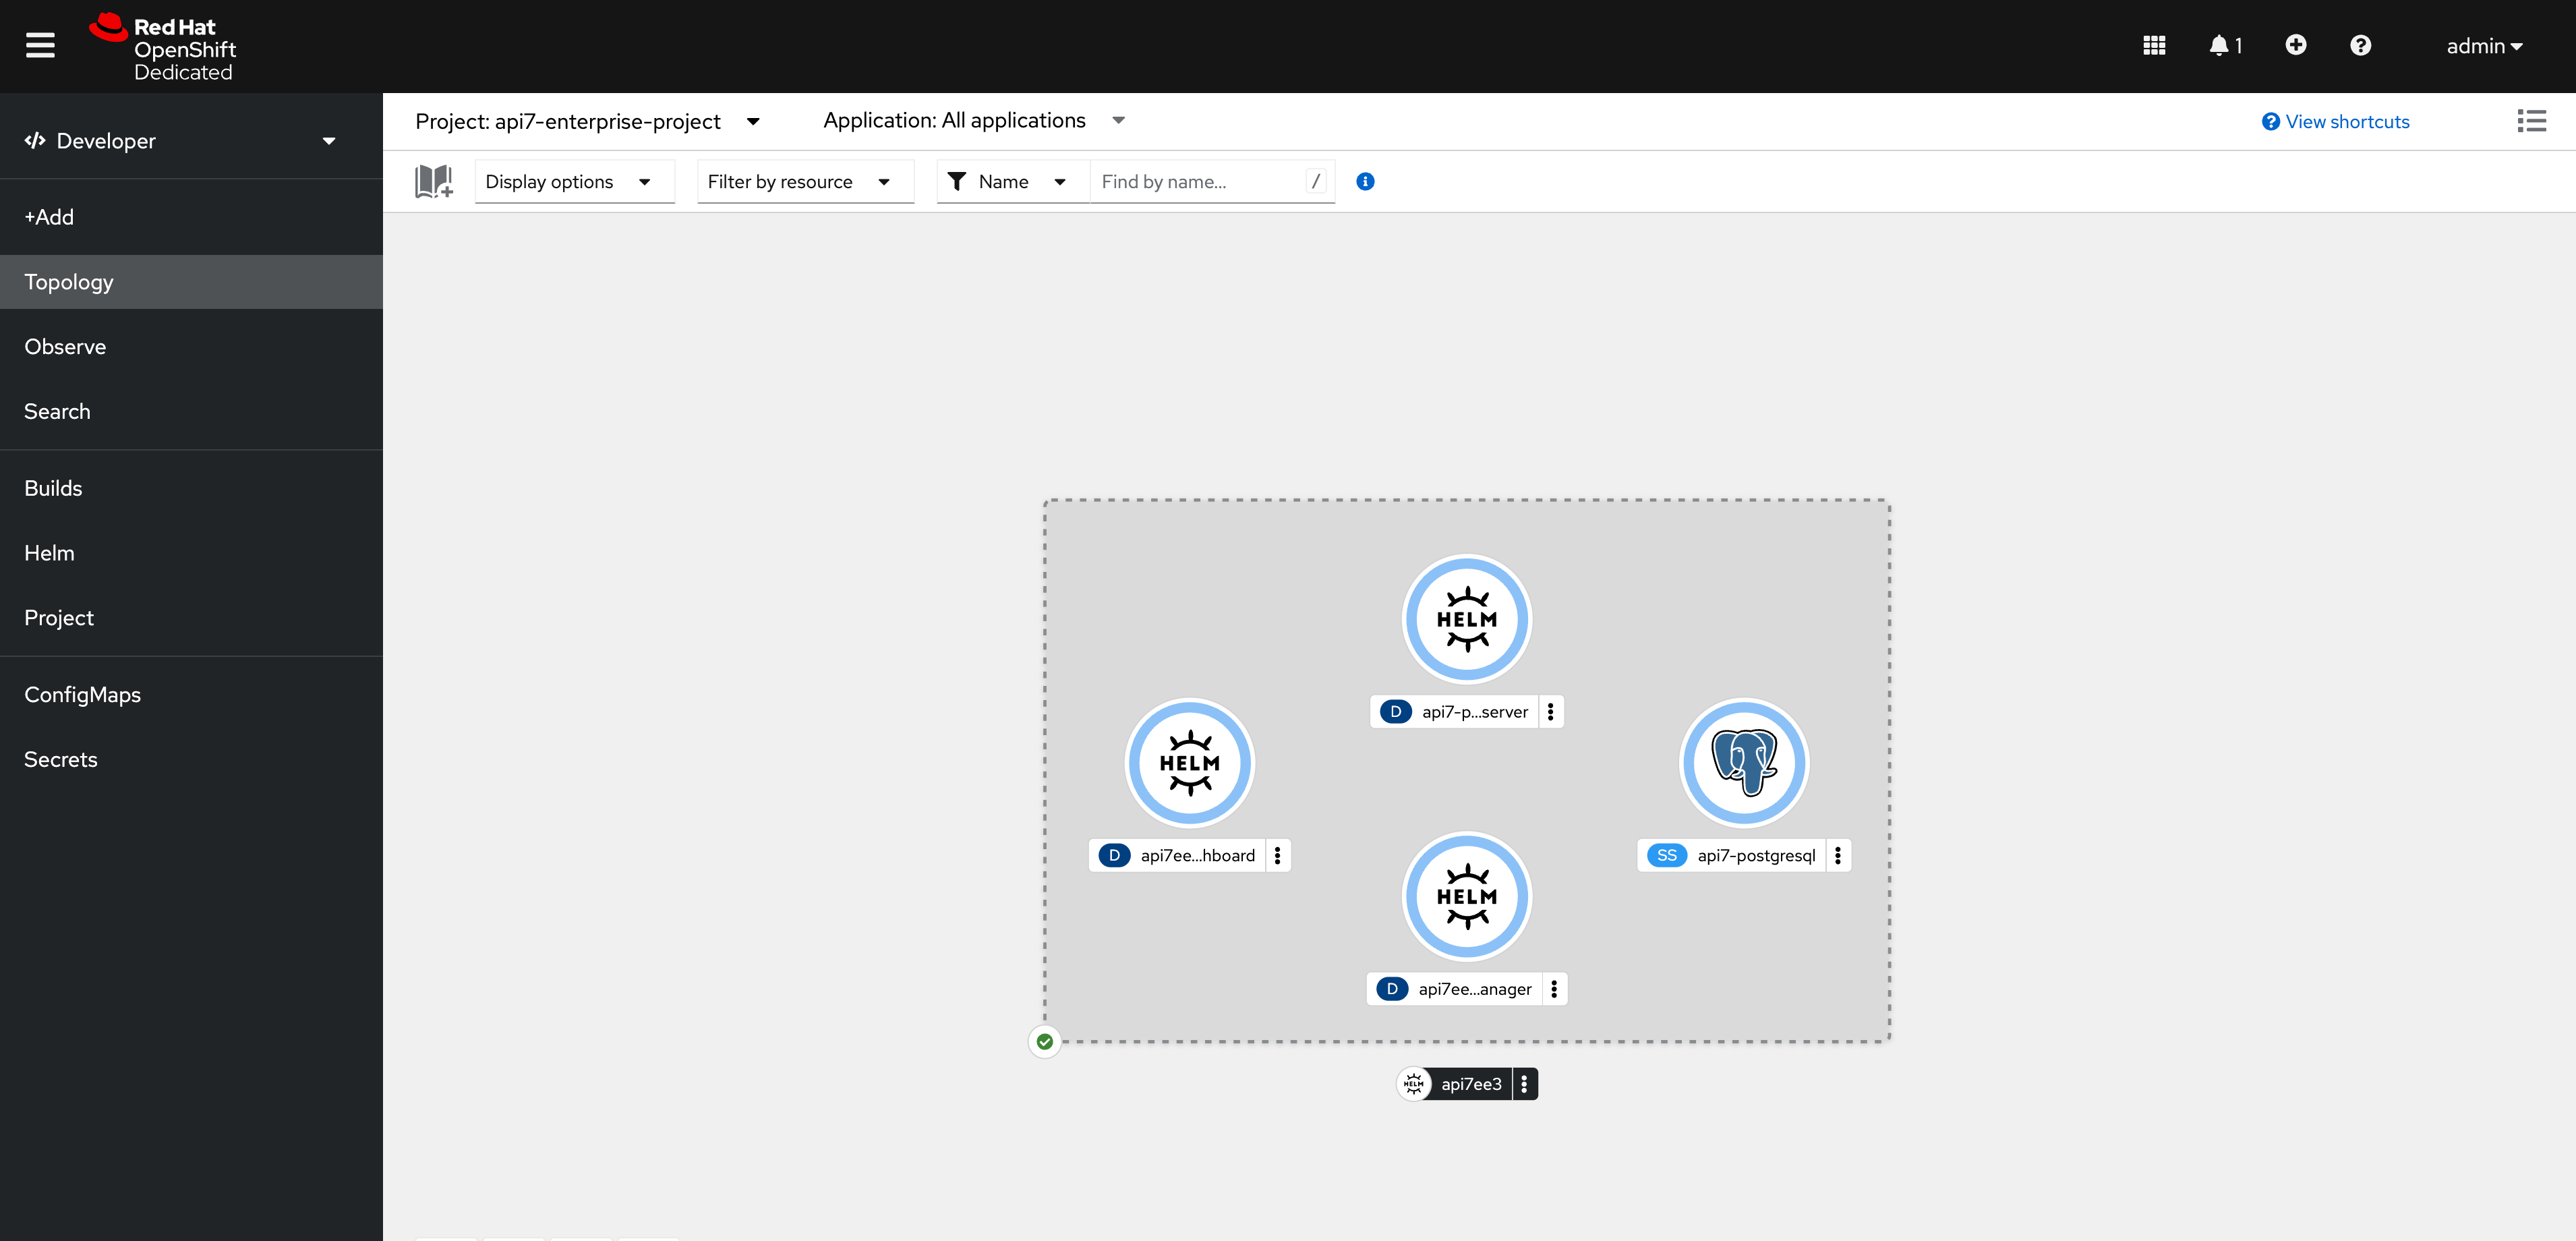
See all the created services:
kubectl get svc -owide -l app.kubernetes.io/name=api7ee3

NAME                 TYPE        CLUSTER-IP      EXTERNAL-IP   PORT(S)             AGE   SELECTOR
api7ee3-dashboard    ClusterIP   172.30.249.55   <none>        7080/TCP            28m  app.kubernetes.io/component=dashboard,app.kubernetes.io/instance=api7ee3,app.kubernetes.io/name=api7ee3

api7ee3-dp-manager   ClusterIP   172.30.43.83    <none>        7900/TCP,7943/TCP   28m   app.kubernetes.io/component=dp-manager,app.kubernetes.io/instance=api7ee3,app.kubernetes.io/name=api7ee3
Activate License in the Dashboard
Port forward the Dashboard service to localhost:7080:
kubectl port-forward svc/api7ee3-dashboard 7080:7080
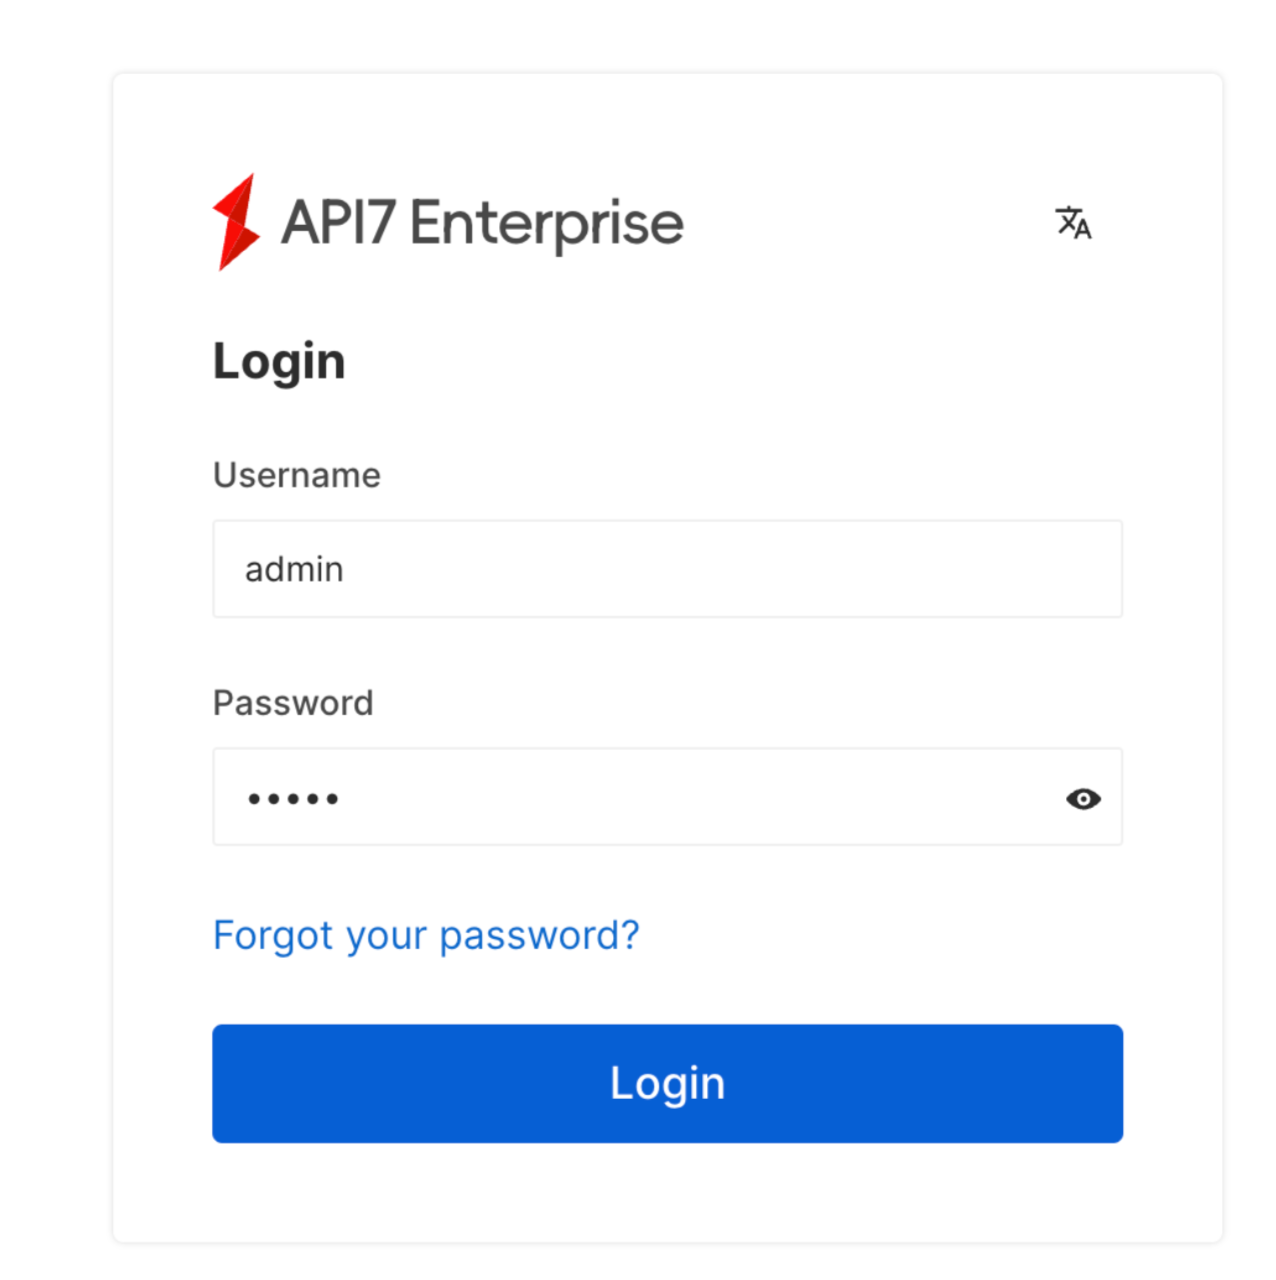
If successful, you should be able to visit the dashboard at http://localhost:7080.
Log in with admin as both the username and the password:
Then upload your license. If you do not have a license, you can request a 30-day trial license.
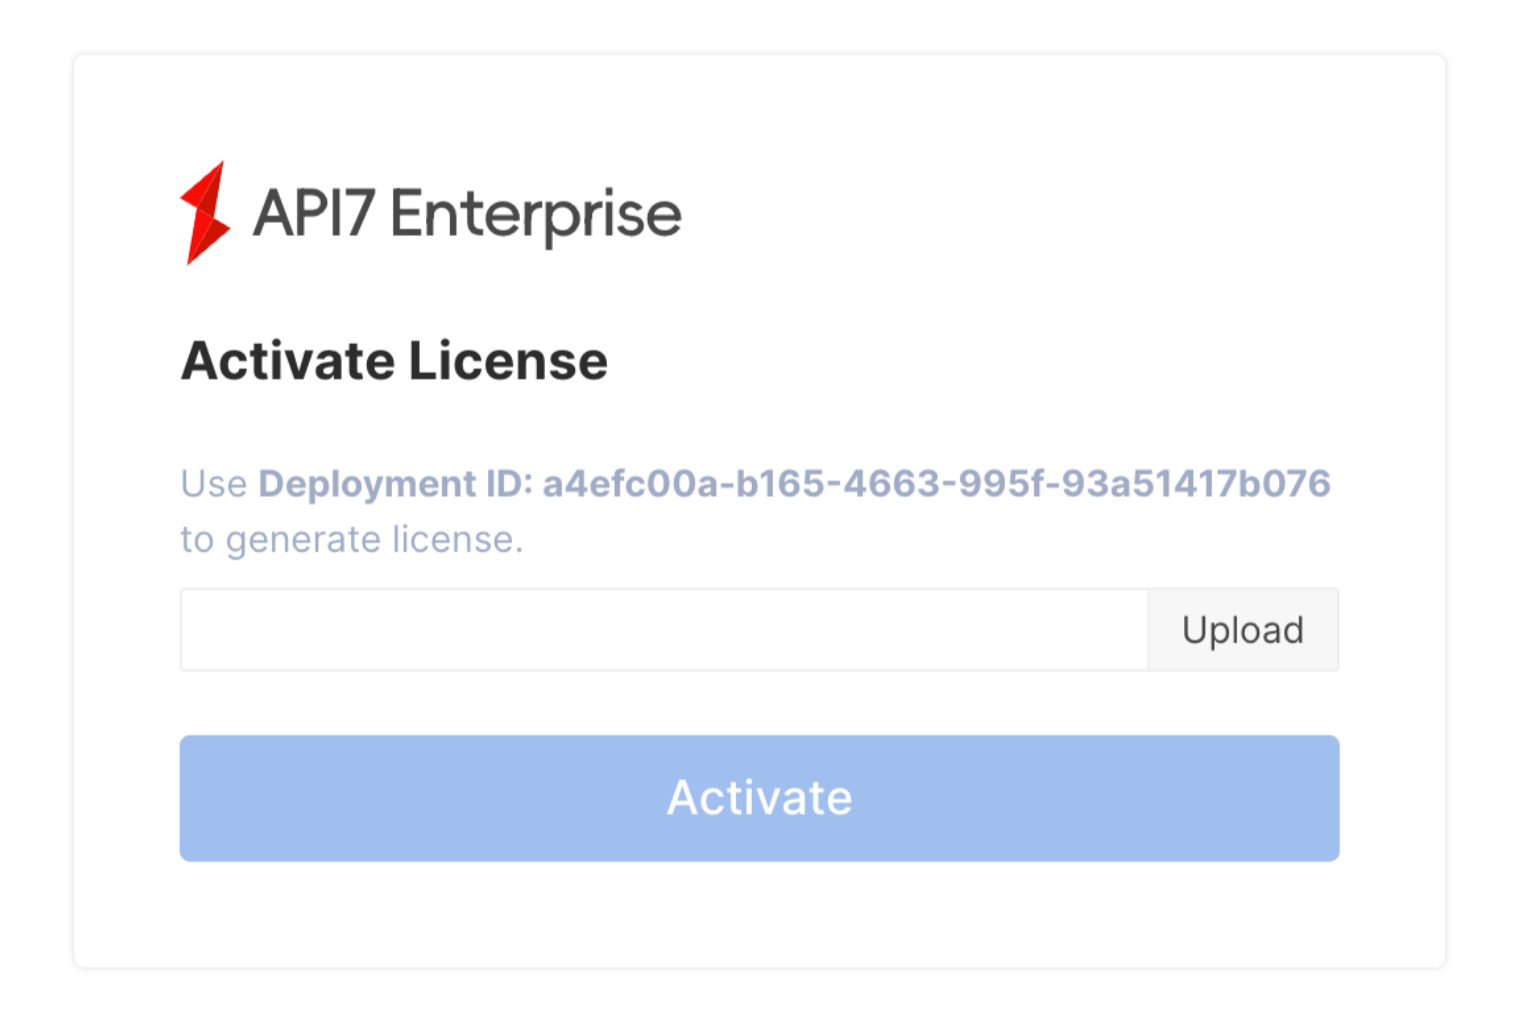
Select Activate:
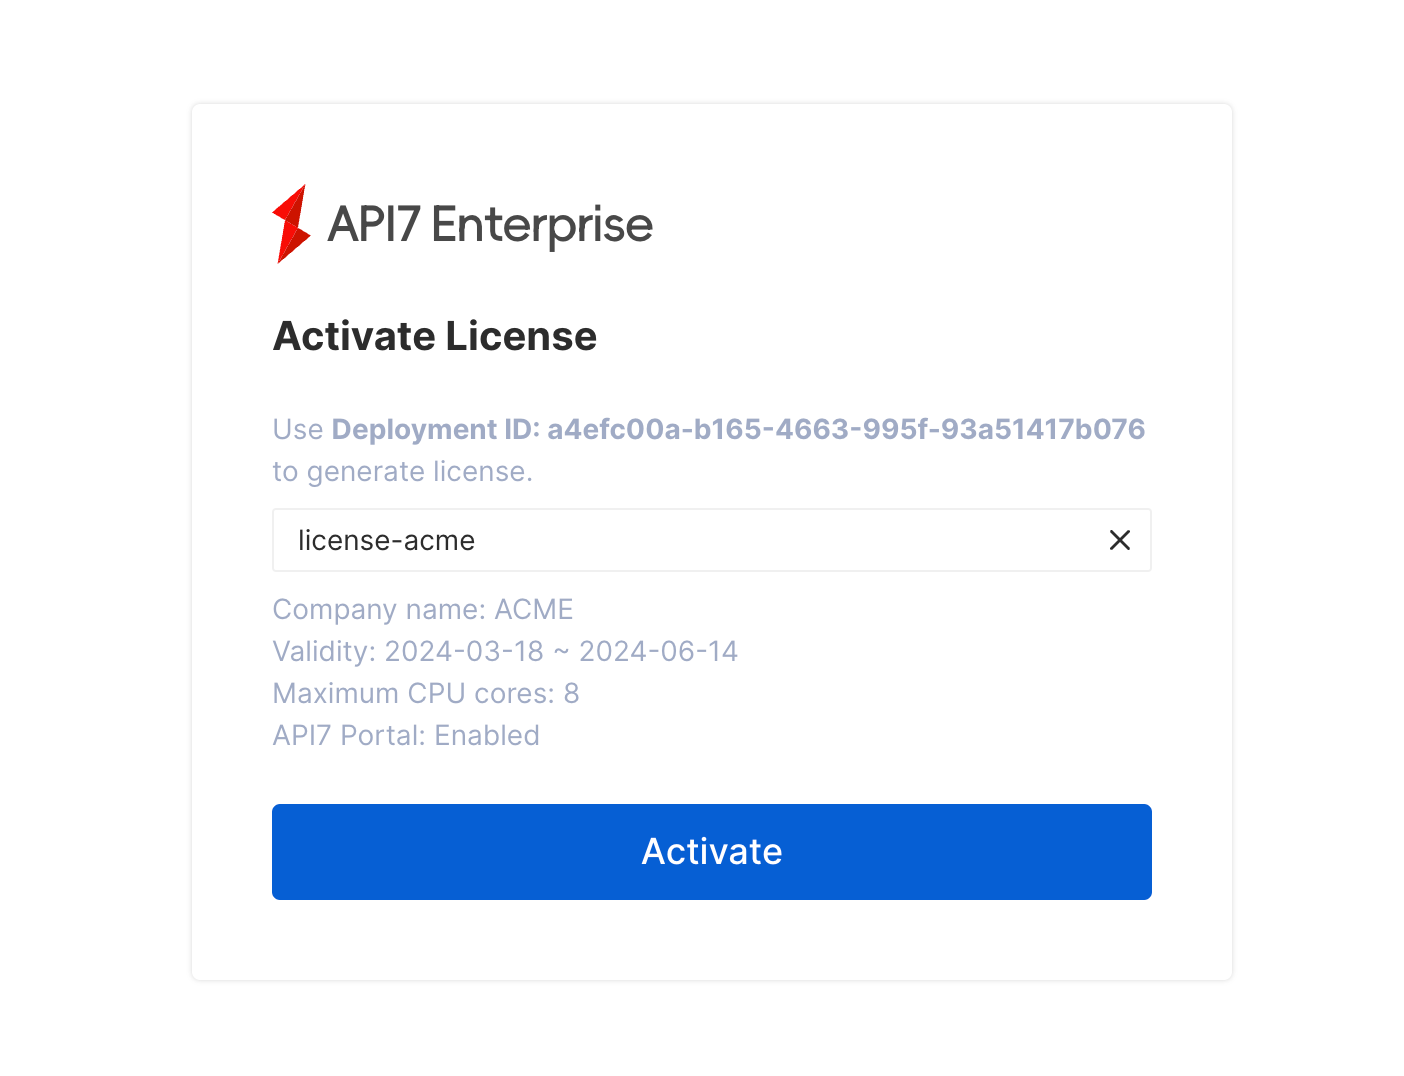
You should now be redirected to the Dashboard main interface.
Add Control Plane Address
Before adding more Gateway instances, first configure the connection address of the control plane.
In the same cluster, the data plane and control plane follow the format of http://{service-name}.{namespace}.svc.cluster:7900, regardless of whether they are deployed under the same namespace.
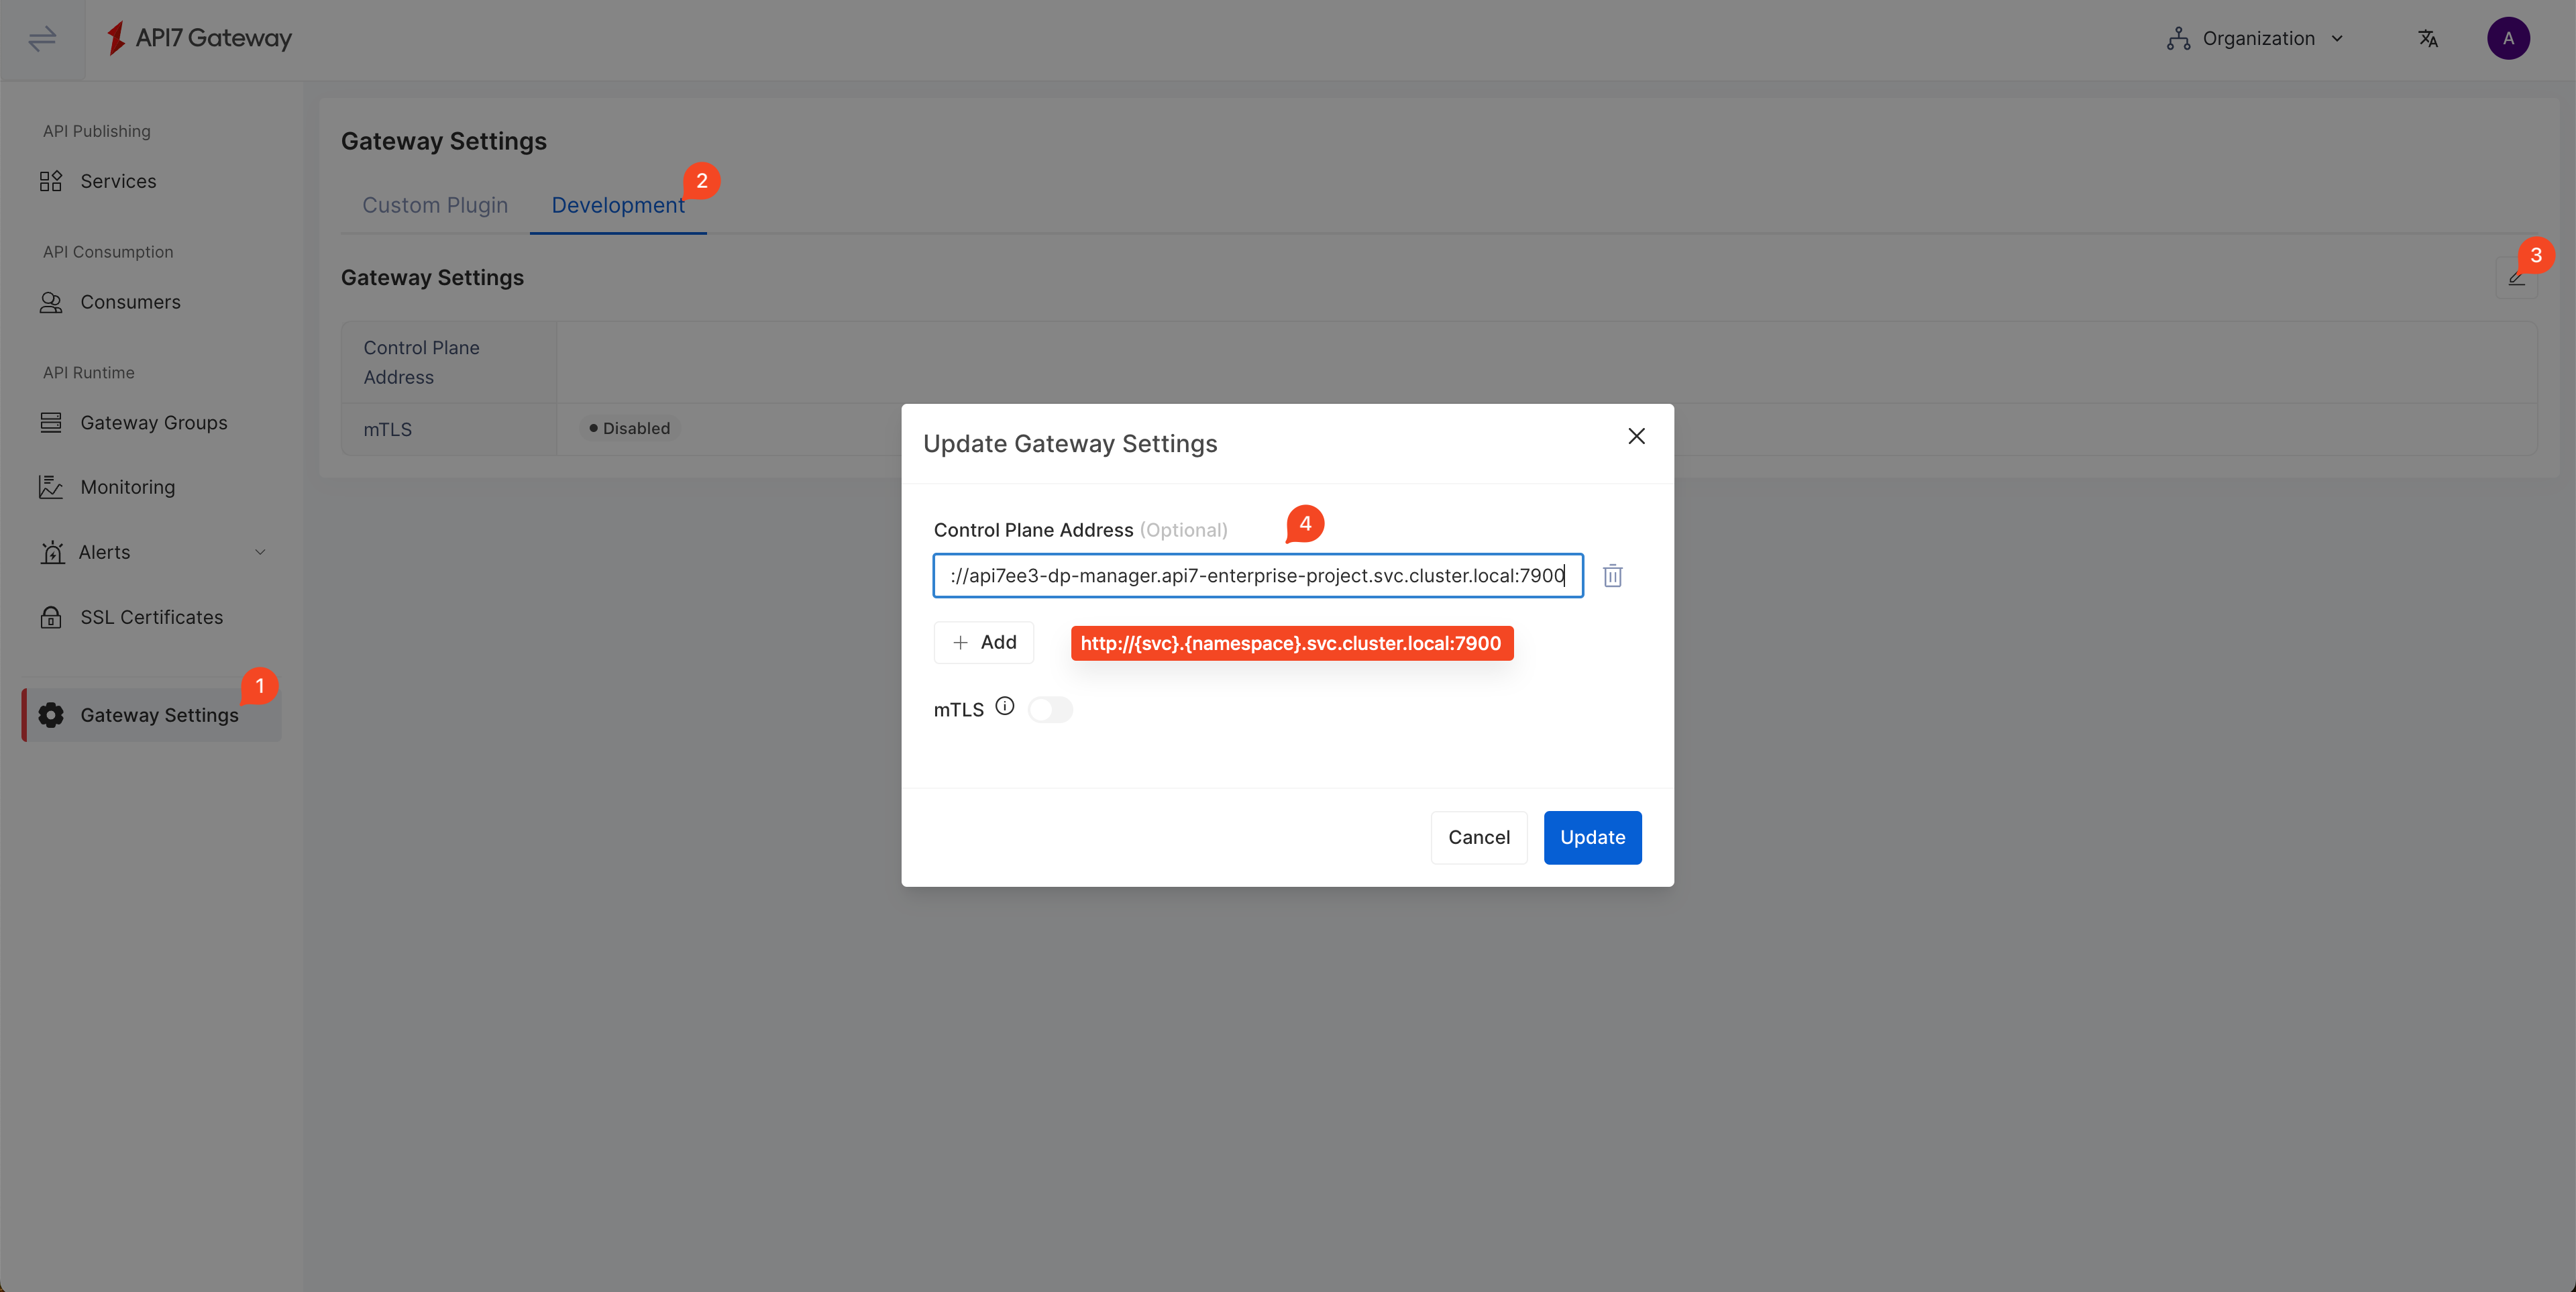
mTLS (Optional)
By default, API7 Gateway and Control Plane will authenticate with each other with Token. If you prefer to use mTLS for verification, you should enable the mTLS option and access the dashboard at http://{service-name}.{namespace}.svc.cluster:7943.
Install Data Plane
Configure SCC for API7 Gateway
API7 Gateway needs to generate local files at runtime, including nginx.conf, logs, and cached files. The nonroot-v2 SCC is sufficient with the required permissions.
Create a service account:
oc create serviceaccount api7-gateway
Create a role with nonroot-v2 SCC:
oc create role api7-gateway \
  --verb=use \
  --resource=scc
  --resource-name=nonroot-v2
Bind the role to the service account:
oc create rolebinding api7-gateway \
  --role=api7-gateway
  --serviceaccount=api7-enterprise-project:api7-gateway
Generate and Run Deployment Script
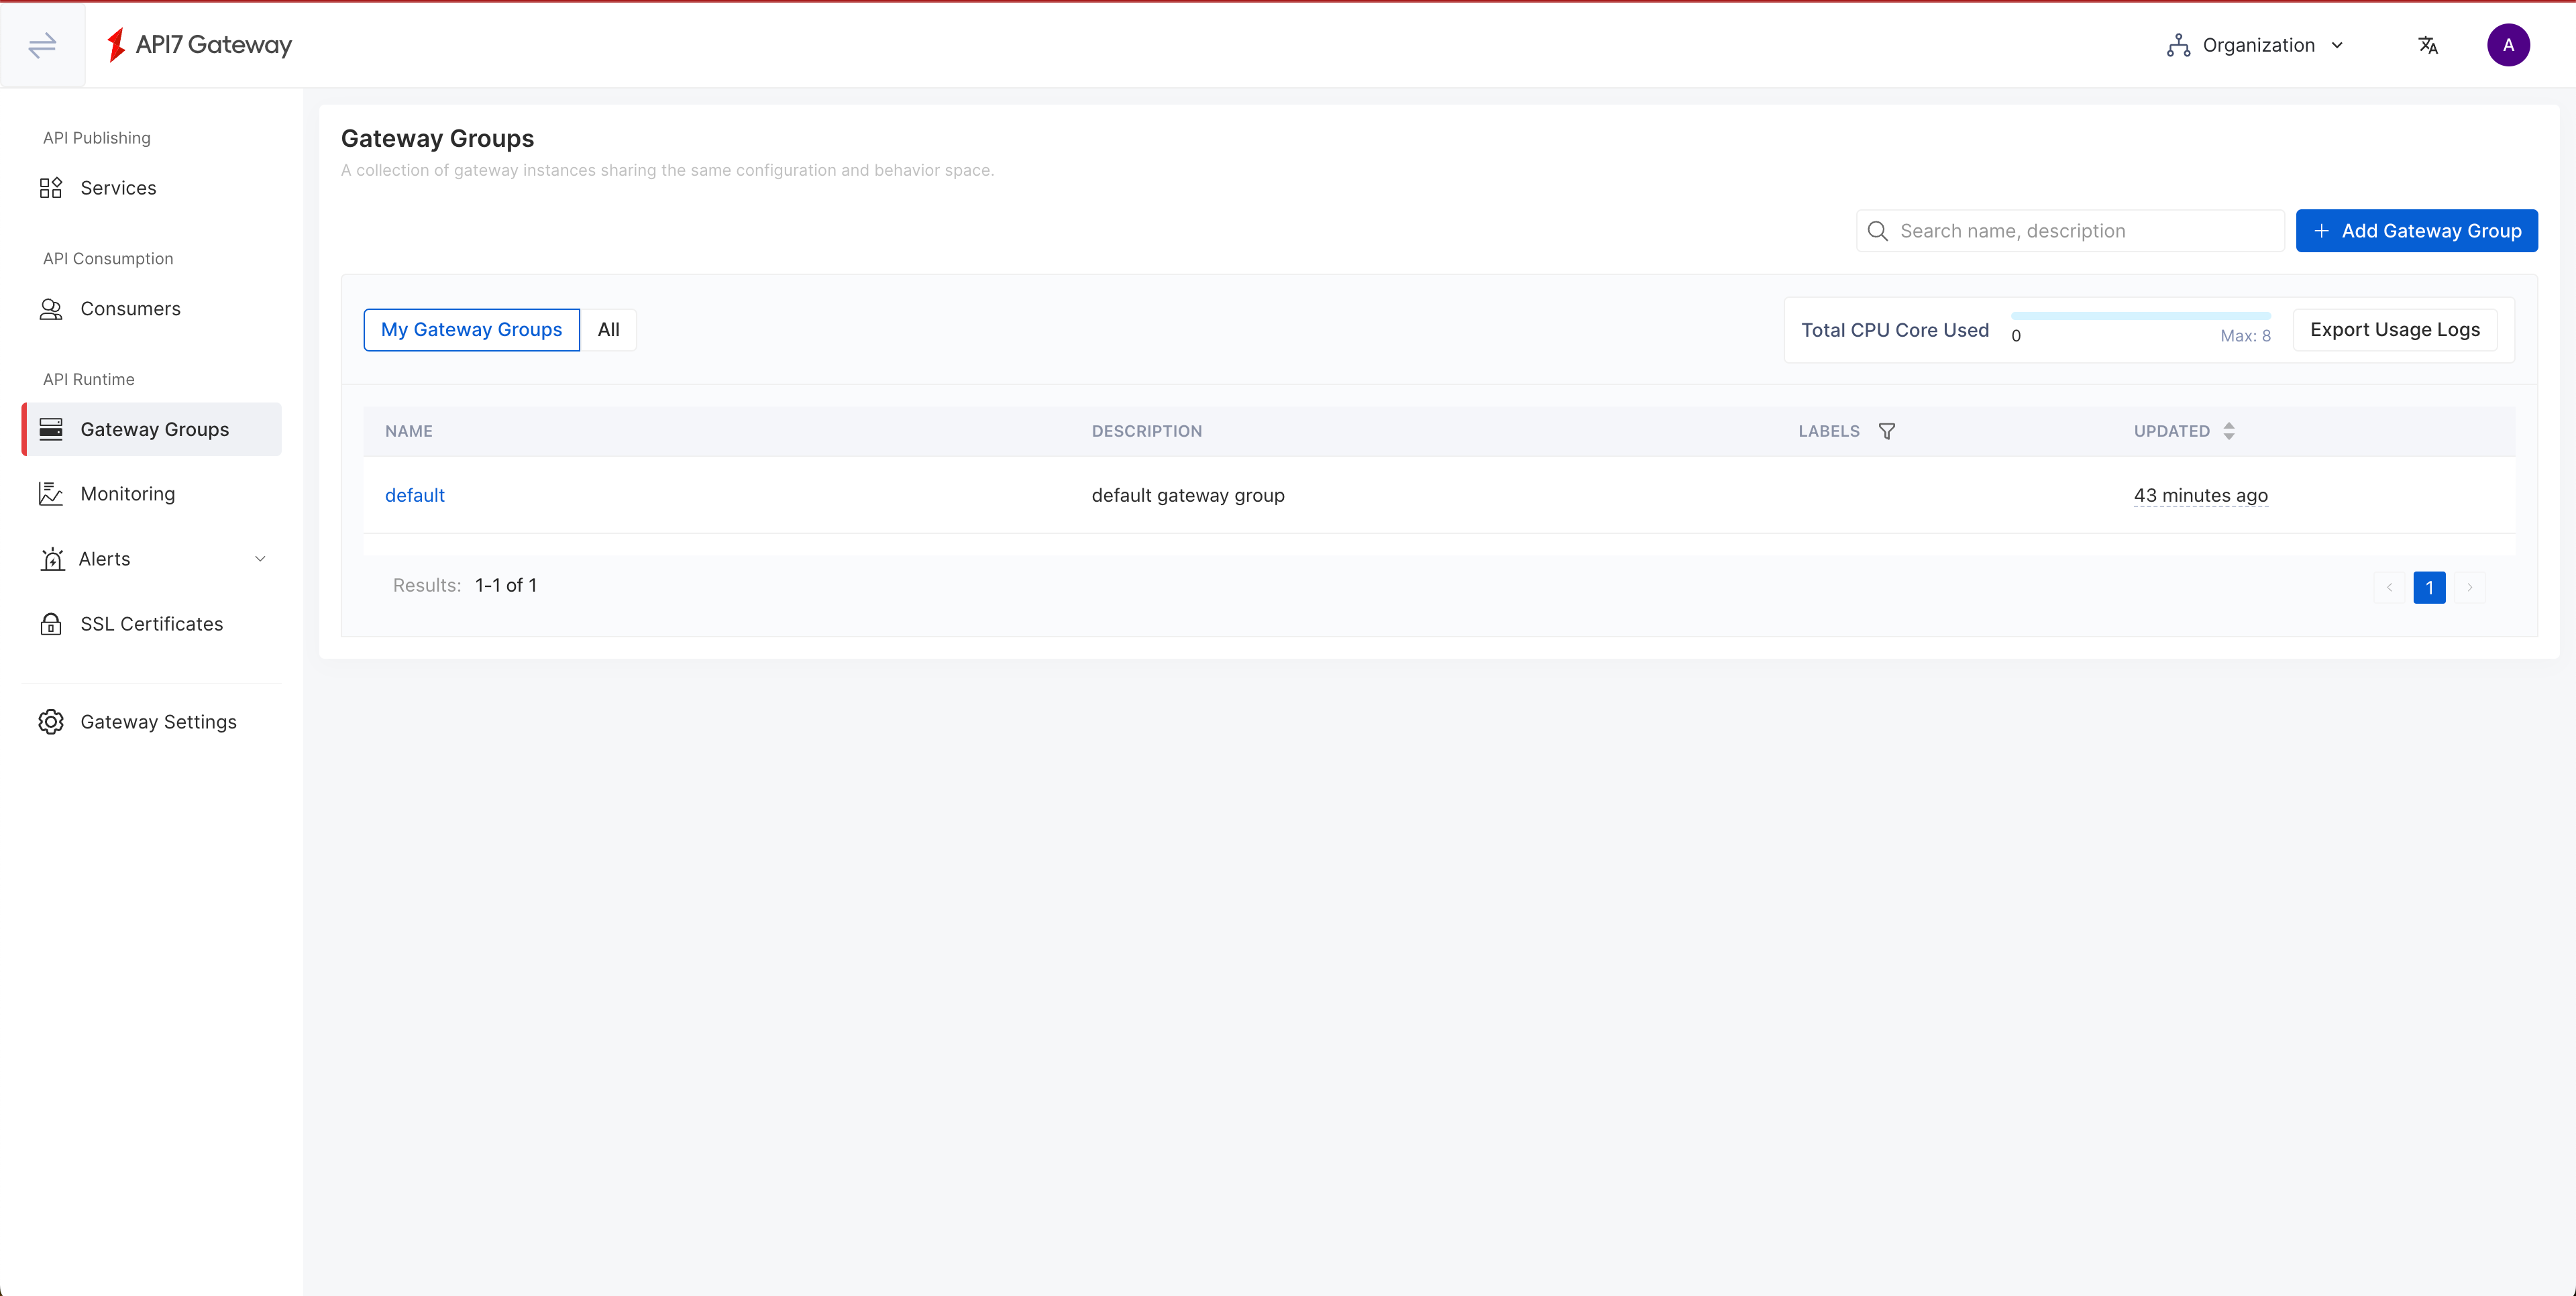
Compared with Apache APISIX, API7 Enterprise introduces an additional logical grouping called Gateway Group, where you can manage different sets of Gateway instances with the same API7 Dashboard.
First, you should create or choose the target Gateway Group. In this guide, you will use the default gateway group:
Next, select Add Gateway Instance:
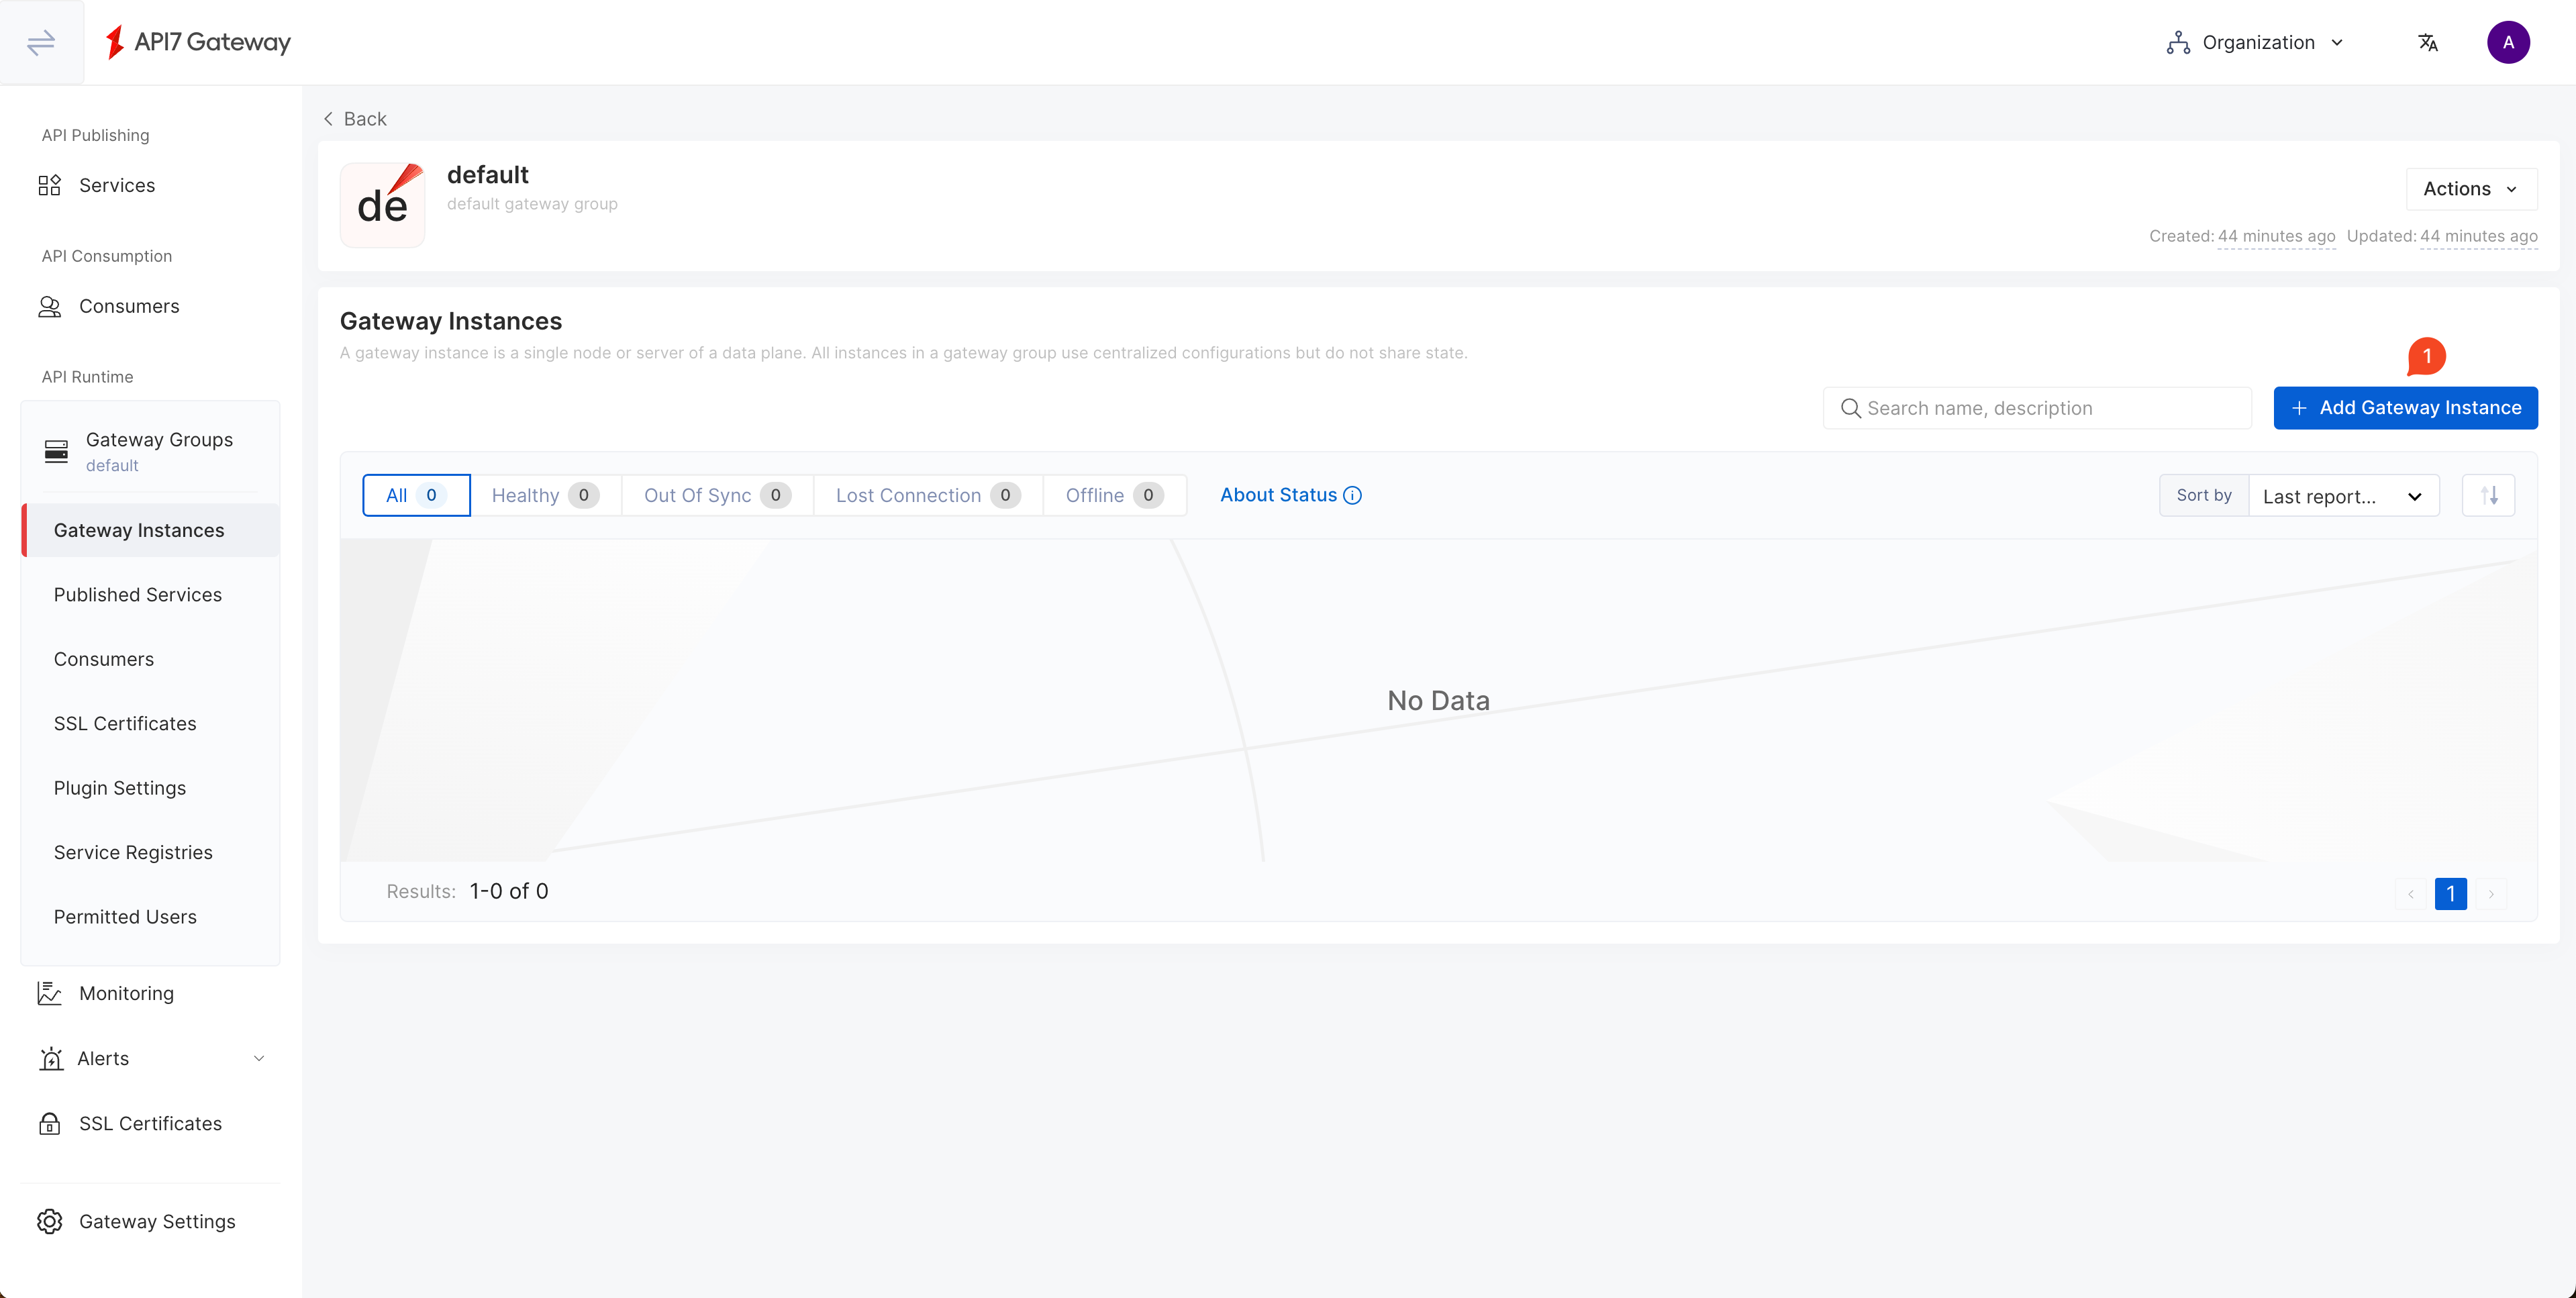
Switch to the Kubernetes tab and fill out the parameters. Once finished, click Generate to see the deployment script.
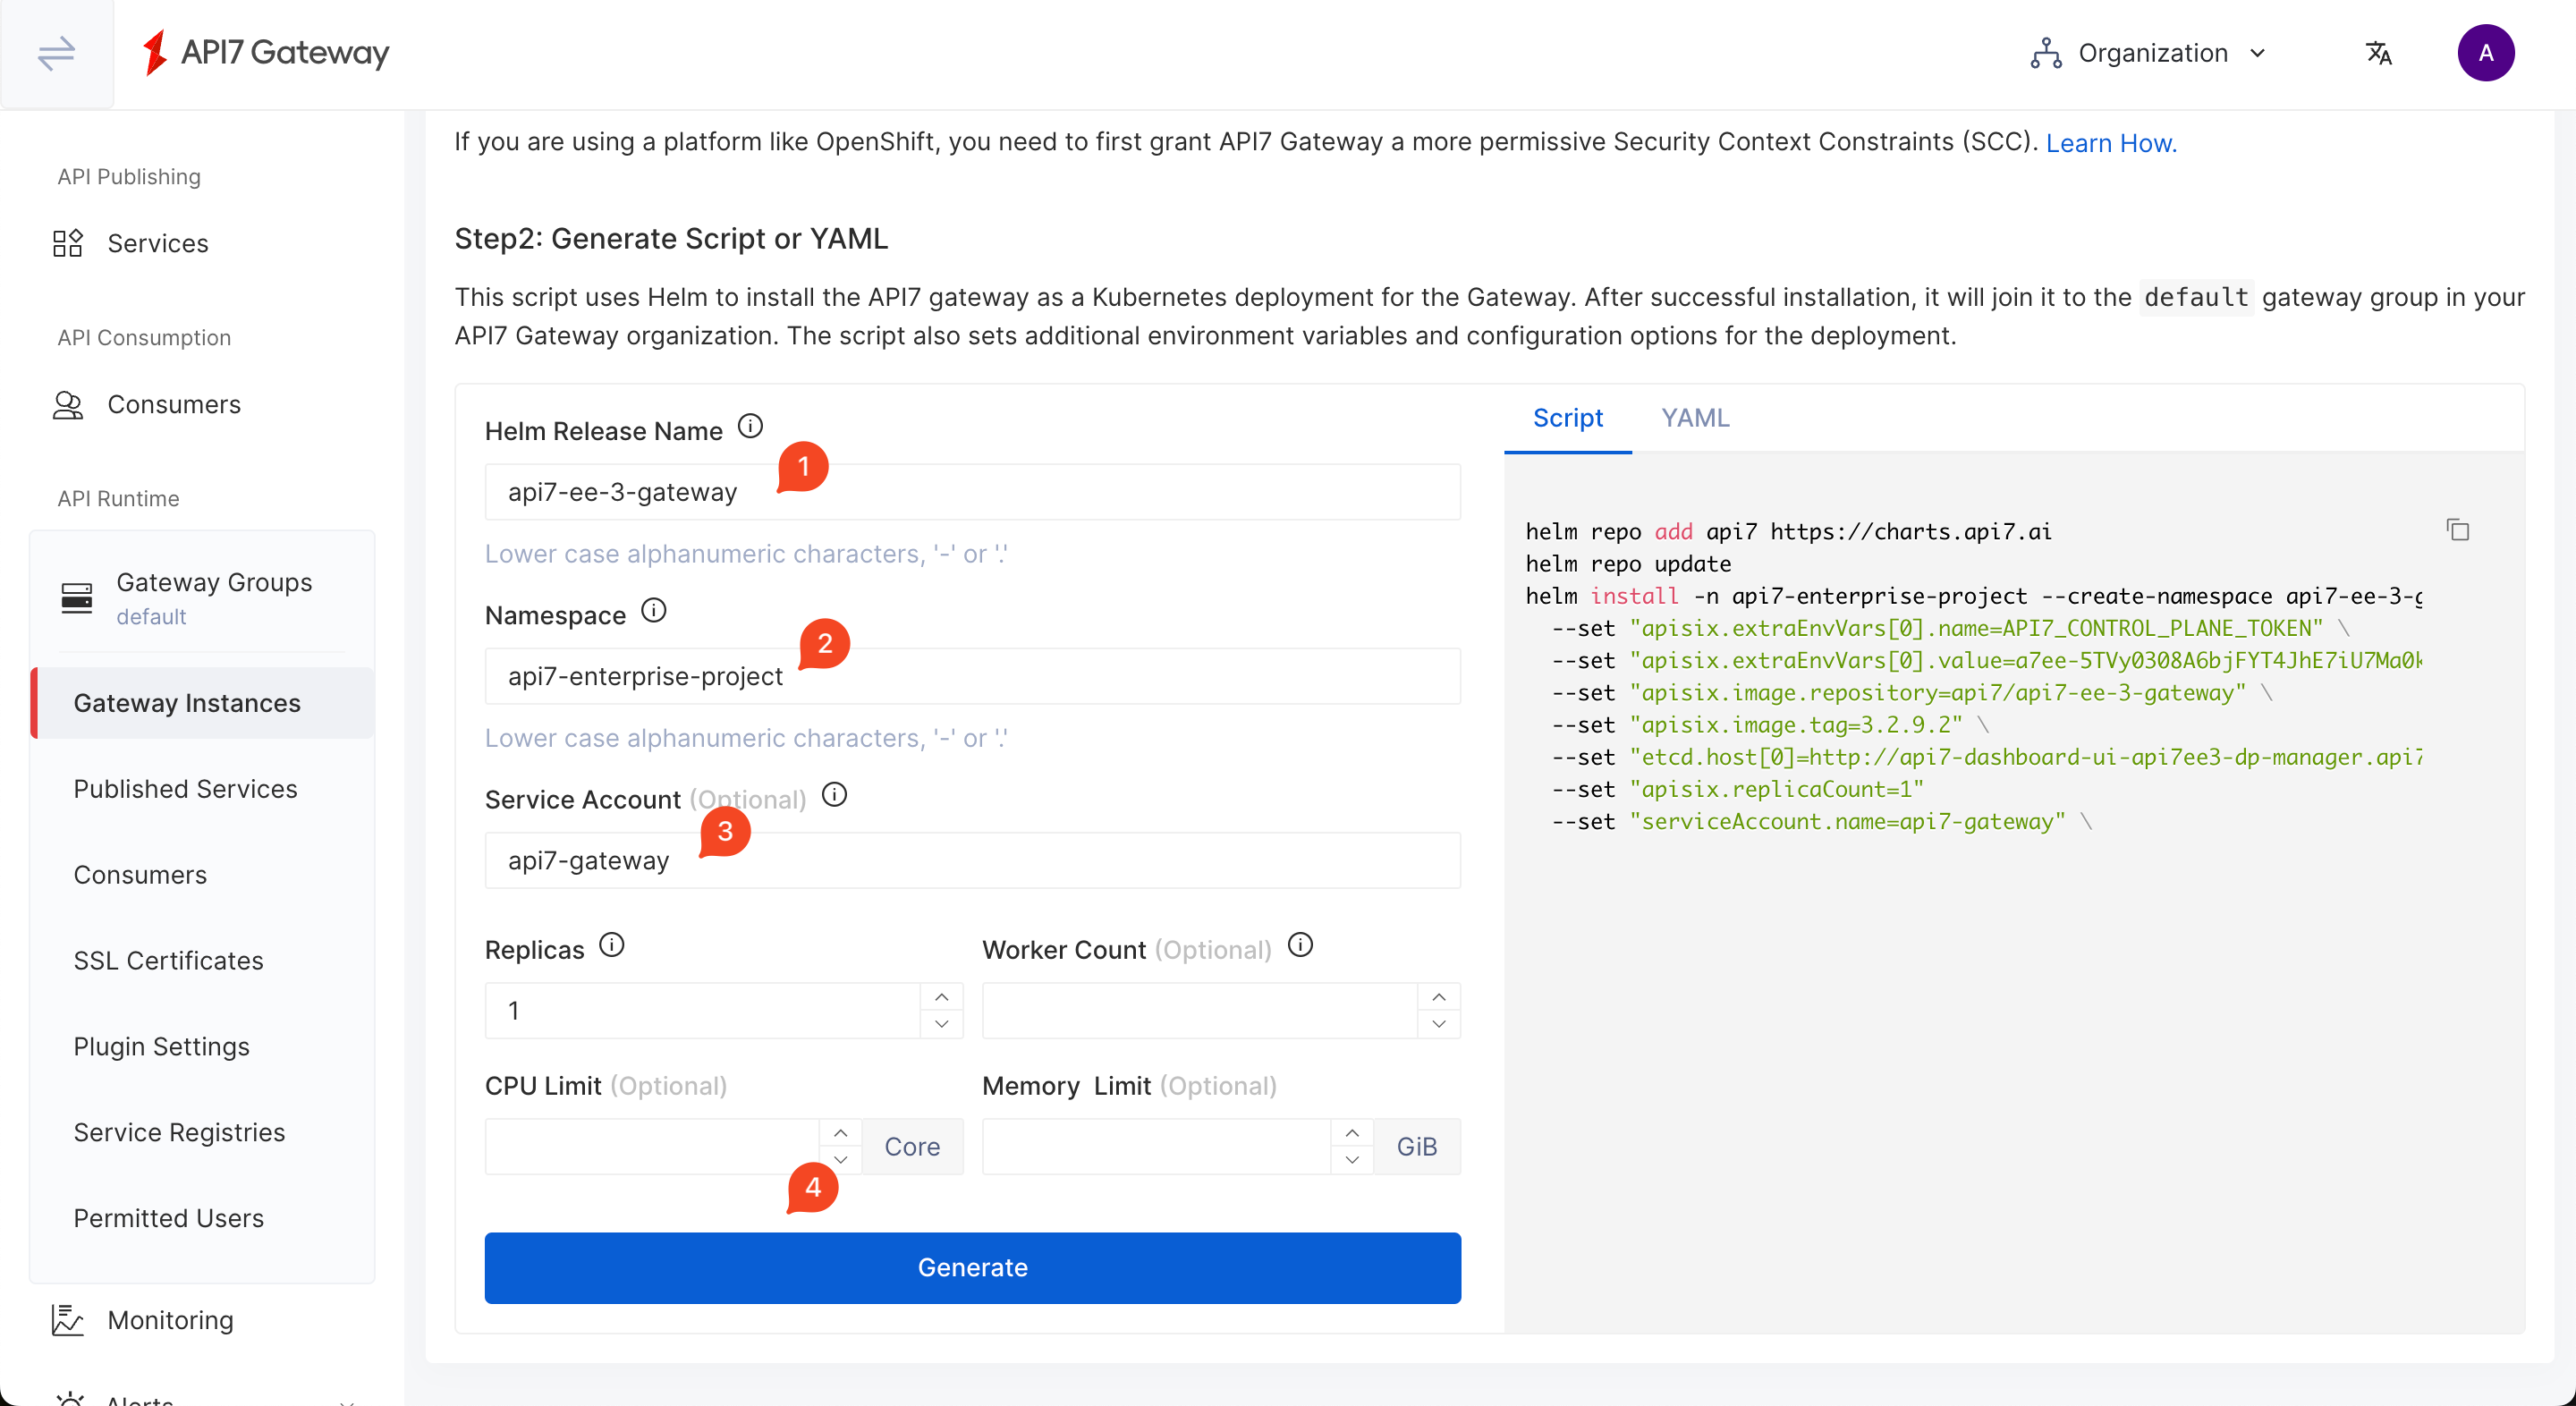
Copy the generated script and set the additional securityContext. The command should be similar to the following:
helm repo add api7 https://charts.api7.ai
helm repo update
helm install api7-ee-3-gateway api7/gateway \
  --set "apisix.extraEnvVars[0].name=API7_GATEWAY_GROUP_SHORT_ID" \
  --set "apisix.extraEnvVars[0].value=yibabwmnbi3qo" \
  --set "apisix.extraEnvVars[1].name=API7_CONTROL_PLANE_TOKEN" \
  --set "apisix.extraEnvVars[1].value=yibabwmnbi3qo-60FcKJ6QIOteArg8BVyPgv2vII34aIUF6iMSRAKTNjFEFsS0Sl-d4ebab44bf6e49218949e92c134e0a78" \
  --set "apisix.image.repository=api7/api7-ee-3-gateway" \
  --set "apisix.image.tag=3.2.14.0" \
  --set "etcd.host[0]=http://192.168.101.10:7900" \
  --set "apisix.replicaCount=1" \
  --set "serviceAccount.name=api7-gateway" \
  --set "apisix.securityContext.runAsNonRoot=true" \
  --set "apisix.securityContext.runAsUser=636"
Install API gateway instances on your cluster.
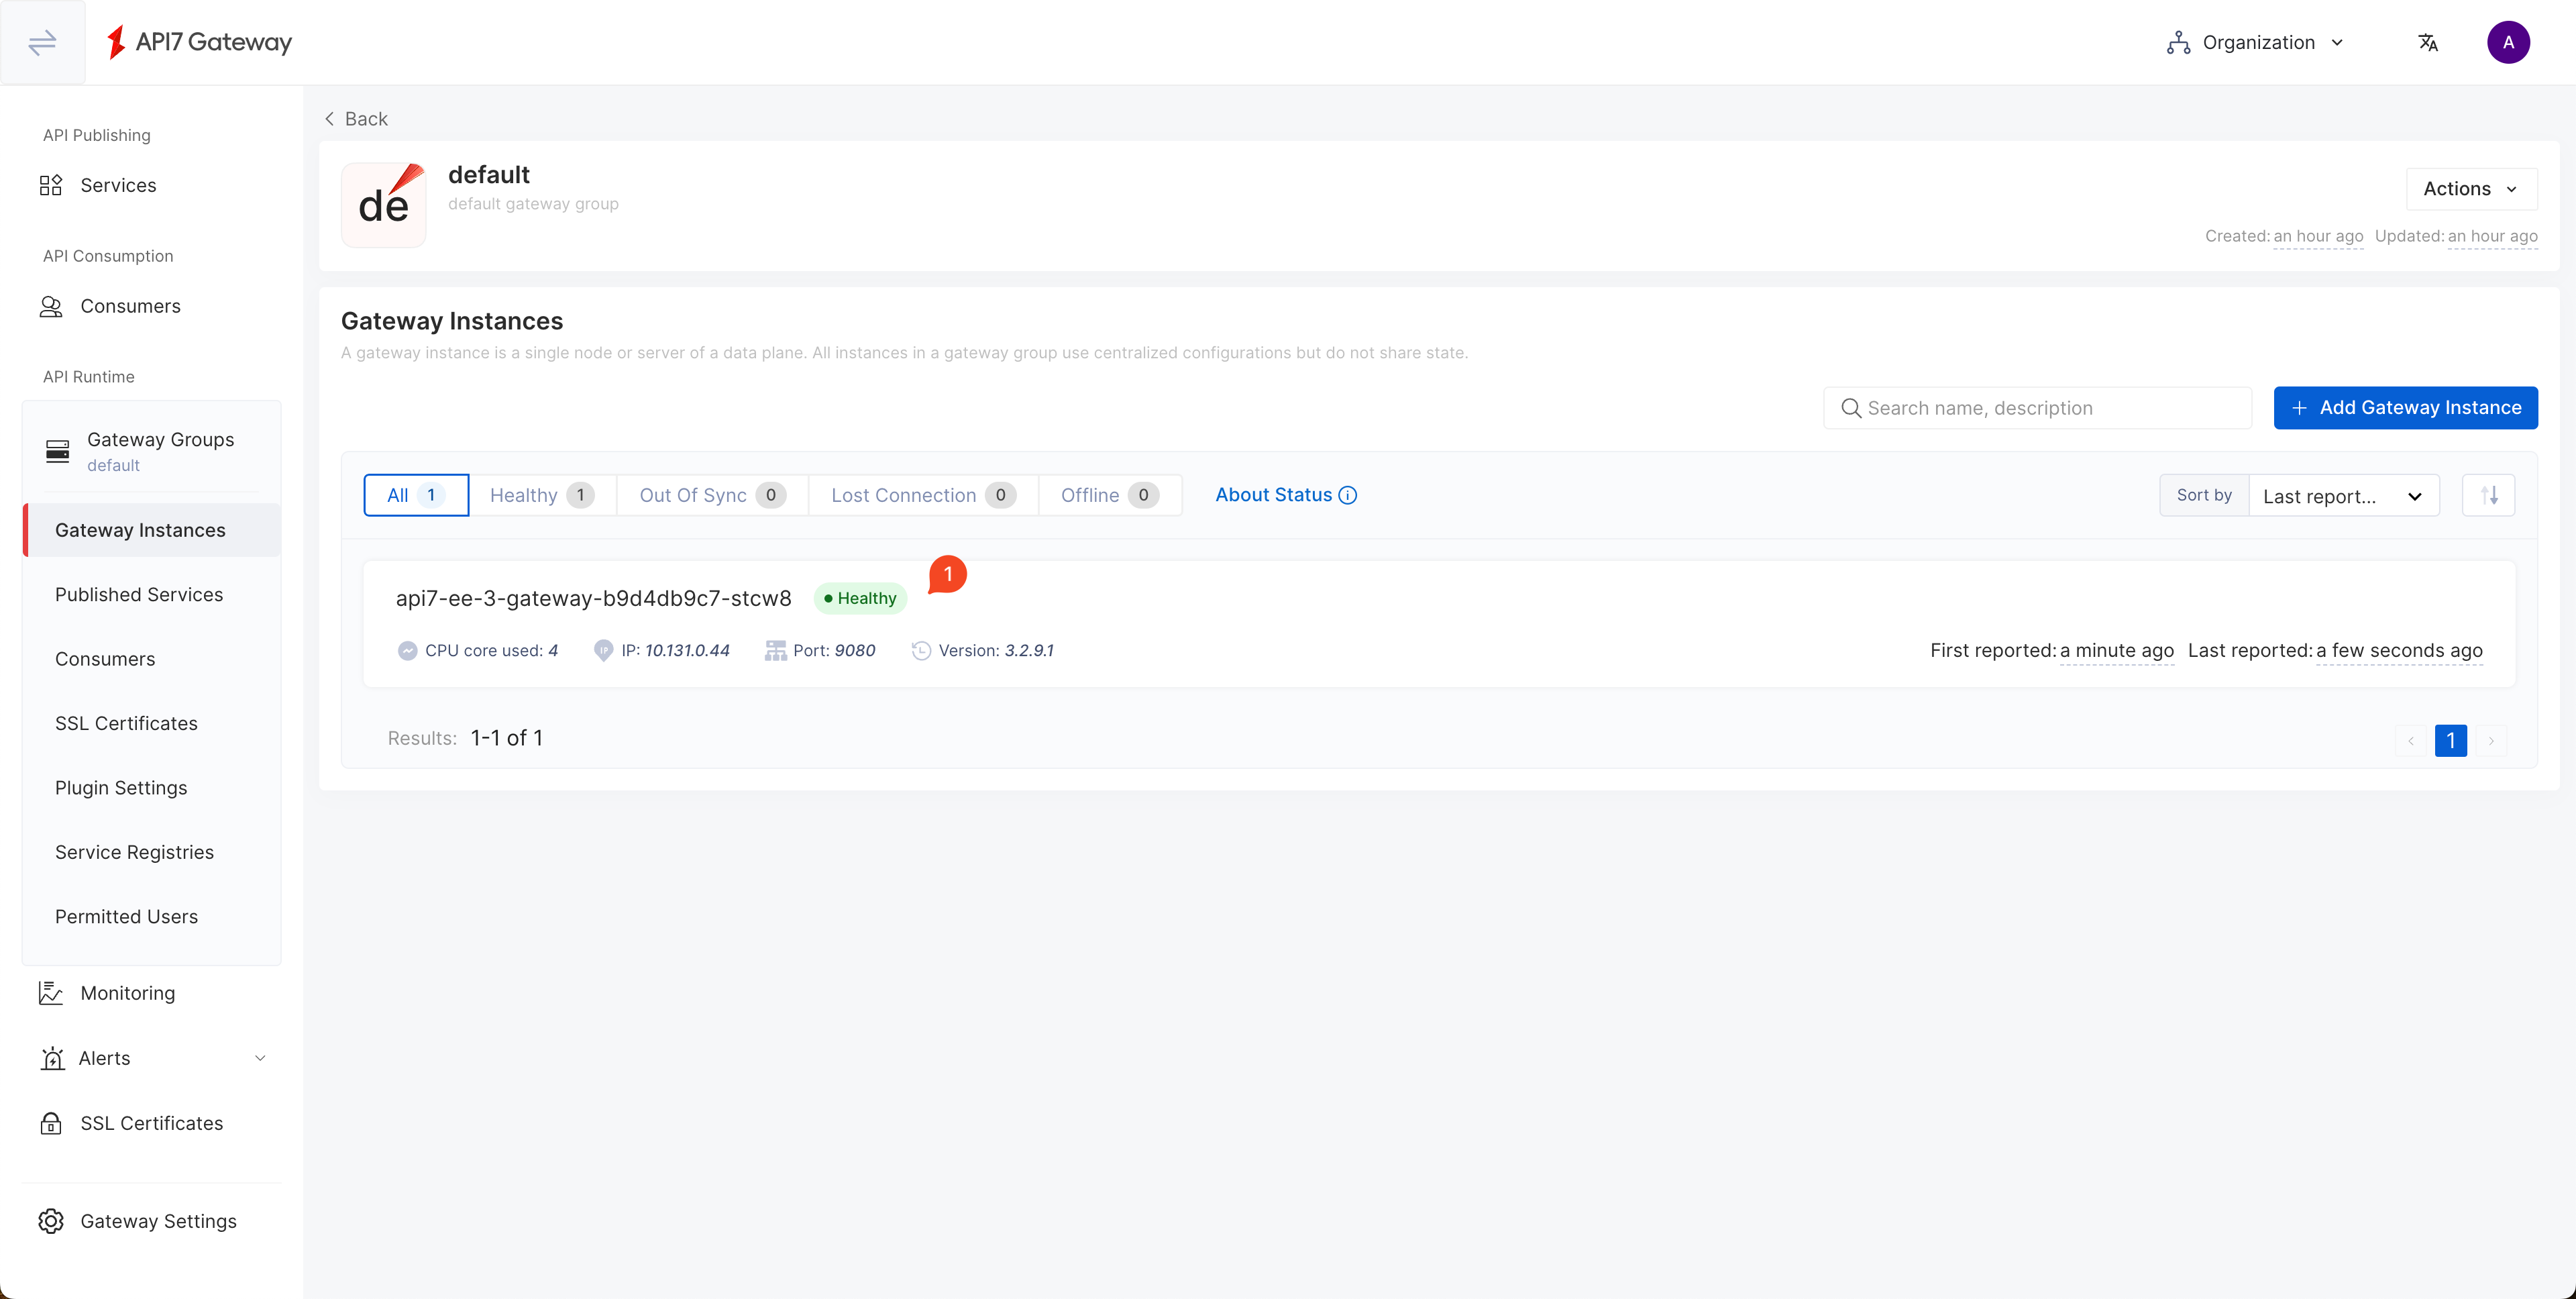
Navigating back to the default gateway group, you should see an healthy gateway instance:
Verify Installation
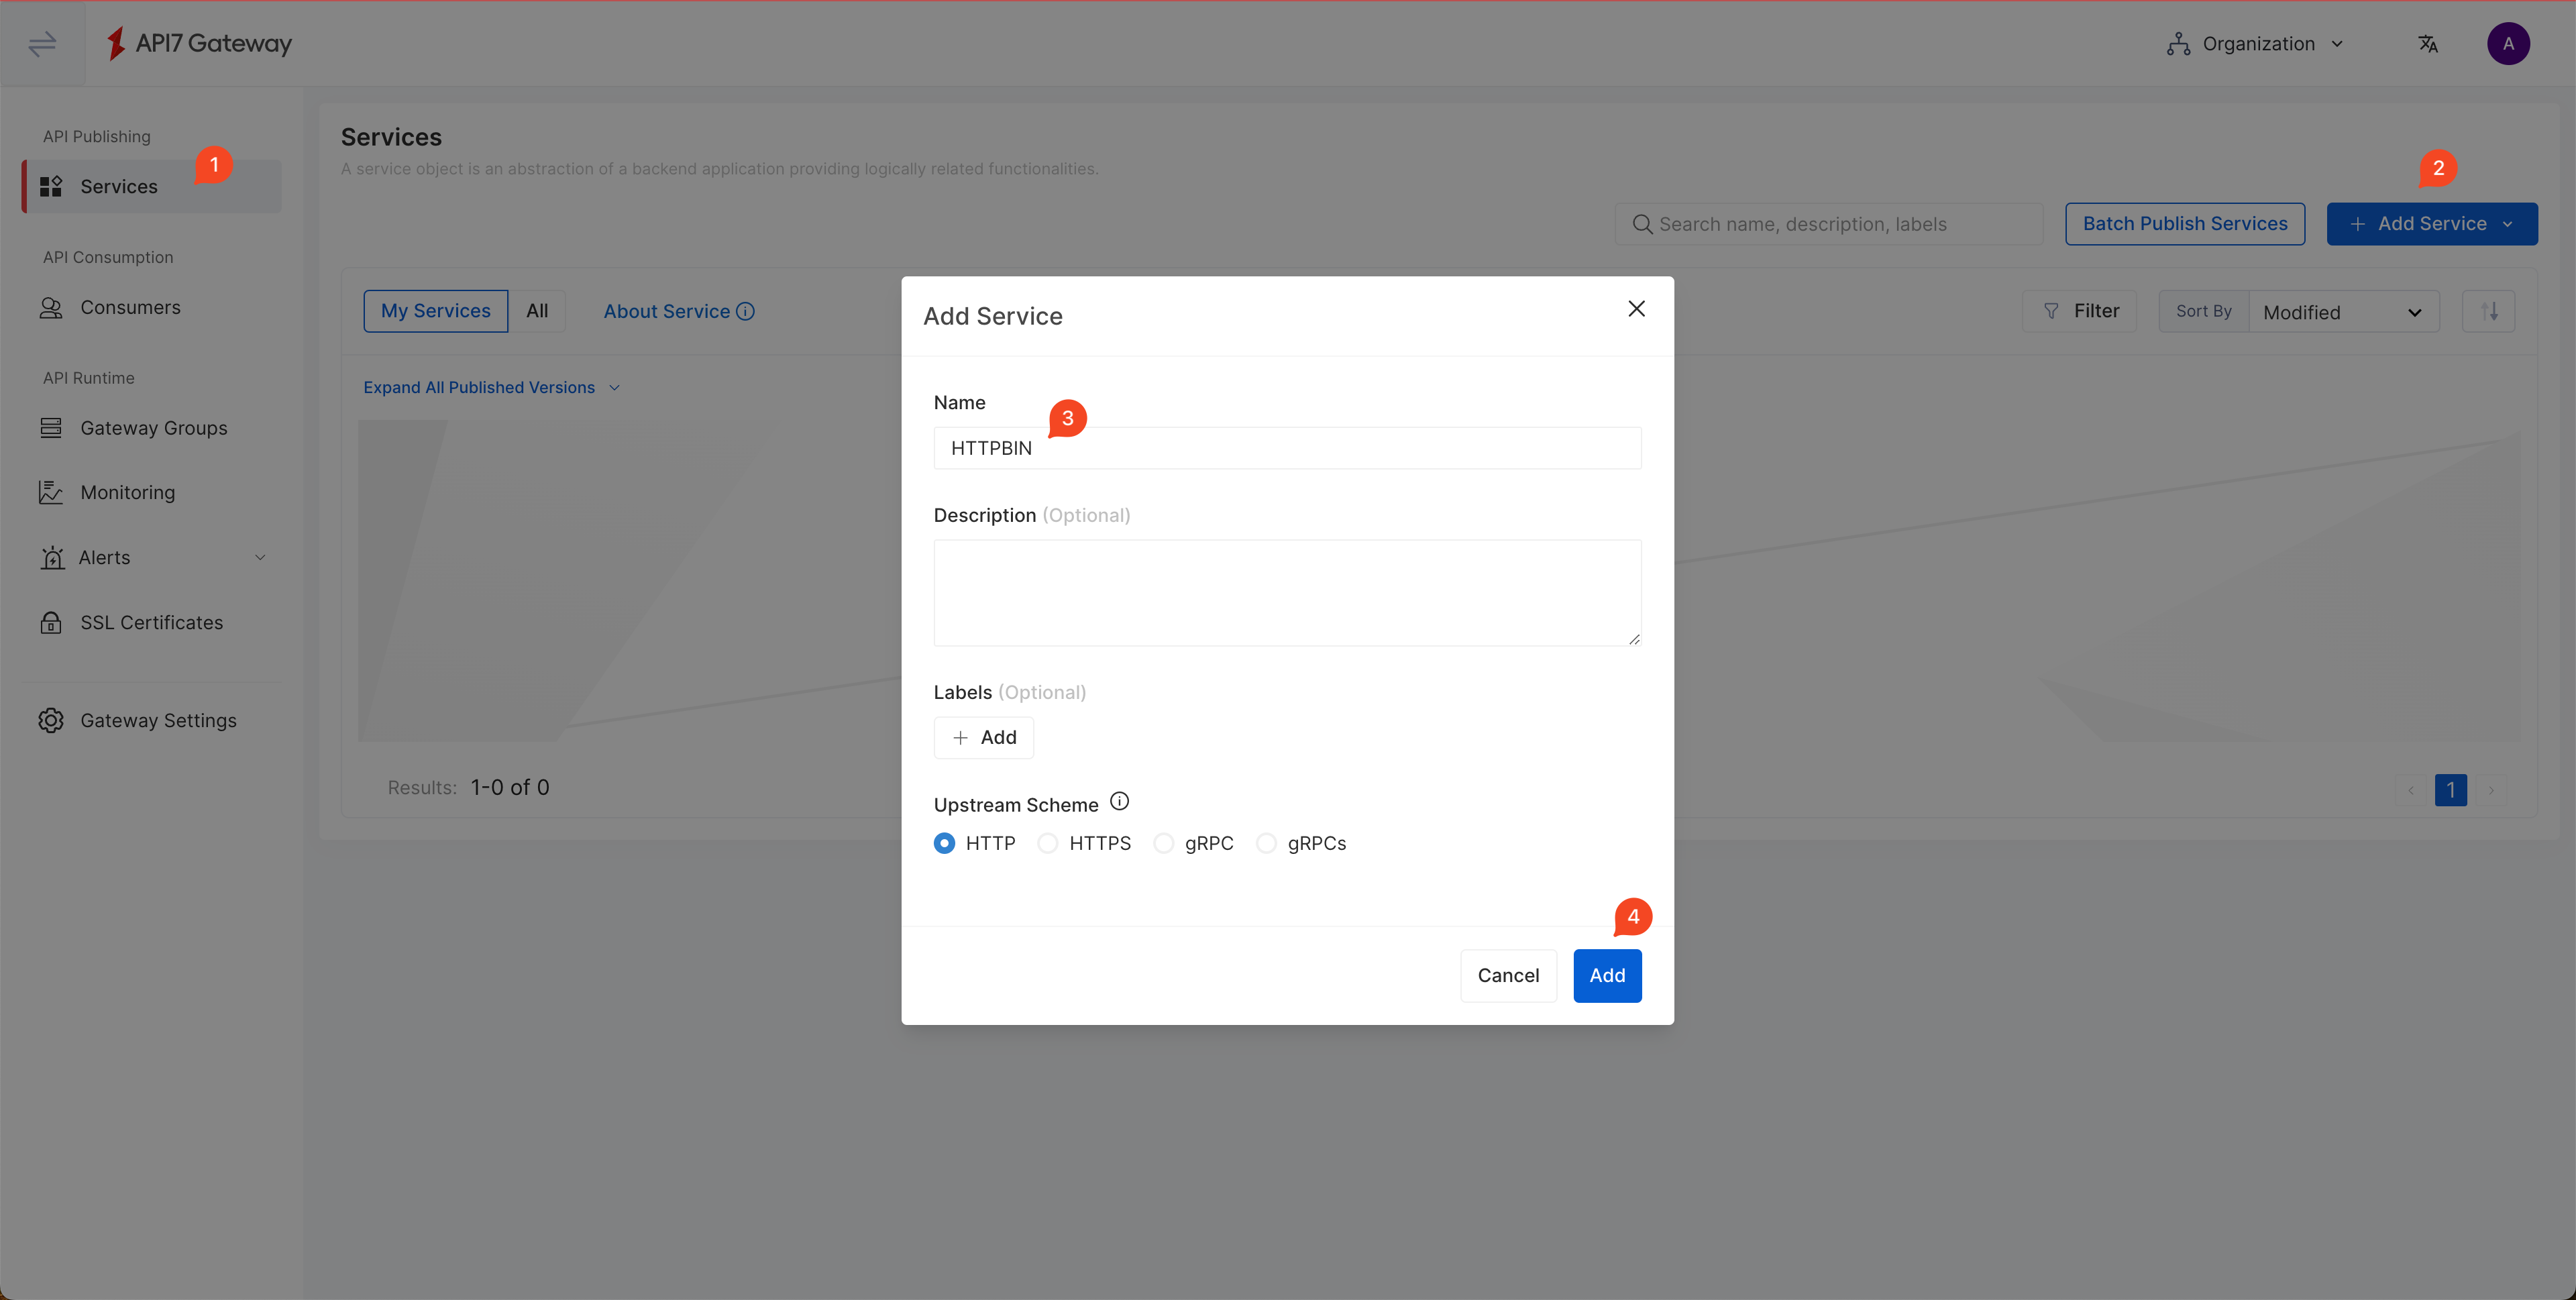
Create a Sample Service
Create a service HTTPBIN:
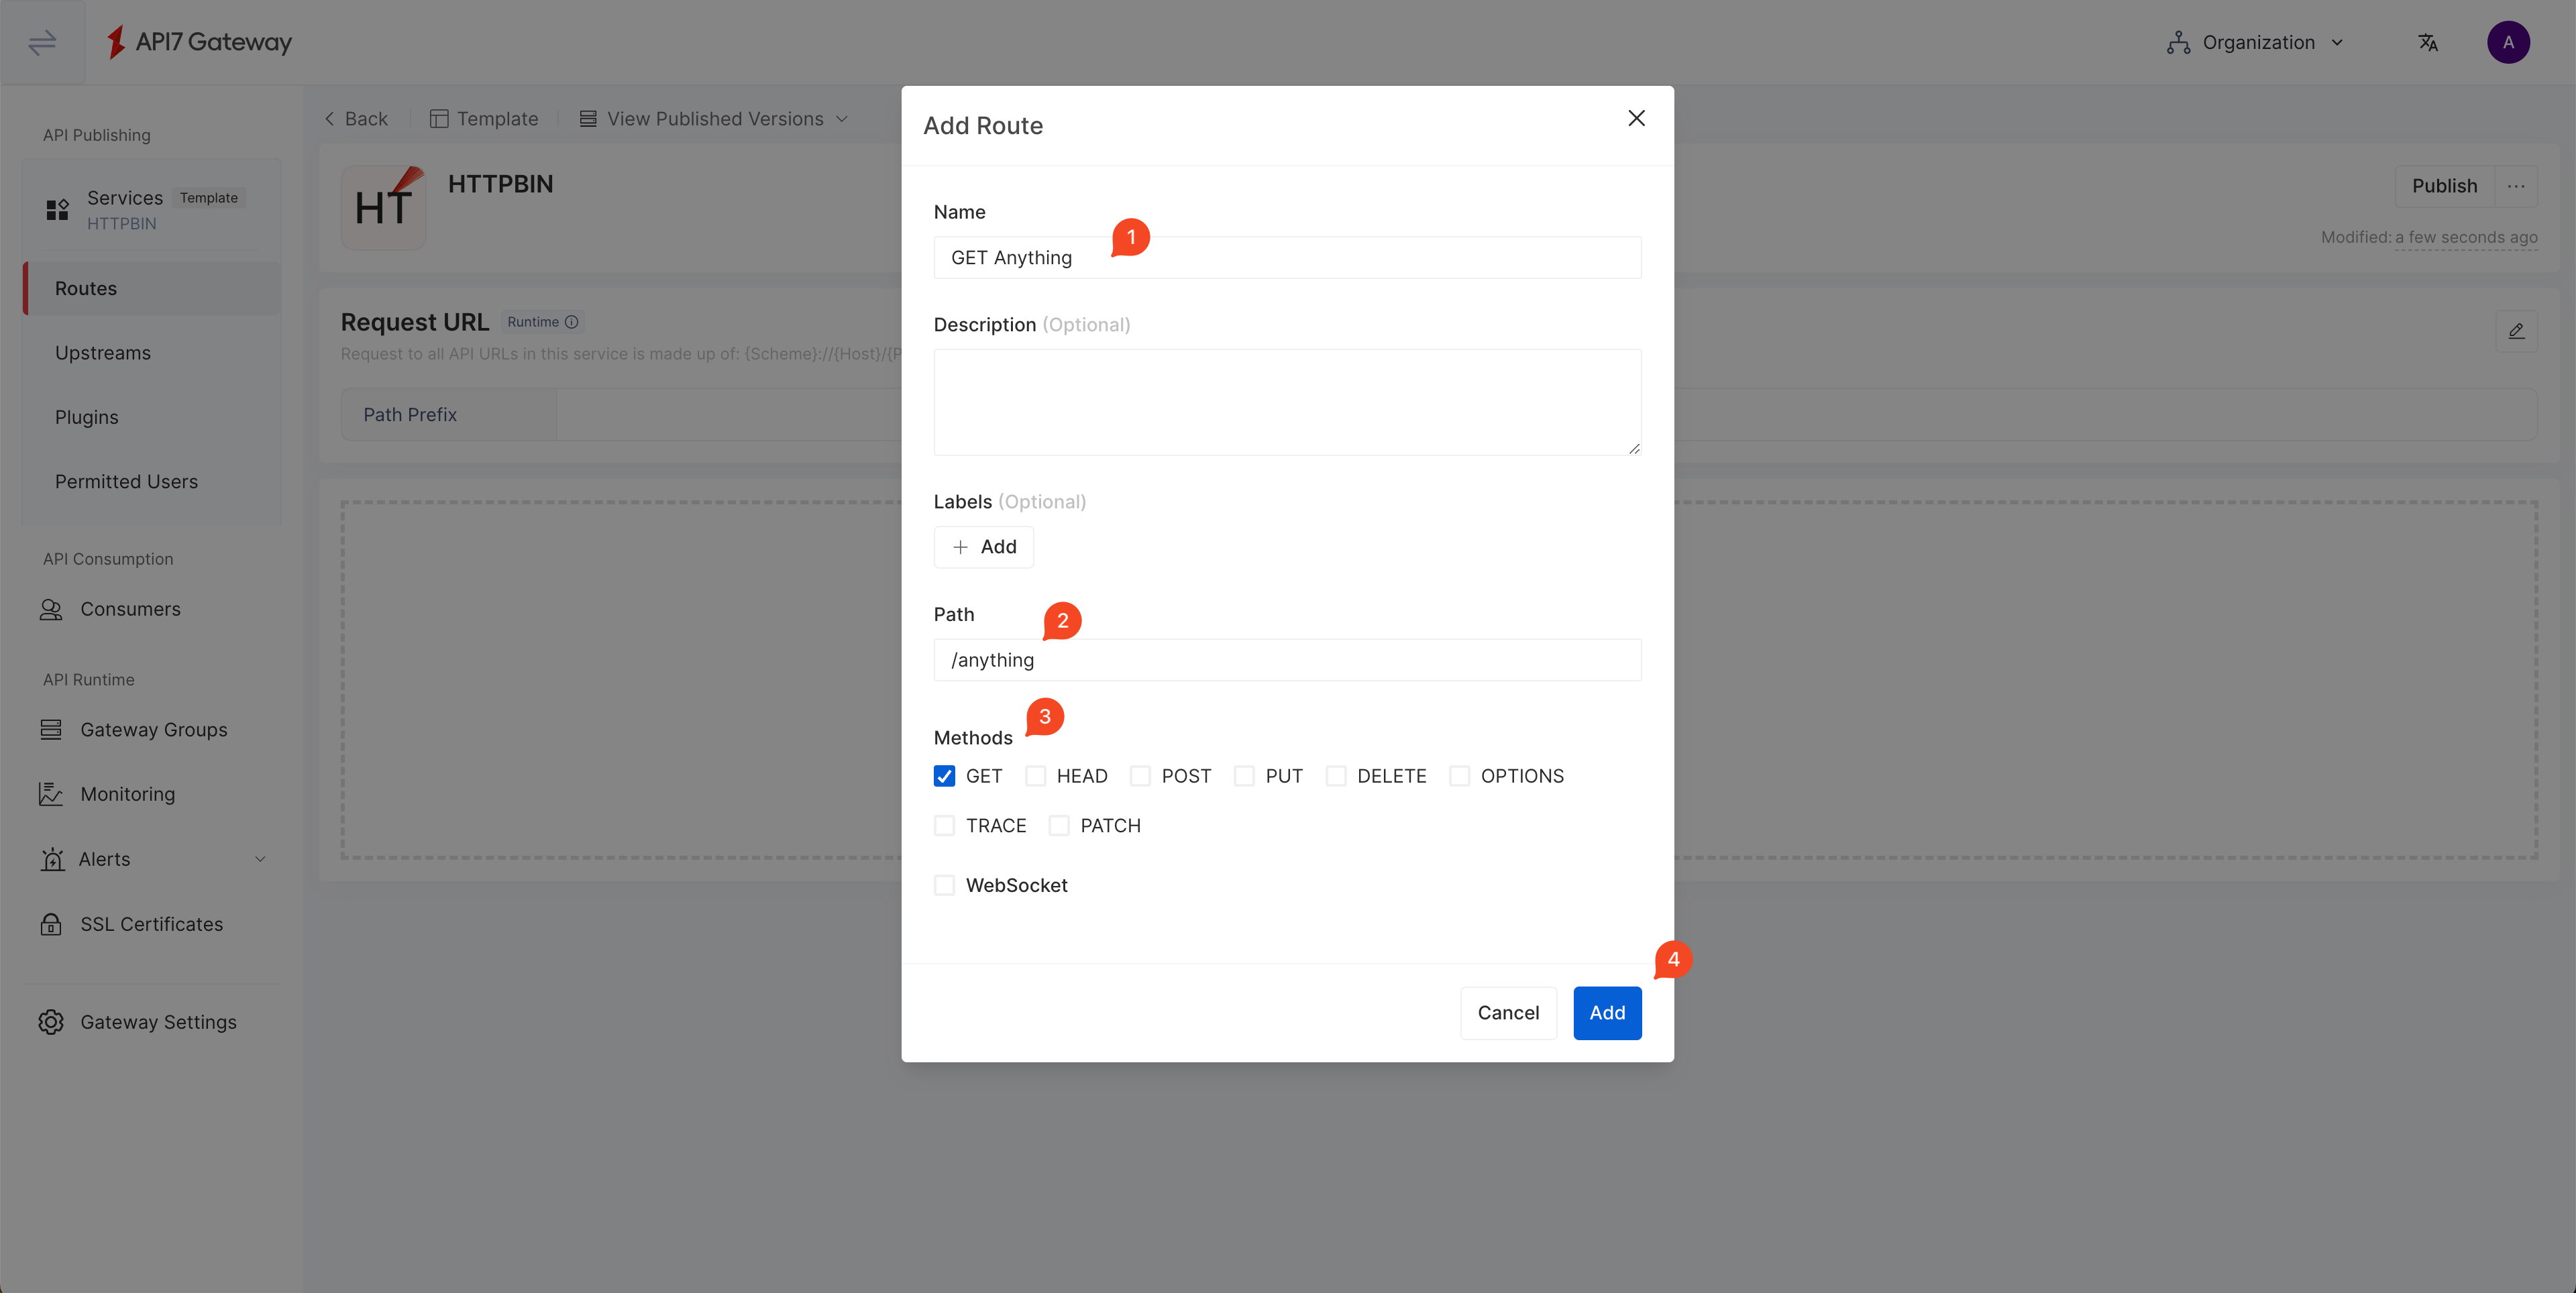
Add a route to /anything endpoint and allow only the GET method:
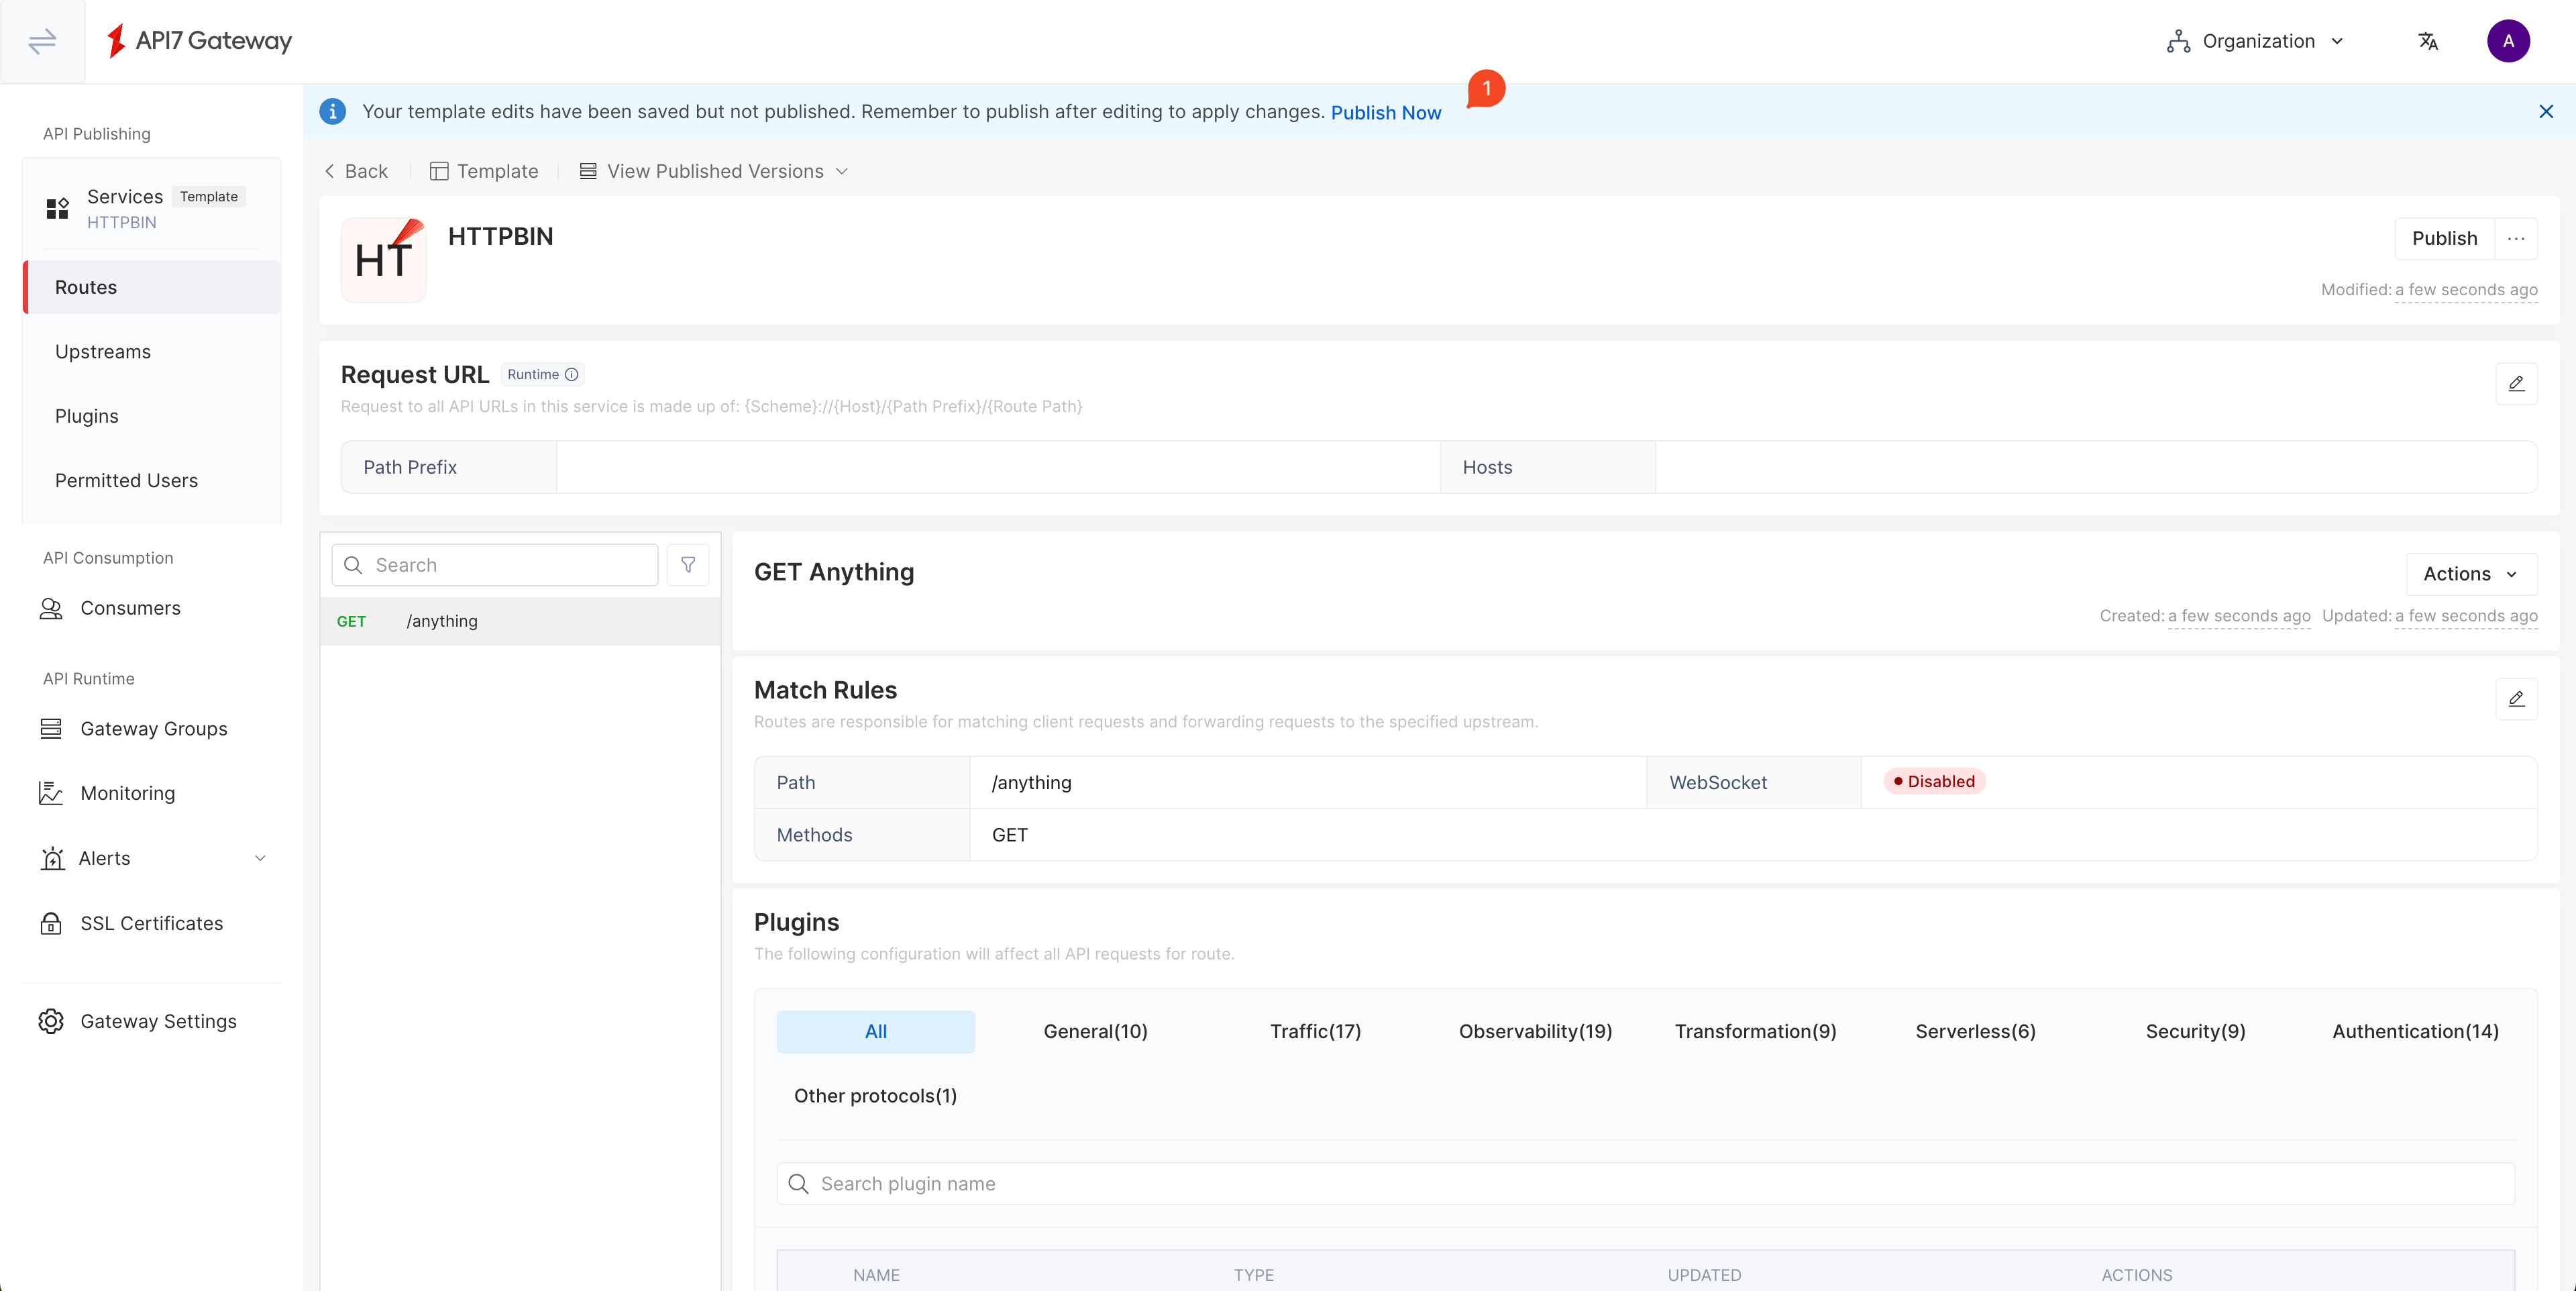
You should see the service now shows the created route:
Port Forward Gateway Service
Before you can send a request to the Gateway, you should first port forward the gateway listening port to the localhost.
First, list all Services to check the gateway service name:
kubectl get svc
The gateway service name is api7-ee-3-gateway-gateway:
NAME                        TYPE        CLUSTER-IP      EXTERNAL-IP   PORT(S)             AGE
api7-ee-3-gateway-gateway   NodePort    172.30.211.30   <none>        80:31649/TCP        3m51s
api7-postgresql             ClusterIP   172.30.215.68   <none>        5432/TCP            56m
api7-postgresql-hl          ClusterIP   None            <none>        5432/TCP            56m
api7-prometheus-server      ClusterIP   172.30.3.68     <none>        9090/TCP            56m
api7ee3-dashboard           ClusterIP   172.30.249.55   <none>        7080/TCP            56m
api7ee3-dp-manager          ClusterIP   172.30.43.83    <none>        7900/TCP,7943/TCP   56m
Next, forward the gateway port 80 to localhost:9080:
kubectl port-forward svc/api7-ee-3-gateway-gateway 9080:80
Send a Request
This request receives the correct response, which means the installation is successfully.
curl "http://127.0.0.1:9080/anything" -i
You should receive an HTTP/1.1 200 OK response similar to the following:
{
  "args": {},
  "data": "",
  "files": {},
  "form": {},
  "headers": {
    "Accept": "*/*",
    "Host": "localhost",
    "User-Agent": "curl/8.4.0",
    "X-Amzn-Trace-Id": "Root=1-65fa9071-7506ab7b0e98d7546e3c0845",
    "X-Forwarded-Host": "localhost"
  },
  "json": null,
  "method": "GET",
  "origin": "::1, 3.1.235.149",
  "url": "http://localhost/anything"
}
What's Next
In addition to publishing services through the Dashboard UI, API7 provides a command line tool that can operate declarative configuration, so you can integrate API7 Operations with internal GitOps. See Managing APISIX Declaratively with APISIX Declarative CLI (ADC).
See Getting Started tutorials to learn more about how to work with ADC.
FAQ
How to Connect to Existing PostgreSQL?
Configure your database DSN in the Helm values file:
dashboard_configuration:
  database:
    dsn: "postgres://api7ee:changeme@api7-postgresql:5432/api7ee"

dp_manager_configuration:
  database:
    dsn: "postgres://api7ee:changeme@api7-postgresql:5432/api7ee"