Rate Limiting
As an API gateway, APISIX serves as a unified entry point for a massive volume of requests that could include both legitimate and unwanted traffic.
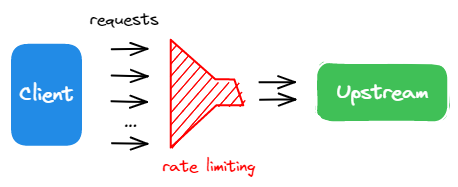
Rate limiting is one of the commonly used techniques to protect and manage APIs. For example, you can configure your API endpoints to allow for a set number of requests within a given period of time. This ensures fair usage of the upstream services and safeguards the APIs from potential cyber attacks like DDoS (Distributed Denial of Service) or excessive requests from web crawlers.
In this tutorial, you will enable the limit-count plugin to set a rate limiting constraint on the incoming traffic.
Prerequisite(s)
- Complete Get APISIX to install APISIX in Docker.
- Complete Configure Routes.
- Install ADC or APISIX-MCP if you are using these tools.
Enable Rate Limiting
- Admin API
- ADC
- APISIX-MCP
Update the getting-started-ip route from Configure Routes with the limit-count plugin:
curl -i "http://127.0.0.1:9180/apisix/admin/routes/getting-started-ip" -X PATCH -d '
{
  "plugins": {
    "limit-count": {
      "count": 2,
      "time_window": 10,
      "rejected_code": 429
    }
  }
}'
You will receive an HTTP/1.1 200 OK response if the plugin was added successfully.
services:
  - name: httpbin Service
    routes:
      - uris:
          - /ip
        name: getting-started-ip
        plugins:
          limit-count:
            rejected_code: 429
            count: 2
            time_window: 10
    upstream:
      type: roundrobin
      nodes:
        - host: httpbin.org
          port: 80
          weight: 1
Synchronize the configuration to APISIX:
adc sync -f adc.yaml
You will receive a similar response if the configuration was synchronized successfully:
[11:25:49 AM] [ADC] › ✔  success   Sync configuration
[11:25:49 AM] [ADC] › ★  star      All is well, see you next time!
Enter the following prompt in your AI client:
Apply rate limiting to the getting-started-ip route to restrict access to 2 requests every 10 seconds, returning a 429 response when the limit is exceeded.
You should see a response similar to the following:
Successfully configured rate limiting for route 'getting-started-ip' with:

* Limit of 2 requests per 10 seconds
* Rate limiting by client IP address (remote_addr)
* HTTP 429 response when limit is exceeded
The above configuration limits the incoming requests to a maximum of 2 requests within 10 seconds.
Verify
- Admin API
- ADC
- APISIX-MCP
Generate 50 simultaneous requests to see the rate limiting plugin in effect.
resp=$(seq 50 | xargs -I{} curl "http://127.0.0.1:9080/ip" -o /dev/null -s -w "%{http_code}\n") && \
  count_200=$(echo "$resp" | grep "200" | wc -l) && \
  count_429=$(echo "$resp" | grep "429" | wc -l) && \
  echo "200": $count_200, "429": $count_429
The results are as expected: out of the 50 requests, 2 requests were sent successfully (status code 200) while the others were rejected (status code 429).
"200": 2, "429": 48
Enter the following prompt in your AI client:
Generate 50 consecutive requests to the APISIX /ip route to observe the load-balancing behavior, then count how many responses are 200 and how many are 429.
You should see a response similar to the following:
From 50 consecutive requests to the /ip route:

* Successful responses (HTTP 200): 2
* Rate limited responses (HTTP 429): 48

The rate limiting is working as configured (2 requests per 10 seconds). All requests beyond the limit received 429 responses. The two successful responses show the load balancing is working with the upstream httpbin.org service.
Disable Rate Limiting
- Admin API
- ADC
- APISIX-MCP
Disable rate limiting by setting the _meta.disable parameter to true:
curl -i "http://127.0.0.1:9180/apisix/admin/routes/getting-started-ip" -X PATCH -d '
{
  "plugins": {
    "limit-count": {
      "_meta": {
        "disable": true
      }
    }
  }
}'
Disable rate limiting by setting the _meta.disable parameter to true:
services:
  - name: httpbin Service
    routes:
      - uris:
          - /ip
        name: getting-started-ip
        plugins:
          limit-count:
            rejected_code: 429
            count: 2
            time_window: 10
            _meta:
              disable: true
    upstream:
      type: roundrobin
      nodes:
        - host: httpbin.org
          port: 80
          weight: 1
Synchronize the configuration to APISIX:
adc sync -f adc.yaml
Enter the following prompt in your AI client:
Disable the rate limiting plugin for route getting-started-ip while keeping its configuration intact.
You should see a response similar to the following:
Successfully disabled the limit-count plugin for route 'getting-started-ip' while maintaining all other configuration. The route now:

* Still matches requests to URI '/ip'
* Forwards to upstream httpbin.org:80
* Has rate limiting disabled (but configuration preserved)
Verify
- Admin API
- ADC
- APISIX-MCP
Generate 50 requests again to verify if the rate limiting is disabled:
resp=$(seq 50 | xargs -I{} curl "http://127.0.0.1:9080/ip" -o /dev/null -s -w "%{http_code}\n") && \
  count_200=$(echo "$resp" | grep "200" | wc -l) && \
  count_429=$(echo "$resp" | grep "429" | wc -l) && \
  echo "200": $count_200, "429": $count_429
The results below show that all requests were sent successfully:
"200": 50, "429": 0
Enter the following prompt in your AI client:
Generate 50 consecutive requests to the APISIX /ip route to observe the load-balancing behavior, then count how many responses are 200 and how many are 429.
You should see a response similar to the following:
From 50 consecutive requests to the /ip route:

* Successful responses (HTTP 200): 50
* Rate limited responses (HTTP 429): 0

The rate limiting has been disabled and is working as expected with all requests successfully reaching the upstream httpbin.org service.
More
You can use APISIX variables to configure fine-grained matching rules of rate limiting, such as $host and $uri. In addition, APISIX also supports rate limiting at the cluster level using Redis.
What's Next
You have learned how to configure rate limiting and completed the Getting Started tutorials.
You can continue to explore other documentation to customize APISIX and meet your production needs.