Apply Rate Limiting to APIs
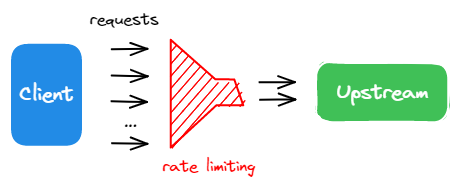
Applying rate limiting controls the number of requests sent to your API backend. This protects your backend from too much traffic, both wanted and unwanted (web crawlers, DDoS attacks), which can result in operational inefficiencies and higher costs.
This guide walks you through applying rate limits to control the requests sent to your upstream nodes over time.
Prerequisites
Apply Rate Limiting for All Services (Not Recommended)
You should not configure rate-limiting plugins globally, as different APIs typically require different rate-limiting quotas. If you configure the same plugin globally (in a global rule) and locally (in a route), the API7 Gateway executes both plugin instances sequentially.
Apply Rate Limiting for a Single Route
Limit Request Count
This section configures a route with rate limiting to only allow 3 requests in 60 seconds. When the limit is exceeded, a 429 status code is returned to the consumer.
- Dashboard
- ADC
- Select Published Services of your gateway group from the side navigation bar, then click the service you want to modify, for example,
httpbinwith version1.0.0. - Under the published service, select Routes from the side navigation bar.
- Select your target route, for example,
get-ip. - In the Plugin field, click Add Plugin.
- Search for the
limit-countplugin, then click Add. - In the dialog box, do the following:
-
Add the following configuration to the JSON Editor:
{"count": 3,"time_window": 60,"key_type": "var","key": "remote_addr","rejected_code": 429,"rejected_msg": "Too many requests","policy": "local","allow_degradation": false,"show_limit_quota_header": true}
If you want to reference from Secret Provider, see Reference Secrets in HashiCorp Vault and Reference Secrets in AWS Secrets Manager, and use the following configuration with secret instead:
{
 "count": 3,
 "time_window": 60,
 "key_type": "var",
     "key": "remote_addr",
 "rejected_code": 429,
 "rejected_msg": "Too many requests",
 "policy": "redis",
 "redis_host": "127.0.0.1",
 "redis_port": 6379,
 "redis_username": "$secret://vault/my-vault/redis/username",
 "redis_password": "$secret://vault/my-vault/redis/password",
 "redis_database": 1,
 "redis_timeout": 1001,
 "allow_degradation": false,
 "show_limit_quota_header": true
}
- Click Add.
Below is an interactive demo that provides a hands-on introduction to limiting request numbers. You will gain a better understanding of how to use it in API7 Enterprise by clicking and following the steps.
To use ADC to configure the route, create the following configuration:
services:
  - name: httpbin
    upstream:
      name: default
      scheme: http
      nodes:
        - host: httpbin.org
          port: 80
          weight: 100
    routes:
      - uris:
          - /ip
        name: get-ip
        methods:
          - GET
        plugins:
          limit-count:
            _meta:
              disable: false
            count: 3
            time_window: 60
            key_type: var
            key: remote_addr
            policy: local
            rejected_code: 429
            rejected_msg: Too many requests
            allow_degradation: false
            show_limit_quota_header: true
Synchronize the configuration to API7 Enterprise:
adc sync -f adc.yaml
Validate
To validate, send five consecutive requests:
resp=$(seq 5 | xargs -I{} curl "http://127.0.0.1:9080/ip" -o /dev/null -s -w "%{http_code}\n") && \
  count_200=$(echo "$resp" | grep "200" | wc -l) && \
  count_429=$(echo "$resp" | grep "429" | wc -l) && \
  echo "200": $count_200, "429": $count_429
You should see the following response, showing that out of the 5 requests, 3 requests were successful (status code 200) while the others were rejected (status code 429).
200: 3, 429: 2
Limit Requests per Second
This section configures a route with rate-limiting to only allow 1 request per second. When the number of requests per second is between 1 and 3 they will be delayed/throttled. When the number of requests per second is more than 3, a 429 status code is returned.
- Dashboard
- ADC
- Select Published Services of your gateway group from the side navigation bar, then select the service you want to modify, for example,
httpbinwith version1.0.0. - Under the published service, select Routes from the side navigation bar.
- Select your target route, for example,
get-ip. - In the Plugin field, click Add Plugin.
- Search for the
limit-reqplugin, then click Add. - In the dialog box, do the following:
-
Add the following configuration to the JSON Editor:
{"rate": 1,"burst": 2,"key_type": "var","key": "remote_addr","rejected_code": 429,"rejected_msg": "Requests are too frequent, please try again later."} -
Click Add.
To use ADC to configure the route, create the following configuration:
services:
  - name: httpbin
    upstream:
      name: default
      scheme: http
      nodes:
        - host: httpbin.org
          port: 80
          weight: 100
    routes:
      - uris:
          - /ip
        name: get-ip
        methods:
          - GET
        plugins:
          limit-req:
            _meta:
              disable: false
            rate: 1
            burst: 2
            key_type: var
            key: remote_addr
            rejected_code: 429
            rejected_msg: Requests are too frequent, please try again later.
Synchronize the configuration to API7 Gateway:
adc sync -f adc.yaml
Validate
To validate, send three requests to the route:
resp=$(seq 3 | xargs -I{} curl -i "http://127.0.0.1:9080/ip" -o /dev/null -s -w "%{http_code}\n") && \
  count_200=$(echo "$resp" | grep "200" | wc -l) && \
  count_429=$(echo "$resp" | grep "429" | wc -l) && \
  echo "200 responses: $count_200 ; 429 responses: $count_429"
You are likely to see that all three requests are successful:
200 responses: 3 ; 429 responses: 0
Update burst in the plugin configuration to 0, then send three requests to the route:
resp=$(seq 3 | xargs -I{} curl -i "http://127.0.0.1:9080/ip" -o /dev/null -s -w "%{http_code}\n") && \
  count_200=$(echo "$resp" | grep "200" | wc -l) && \
  count_429=$(echo "$resp" | grep "429" | wc -l) && \
  echo "200 responses: $count_200 ; 429 responses: $count_429"
You should see a response similar to the following, showing requests surpassing the rate have been rejected:
200 responses: 1 ; 429 responses: 2
Rate Limit with Consumers
The following example demonstrates how you can configure different rate limiting policies by regular and anonymous consumers, where the anonymous consumer does not need to authenticate and has less quota. While this example uses Key Auth Plugin for authentication, the anonymous consumer can also be configured with Basic Auth Plugin, JWT Auth Plugin, and HMAC Auth Plugin.
Add a Regular Consumer
Create a regular consumer Alice with key authentication credential, and configure the Limit Count Plugin to allow for a quota of 3 within a 60-second window:
- Dashboard
- ADC
- Select Consumers of your gateway group from the side navigation bar.
- Click Add Consumer.
- From the dialog box, do the following:
- In the Name field, enter
Alice. - Click Add.
- Under the Credentials tab, click Add Key Authentication Credential.
- From the dialog box, do the following:
- In the Name field, enter
alice-key. - In the Key field, choose Manually Input, then enter
alice-key.- If you want to choose Reference from Secret Provider, see Reference Secrets in HashiCorp Vault or Reference Secrets in AWS Secrets Manager.
- Click Add.
- Got to the Plugins tab, click Add Plugin.
- Search for the
limit-countplugin, then click Add. - In the dialog box, do the following:
-
Add the following configuration to the JSON Editor:
{"count": 3,"time_window": 60,"key_type": "var","key": "remote_addr","rejected_code": 429,"rejected_msg": "Too many requests","policy": "local","allow_degradation": false,"show_limit_quota_header": true} -
Click Add.
To use ADC to create a consumer, create the following configuration:
consumers:
  - username: Alice
    credentials:
      - name: alice-key
        type: key-auth
        config:
          key: alice-key
    plugins:
      limit-count:
        allow_degradation: false
        count: 3
        key: remote_addr
        key_type: var
        policy: local
        rejected_code: 429
        rejected_msg: Too many requests
        show_limit_quota_header: true
        time_window: 60
Synchronize the configuration to API7 Enterprise:
adc sync -f adc-reg-consumer.yaml
Add an Anonymous Consumer
Create an anonymous consumer anonymous and configure the Limit Count Plugin to allow for a quota of 1 within a 60-second window:
- Dashboard
- ADC
- Select Consumers of your gateway group from the side navigation bar.
- Click Add Consumer.
- From the dialog box, do the following:
- In the Name field, enter
anonymous. - Click Add.
- Got to the Plugins tab, click Add Plugin.
- Search for the
limit-countplugin, then click Add. - In the dialog box, do the following:
-
Add the following configuration to the JSON Editor:
{"count": 1,"time_window": 60,"key_type": "var","key": "remote_addr","rejected_code": 429,"rejected_msg": "Too many requests","policy": "local","allow_degradation": false,"show_limit_quota_header": true} -
Click Add.
To use ADC to create an anonymous consumer, create the following configuration:
consumers:
  - username: anonymous
    plugins:
      limit-count:
        allow_degradation: false
        count: 1
        key: remote_addr
        key_type: var
        policy: local
        rejected_code: 429
        rejected_msg: Too many requests
        show_limit_quota_header: true
        time_window: 60
Synchronize the configurations to API7 Enterprise:
adc sync -f adc-reg-consumer.yaml -f adc-anon-consumer.yaml
Configure Route
Create a route and configure the Key Auth Plugin to accept anonymous consumer anonymous from bypassing the authentication:
- Dashboard
- ADC
- Select Published Services of your gateway group from the side navigation bar, then click the service you want to modify, for example,
httpbinwith version1.0.0. - Under the published service, select Routes from the side navigation bar.
- Select your target route, for example,
get-ip. - In the Plugin field, click Add Plugin.
- Search for the
key-authplugin, then click Add. - In the dialog box, do the following:
-
Add the following configuration to the JSON Editor:
{"anonymous_consumer": "anonymous"} -
Click Add.
To use ADC to configure the route, create the following configuration:
services:
  - name: httpbin
    upstream:
      name: default
      scheme: http
      nodes:
        - host: httpbin.org
          port: 80
          weight: 100
    routes:
      - uris:
          - /ip
        name: get-ip
        methods:
          - GET
        plugins:
          key-auth:
            _meta:
              disable: false
            anonymous_consumer: anonymous
Synchronize the configurations to API7 Gateway:
adc sync -f adc-reg-consumer.yaml -f adc-anon-consumer.yaml -f adc-route.yaml
Validate
To validate, send five consecutive requests with Alice's key:
resp=$(seq 5 | xargs -I{} curl "http://127.0.0.1:9080/ip" -H 'apikey: alice-key' -o /dev/null -s -w "%{http_code}\n") && \
  count_200=$(echo "$resp" | grep "200" | wc -l) && \
  count_429=$(echo "$resp" | grep "429" | wc -l) && \
  echo "200": $count_200, "429": $count_429
You should see the following response, showing that out of the 5 requests, 3 requests were successful (status code 200) while the others were rejected (status code 429).
200: 3, 429: 2
Send five anonymous requests:
resp=$(seq 5 | xargs -I{} curl "http://127.0.0.1:9080/ip" -o /dev/null -s -w "%{http_code}\n") && \
  count_200=$(echo "$resp" | grep "200" | wc -l) && \
  count_429=$(echo "$resp" | grep "429" | wc -l) && \
  echo "200": $count_200, "429": $count_429
You should see the following response, showing that only one request was successful:
200: 1, 429: 4