Developing APIs
This guide will instruct you on how to develop high-performance and healthy APIs based on the completed API design document.
Prerequisites
Development Process
- Scheduling: Scheduling is a key aspect of the API development process. People in your team need to complete and report their work based on the scheduled timeline to ensure timely project delivery.
- Development and Self-Testing: The development phase typically involves coding and debugging, while the self-testing phase involves developers testing and validating their own developed APIs to ensure their functionality meets expectations.
- Integration Testing: Integration testing is a stage where APIs between different modules are debugged and tested to ensure their interactions and communications are correct and stable.
- QA Testing: Also known as quality assurance testing, aims to identify and eliminate defects or vulnerabilities in the API before it is released to end-users.
- Product Acceptance: API undergoes comprehensive testing, evaluation, and confirmation to determine if it meets the expected goals and standards.
- Deployment: Deploying the API to the production environment, allowing users or clients to access and utilize it.
At this point, we have completed the API development work.
Mocking APIs
We will use Postman's Mock Server and Example to simulate the behavior of the three APIs. Later, we will publish the simulated APIs to the gateway. In a real-world scenario, you would replace them with actual developed APIs.
Create Collection
Log in to Postman and navigate to the shop API created in Designing APIs.
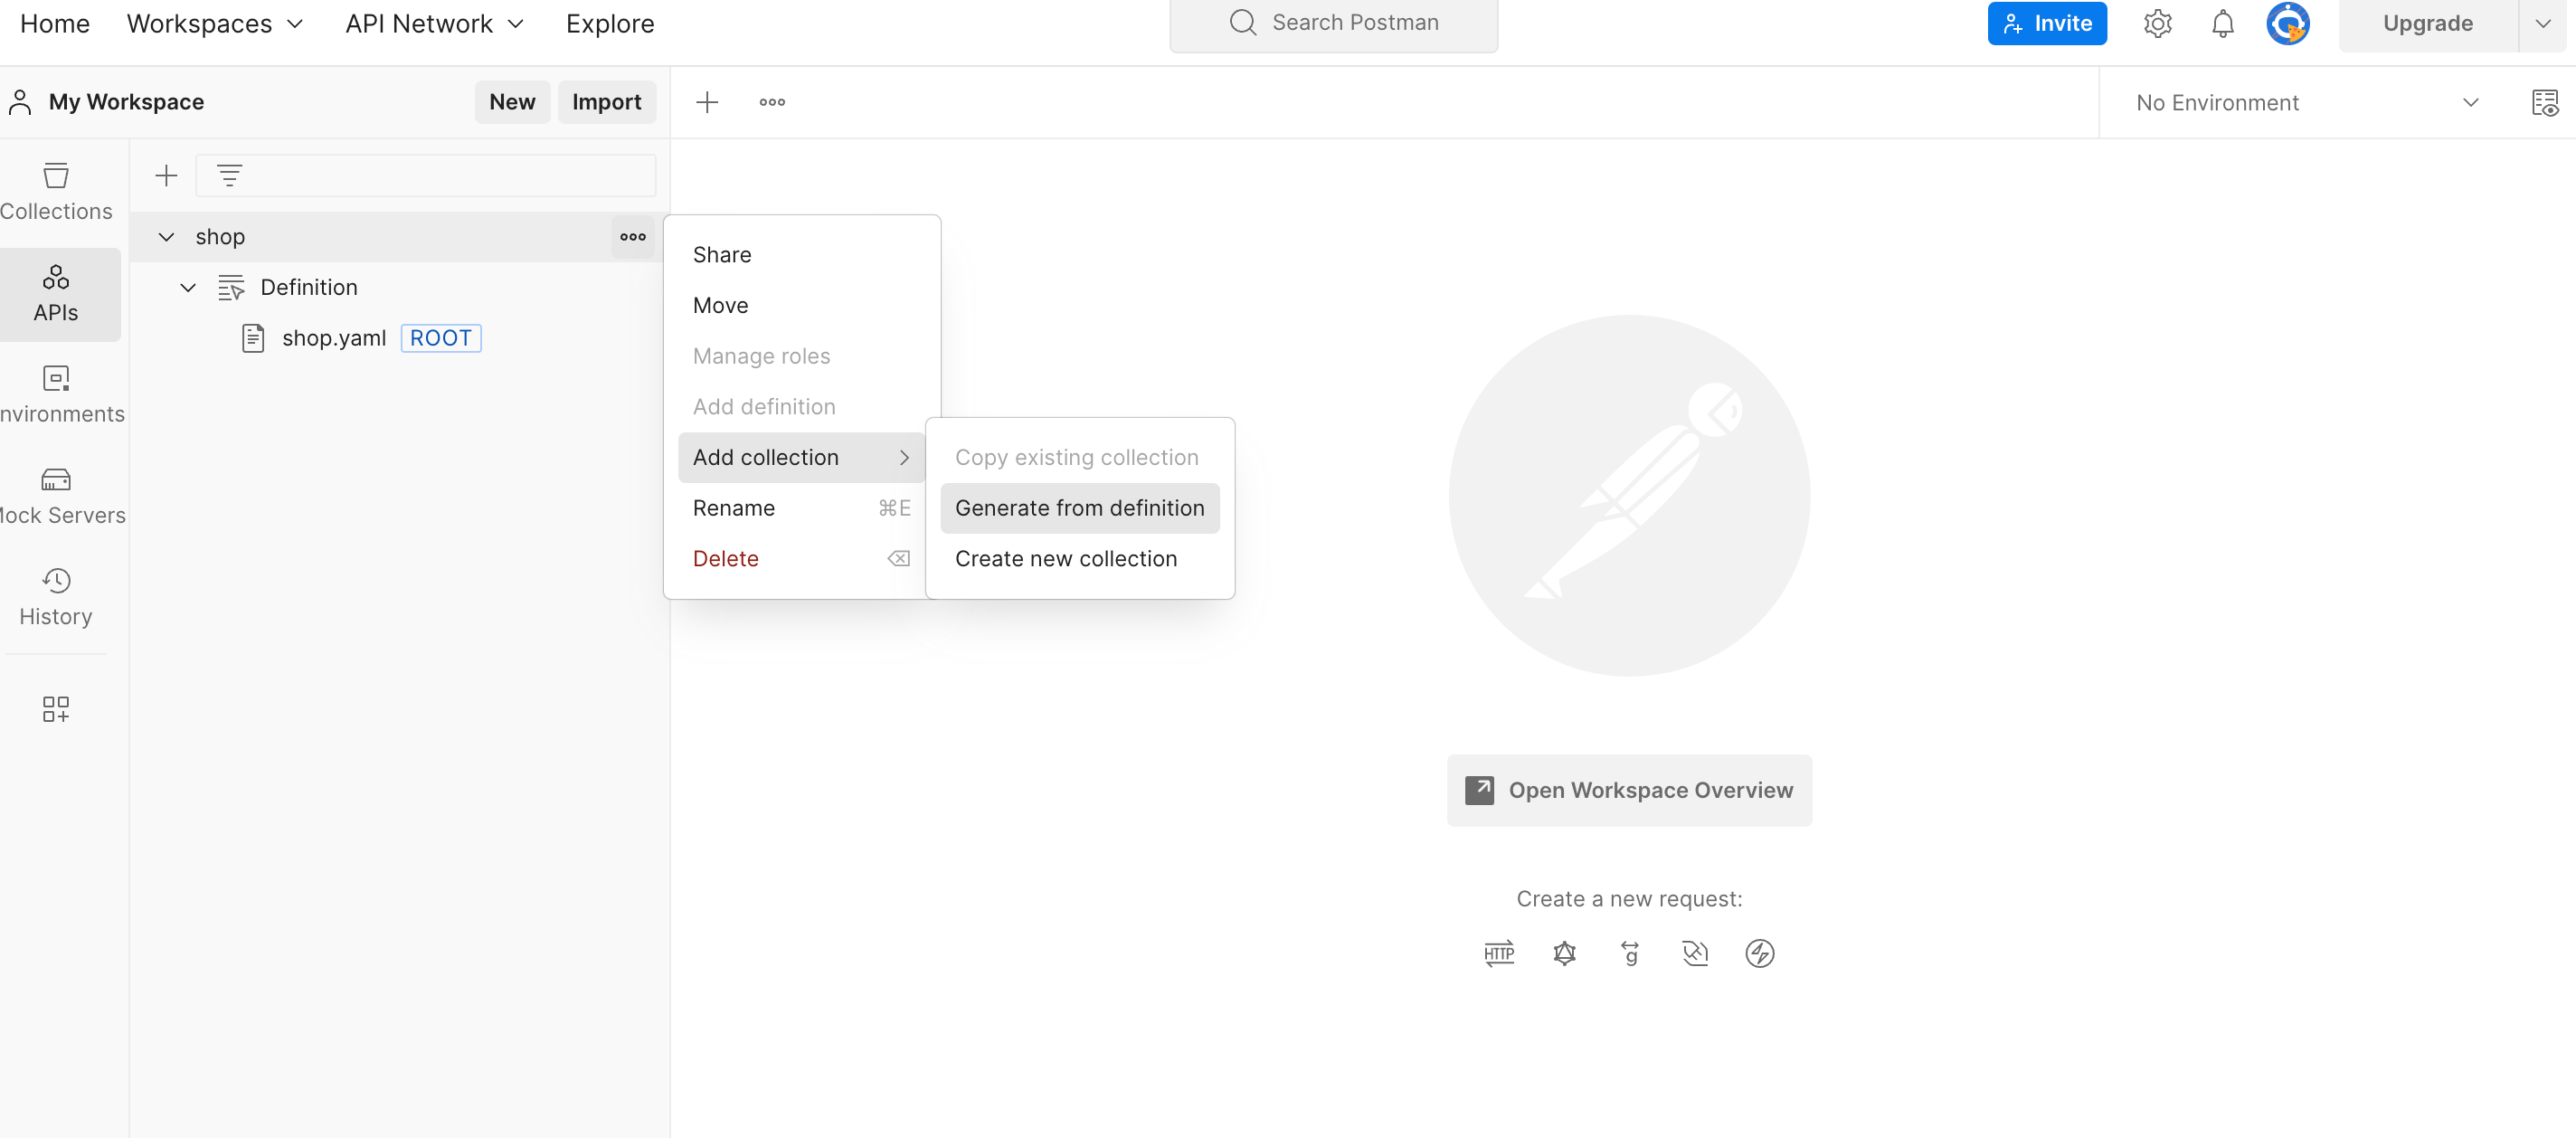
Select Add Collection from definition:
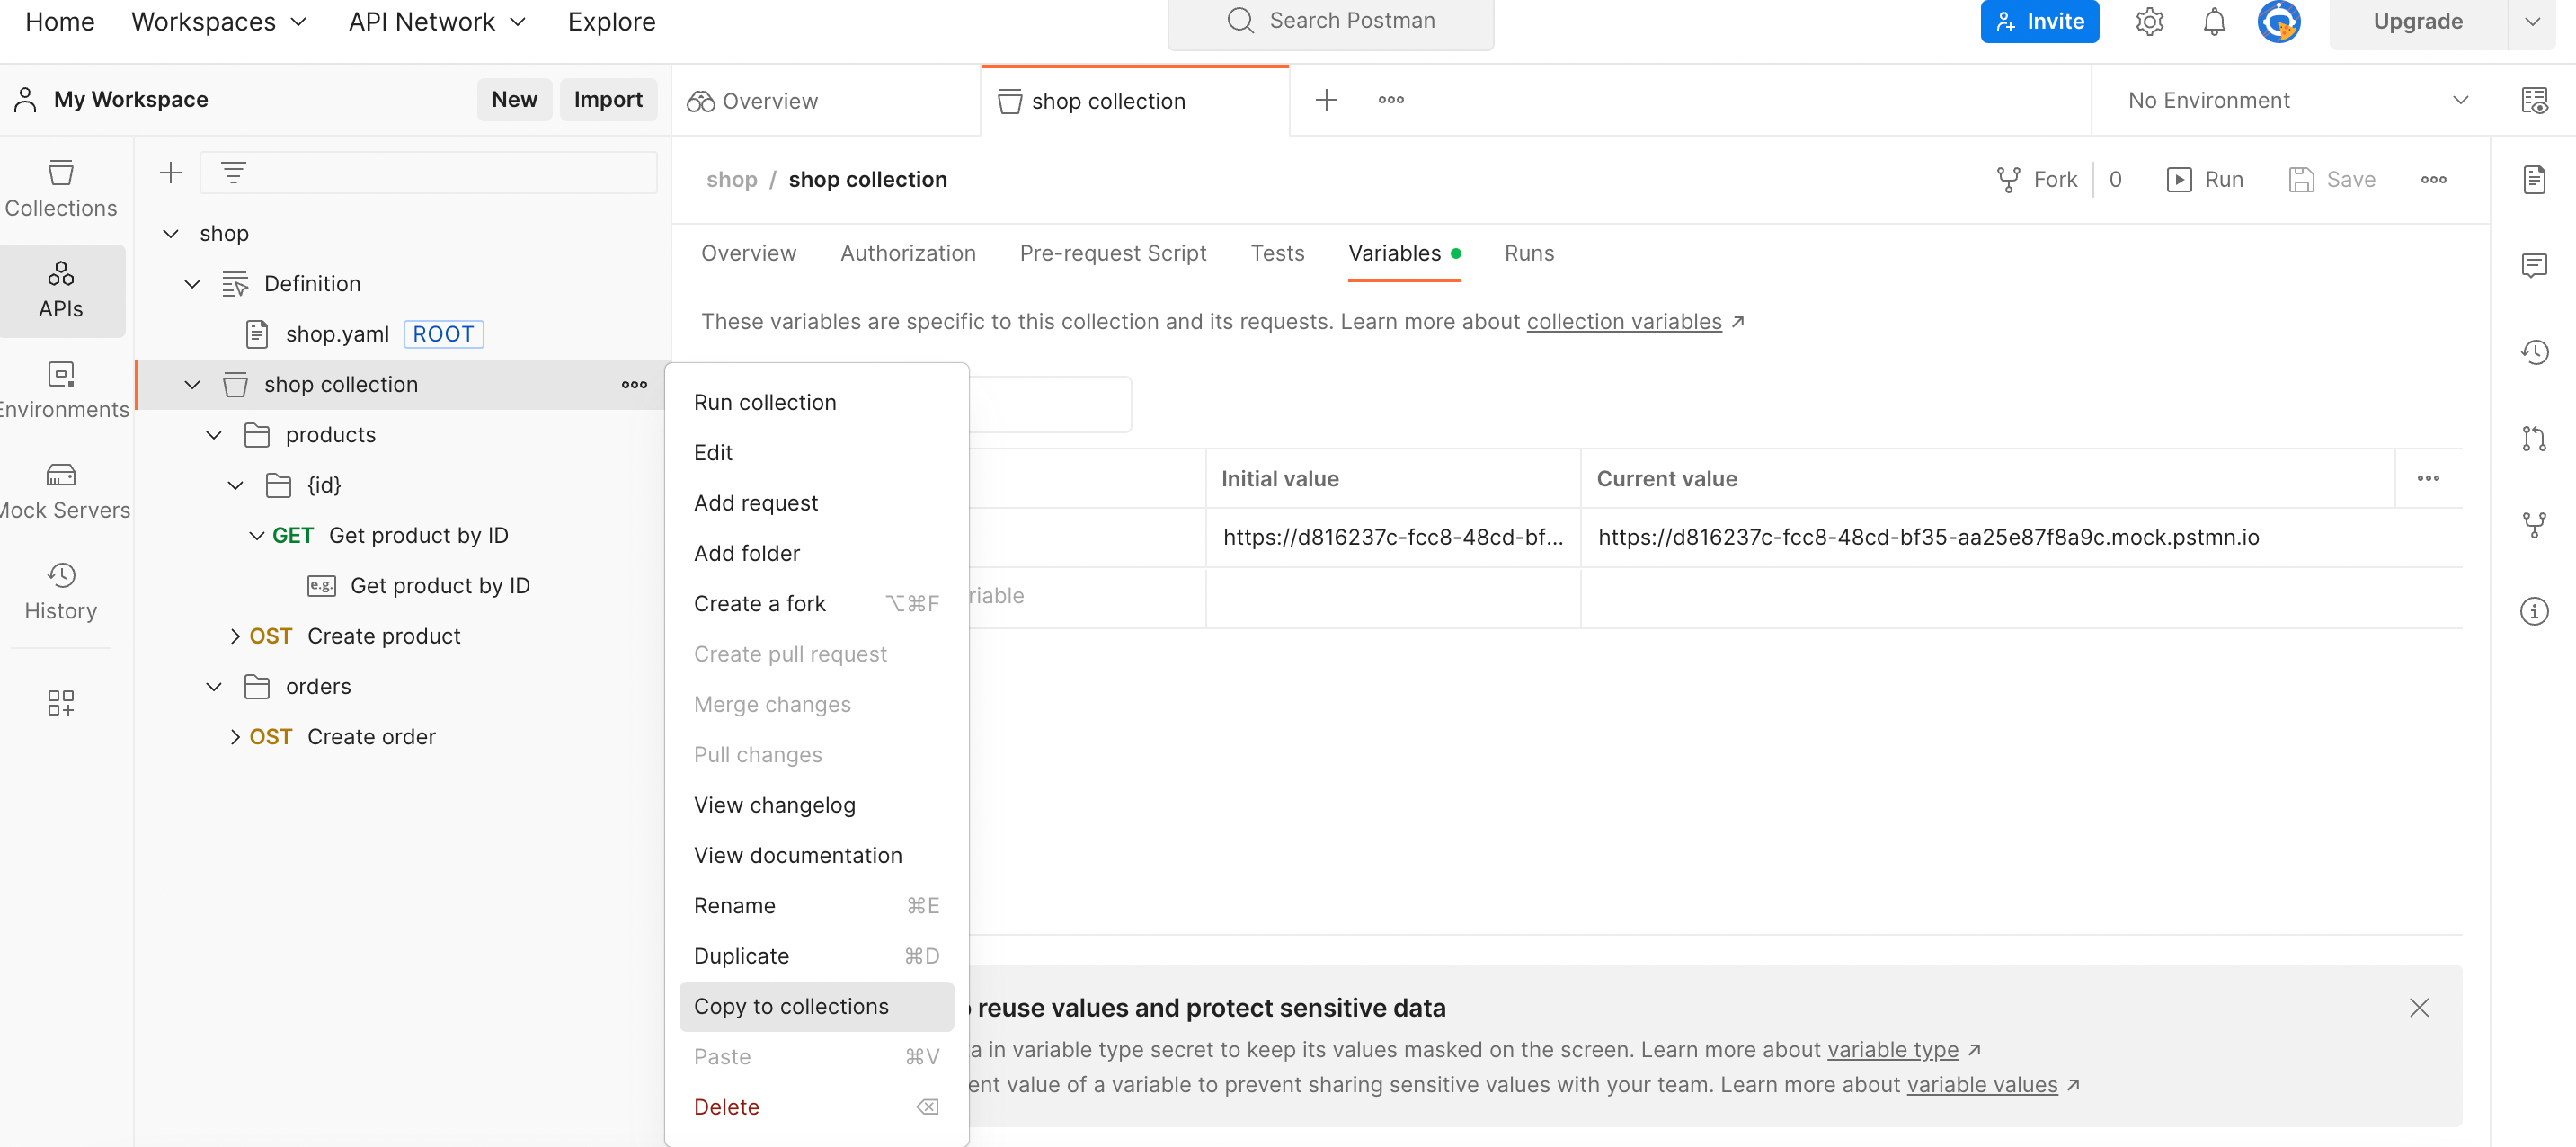
Select Copy to collections:
Create Mock Server
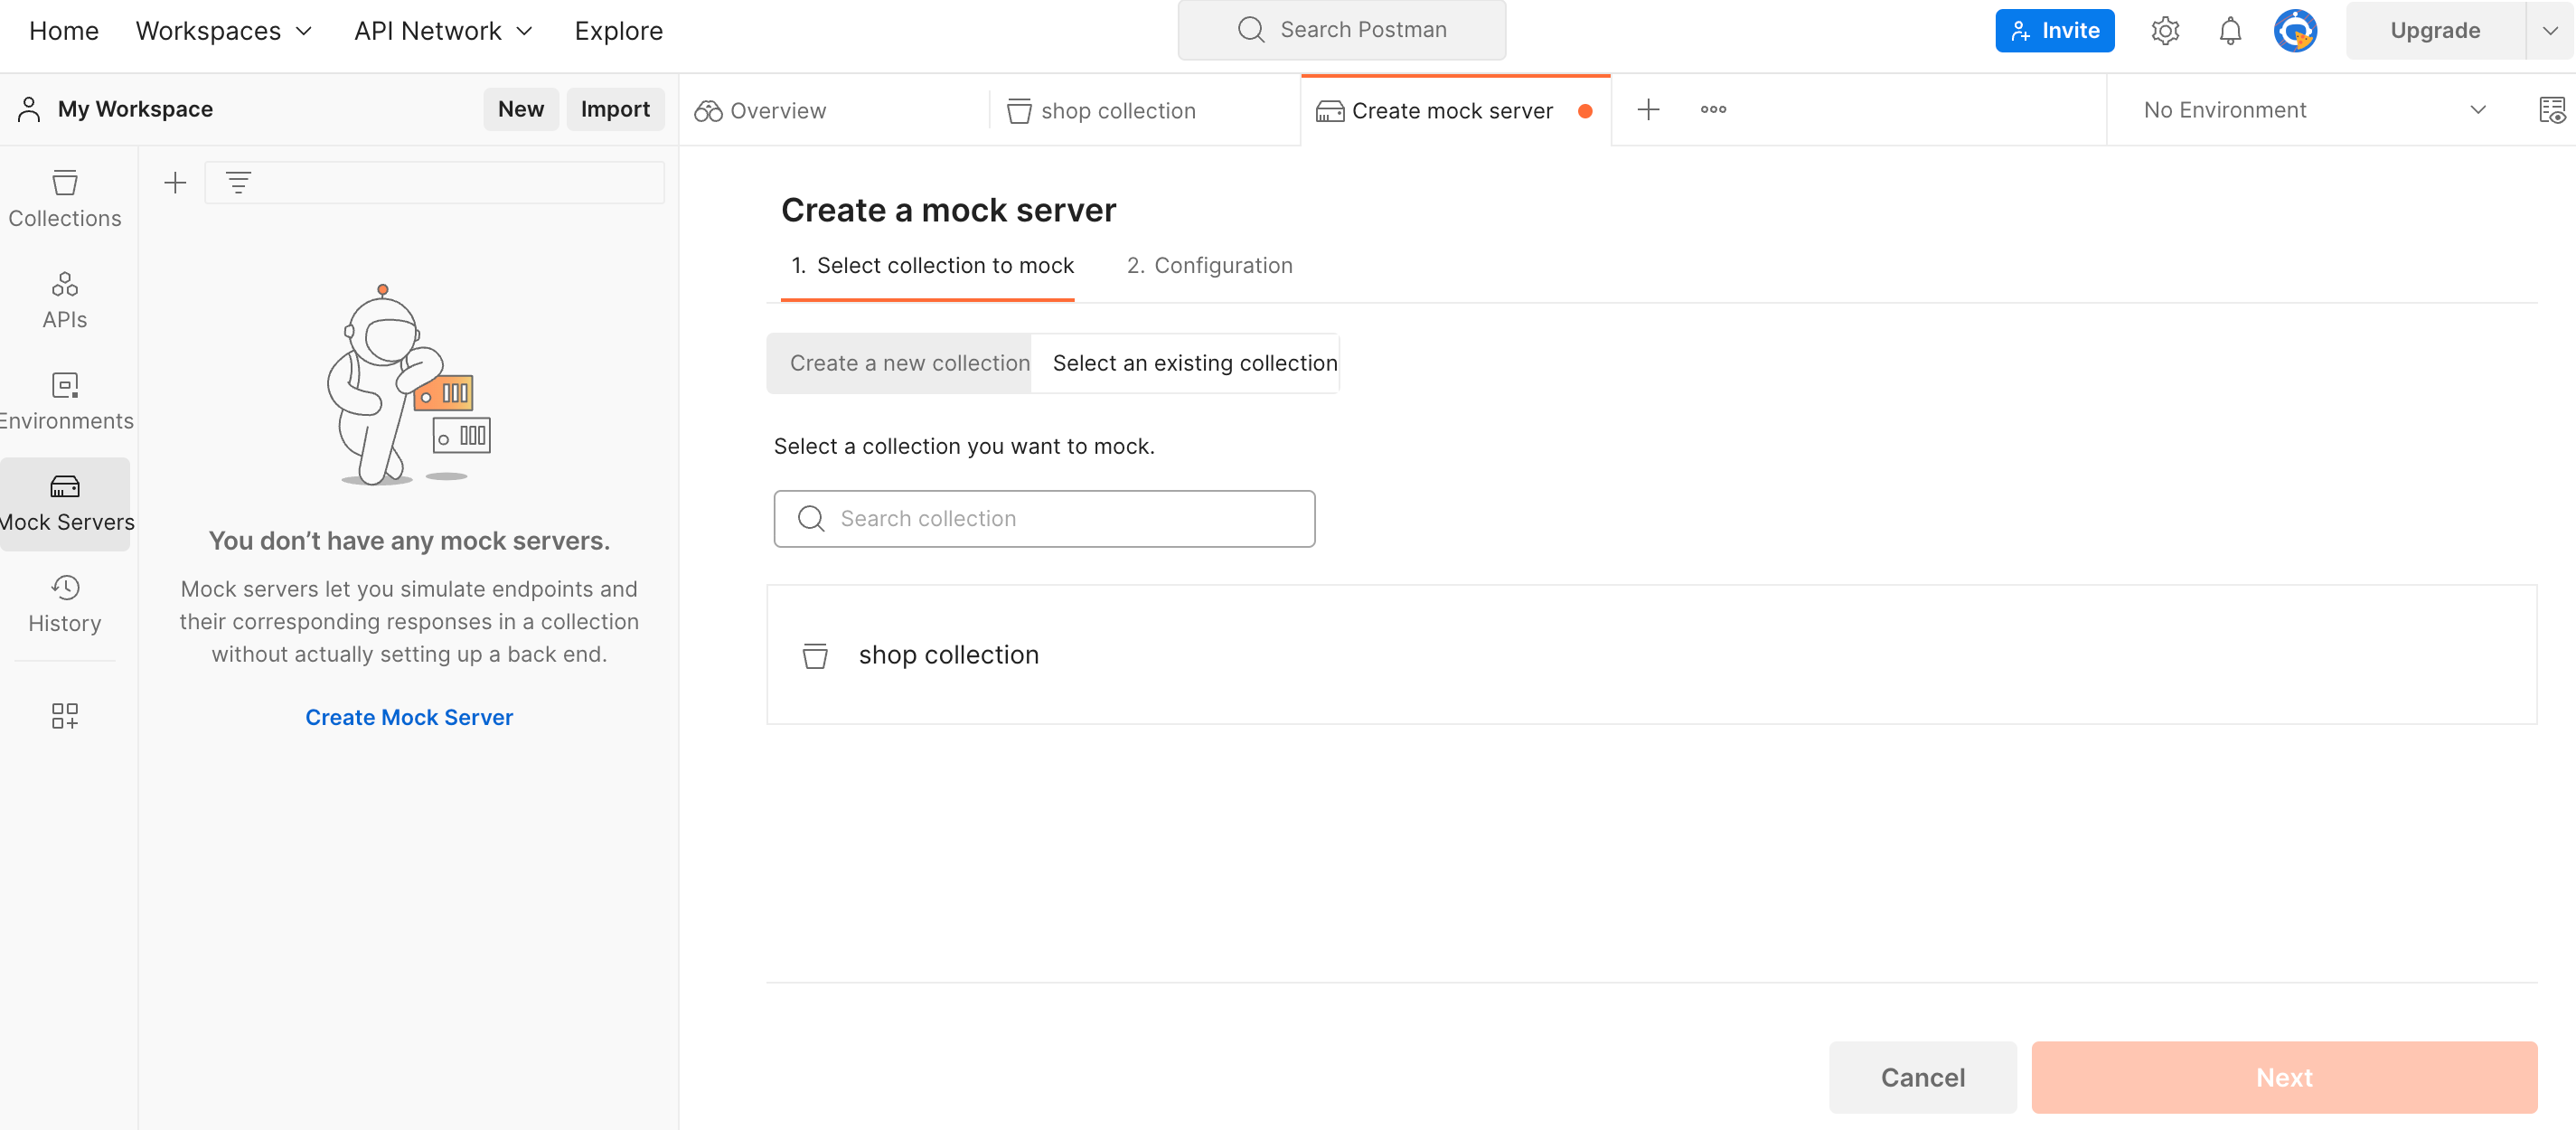
Create a Mock Server for the shop collection:
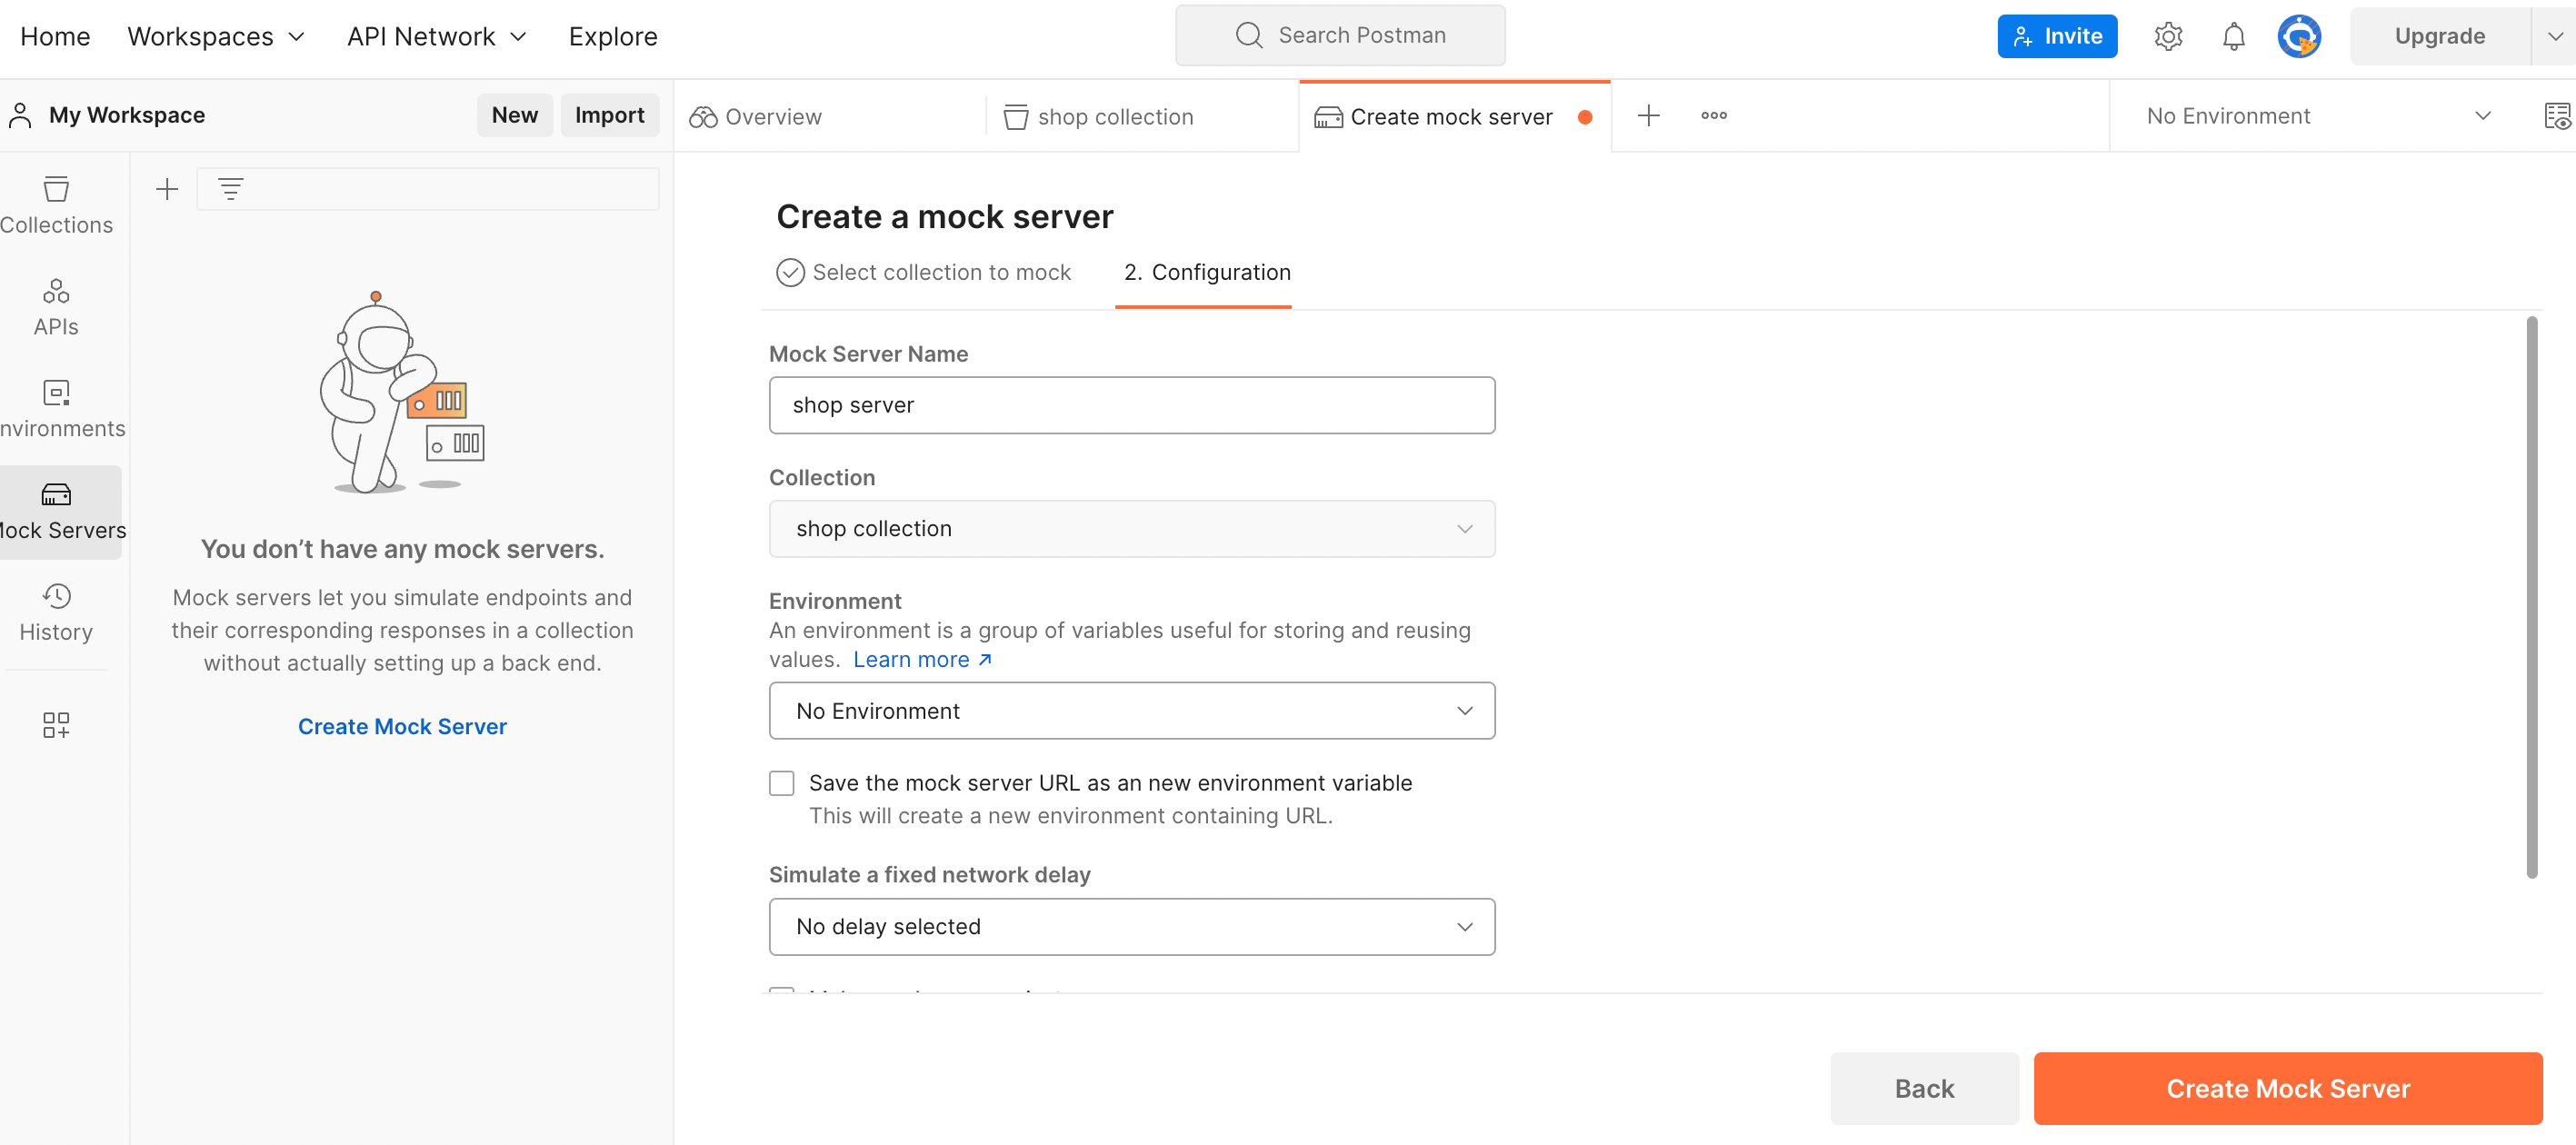
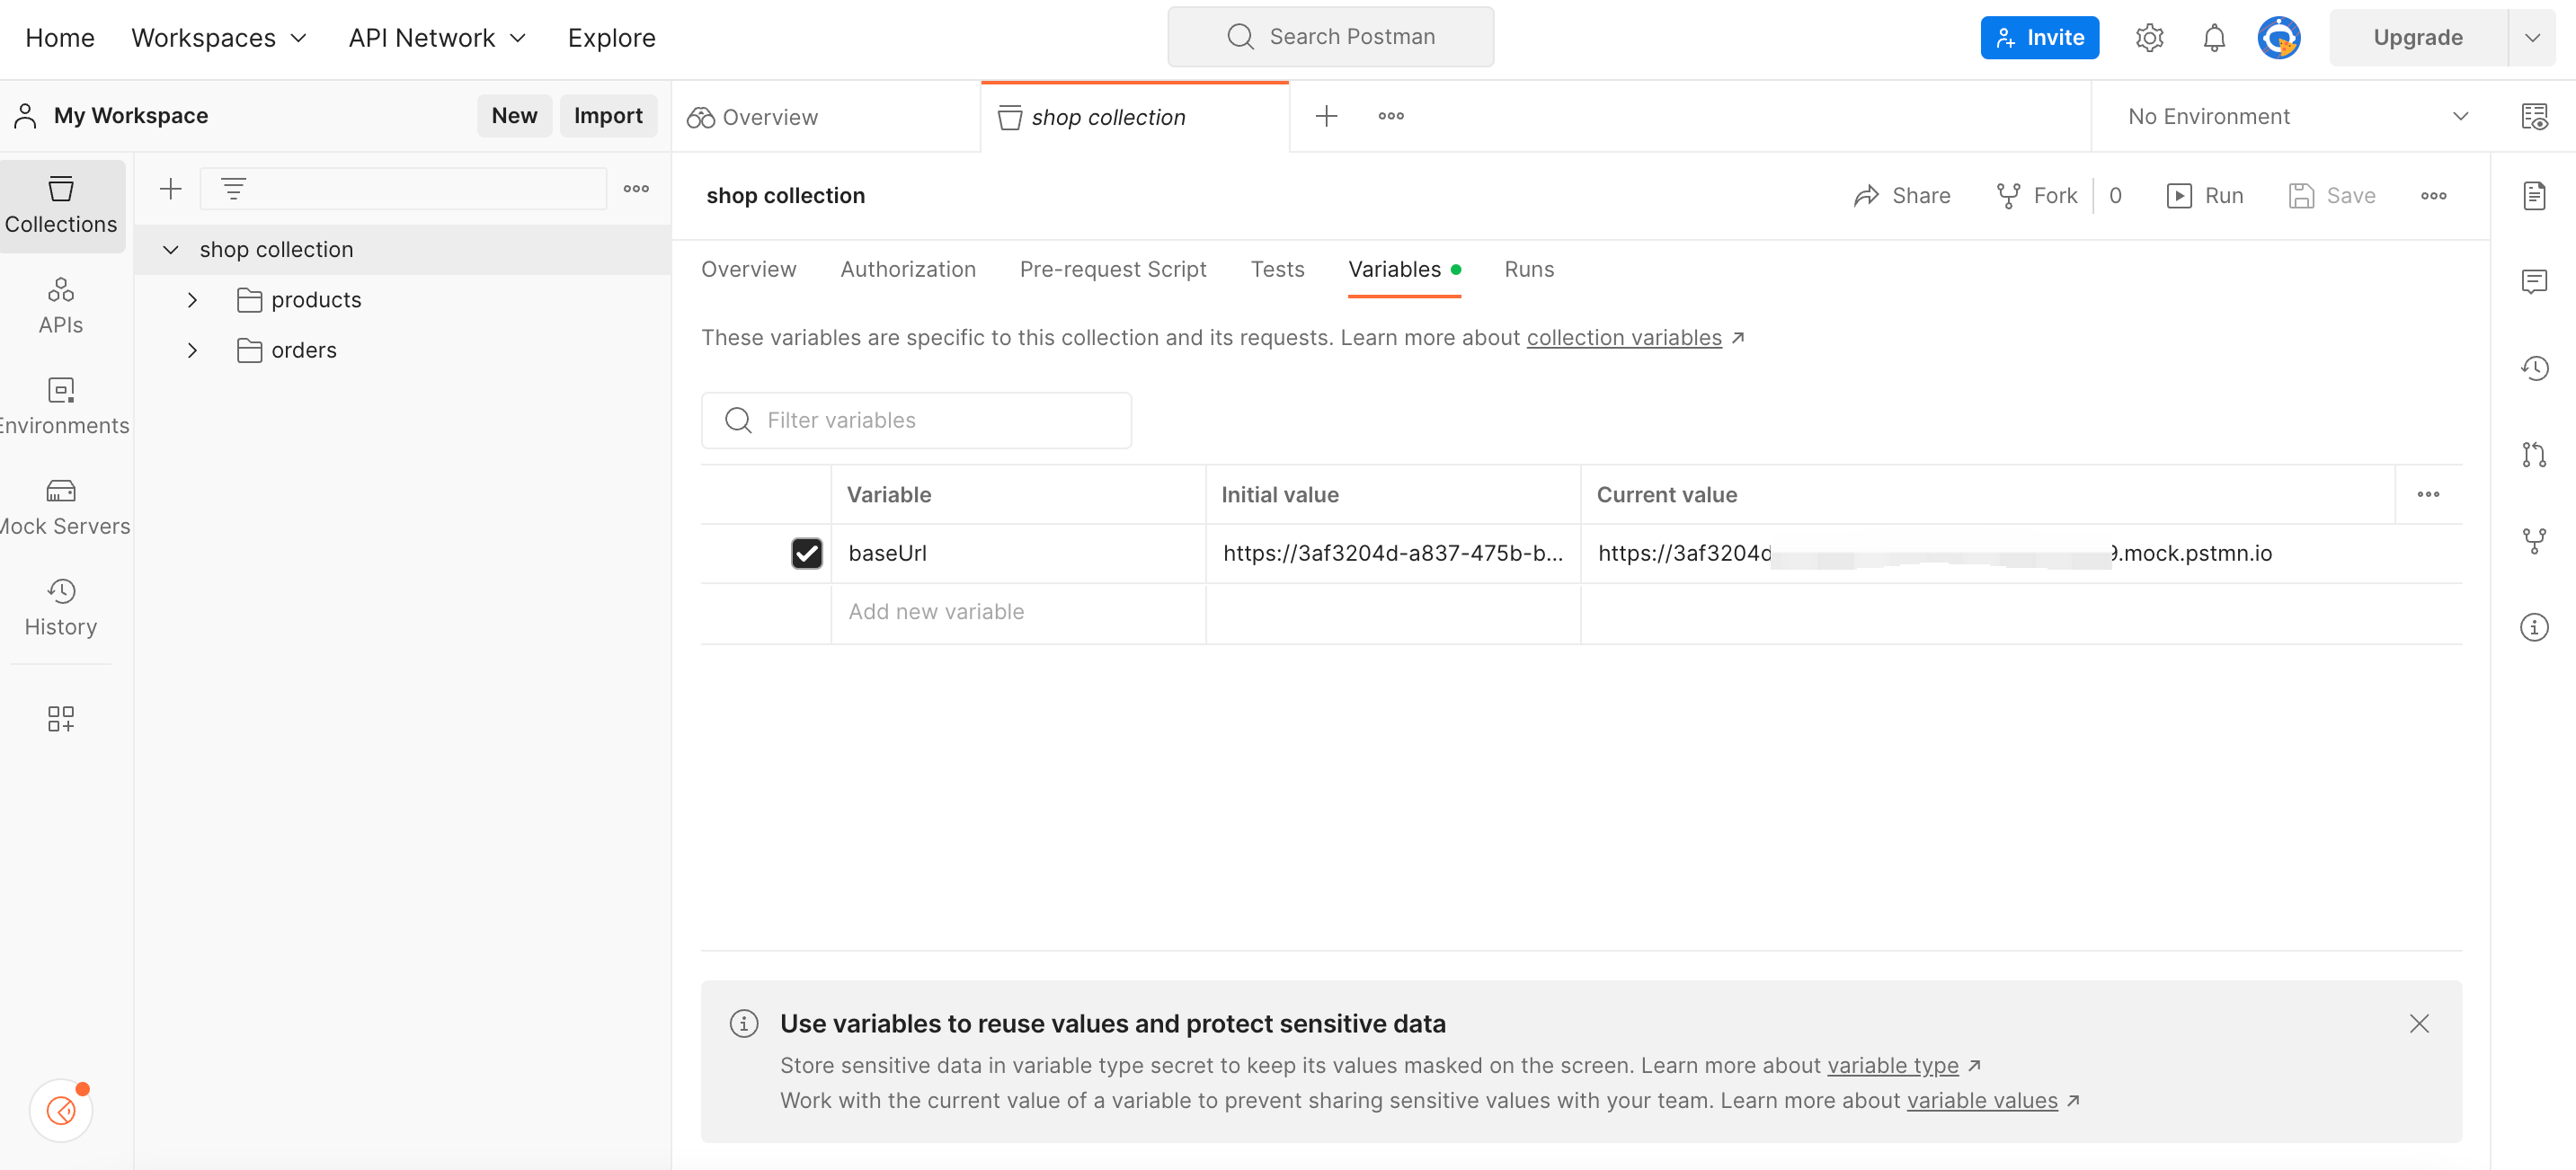
After successful creation, click Copy URL button to copy the Mock Server URL. Then navigate to the shop collection Variables, set the value of baseUrl to the Mock Server URL and Save:
Add Examples
In the shop collection, add examples for the three requests and save.
GetProductById
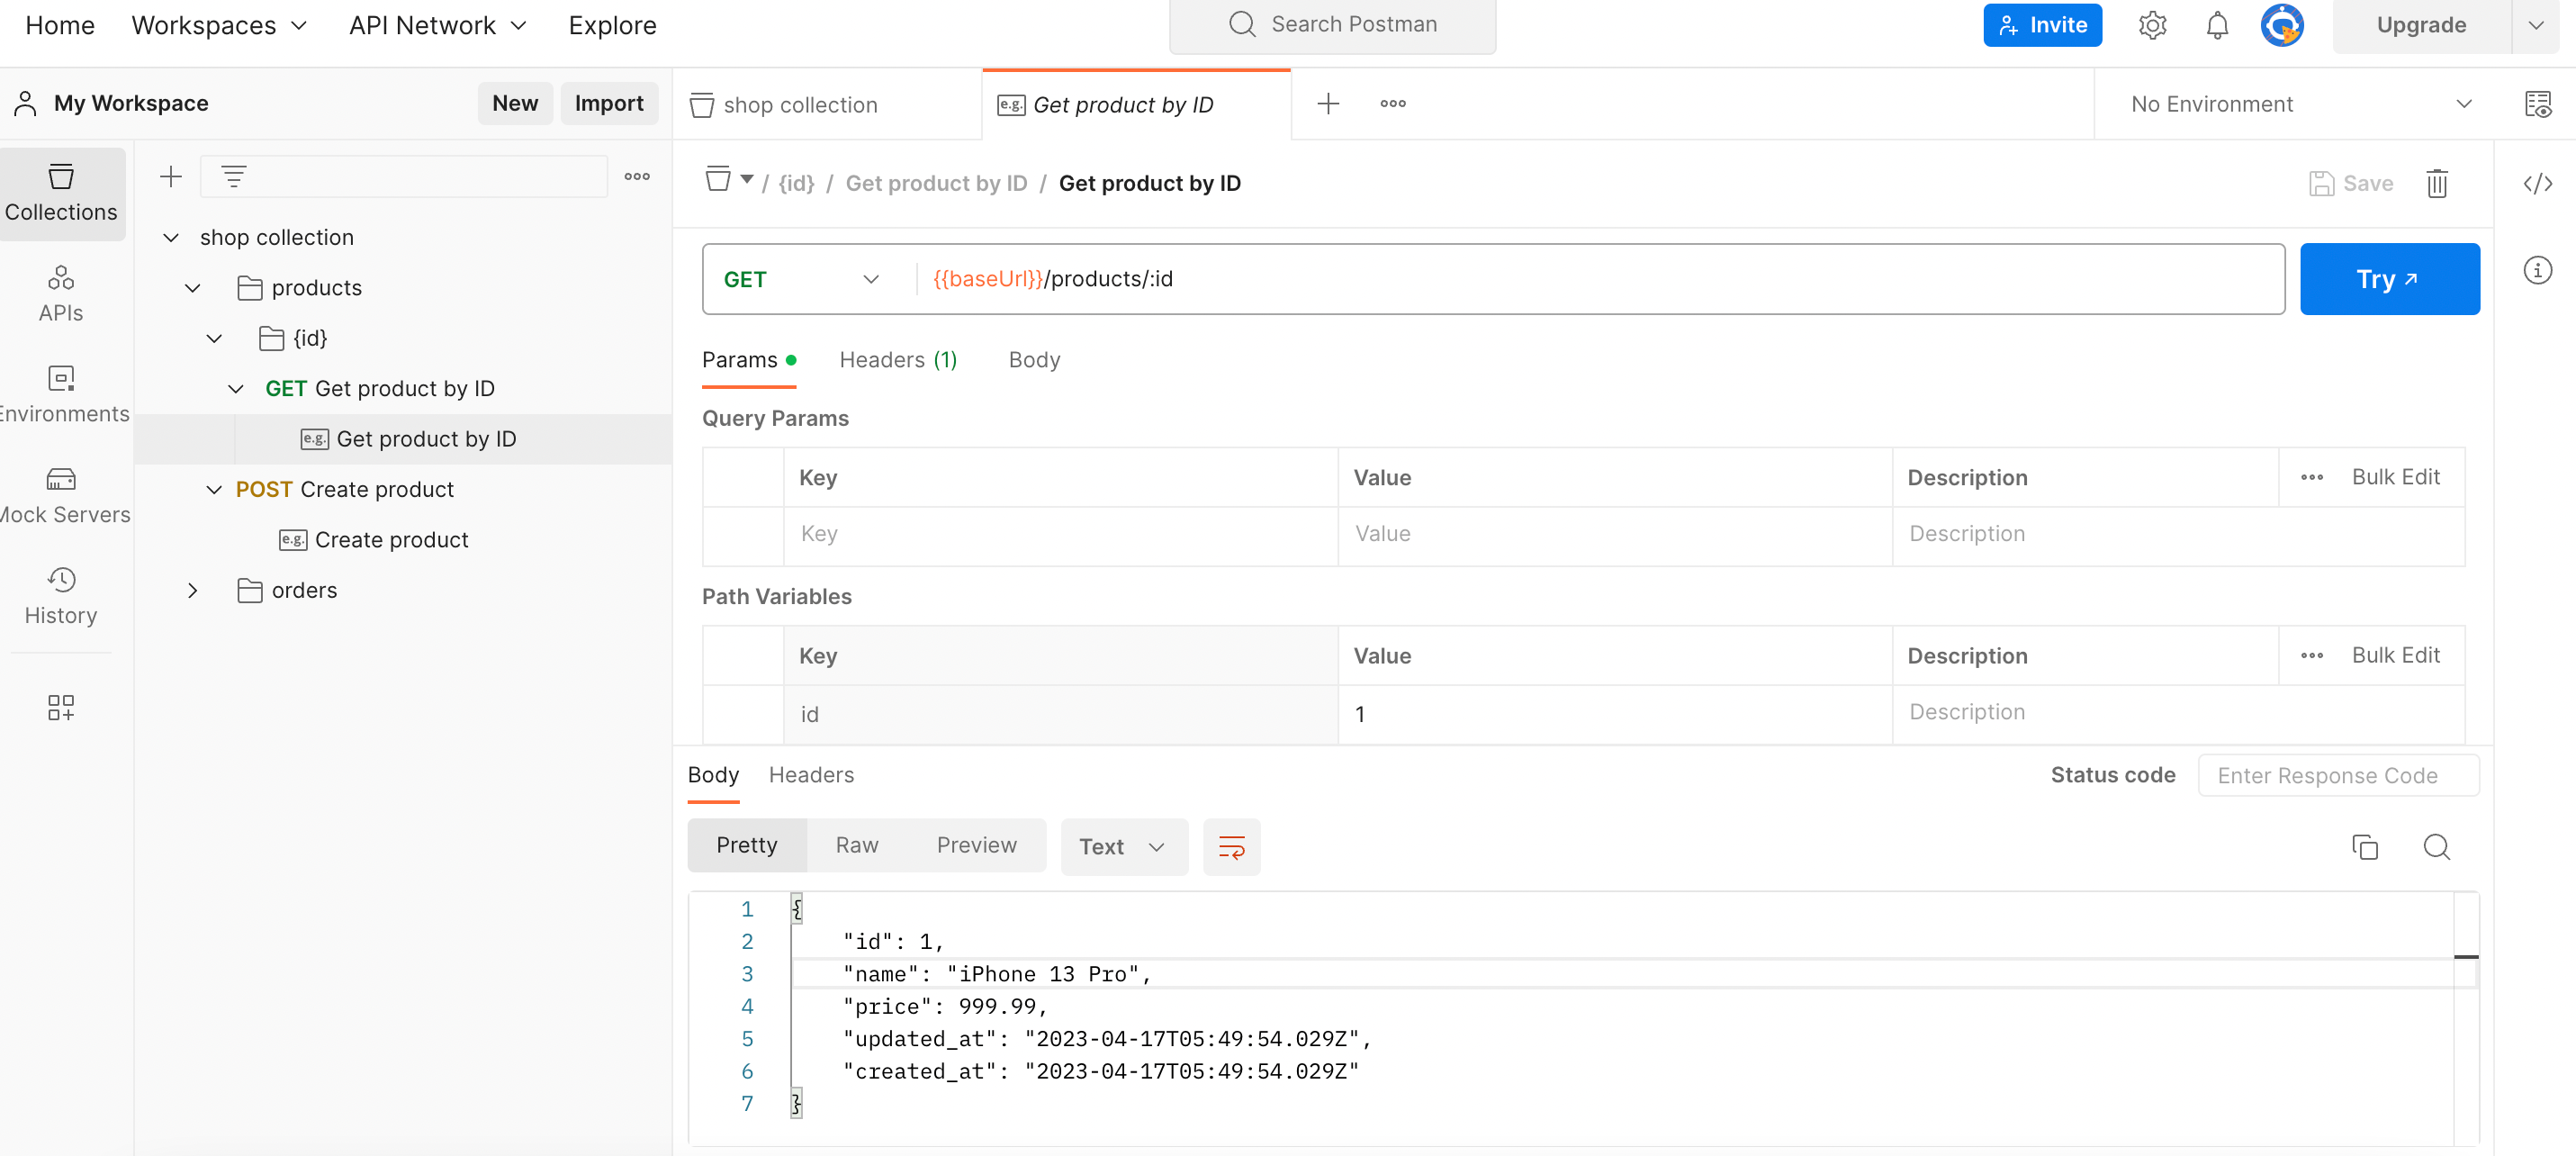
In Path Variables, set the Value for id to 1, then set the response:
{
    "id": 1,
    "name": "iPhone 13 Pro",
    "price": 999.99,
    "updated_at": "2023-04-17T05:49:54.029Z",
    "created_at": "2023-04-17T05:49:54.029Z"
}
Click Save:
CreateProduct
Set request body:
{
  "name": "iPhone 13 Pro",
  "price": 999.99
}
Set response:
{
  "id": 1
}
Click Save.
CreateOrder
Set request body:
{
    "customer_id":"user_ascx8e21nsd",
    "product_id": 1,
    "quantity": 1
}
Set response:
{
  "order_id": 123
}
Click Save.