Configure SCIM Provisioning for Developer Portal with Okta
This guide explains how to enable SCIM (System for Cross-domain Identity Management) provisioning for your Custom Developer Portal. By integrating Okta, you can automatically synchronize user accounts to your portal, ensuring consistent access control.
Since the Developer Portal is based on the API7 Developer Portal Boilerplate, this configuration involves modifying the source code to enable the SCIM plugin in the authentication system (Better Auth).
Prerequisites
- Custom Developer Portal deployed and configured based on the
apps/sitestructure of the boilerplate. See Set Up Developer Portal with Provider Portal and Customize Developer Portal. - An Okta account with administrative privileges.
Create a SCIM Application in Okta
Before modifying your portal code, set up a SCIM application in Okta.
-
Log in to the Okta Admin Console.
-
Navigate to Applications > Applications.
-
Click Browse App Catalog.
-
Search for
SCIMand select SCIM 2.0 Test App (Header Auth).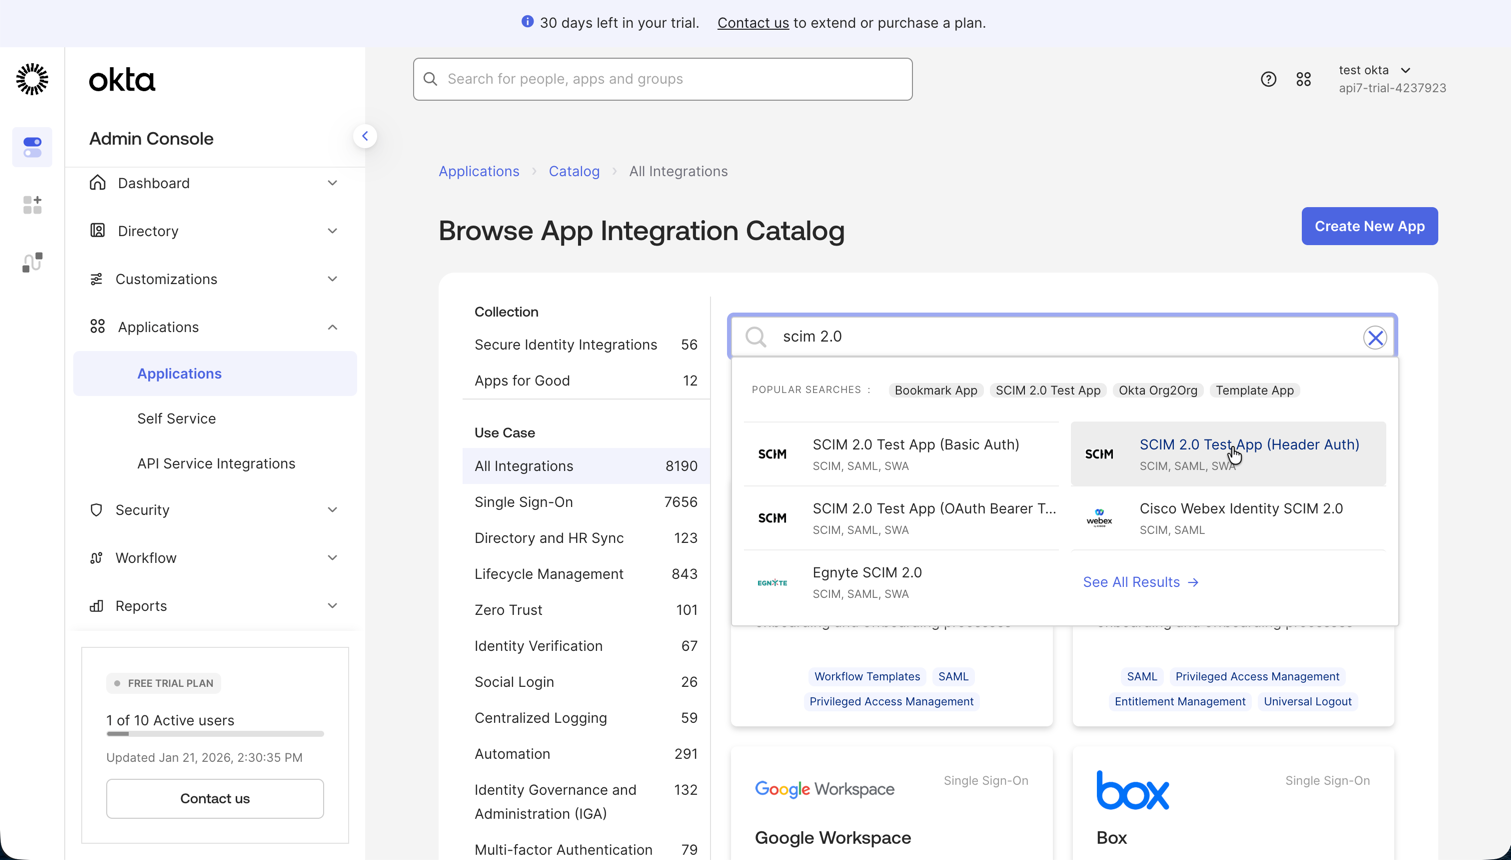
-
Click Add Integration.
-
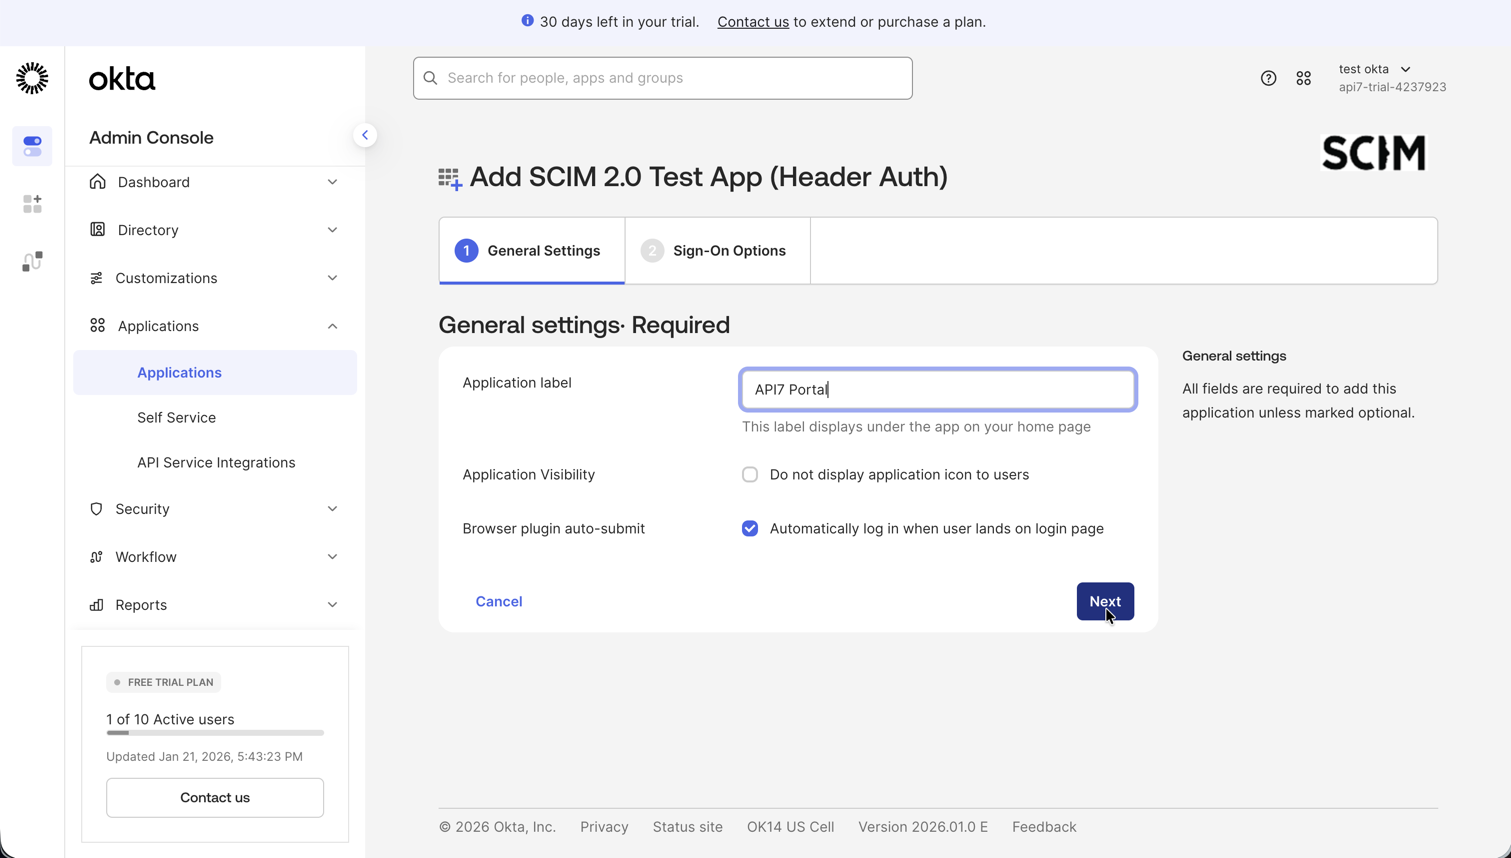
In the General Settings tab, name the application (e.g., "API7 Portal").
-
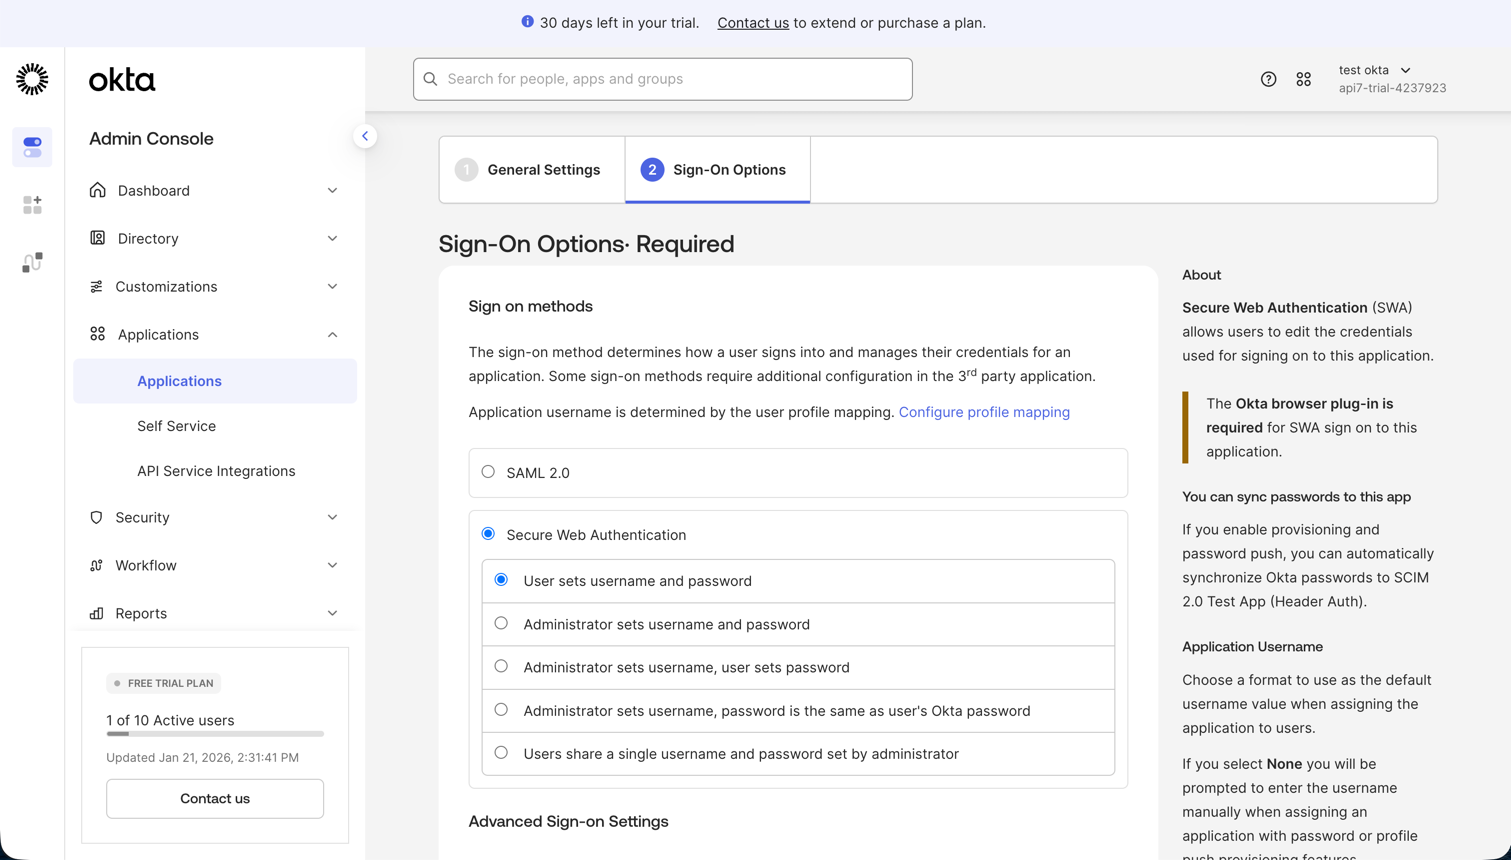
In the Sign-On Options tab, select Secure Web Authentication (SWA).
- Alternatively, select SAML/OIDC if you have configured SSO separately.
-
Click Done to finish creating the application.
Enable SCIM in Developer Portal
Update your portal's code to install and configure the SCIM plugin.
Install SCIM Plugin
In your project root (or apps/site directory), install the SCIM plugin. Ensure the version matches your better-auth version.
pnpm add @better-auth/scim@1.4.10
Add Plugin to Server and Client
Modify the server and client files to register the SCIM plugin:
import {
  // ... existing imports
  organization,
  openAPI,
} from 'better-auth/plugins';
import { scim } from '@better-auth/scim';

export const auth = betterAuth({
  // ... existing config
  plugins: [
    nextCookies(),
    organization(),
    openAPI(),
    scim(),
    ...getTestingConfig(),
  ],
});
import {
  // ... existing imports
  genericOAuthClient,
} from 'better-auth/client/plugins';
import { scimClient } from '@better-auth/scim/client';

export const authClient = createAuthClient({
  basePath: AUTH_BASE_PATH,
  plugins: [
    organizationClient(),
    magicLinkClient(),
    genericOAuthClient(),
    scimClient(),
  ],
});
Update Route Handler HTTP Methods
SCIM requires specific HTTP methods (PUT, PATCH, DELETE) for user management. Update your route handler for these methods:
// export const { GET, POST } = toNextJsHandler(auth.handler);
export const { GET, POST, PUT, PATCH, DELETE } = toNextJsHandler(auth.handler);
Update Database Schema
The SCIM plugin requires additional database tables. Generate the schema and apply migrations:
cd apps/site
pnpm db:generate-schema
pnpm db:generate
pnpm db:migrate
You should see an output similar to the following:
> @api7ee/site@0.5.6 db:migrate /path/to/your/project/apps/site
> drizzle-kit migrate

No config path provided, using default 'drizzle.config.ts'
Reading config file '/path/to/your/project/apps/site/drizzle.config.ts'
Using 'pg' driver for database querying
[✓] migrations applied successfully!
Generate SCIM Token
Create a temporary script to generate the SCIM token for Okta integration.
-
Create the following script:
apps/site/scripts/get-scim-token.tsimport { auth } from '@/lib/auth/server';async function main() {// 1. Sign in as an admin to get a sessionconst loginRes = await auth.api.signInEmail({returnHeaders: true,body: {email: 'admin@example.com', // Replace with your admin emailpassword: 'password1234', // Replace with your admin password},});const headers = {cookie: loginRes.headers.get('set-cookie') || '',};// 2. Generate the SCIM Token for Oktaconst res = await auth.api.generateSCIMToken({body: {providerId: 'okta',},headers,});console.log('SCIM Token:', res.scimToken);}main().catch((err) => console.trace(err)); -
Run the script:
pnpm dlx tsx ./scripts/get-scim-token.ts -
Copy the generated token, which is in the format of
Y0xRcHlHZTVVZGM5aTl3U19SSGtWSFczOm9rdGE=.
Configure Okta API Integration��
Connect Okta to your Developer Portal.
-
In Okta, navigate to the Provisioning tab of your SCIM application.
-
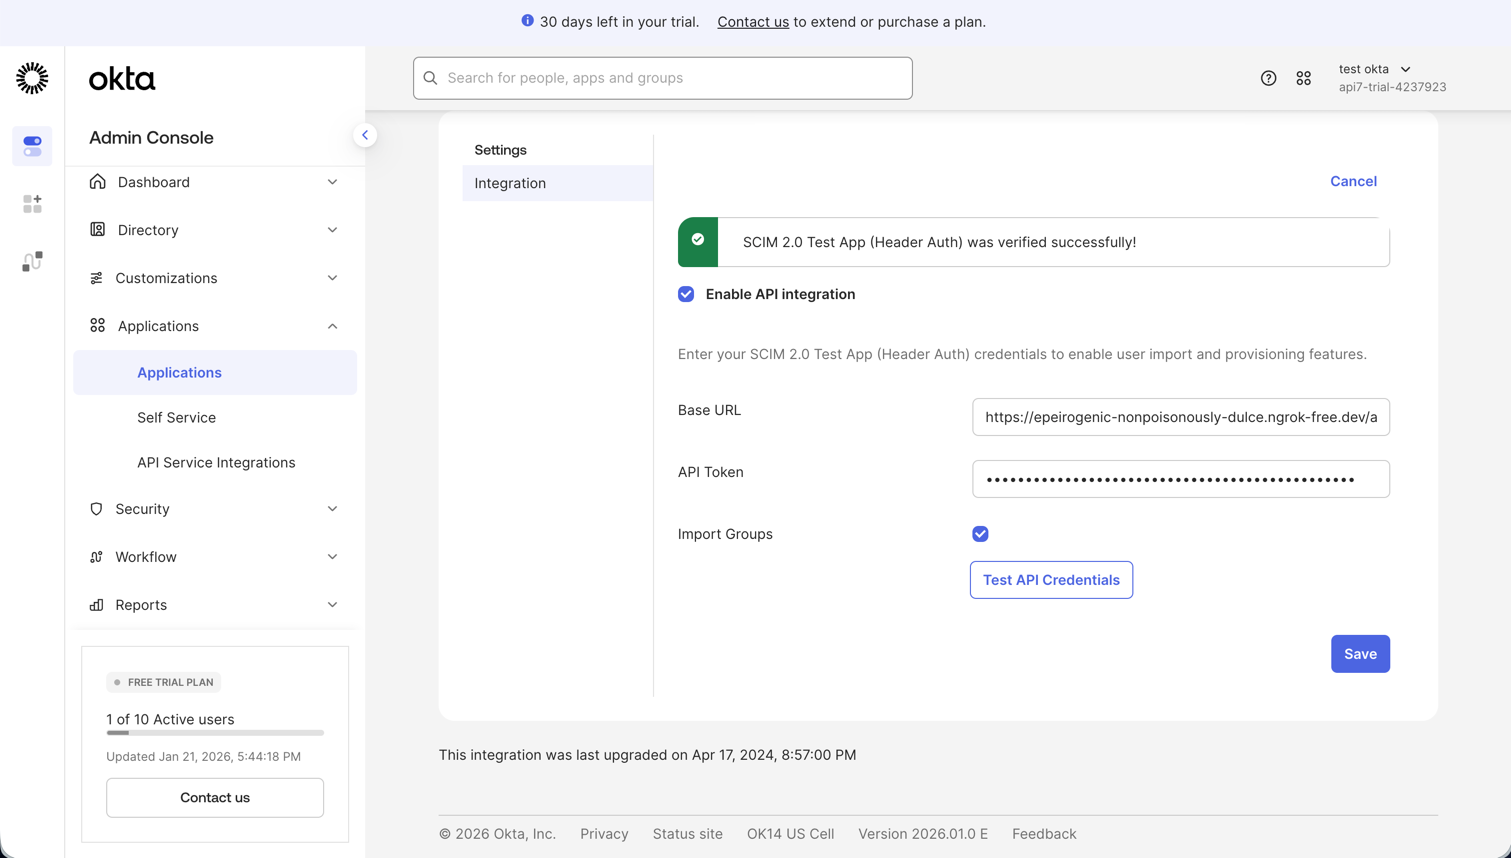
Click Configure API Integration > Enable API Integration.
-
Configure the following defaults:
- SCIM 2.0 Base URL: Enter your portal's auth URL appended with
/scim/v2, for examplehttps://<YOUR_PORTAL_DOMAIN>/api/auth/scim/v2. - API Token: Enter
Bearer <YOUR_SCIM_TOKEN>. Ensure there is a space betweenBearerand the token.
- SCIM 2.0 Base URL: Enter your portal's auth URL appended with
-
Click Test API Credentials to verify the connection. If successful, click Save.
Configure Provisioning and Assign Users
Before you assign users to the application, you should first enable and configure how Okta will provision user accounts and lifecycle changes to your SCIM‑enabled app. This ensures that Okta can create, update, and deactivate accounts correctly once assignments are made.
Configure Provisioning
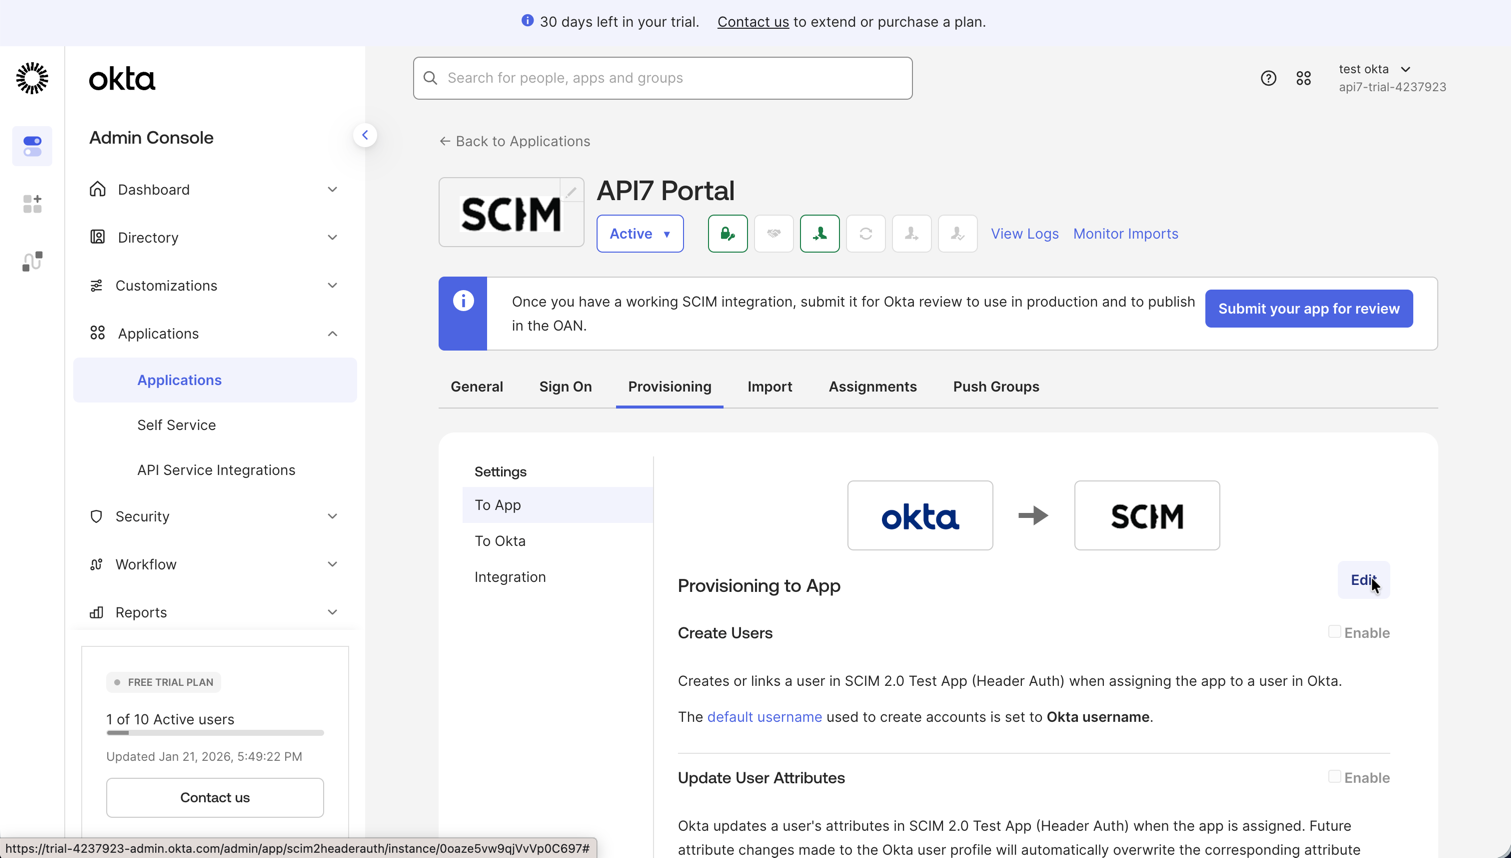
- In Okta, navigate to the Provisioning tab of your SCIM application.
- Select To App settings and click Edit to configure provisioning.
- Enable the following options so Okta can manage user lifecycle events in your app:
- Create Users: provision new users created in Okta to the app
- Update User Attributes: synchronize profile updates from Okta to the app
- Deactivate Users: deactivate users in the app when they are unassigned or deactivated in Okta
- Click Save.
Assign Users
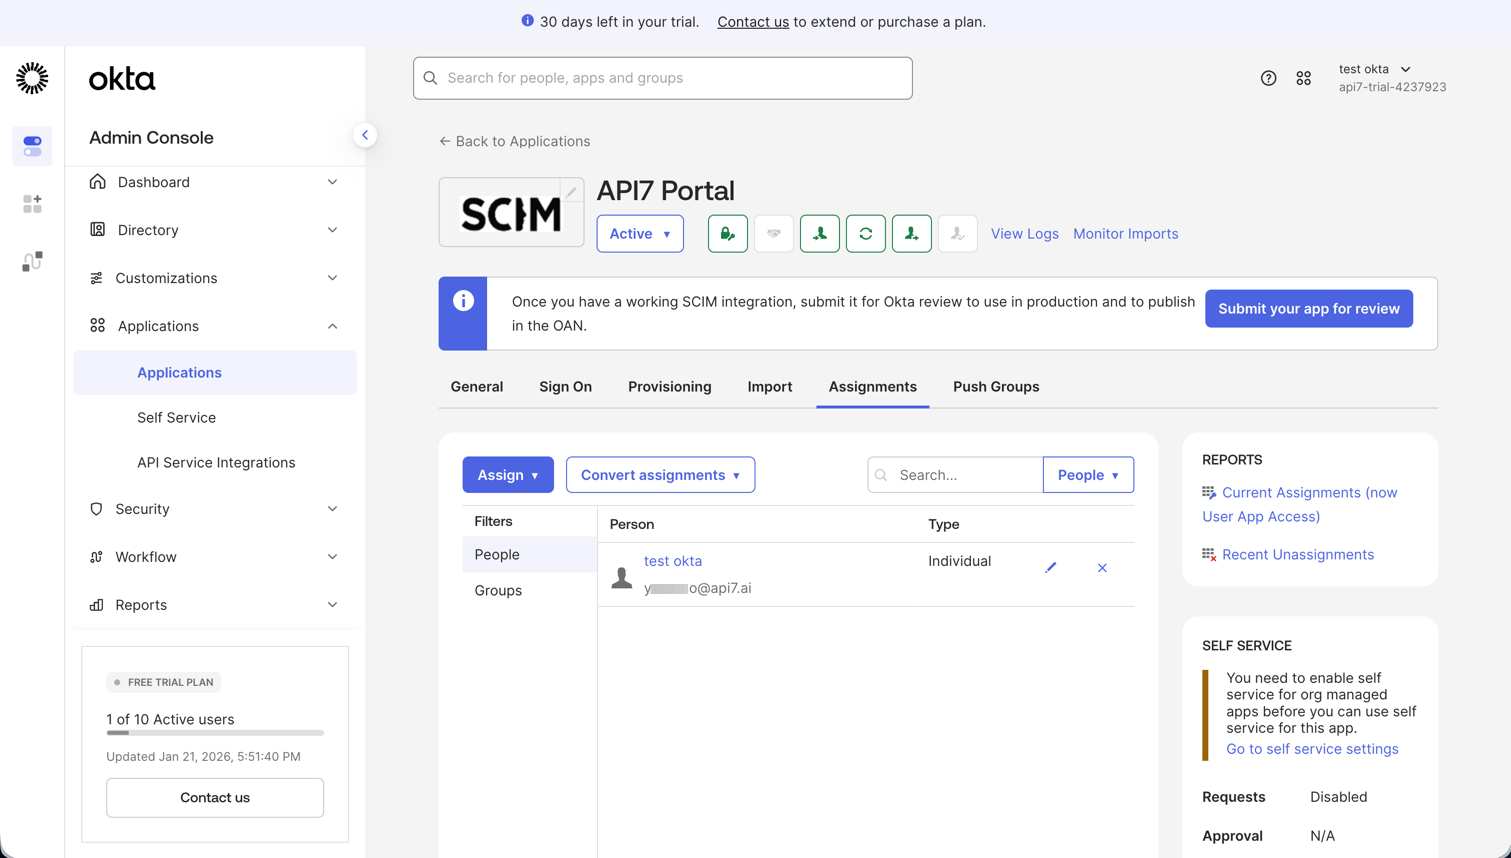
- In Okta, navigate to the Assignments tab of your SCIM application.
- Click Assign > Assign to People (or Assign to Groups).
- Select users or groups and click Assign, then Done.
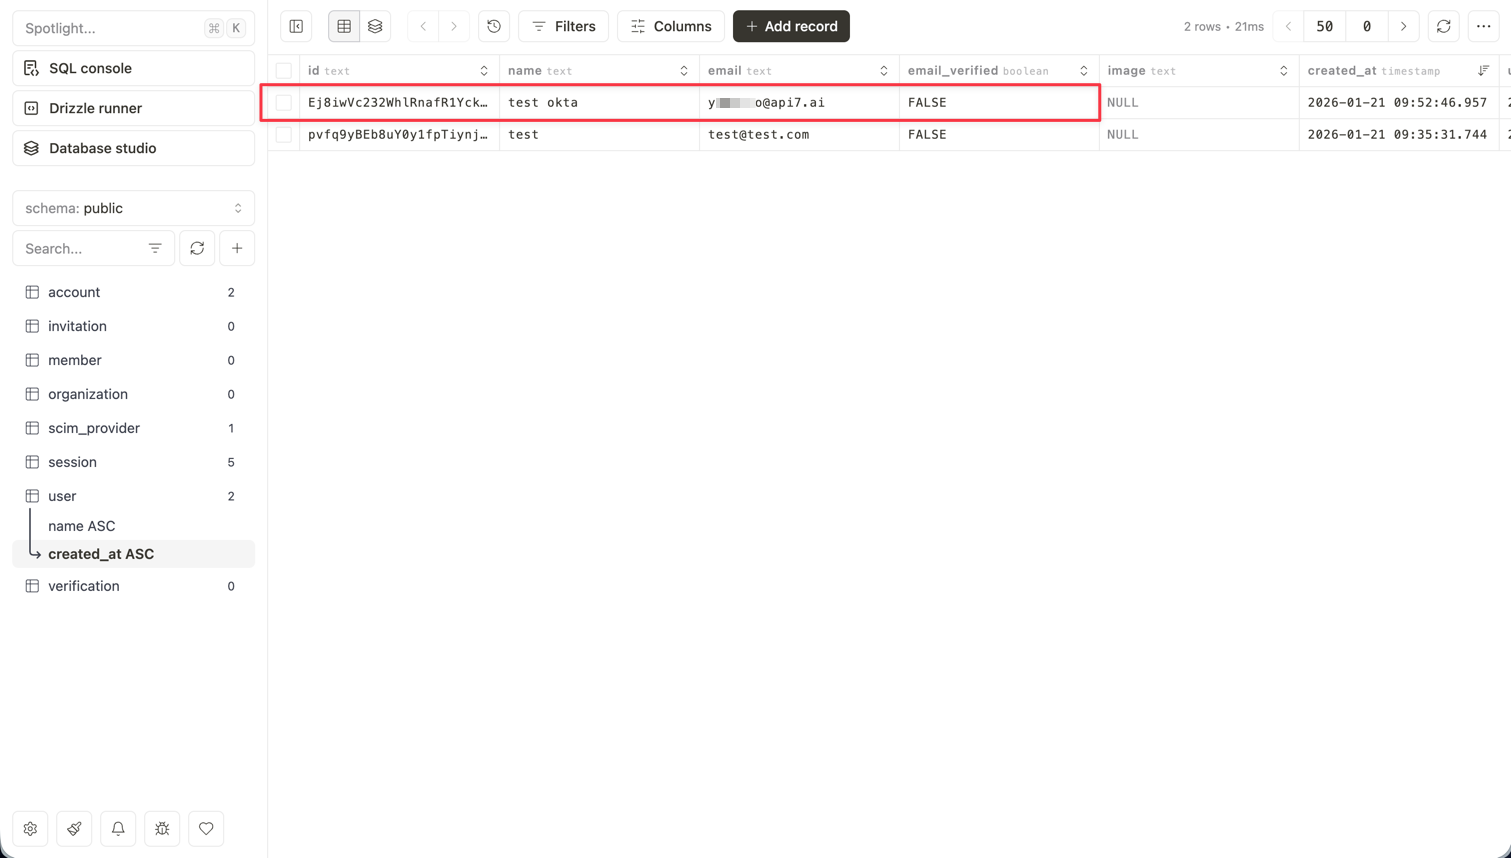
Verify
To confirm user synchronization, check your Developer Portal’s user list or database to verify that the users you assigned in Okta have been provisioned correctly: