Set Up Developer Portal with Provider Portal
API Portal consists of two components:
- Provider Portal: Built into the API7 Dashboard, where API providers manage API Products, portal settings, and developer subscriptions.
- Developer Portal: A standalone web application where API consumers discover, explore, and subscribe to API Products.
This guide demonstrates how to use the sample Developer Portal with the Provider Portal. You will deploy the Developer Portal using a Docker image built from the API7 Developer Portal Boilerplate, which serves as a reference implementation. To customize or build your own Developer Portal, see Custom Portal.
Prerequisites
- API7 Enterprise v3.9.0 or later installed and activated with a Portal-enabled license. If you are using a trial license, the Portal is enabled by default. See Install API7 Enterprise.
- Depending on your deployment method, prepare the following tools:
- Docker Compose deployment: Docker and Docker Compose installed on the target host.
- Kubernetes deployment: Access to a Kubernetes cluster with
kubectlandhelminstalled.
- The Portal API of your API7 Enterprise deployment is accessible from the environment where you will deploy the Developer Portal.
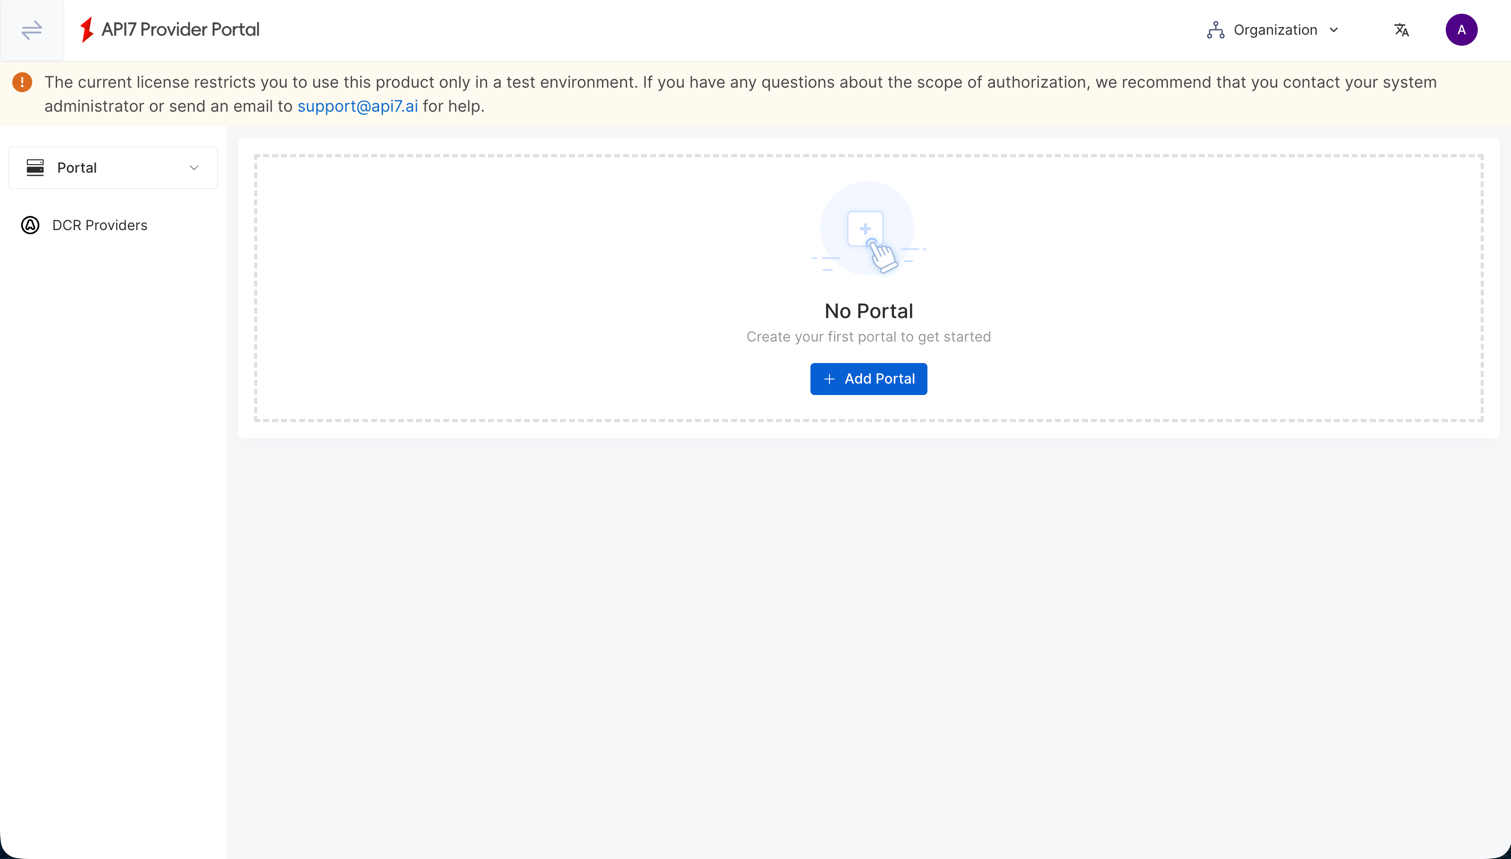
Create a Portal in Provider Portal
The Provider Portal is part of the API7 Dashboard and allows API providers to manage API Products and expose them to their corresponding Developer Portals. Each Portal created in the Provider Portal can connect to a single Developer Portal instance or to multiple Developer Portal instances configured as replicas, exposing a defined set of API Products.
When multiple Developer Portal instances share the same Provider Portal connection token and maintain consistent configurations, such as the connected database, they function as replicas of the same portal. If the configurations differ, this is considered a misconfiguration and may lead to unexpected behavior.
In this section, you will create a Portal within the Provider Portal, specify the public URL of the Developer Portal, and generate a token required to establish connection with the Developer Portal.
-
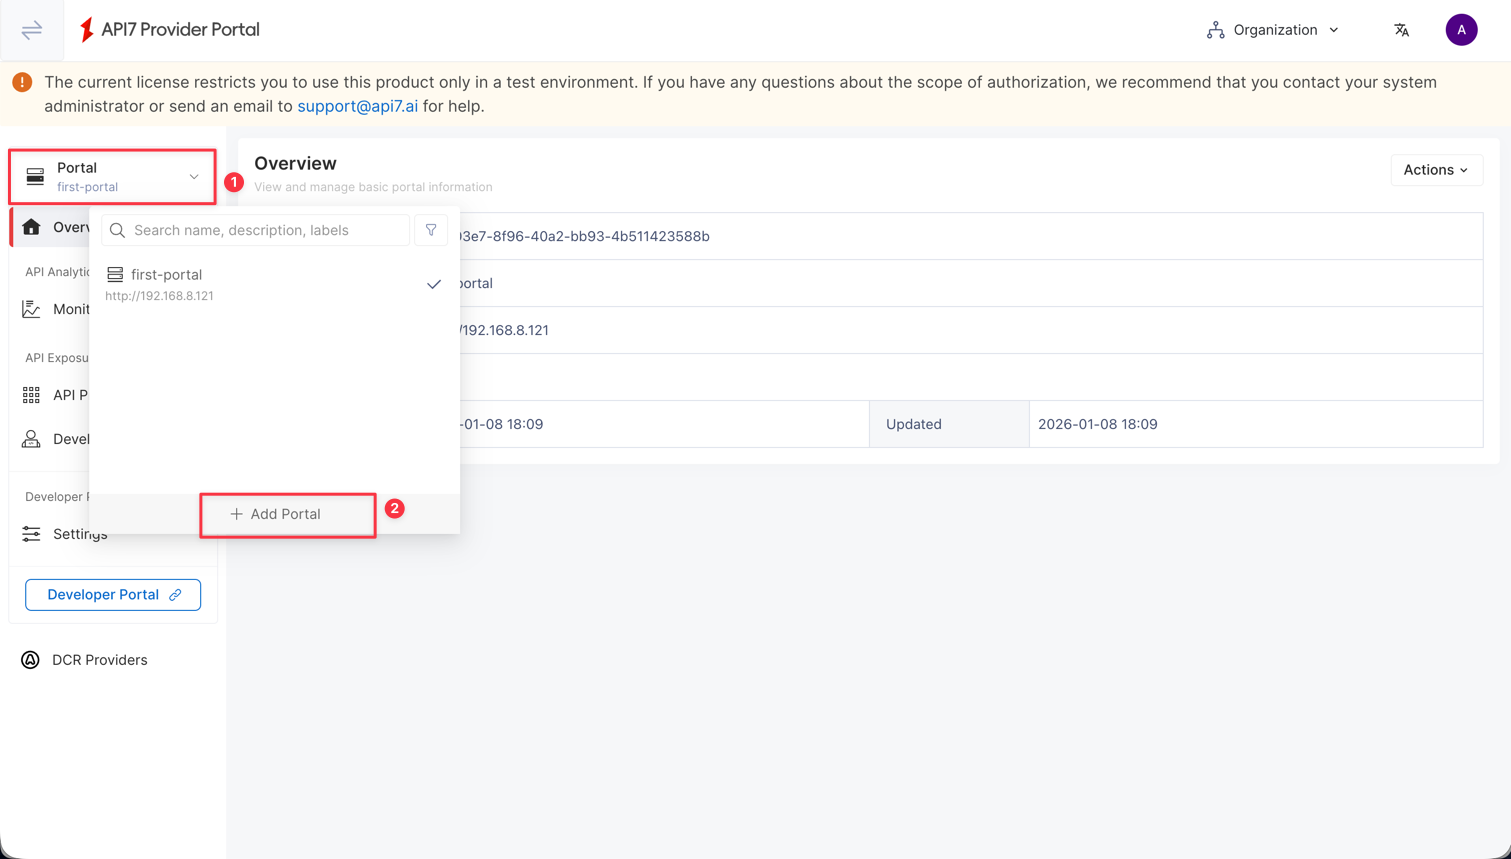
Visit the API7 Dashboard and switch to Provider Portal using the button on the top-left corner.
-
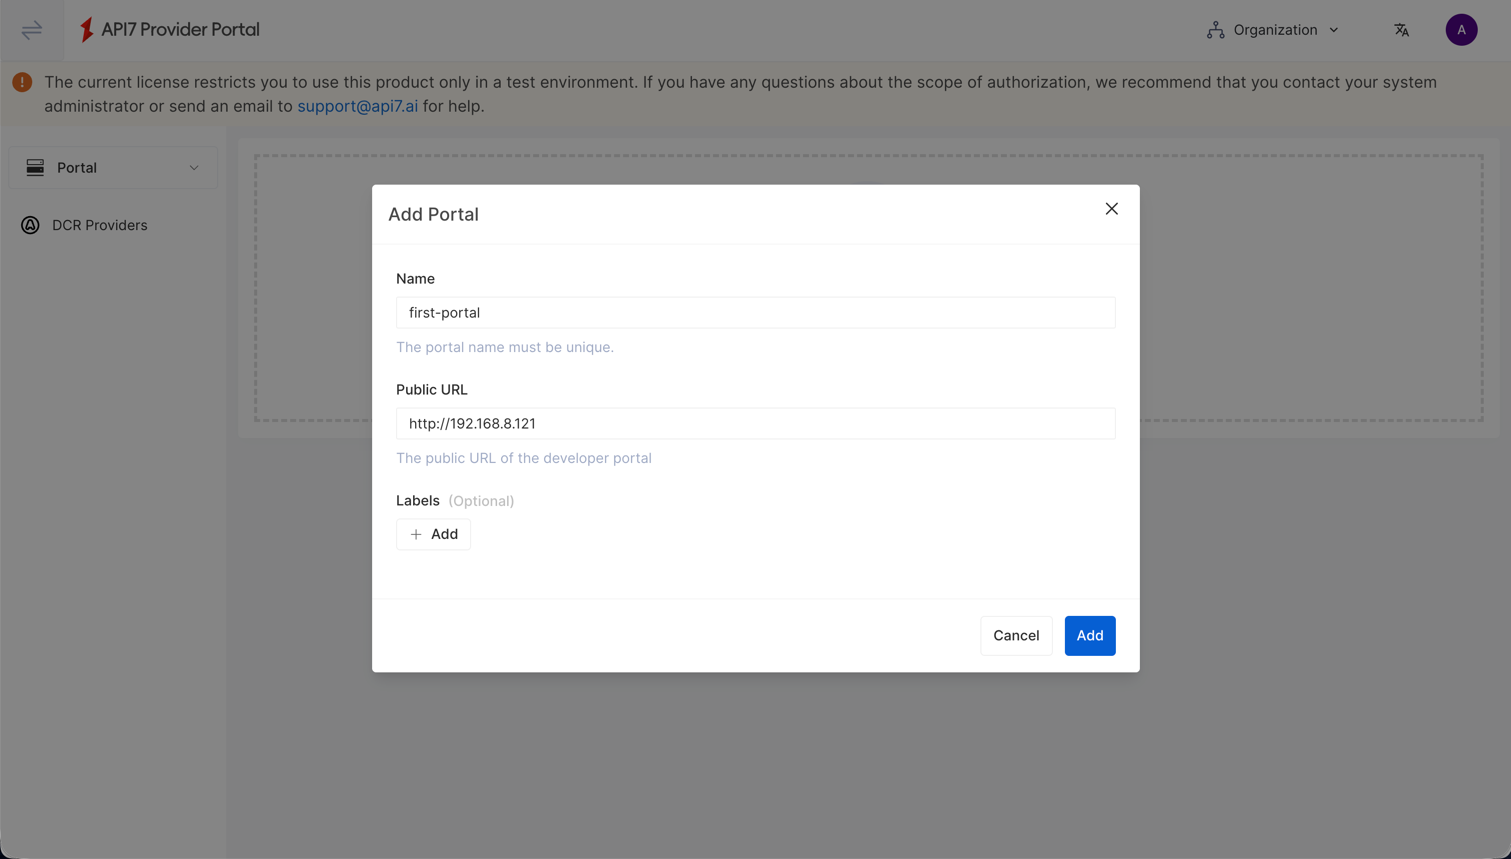
Click Add Portal.
-
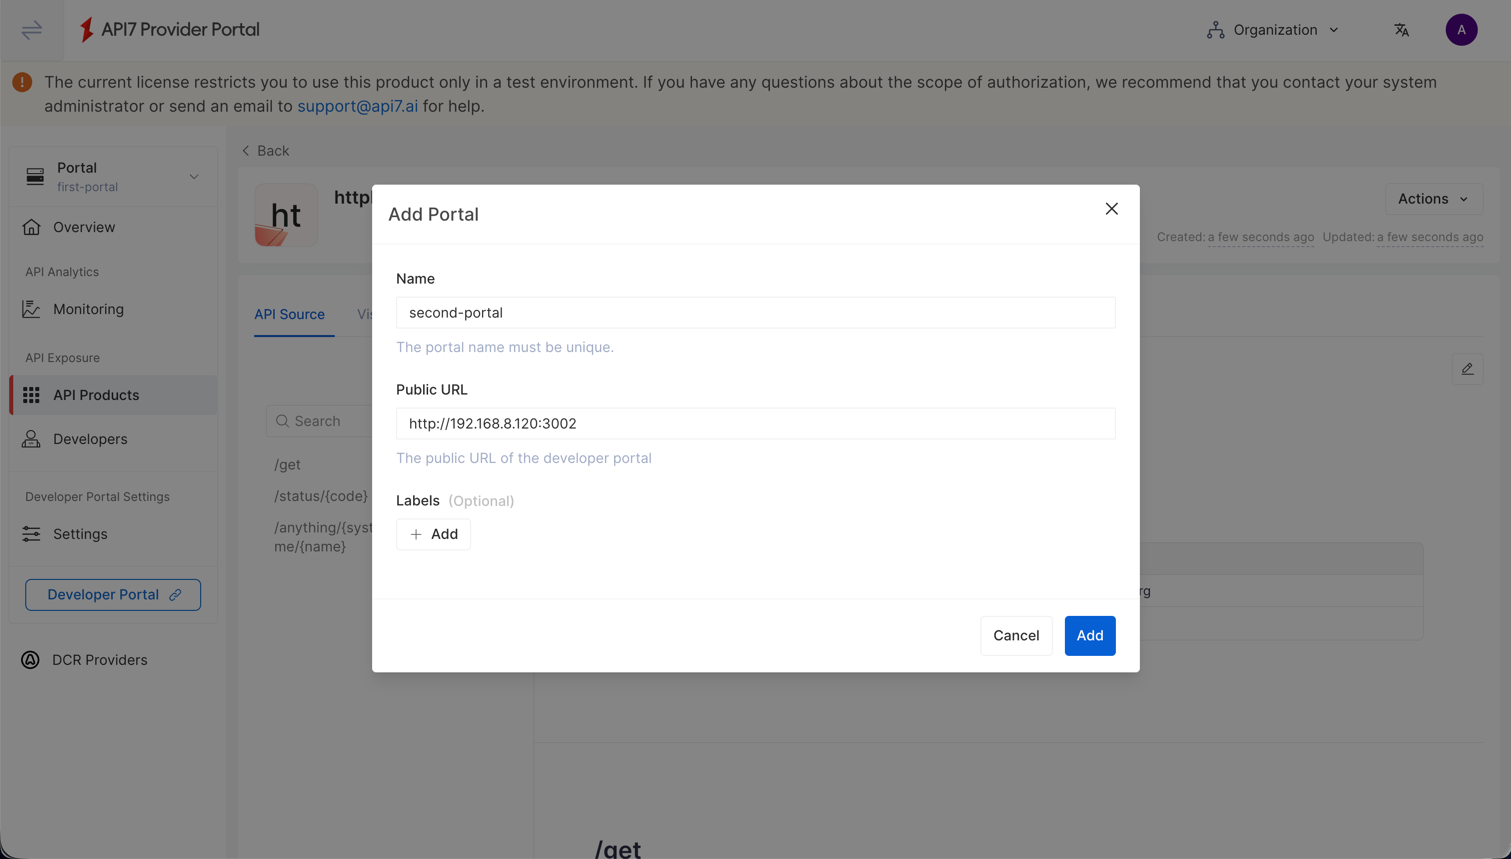
Provide a Name for the portal and specify the Public URL where the sample Developer Portal is expected to be accessible, then click Add.
infoThe Public URL is currently only used for redirection from the Provider Portal to the Developer Portal. Each Portal must have a unique Public URL.
-
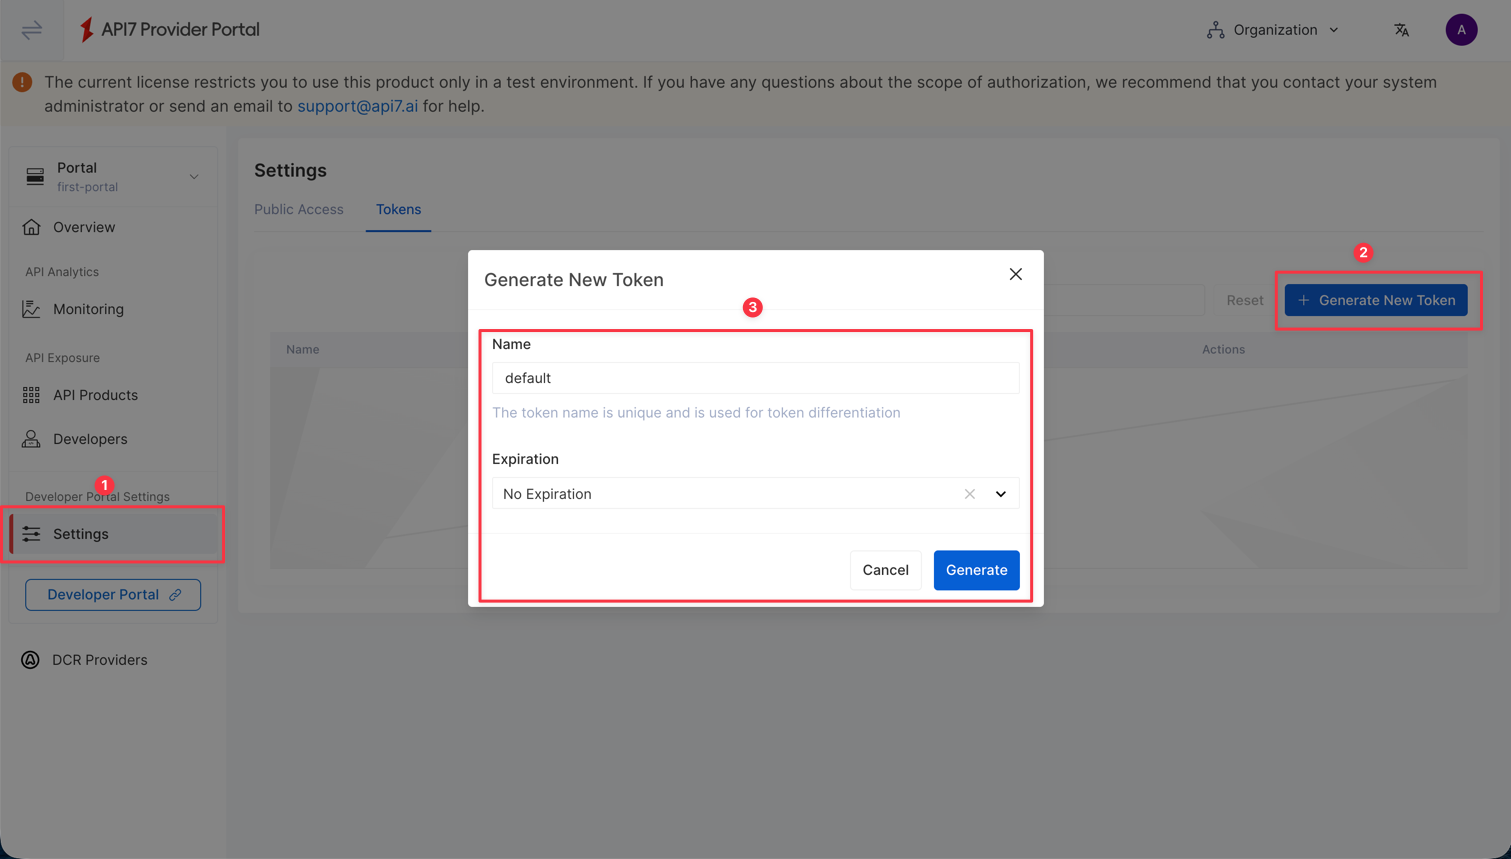
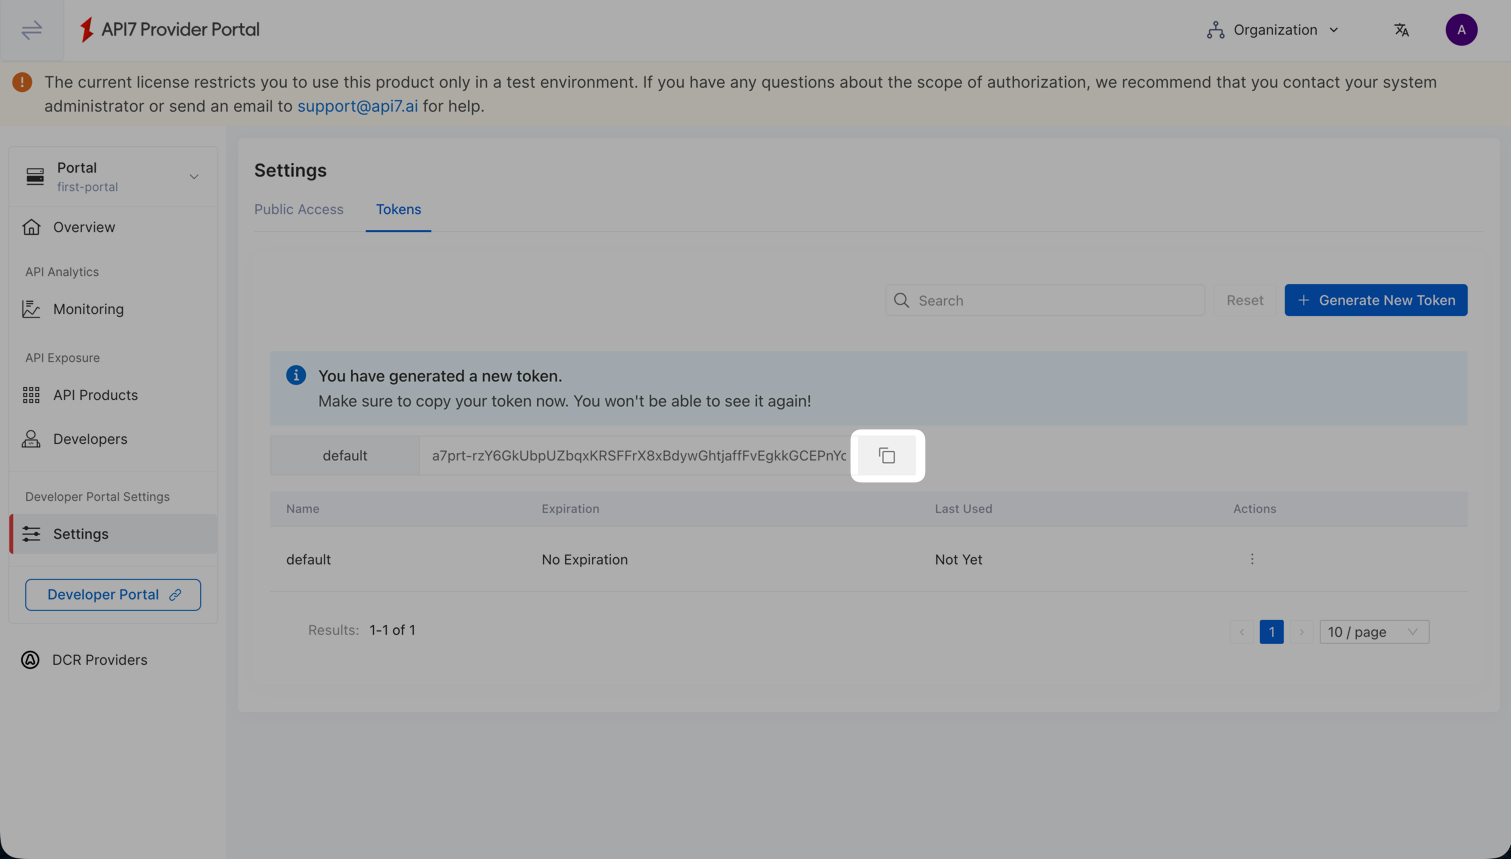
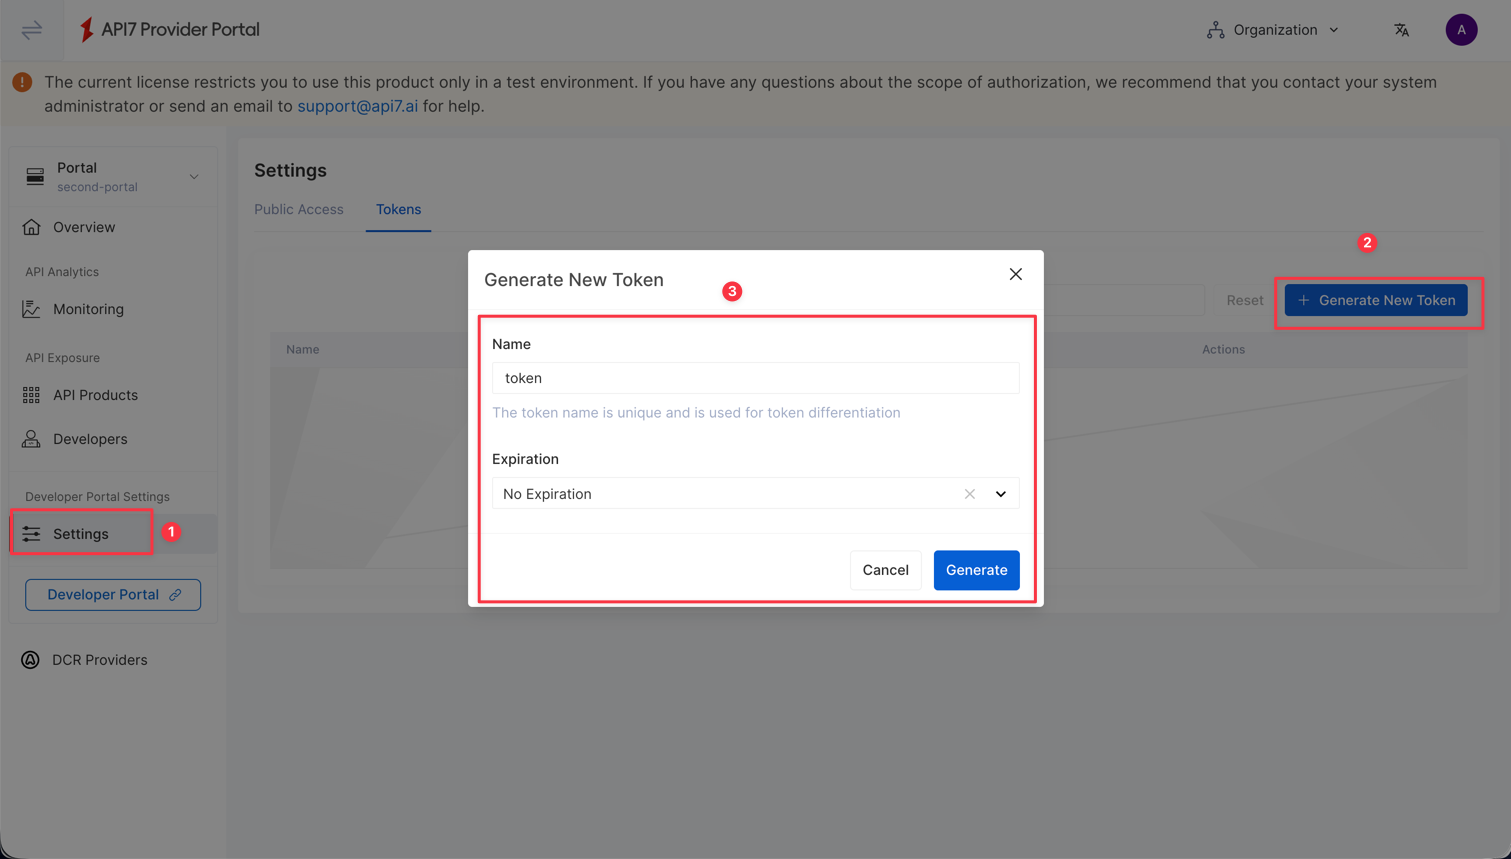
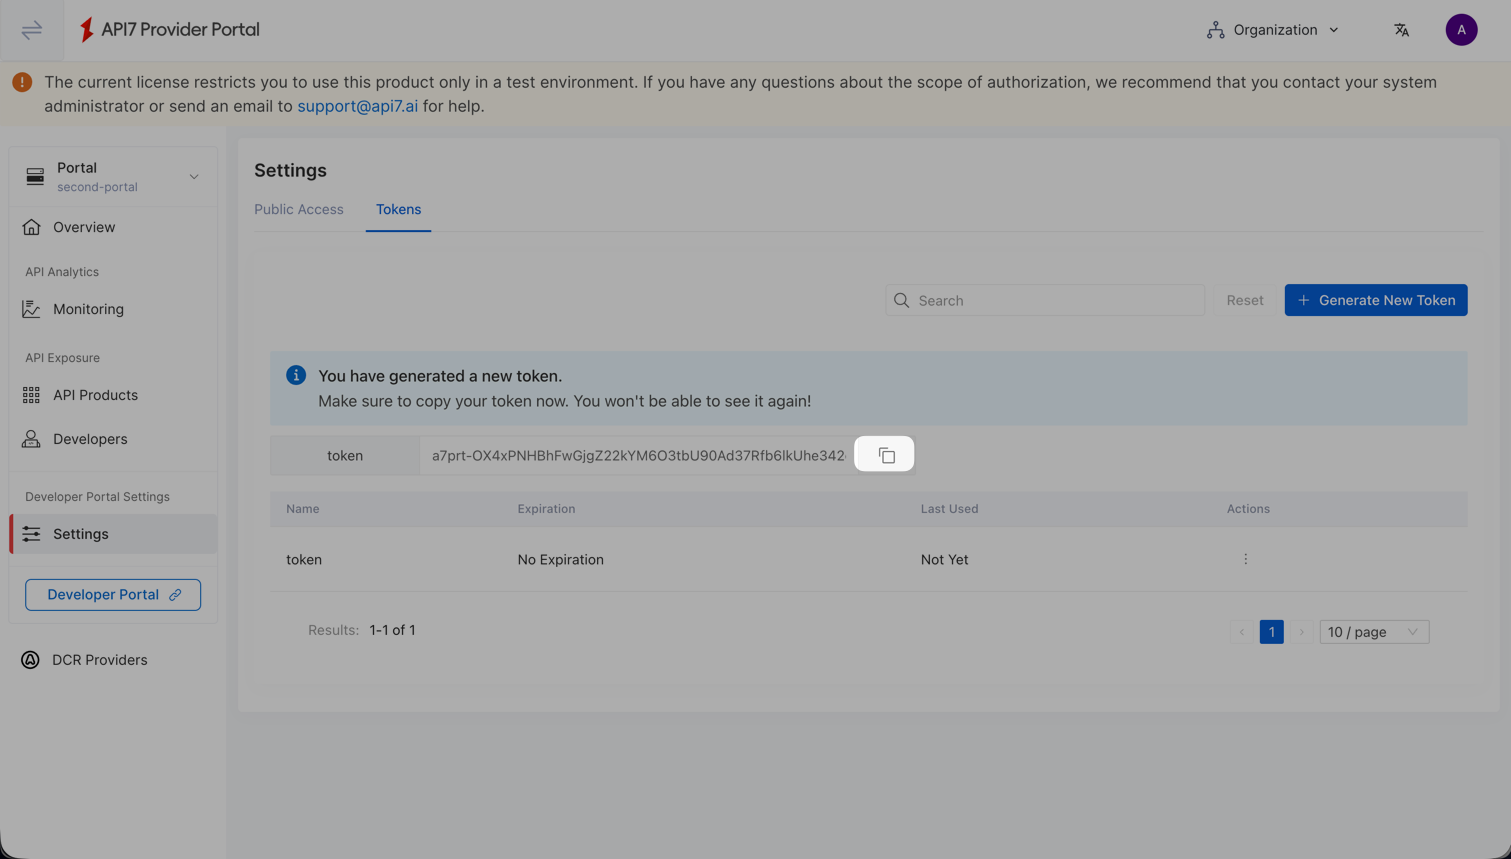
After creating the portal, click Generate New Token to create a token for your Developer Portal configuration.
-
Note down the generated token.
Deploy a Developer Portal
In this section, you will deploy a Developer Portal using a Docker image built from the API7 Developer Portal Boilerplate. You can use Docker Compose for a quick start on a physical machine or virtual machine, or deploy using a Helm chart in a Kubernetes cluster.
Deploy with Docker Compose
-
Create a new directory for the deployment:
mkdir developer-portal && cd developer-portal -
Create a
config.yamlfile and update the values for your environment.config.yaml# Example: https://github.com/api7/api7-portal-boilerplate/blob/main/apps/site/config.yaml.example
portal:
# Replace with your API7 Portal API endpoint.
url: https://192.168.2.10:4321
# Replace with the token generated from Provider Portal in the previous section.
token: <your-portal-token>
db:
# Connection string for a PostgreSQL-compatible database.
# This database will be created by Docker Compose in step 3.
url: "postgres://portal:portal123@postgres:5432/portal"
auth:
# Secret key used for authentication.
# In a production environment, this example value must be replaced.
# You can generate a secure secret using `openssl rand -base64 32`.
secret: "5xNGl5Ue7EV8yWjlPdYjRU2GHUrI2dXMwqF025MTS7c="
app:
# Replace with the URL where Developer Portal will be accessible.
# This should be your private IP if deploying locally.
baseURL: "http://192.168.8.121"
# Trusted origins for CORS. Must include the baseURL.
trustedOrigins:
- "http://192.168.8.121" -
Create a Docker Compose file to define the Developer Portal and its database:
docker-compose.yamlservices:
postgres:
image: postgres:16
environment:
POSTGRES_USER: portal
POSTGRES_PASSWORD: portal123
POSTGRES_DB: portal
volumes:
- postgres_data:/var/lib/postgresql/data
healthcheck:
test: ["CMD-SHELL", "pg_isready -U portal -d portal"]
interval: 5s
timeout: 5s
retries: 5
developer-portal:
# Check https://hub.docker.com/r/api7/api7-ee-developer-portal-fe for the latest version.
image: api7/api7-ee-developer-portal-fe:v0.5.6
ports:
- "80:3001"
volumes:
- ./config.yaml:/app/apps/site/config.yaml
environment:
# If your Portal API (e.g., https://192.168.2.10:4321) uses a self-signed certificate,
# set this to "0" to skip TLS verification. Only use this in development.
NODE_TLS_REJECT_UNAUTHORIZED: "0"
depends_on:
postgres:
condition: service_healthy
volumes:
postgres_data:Start the services:
docker compose up -d
Deploy on Kubernetes
This section describes how to deploy the Developer Portal and its PostgreSQL database in a Kubernetes cluster using the official API7 Helm chart.
-
Ensure
helmandkubectlare installed, and you have access to the target Kubernetes cluster. The cluster network must be able to reach the API7 Enterprise Portal API. -
Add the API7 Helm repository and update it:
helm repo add api7 https://charts.api7.ai
helm repo update -
Create a values.yaml file to configure the Developer Portal. Update the values according to your environment:
portal:
  # Replace with your API7 Enterprise Portal API endpoint.
  # The Portal API runs on port 4321 by default (not the Dashboard port 7443).
  # In a Kubernetes cluster, use an address reachable from within the cluster,
  # such as a LoadBalancer IP, NodePort, or an in-cluster Service name.
  # Do NOT use host.docker.internal or a local machine IP that is not reachable from Pods.
  url: "https://192.168.2.10:4321"
  # Replace with the token generated from Provider Portal.
  token: "<your-portal-token>"

auth:
  # Replace with a secure random value in production.
  # You can generate one using: openssl rand -base64 32
  secret: "5xNGl5Ue7EV8yWjlPdYjRU2GHUrI2dXMwqF025MTS7c="

app:
  # Replace with the URL where Developer Portal will be accessible.
  baseURL: "https://portal.example.com"
  # Trusted origins for CORS. Must include the baseURL.
  trustedOrigins:
    - "https://portal.example.com"

developerPortal:
  # API7 Enterprise uses a self-signed certificate by default.
  # Set to false to skip TLS verification. Only use this in development.
  # In production, configure a trusted certificate and set this to true.
tlsRejectUnauthorized: falsetipBy default, the Helm chart automatically deploys a built-in PostgreSQL database. If you want to use an external database, you can disable the built-in one by setting
postgresql.builtin: falseand configuring thedb.urlfield in yourvalues.yaml. -
Install the Developer Portal using Helm:
helm install developer-portal api7/developer-portal-fe \
--namespace developer-portal \
--create-namespace \
-f values.yaml -
Wait for all Pods to become ready:
kubectl get pods -n developer-portal -w -
Verify the Service status to get the access address:
kubectl get svc -n developer-portalThe access URL for the Developer Portal depends on your Service type and Ingress configuration. Ensure this URL matches the value of app.baseURL you configured.
For local testing without an Ingress, use kubectl port-forward to access the Developer Portal:
kubectl port-forward svc/developer-portal-developer-portal-fe -n developer-portal 8080:80Then open http://localhost:8080 in your browser. Make sure
app.baseURLis set to http://localhost:8080 in yourvalues.yaml.
Verify Developer Portal Setup
In this section, you will verify the Developer Portal setup, including developer signup, its connection to the Provider Portal, and the creation and browsing of API Products.
-
Access the Developer Portal in your browser. The address should be the same as the URL specified in the
baseURLconfiguration. On the Developer Portal home page, click Sign Up to create a new account: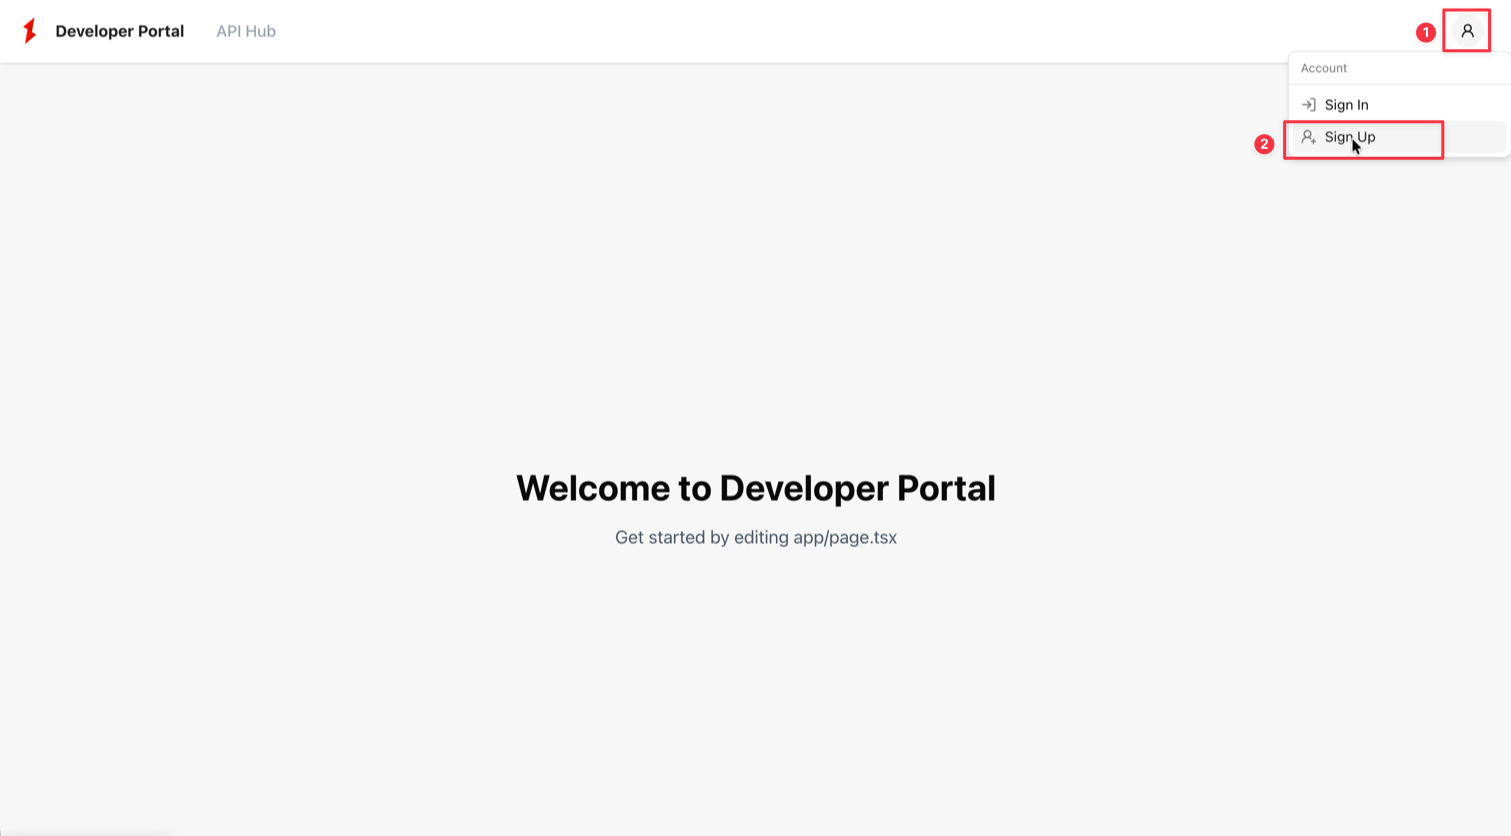
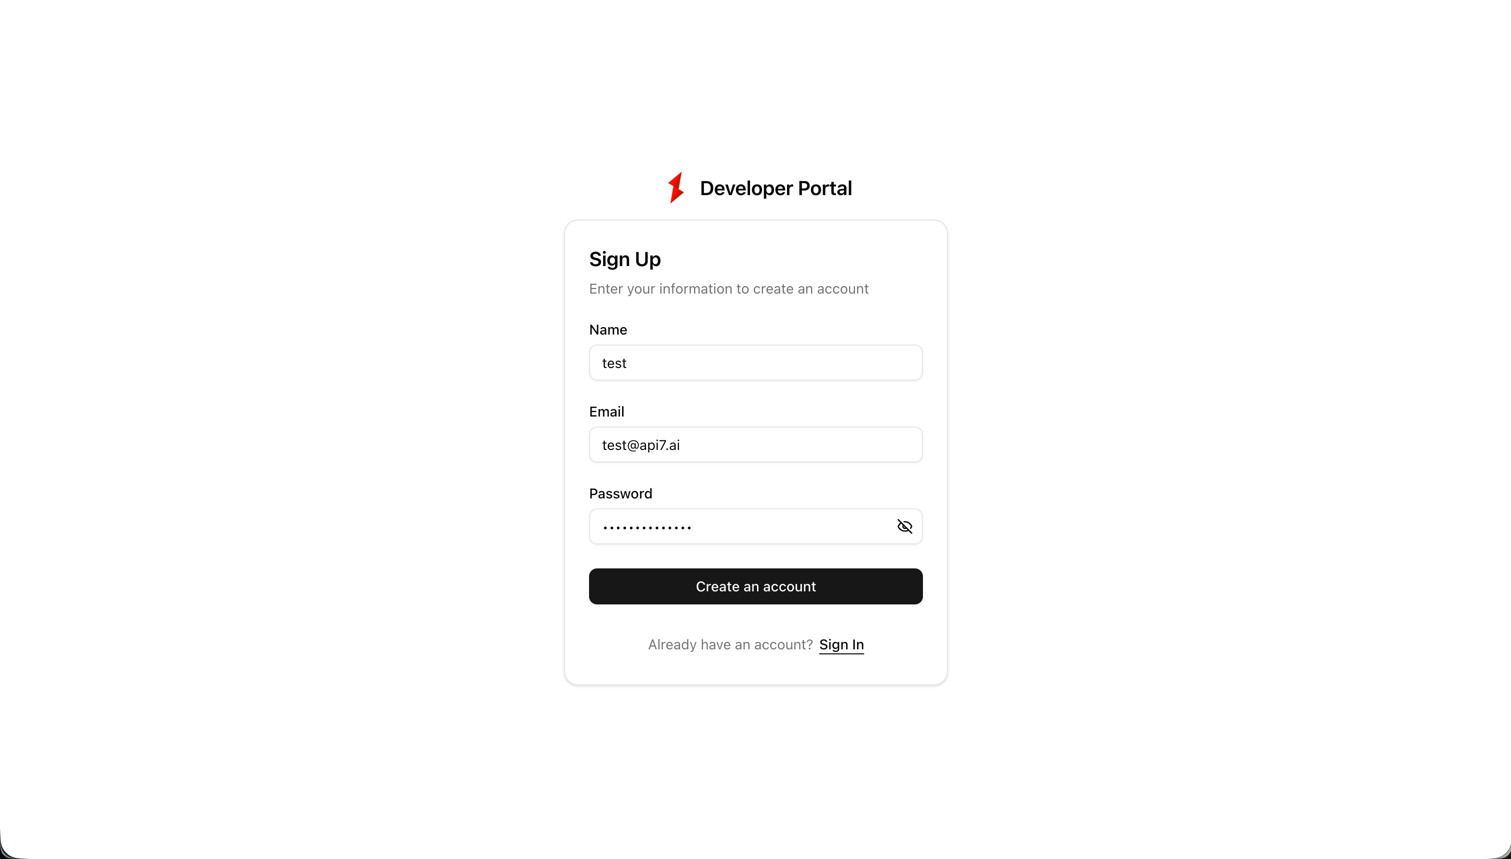
Fill in a name, email, and password to create the new account:
-
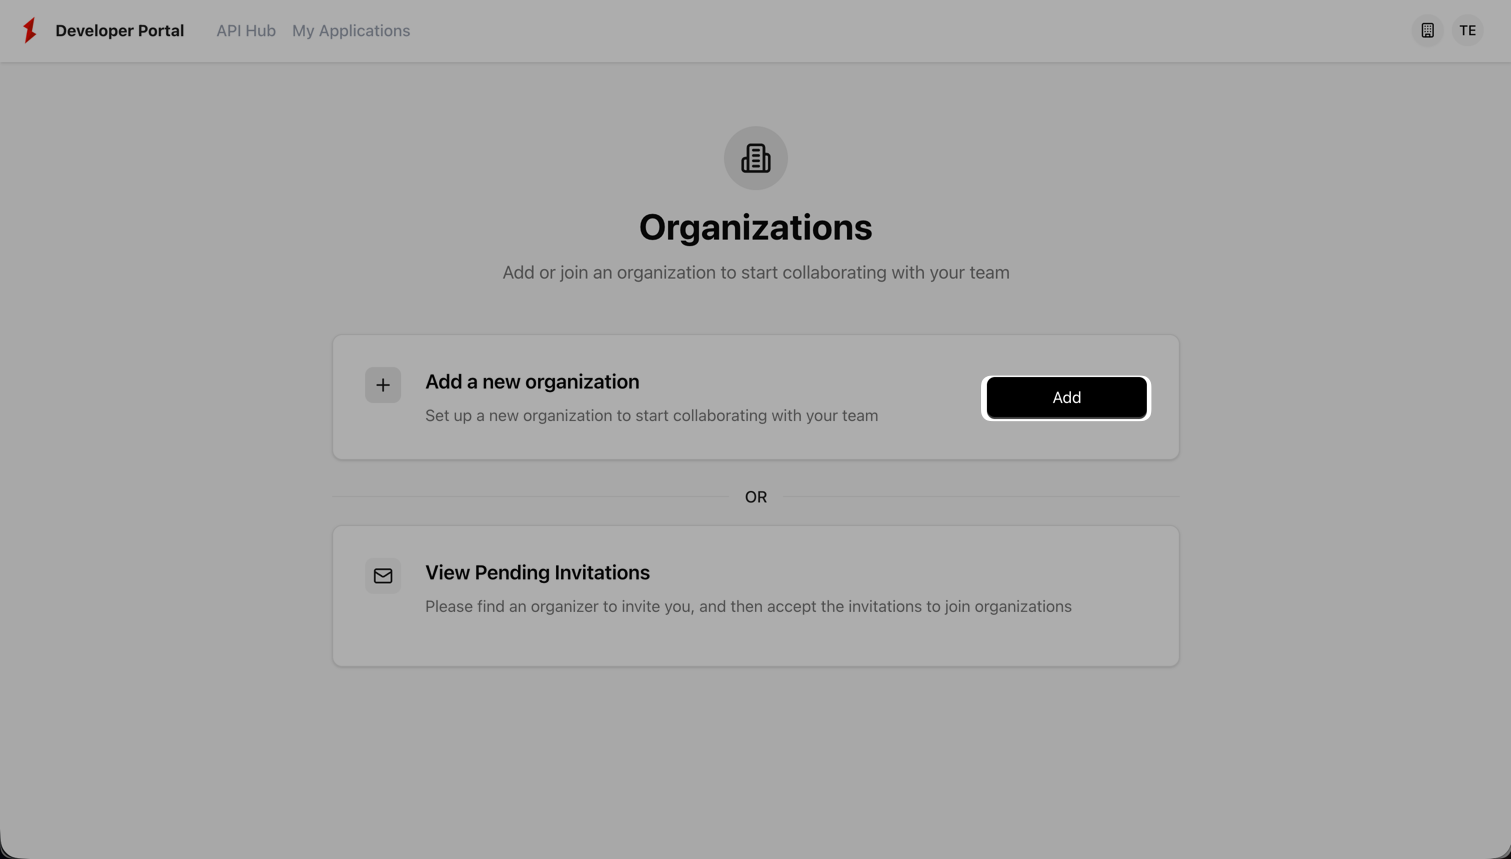
After signing up, you will be prompted to create an organization.
infoThe concept of an organization comes from the authentication system (Better Auth) used by the Developer Portal and is not created or managed by API7 Enterprise. In the current Boilerplate Developer Portal implementation, each Developer Portal organization establishes a one-to-one mapping with a developer in the Provider Portal. If you build your own Developer Portal and do not use Better Auth’s organization functionality, this step may not be present or required in your custom implementation.
Enter a Name and Slug URL for the organization, then click Create. The Slug URL is a required configuration but is currently not used.
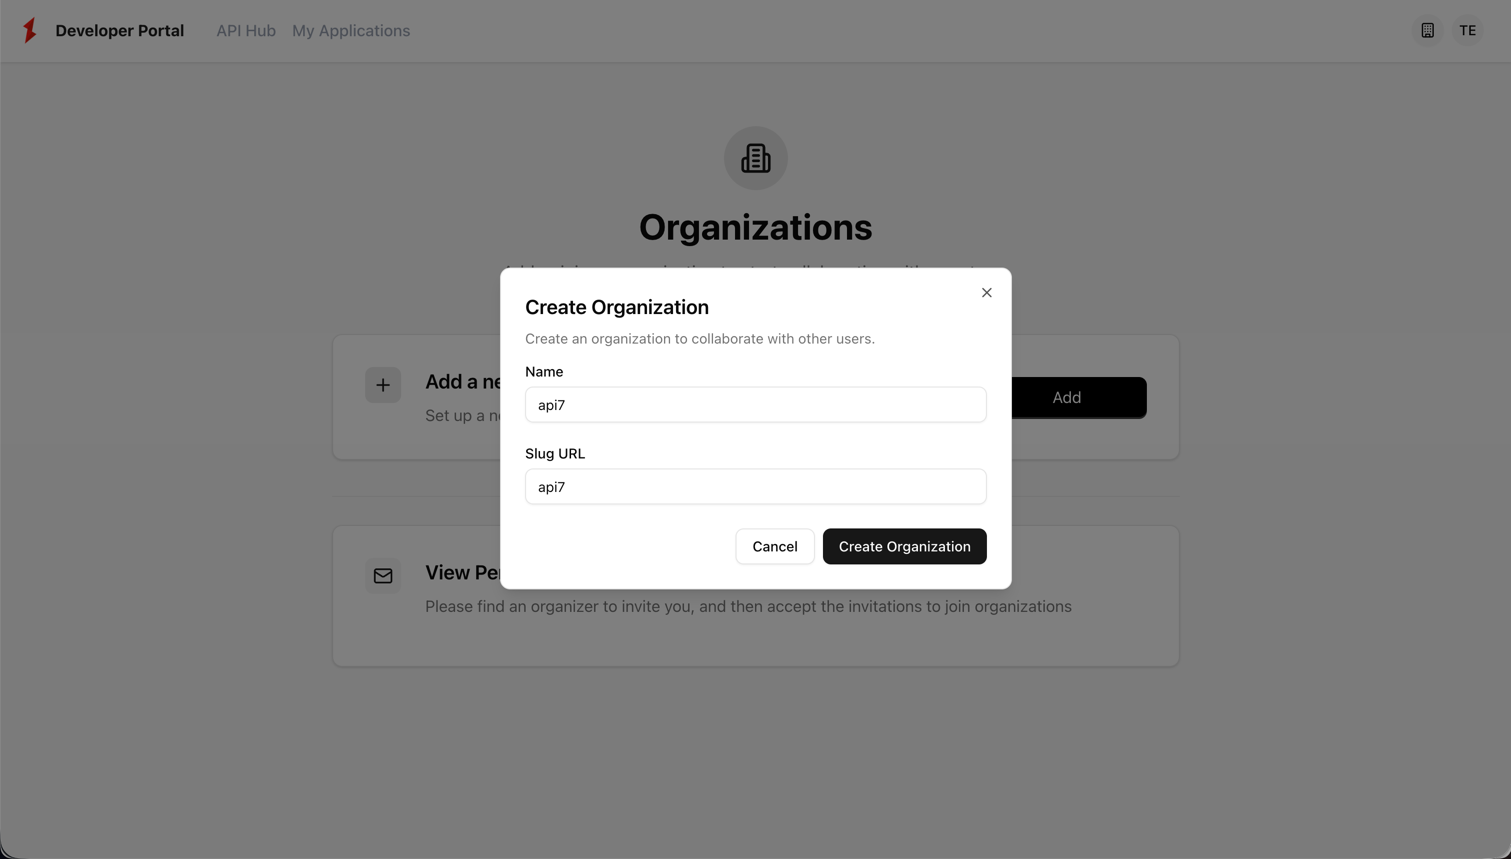
Create the organization.
-
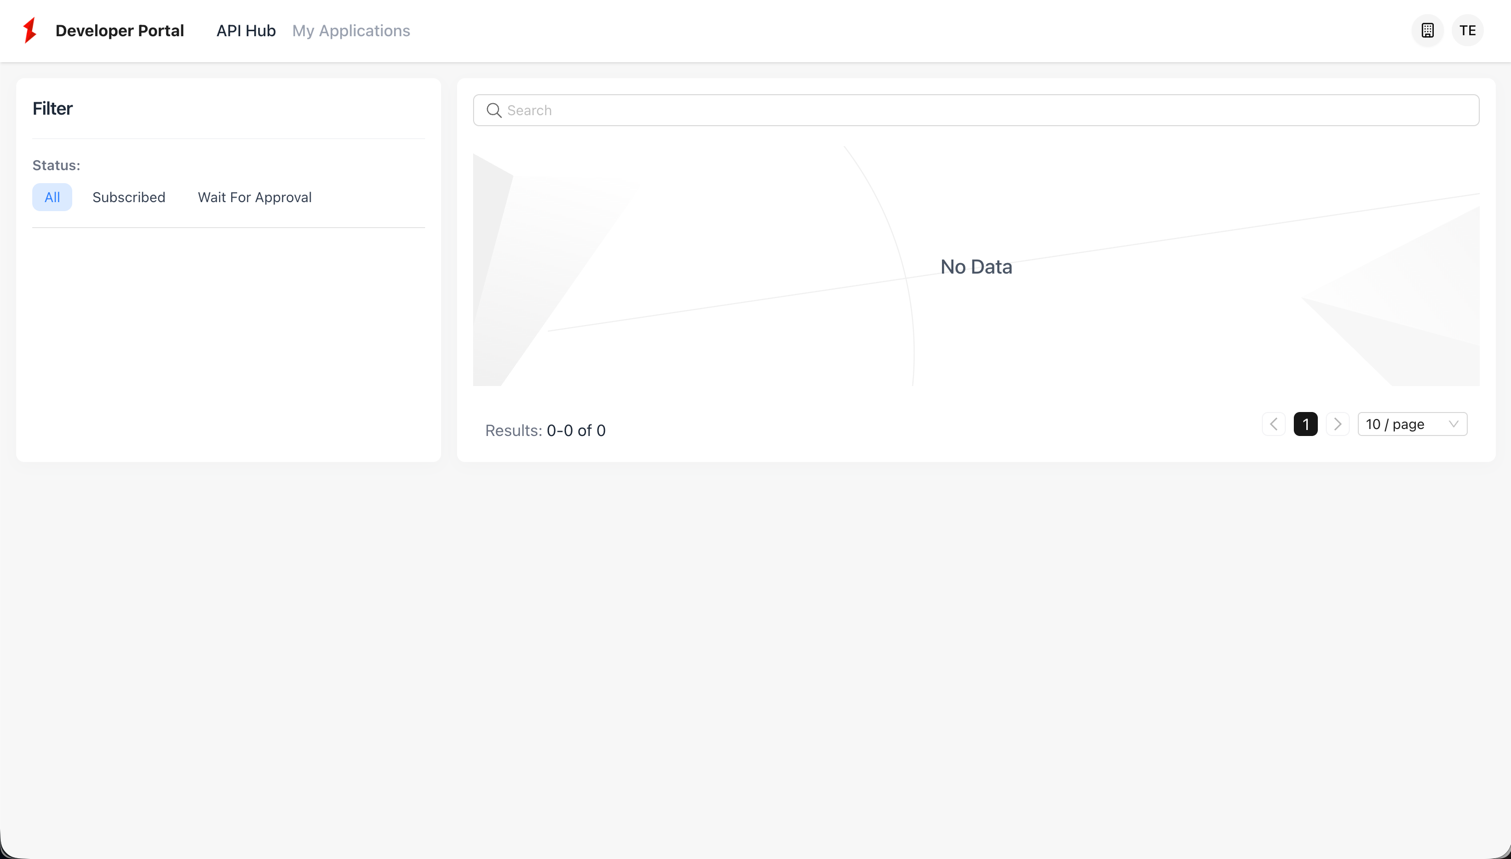
Click API Hub to view available API Products. Initially, it will be empty if no API Products have been published.
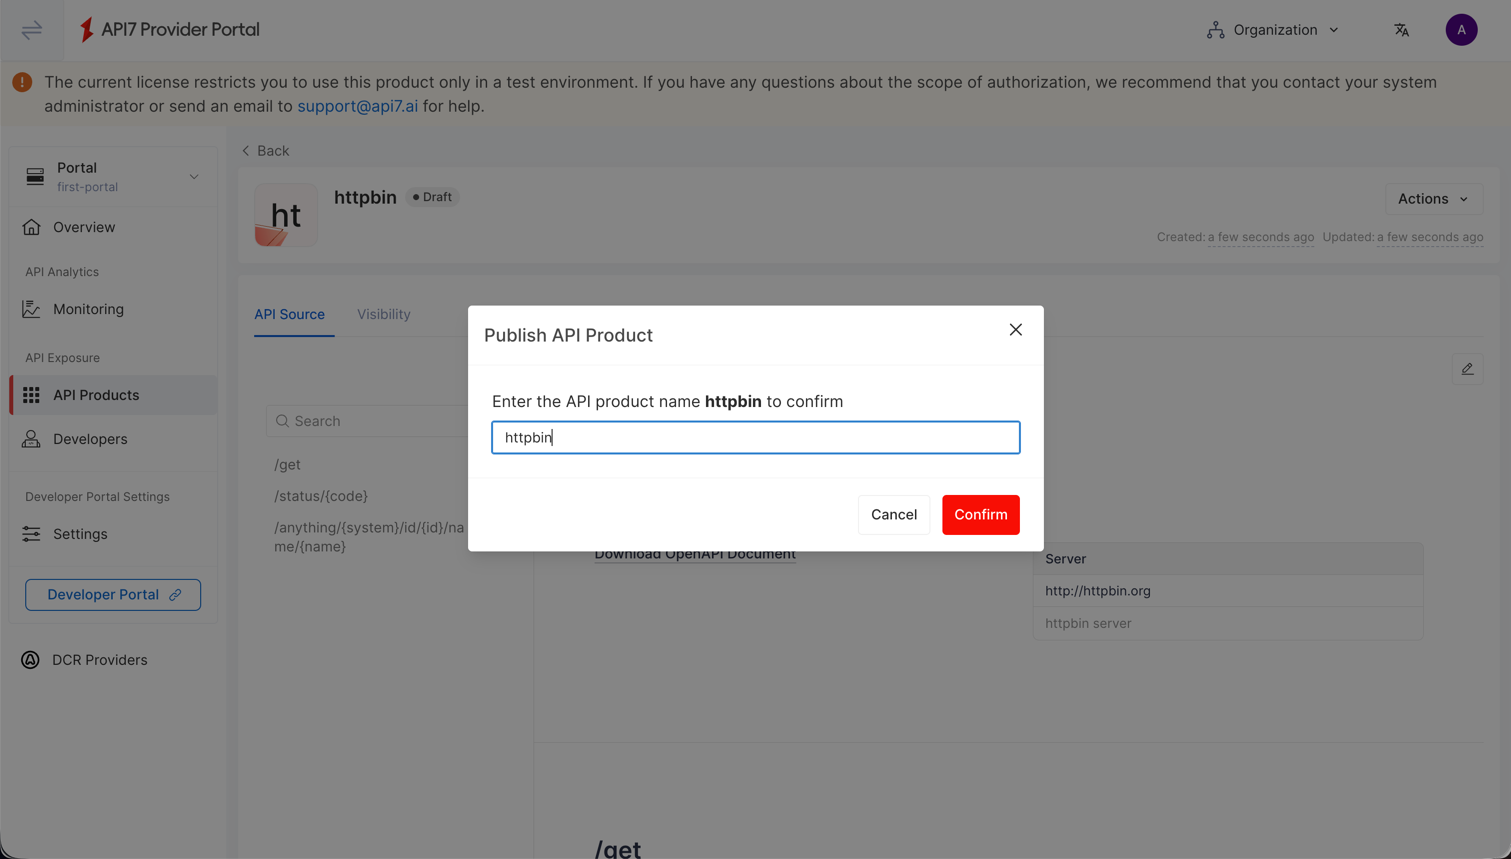
To see API Products, go to Provider Portal and create an API Product.
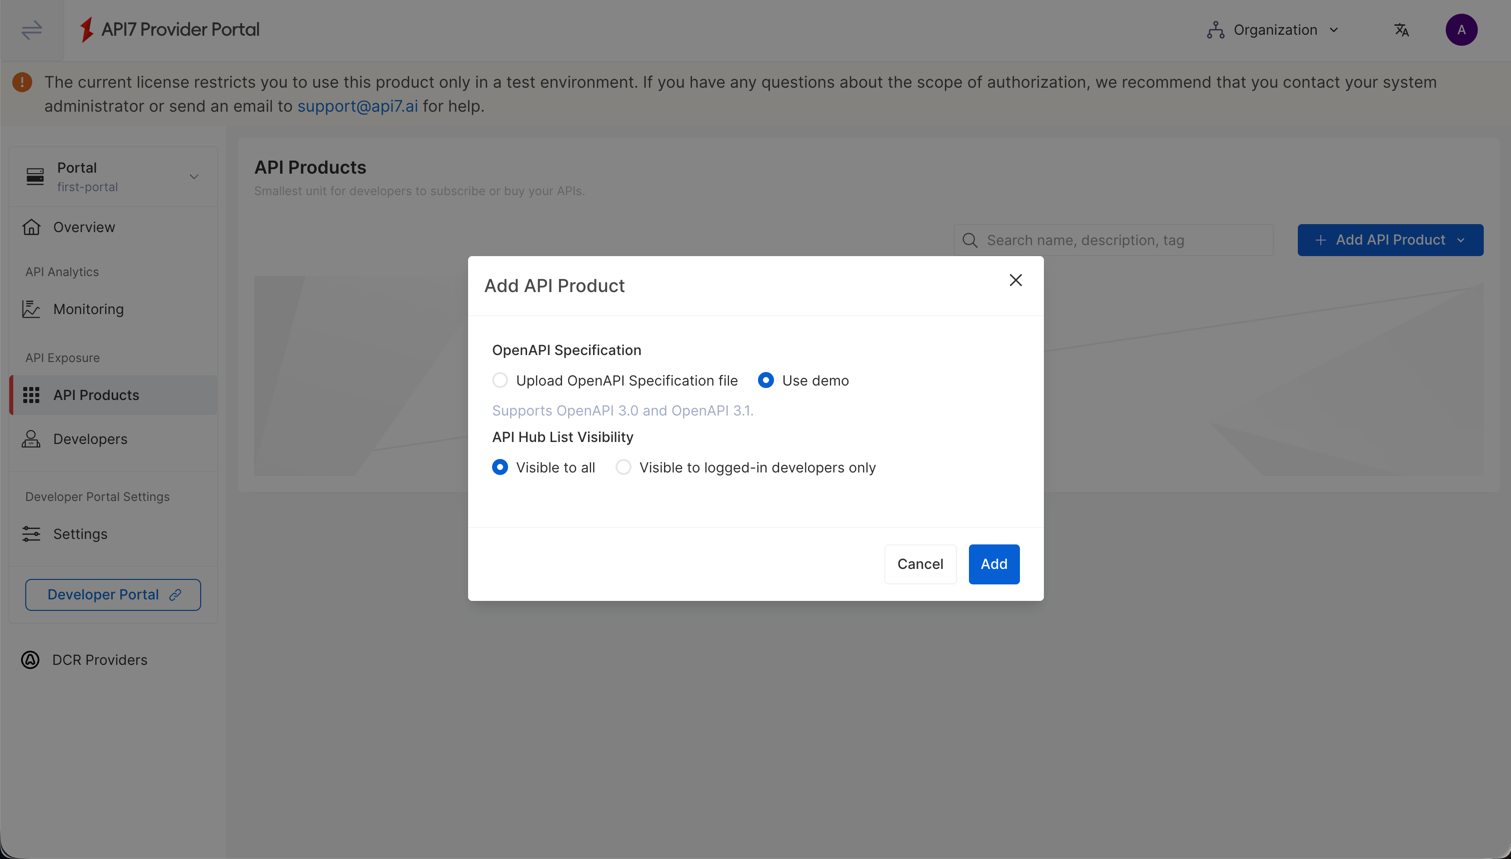
Publish the API Product to make it visible in Developer Portal.
-
Return to Developer Portal and refresh the API Hub. The published API Product should now be visible.
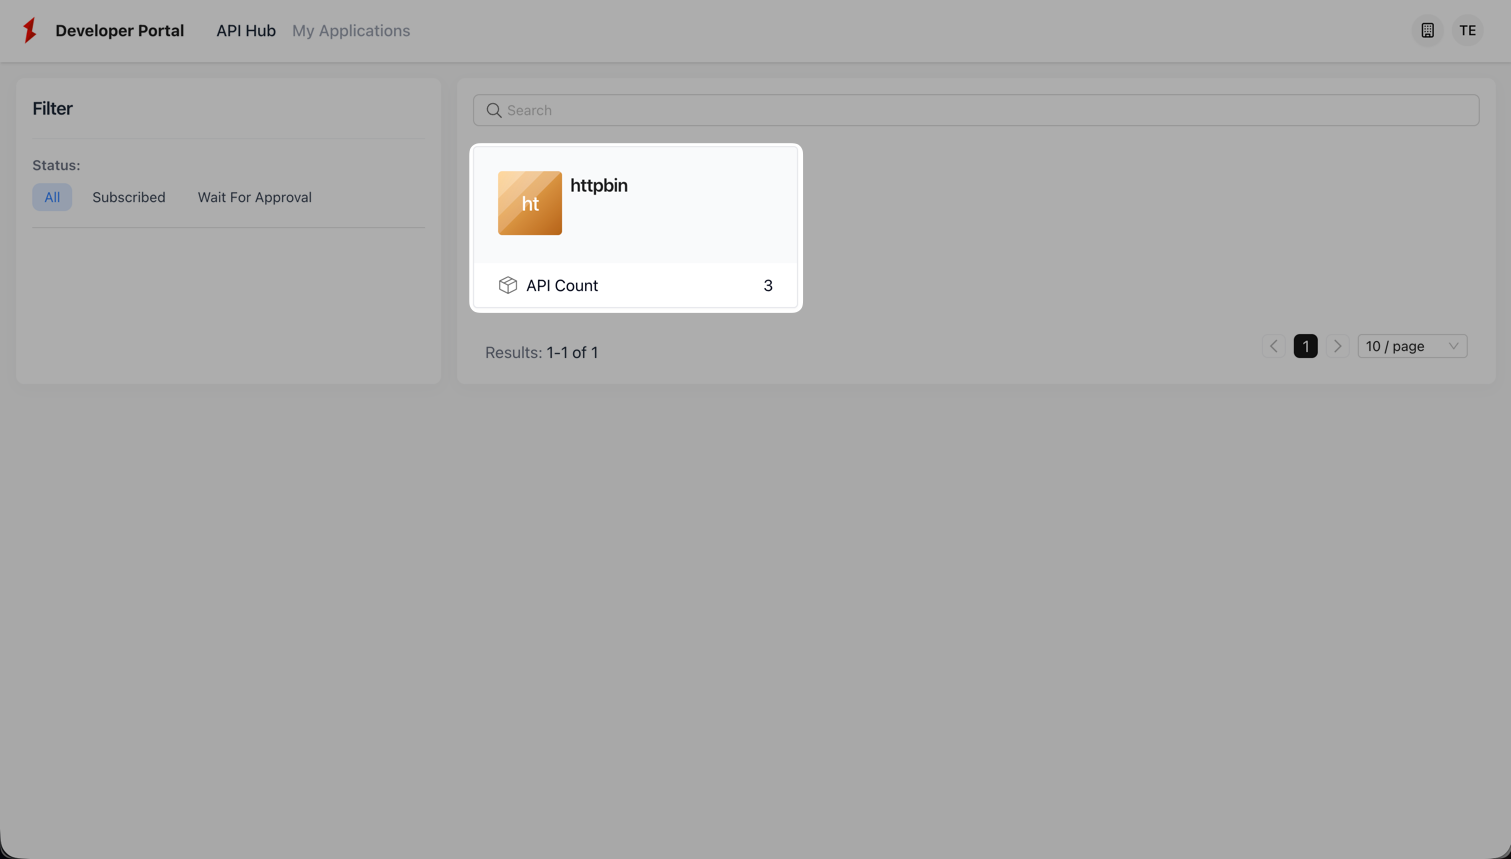
Click into the API Product to view its details.
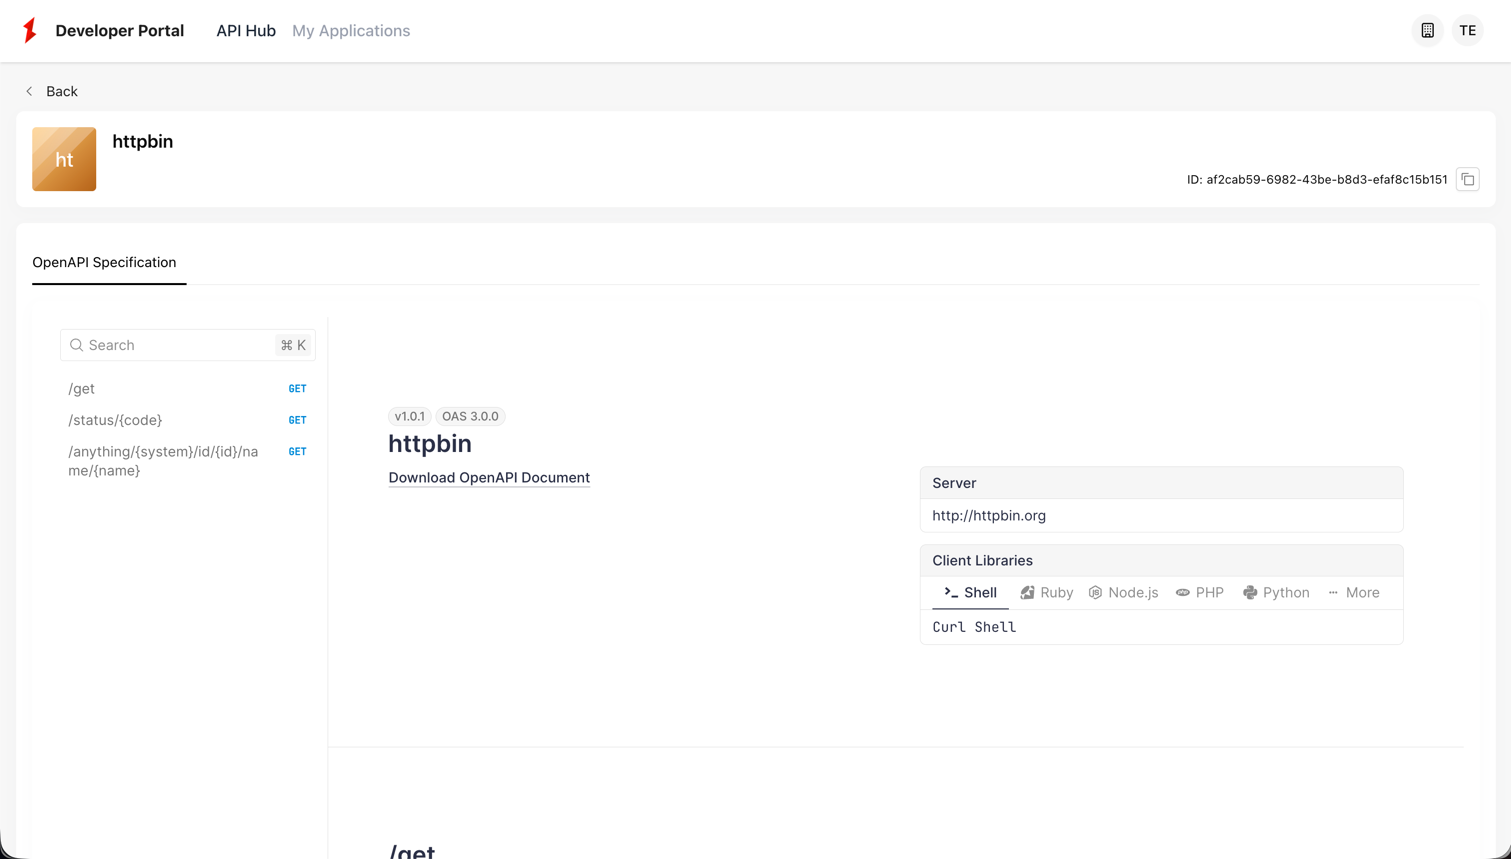
This confirms that the Developer Portal is successfully connected to the Provider Portal.
For more instructions on creating and publishing API Products, see Productize Services.
Deploy Multiple Developer Portal Instances
The Portal API identifies different Developer Portals by their domain (public URL). This allows you to have separate Developer Portals for different audiences, brands, or environments.
To deploy a second portal instance:
-
In Provider Portal, click Add Portal to create another portal.
-
Enter a different Public URL.
-
Click Generate New Token and note down the token for the new portal.
-
On the new host, follow the same steps in Deploy a Developer Portal to:
- Create
config.yaml(Docker Compose) orvalues.yaml(Kubernetes). - Update
portal.tokento the new portal's token and updateapp.baseURLto the new portal's public URL. - Start the services.
Update the configuration accordingly based on your environment.
- Create
-
Access the second Developer Portal. Because no API Products have been published to this Portal, the API Hub displays no data.
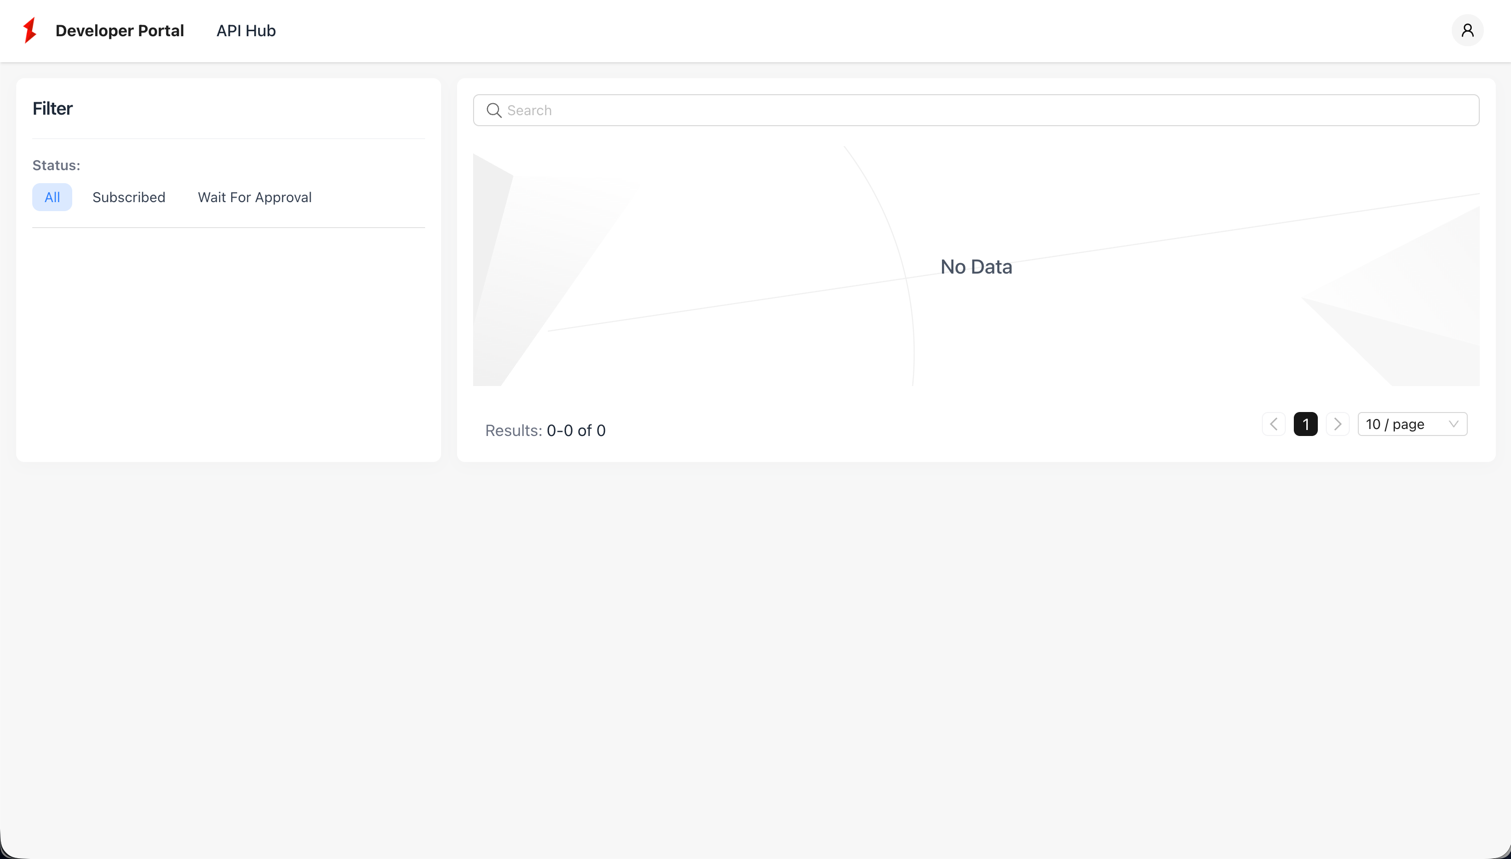
API Products created for one Developer Portal are not visible to other Portals. To make API Products available in this Developer Portal, follow the same steps in Verify Developer Portal Setup to publish API Products to the Developer Portal.
Additional Resources
- Key Concepts
- API Portal