Connect Claude Through Apache APISIX
This guide puts Apache APISIX in front of AISIX MCP Gateway, signs users in at Keycloak through the openid-connect plugin, and connects a Claude custom connector to the result. It covers two architectures:
| Gateway sign-in | Keycloak-issued JWT | |
|---|---|---|
| Who issues the token Claude sends | AISIX, after the user signs in at Keycloak | Keycloak |
| Who validates each MCP request | AISIX | APISIX, then AISIX |
Where APISIX runs openid-connect | Only on the browser sign-in pages | On every MCP request |
| Connector URL | One per server, https://gateway.example.com/ai/mcp/<server> | The aggregated https://gateway.example.com/ai/mcp |
| Claude OAuth client | Claude registers itself | A Keycloak client you create for Claude |
| Keycloak must be reachable from | Users' browsers, APISIX, and AISIX | Users' browsers, APISIX, AISIX, and Anthropic's cloud |
| Upstream receives the user's own token | Yes, from a per-user sign-in at the upstream | Not covered by this guide |
Choose gateway sign-in when Keycloak must not be reachable from Anthropic's cloud, when each user needs their own token at the upstream MCP server, or when you want one connector per server. Choose Keycloak-issued JWTs when APISIX itself must validate every MCP request against Keycloak and the upstream servers need no per-user sign-in.
The two architectures are alternatives, and this guide configures each one on its own. To run both behind one APISIX host, give each its own path prefix, AISIX environment, APISIX upstream and route IDs, and MCP server name, and let both use one apisix-gateway Keycloak client with Standard flow on. That is the layout the verified run used, with /ai for gateway sign-in and /ai-jwt for Keycloak-issued JWTs. Do not put both on one prefix: the bearer route of the Keycloak-issued JWT architecture covers /ai/mcp/*, which includes the per-server URLs of gateway sign-in, and gateway sign-in then fails as described in MCP Calls Fail With an Invalid Token After Gateway Sign-In.
Both configurations were verified end to end with Keycloak 26.8.2 and AISIX gateway 1.10.0 connected to AISIX Enterprise: with the claude.ai custom connector, in the browser, on Apache APISIX 3.20.0, and with a scripted client that follows the same flow on Apache APISIX 3.18.0, which behaved the same. Interactive sign-in and a resource URL with a path prefix need gateway 1.9.0 or later.
Prerequisites
Before starting, prepare the following:
- An AISIX Enterprise or AISIX Cloud environment with an attached gateway, and permission to manage the environment, OIDC providers, MCP servers, caller API keys, and claim mappings. Export
AISIX_CP,AISIX_TOKEN, andENV_IDas in Interactive MCP Sign-In. - An upstream MCP server that serves Streamable HTTP. The gateway sign-in architecture also needs the upstream to accept a Keycloak access token.
- Administrator access to a Keycloak realm. This guide uses the realm
exampleathttps://sso.example.com/realms/example. - An Apache APISIX deployment with the Admin API enabled, reachable from the internet over
https. - A Claude account that can add custom connectors. On Team and Enterprise plans, only an organization Owner adds them.
The examples use these values. Replace them with your own:
| Value | Example |
|---|---|
| Public origin of APISIX | https://gateway.example.com |
| Path prefix APISIX strips before forwarding to AISIX | /ai |
| Address APISIX uses to reach the AISIX gateway | aisix.internal:3000 |
| Keycloak issuer | https://sso.example.com/realms/example |
| MCP server name in AISIX | my-tools |
| Audience AISIX accepts | aisix |
Export the APISIX Admin API address and key:
export APISIX_ADMIN="http://127.0.0.1:9180/apisix/admin"
export APISIX_ADMIN_KEY="YOUR_APISIX_ADMIN_KEY"
Route Everything Under the Prefix to AISIX
Both architectures start from a catch-all route. It sends every request under /ai to AISIX with the prefix stripped, and runs no authentication plugin:
curl -sS -X PUT "$APISIX_ADMIN/upstreams/aisix" \
  -H "X-API-KEY: $APISIX_ADMIN_KEY" \
  -d '{
    "type": "roundrobin",
    "pass_host": "pass",
    "scheme": "http",
    "timeout": {"connect": 5, "send": 300, "read": 300},
    "nodes": {"aisix.internal:3000": 1}
  }'

curl -sS -X PUT "$APISIX_ADMIN/routes/aisix" \
  -H "X-API-KEY: $APISIX_ADMIN_KEY" \
  -d '{
    "uri": "/ai/*",
    "priority": 0,
    "upstream_id": "aisix",
    "plugins": {
      "proxy-rewrite": {"regex_uri": ["^/ai/(.*)", "/$1"]}
    }
  }'
Each architecture then adds routes of higher priority for the paths where openid-connect runs or where discovery needs special handling.
Set the environment's MCP resource URL to the public URL of the aggregated entry, prefix included. Both architectures use it:
curl -sS -X PATCH "$AISIX_CP/environments/$ENV_ID" \
  -H "Authorization: Bearer $AISIX_TOKEN" \
  -H "Content-Type: application/json" \
  -d '{"mcp_resource_url": "https://gateway.example.com/ai/mcp"}'
The path must end with /mcp. In the dashboard, the same setting is Resource URL on the environment's MCP Access page. See Run Behind a Path-Prefix Gateway for how AISIX publishes discovery behind a prefix.
Gateway Sign-In
In this architecture AISIX runs the whole OAuth flow for Claude through interactive sign-in. Claude registers itself with AISIX, the user signs in at Keycloak in the browser, and AISIX issues Claude a session token. AISIX then calls the upstream with the user's own Keycloak token.
APISIX adds a Keycloak sign-in in front of the AISIX browser pages only, so a user cannot reach the AISIX authorization page without a Keycloak session. The user types their password once, at the APISIX step. The gateway sign-in at AISIX and the upstream sign-in then complete through Keycloak single sign-on.
Why APISIX Does Not Validate the MCP Calls
APISIX cannot validate the token Claude sends in this architecture. The session token AISIX issues, which starts with aisix_mcp_at_, is encrypted by the gateway with its own key. It is not a JWT signed by Keycloak, and Keycloak cannot introspect it. With bearer_only on the MCP path, APISIX rejects every MCP call with 401, so keep the MCP path, discovery, client registration, and the token endpoint on the catch-all route. AISIX validates every MCP call itself.
Create the Keycloak Clients
Create three OpenID Connect clients in the realm. For each one, go to Clients > Create client, keep Client type at OpenID Connect, enter the Client ID, and select Next. On Capability config, turn Client authentication on and keep Standard flow on. Direct access grants is off by default; keep it off. Select Next, enter the redirect URI in Valid redirect URIs, and select Save. Copy each secret from the Client Secret field of the Credentials tab.
| Client ID | Valid redirect URI | Used by |
|---|---|---|
apisix-gateway | https://gateway.example.com/ai/mcp-oauth/apisix-callback | APISIX openid-connect on the browser pages |
aisix-login | https://gateway.example.com/ai/mcp-oauth/login/callback | AISIX gateway sign-in |
my-tools-upstream | https://gateway.example.com/ai/mcp-oauth/callback | AISIX sign-in at the upstream MCP server |
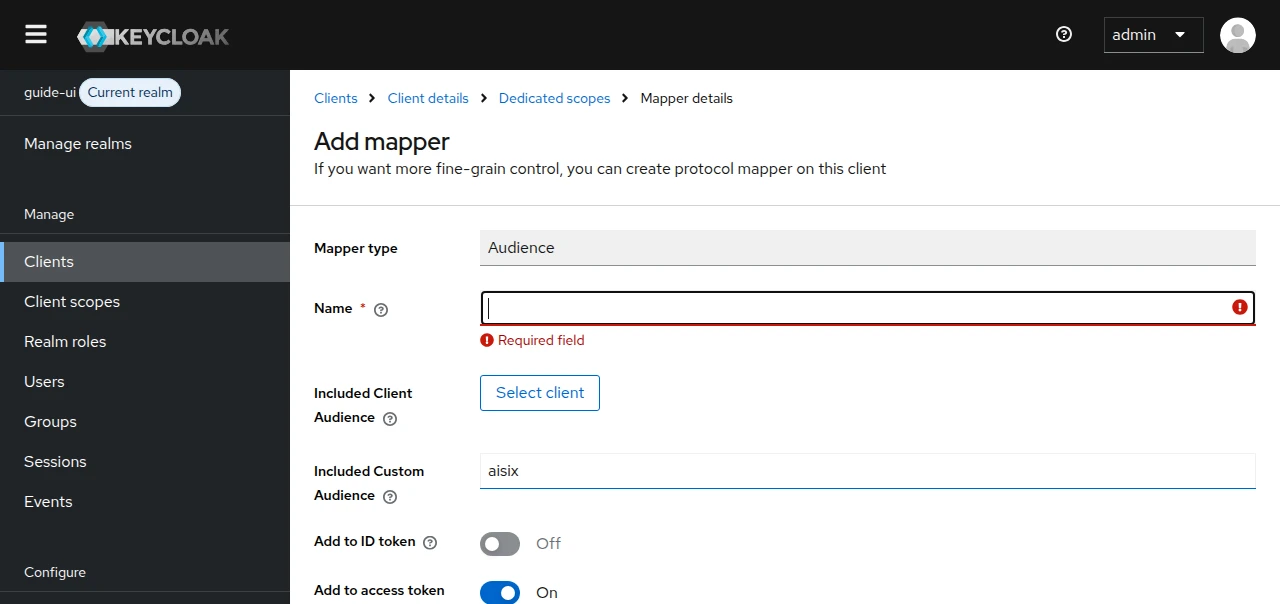
Add an audience mapper to aisix-login and to my-tools-upstream. Go to Clients > the client > Client scopes > <client>-dedicated > Configure a new mapper > Audience. Enter a Name, such as aisix-audience, set Included Custom Audience, keep Add to access token on, which is the default, and select Save:
- For
aisix-login, use the audience AISIX accepts,aisix. - For
my-tools-upstream, use the audience your upstream MCP server expects.
Keycloak requires the Name. Without one, it shows Required field and does not save the mapper:
Configure APISIX
Add one route of higher priority for the AISIX authorization page and its /mcp-oauth/* pages, which serve the sign-in callback, the upstream callback, and the consent page:
curl -sS -X PUT "$APISIX_ADMIN/routes/aisix-browser-oidc" \
  -H "X-API-KEY: $APISIX_ADMIN_KEY" \
  -d '{
    "priority": 10,
    "uris": ["/ai/mcp/*", "/ai/mcp-oauth/*"],
    "vars": [["uri", "~~", "^/ai/(mcp/[^/]+/oauth/authorize|mcp-oauth/.*)$"]],
    "upstream_id": "aisix",
    "plugins": {
      "openid-connect": {
        "client_id": "apisix-gateway",
        "client_secret": "YOUR_APISIX_GATEWAY_CLIENT_SECRET",
        "discovery": "https://sso.example.com/realms/example/.well-known/openid-configuration",
        "scope": "openid email profile",
        "bearer_only": false,
        "unauth_action": "auth",
        "use_pkce": true,
        "redirect_uri": "https://gateway.example.com/ai/mcp-oauth/apisix-callback",
        "session": {"secret": "YOUR_RANDOM_SECRET_OF_32_OR_MORE_CHARACTERS"},
        "set_access_token_header": false
      },
      "proxy-rewrite": {"regex_uri": ["^/ai/(.*)", "/$1"]}
    }
  }'
redirect_urimust be on a path this route covers, and must not be one of the AISIX callbacks,/mcp-oauth/callbackor/mcp-oauth/login/callback.set_access_token_header: falsekeeps the plugin from writing the APISIX session's access token into the request AISIX receives.
Configure AISIX
Export the client secrets:
export AISIX_LOGIN_CLIENT_SECRET="YOUR_AISIX_LOGIN_CLIENT_SECRET"
export UPSTREAM_CLIENT_SECRET="YOUR_MY_TOOLS_UPSTREAM_CLIENT_SECRET"
Create the OIDC provider with gateway sign-in:
curl -sS -X POST "$AISIX_CP/environments/$ENV_ID/oidc_providers" \
  -H "Authorization: Bearer $AISIX_TOKEN" \
  -H "Content-Type: application/json" \
  -d '{
    "name": "keycloak",
    "issuer": "https://sso.example.com/realms/example",
    "audiences": ["aisix"],
    "login": {
      "client_id": "aisix-login",
      "client_secret": "'"$AISIX_LOGIN_CLIENT_SECRET"'",
      "scopes": ["email", "profile"]
    }
  }'
Create the MCP server with per-user sign-in at the upstream:
curl -sS -X POST "$AISIX_CP/mcp_servers" \
  -H "Authorization: Bearer $AISIX_TOKEN" \
  -H "Content-Type: application/json" \
  -d '{
    "name": "my-tools",
    "type": "mcp",
    "url": "https://tools.internal.example.com/mcp",
    "auth_type": "oauth2_authorization_code",
    "client_id": "my-tools-upstream",
    "secret": "'"$UPSTREAM_CLIENT_SECRET"'",
    "authorization_url": "https://sso.example.com/realms/example/protocol/openid-connect/auth",
    "token_url": "https://sso.example.com/realms/example/protocol/openid-connect/token",
    "scopes": [],
    "allowed_environments": ["'"$ENV_ID"'"]
  }'
Create the caller API key that signed-in users run as, and map every user of the realm to it:
export API_KEY_ID=$(curl -sS -X POST "$AISIX_CP/environments/$ENV_ID/api_keys" \
  -H "Authorization: Bearer $AISIX_TOKEN" \
  -H "Content-Type: application/json" \
  -d '{
    "display_name": "my-tools-users",
    "allowed_models": [],
    "mcp_access": {"allow": ["my-tools__*"]}
  }' | jq -r '.api_key.id')

curl -sS -X POST "$AISIX_CP/environments/$ENV_ID/claim_mappings" \
  -H "Authorization: Bearer $AISIX_TOKEN" \
  -H "Content-Type: application/json" \
  -d '{
    "name": "realm-users",
    "jwt_provider": "keycloak",
    "priority": 100,
    "match": [
      {"claim": "iss", "op": "exact", "values": ["https://sso.example.com/realms/example"]}
    ],
    "resolve": {"api_key_id": "'"$API_KEY_ID"'"}
  }'
To give different users different access, match on a group or another claim instead. See JWT Claim Mappings.
In the dashboard, the provider form on the OIDC providers page has a Gateway sign-in (optional) section, and the MCP server form offers OAuth 2.0 (per-user sign-in) as its authentication type.
Add the Connector in Claude
Add the connector in claude.ai or in the Claude desktop app. A custom connector is added by its URL and is not tied to one app. These steps were verified on claude.ai in the browser.
-
Go to Customize > Connectors, select + Add, and then select Add custom connector. On Team and Enterprise plans, an Owner adds the connector in Organization settings > Connectors by selecting Add and then Custom > Web, and members connect to it from Customize > Connectors.
-
In the Add custom connector dialog, enter a name, which is shown in the connectors list, and the per-server URL
https://gateway.example.com/ai/mcp/my-tools. Select Continue.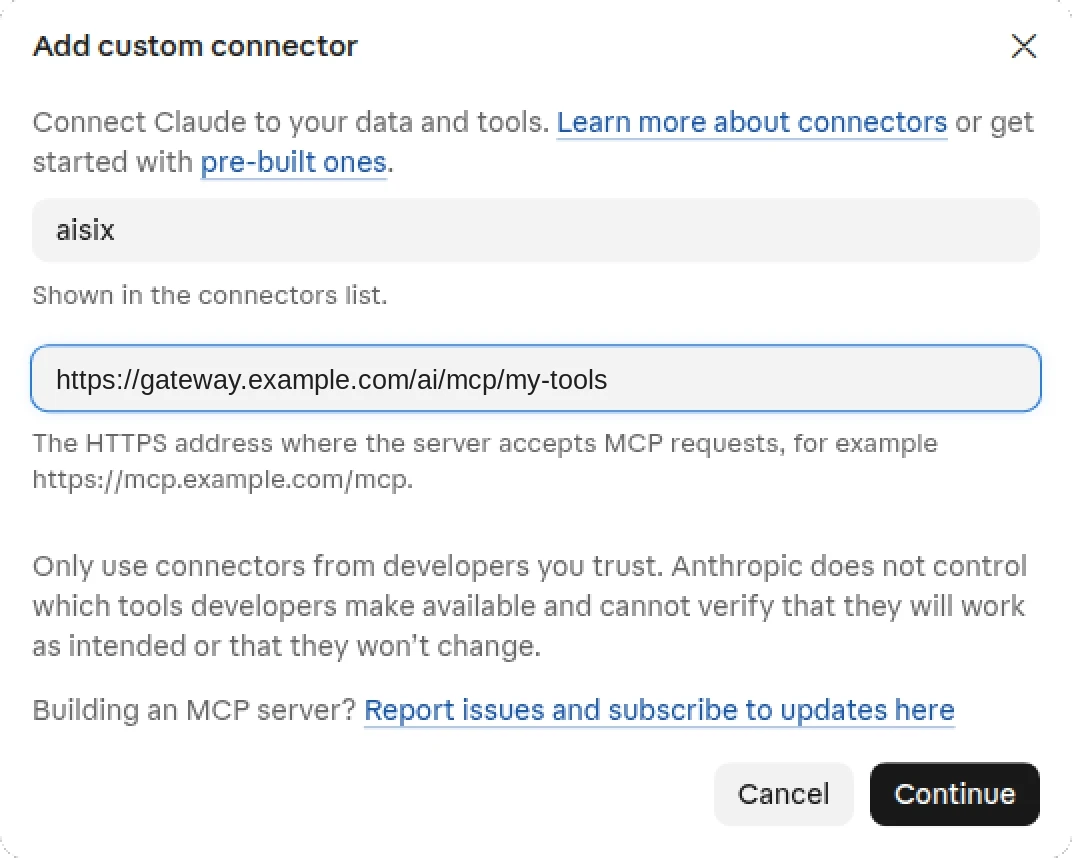
-
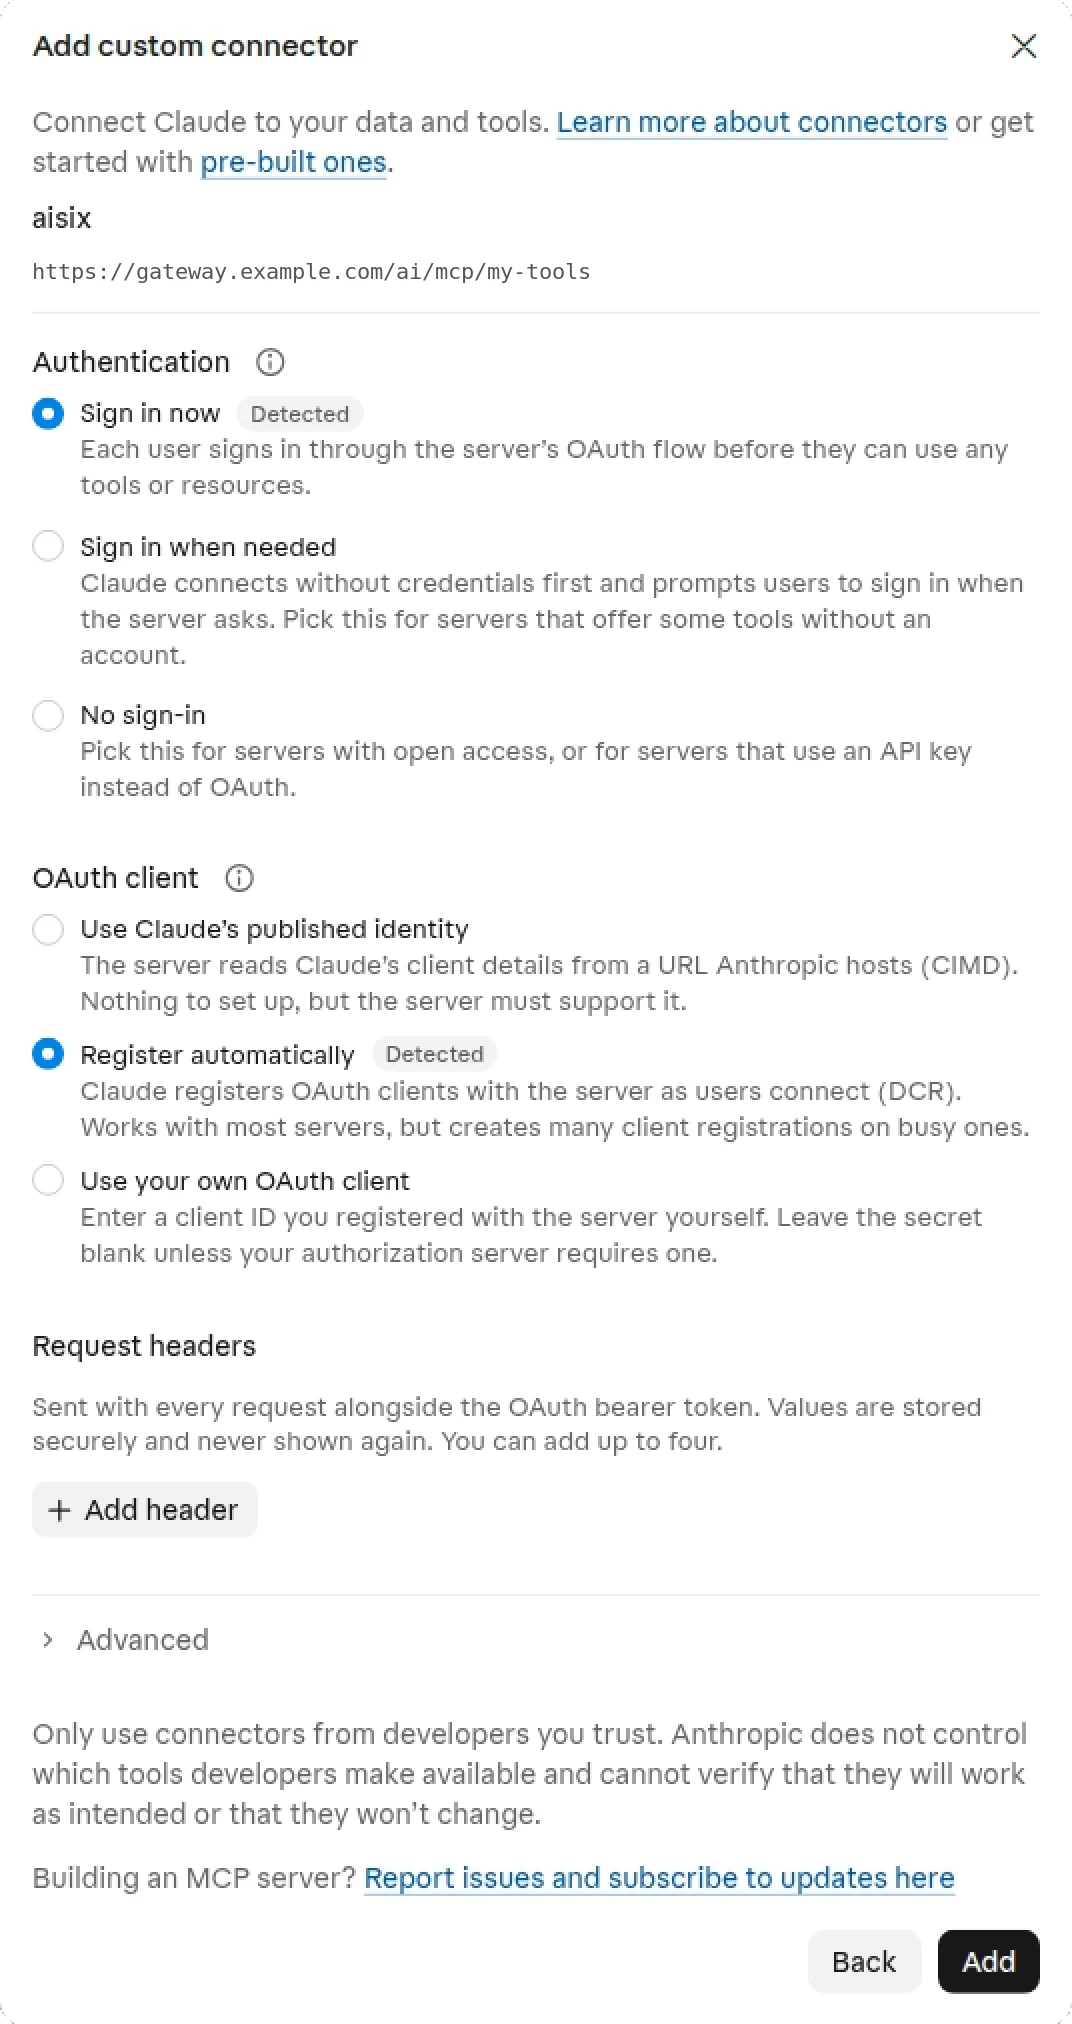
Claude checks the server and marks what it detected. Keep Authentication at Sign in now and OAuth client at Register automatically, both marked Detected, so that Claude registers itself with AISIX. Select Add.
-
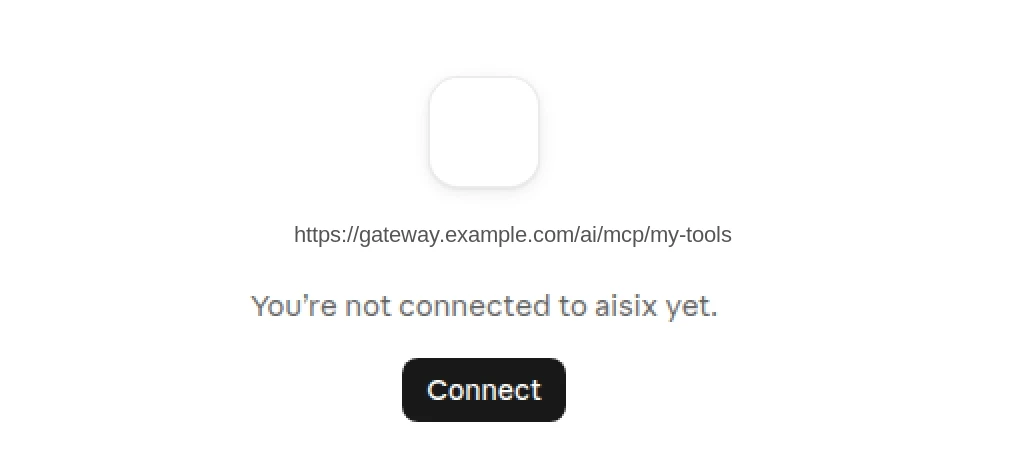
The connector shows that you are not connected yet. Select Connect.
-
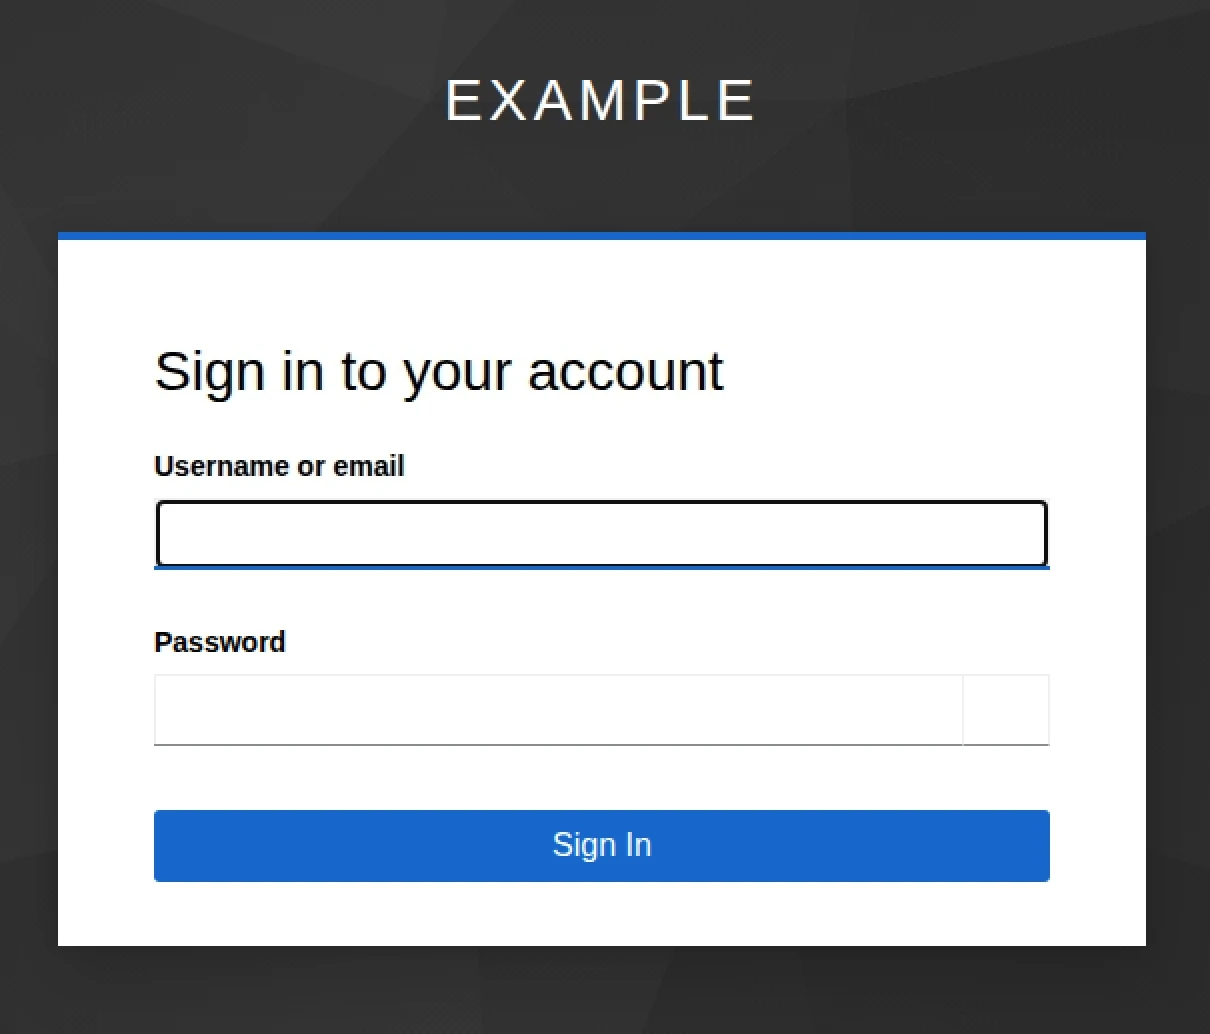
The browser opens Keycloak's Sign in to your account page through the APISIX route. Sign in. The gateway sign-in at AISIX and the upstream sign-in then complete through Keycloak single sign-on without another prompt.
-
The flow ends on the AISIX page Allow access to this MCP server?, which shows the MCP server, the signed-in user, and the application address
https://claude.ai. Select Allow.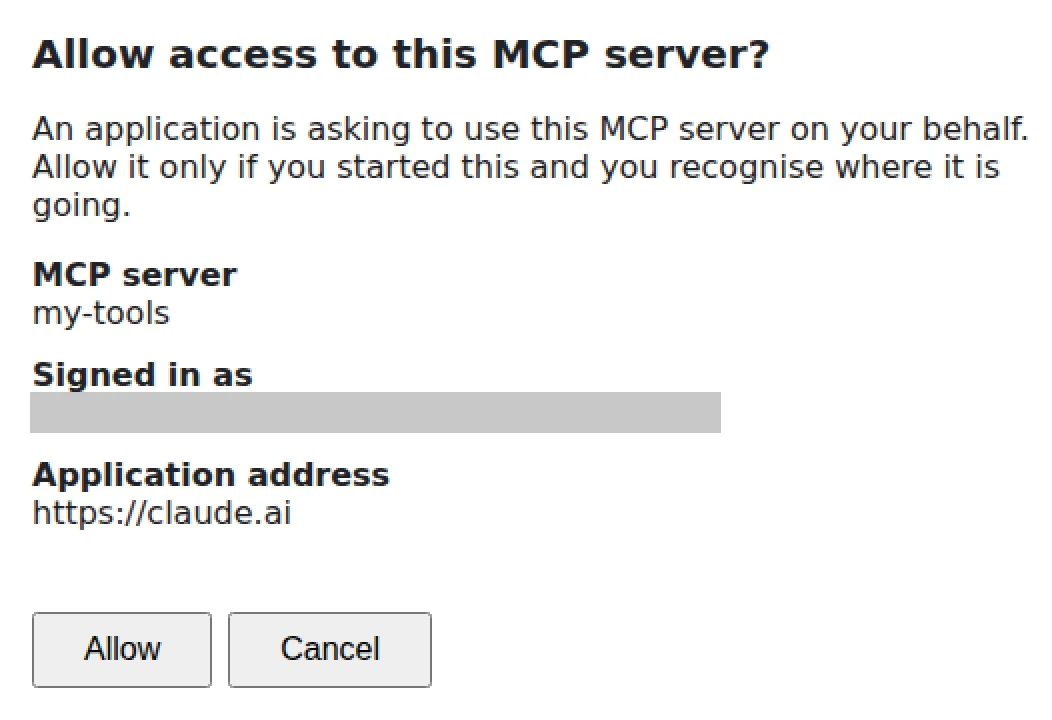
-
The connector is connected and lists the server's tools under Tool permissions. A per-server connector lists each tool under the tool's own name, such as Get weather for
get_weather.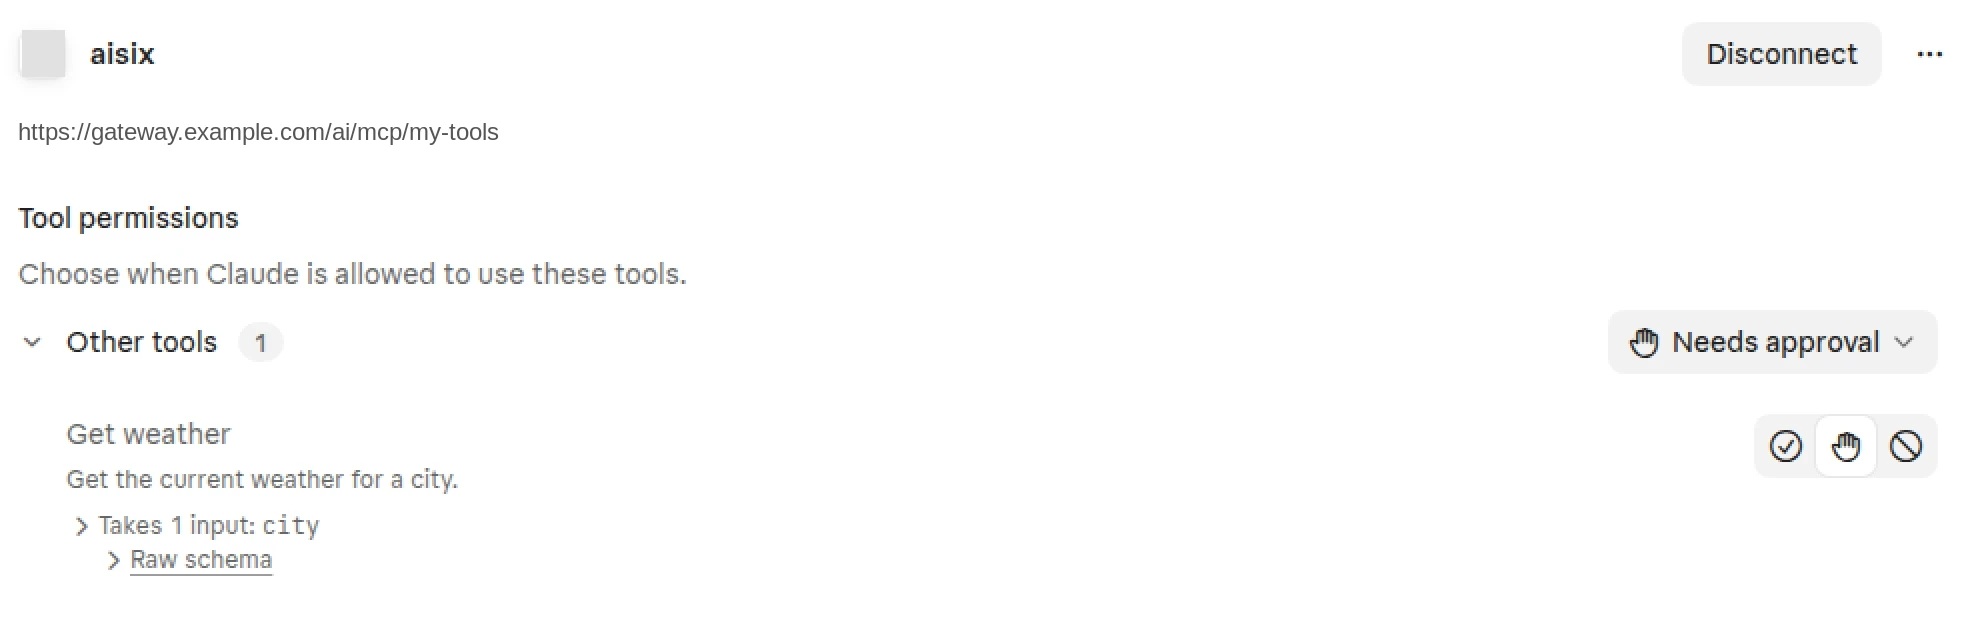
-
Ask Claude to use one of the tools. With the default Needs approval permission, Claude asks before each call. Select Allow once or Always allow.
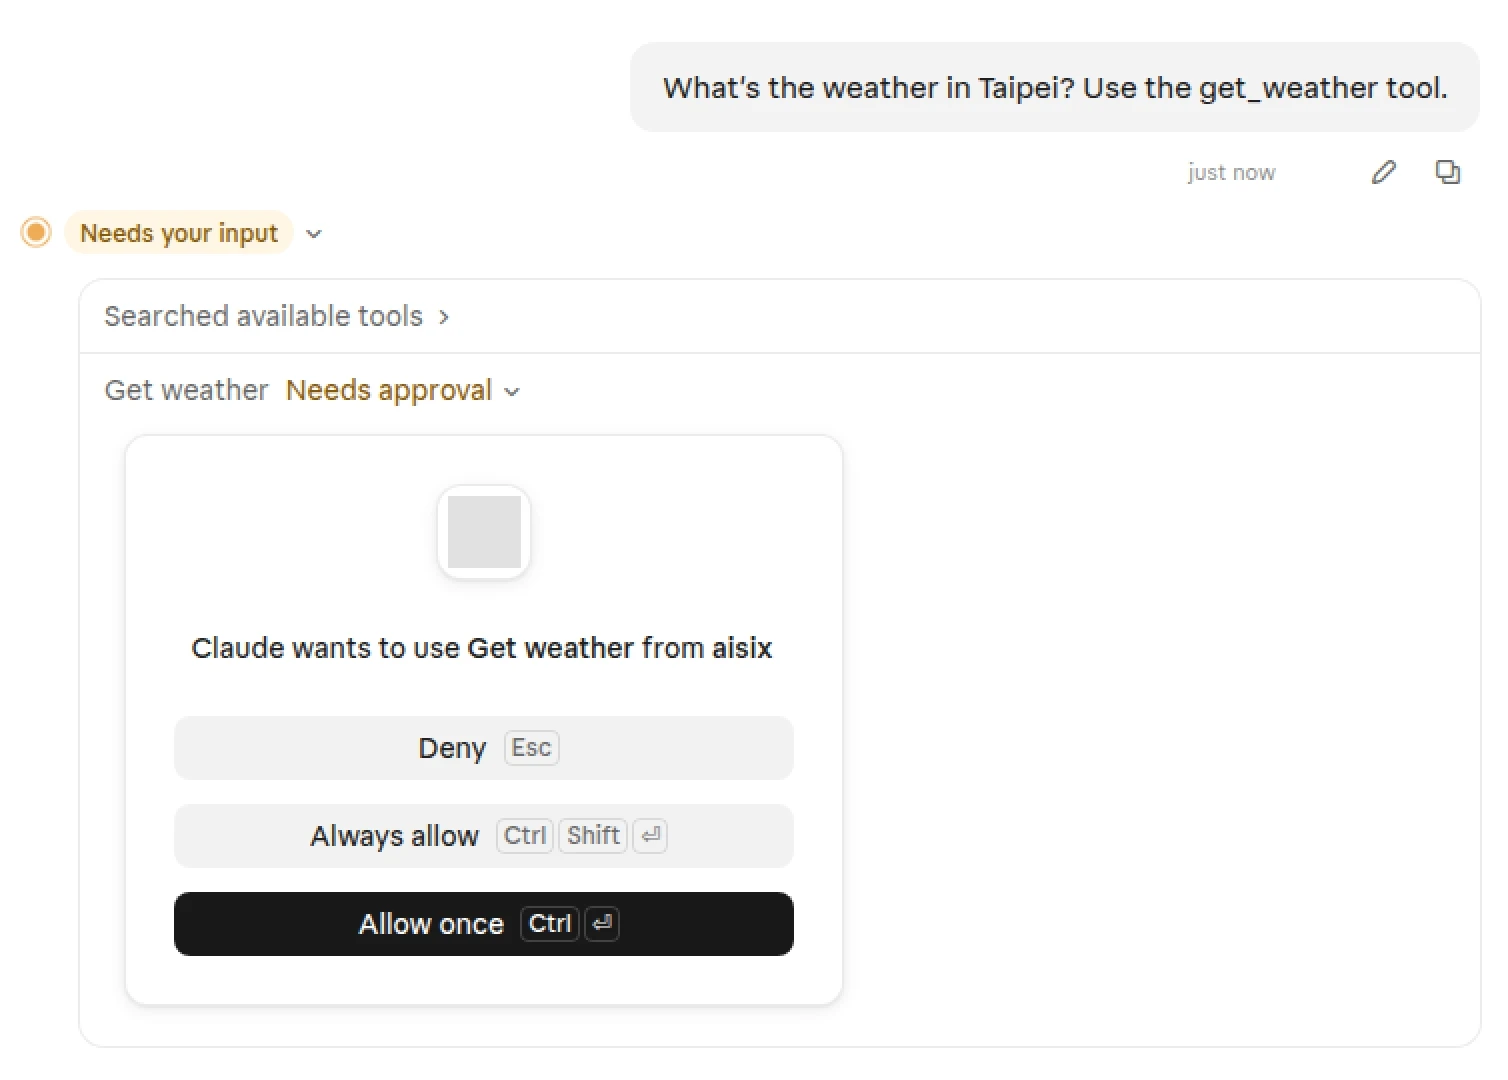
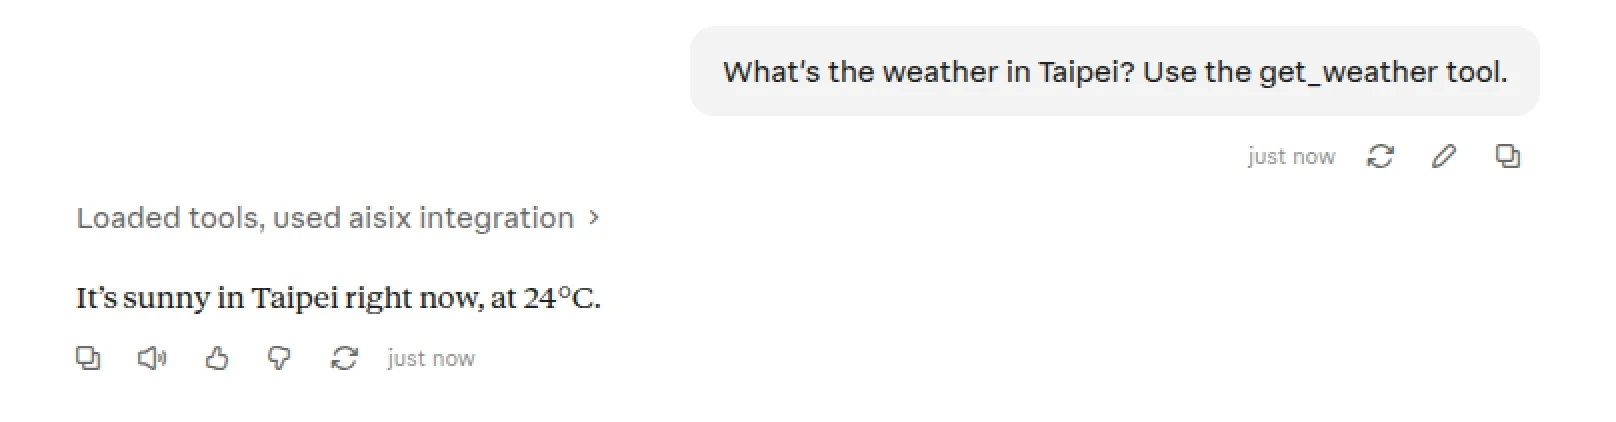
Add one connector per MCP server. Each per-server URL is its own OAuth resource, and a session works only on the server it was issued for.
Keycloak-Issued JWT
In this architecture Claude signs the user in at Keycloak and sends Keycloak's access token with every MCP request. APISIX validates the JWT against Keycloak's signing keys before forwarding, and AISIX validates it again against its OIDC provider.
Requirements
- The connector URL is the aggregated entry,
https://gateway.example.com/ai/mcp. Claude requires theresourcein the protected resource metadata to equal the connector URL, and the resource URL AISIX publishes for JWT discovery ends with/mcp. Tools appear in Claude as<server>__<tool>, such asmy-tools__get_weather. - Keycloak must be reachable from Anthropic's cloud. Claude exchanges the authorization code at Keycloak's token endpoint from Anthropic's servers, whose egress range is
160.79.104.0/21. - The provider needs
required_scopes. Without it, the protected resource metadata AISIX publishes lists no scopes, and Claude requests every scope that Keycloak's discovery document advertises. Keycloak then rejects the request withinvalid_scopebecause some of those scopes are not assigned to the client, and Claude showsAuthorization with <name> failed. You can check your credentials and permissions.A dedicated client scope avoids this, as configured below.
Create the Keycloak Client Scope and Clients
-
Create the client scope
aisix-mcp: go to Client scopes > Create client scope, set Name toaisix-mcp, Type to None, and Protocol to OpenID Connect, turn Include in token scope on, and save. -
Create the client for Claude,
claude-connector: go to Clients > Create client, keep OpenID Connect, and enter the client ID. On Capability config, turn Client authentication on, keep Standard flow on, and turn Require PKCE on. PKCE Method then appears, set to S256; keep it. Addhttps://claude.ai/api/mcp/auth_callbackin Valid redirect URIs, and save. On an existing client, the same switches are on the Settings tab under Capability config: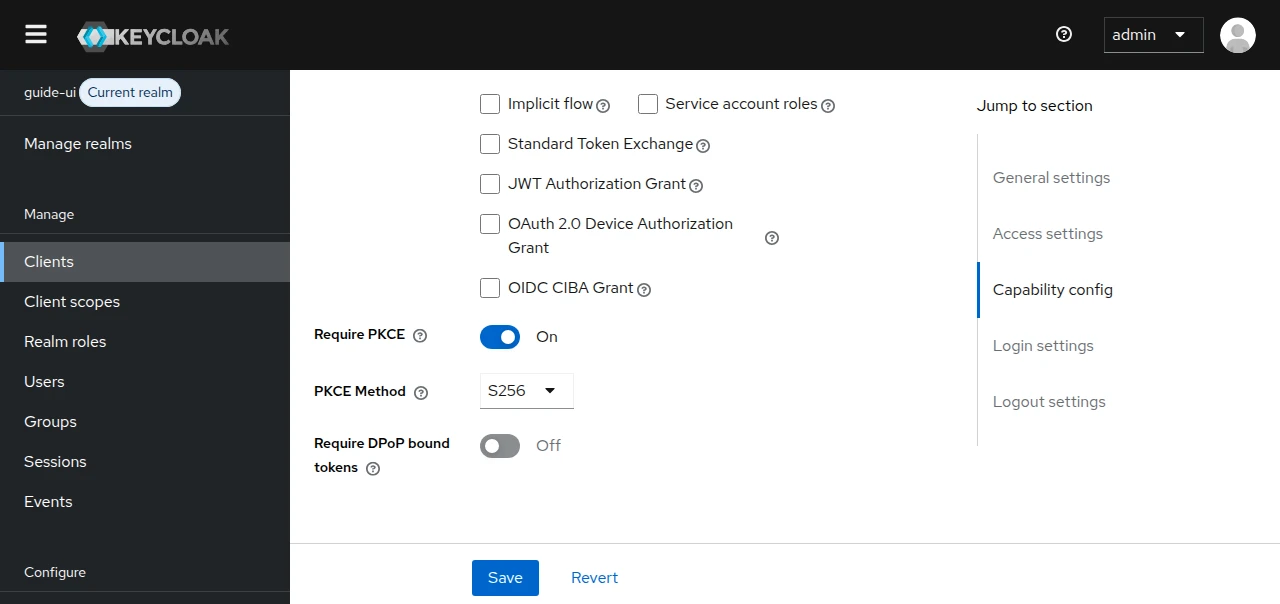
Then:
- On the Client scopes tab, select Add client scope, select
aisix-mcp, and choose Add > Default. Keepoffline_accessassigned, which it is by default as an optional scope, because Claude also requests it. - Under Client scopes >
claude-connector-dedicated, select Configure a new mapper > Audience. Enter a Name, set Included Custom Audience toaisix, keep Add to access token on, and save. - Copy the secret from the Credentials tab.
- On the Client scopes tab, select Add client scope, select
-
Create the client for APISIX,
apisix-gateway, with Client authentication on. Standard flow can be off, because bearer validation withuse_jwksdoes not use the client; the plugin's schema requires aclient_idall the same. If you also run gateway sign-in, reuse itsapisix-gatewayclient, with Standard flow on, instead of creating a second one.
Configure APISIX
Add three routes of higher priority. The MCP route validates bearer JWTs. The two discovery routes reach AISIX without the plugin:
curl -sS -X PUT "$APISIX_ADMIN/routes/aisix-mcp-bearer" \
  -H "X-API-KEY: $APISIX_ADMIN_KEY" \
  -d '{
    "uris": ["/ai/mcp", "/ai/mcp/*"],
    "priority": 10,
    "upstream_id": "aisix",
    "plugins": {
      "openid-connect": {
        "client_id": "apisix-gateway",
        "client_secret": "YOUR_APISIX_GATEWAY_CLIENT_SECRET",
        "discovery": "https://sso.example.com/realms/example/.well-known/openid-configuration",
        "bearer_only": true,
        "use_jwks": true,
        "claim_validator": {"audience": {"required": true}}
      },
      "proxy-rewrite": {"regex_uri": ["^/ai/(.*)", "/$1"]}
    }
  }'

curl -sS -X PUT "$APISIX_ADMIN/routes/aisix-wellknown" \
  -H "X-API-KEY: $APISIX_ADMIN_KEY" \
  -d '{
    "uri": "/ai/.well-known/*",
    "priority": 10,
    "upstream_id": "aisix",
    "plugins": {
      "proxy-rewrite": {"regex_uri": ["^/ai/(.*)", "/$1"]}
    }
  }'

curl -sS -X PUT "$APISIX_ADMIN/routes/aisix-root-prm" \
  -H "X-API-KEY: $APISIX_ADMIN_KEY" \
  -d '{
    "uri": "/.well-known/oauth-protected-resource/ai/mcp",
    "priority": 10,
    "upstream_id": "aisix",
    "plugins": {
      "proxy-rewrite": {"uri": "/.well-known/oauth-protected-resource/mcp"}
    }
  }'
- A request without a token gets APISIX's own
401withWWW-Authenticate: Bearer realm="apisix", which carries noresource_metadata. Claude then looks for the metadata at/.well-known/oauth-protected-resource/ai/mcpat the origin root, which theaisix-root-prmroute answers from AISIX. - Claude reads Keycloak's metadata from
https://sso.example.com/realms/example/.well-known/openid-configuration. Its requests for well-known paths at the root of the Keycloak origin can return404without harm. - AISIX receives the client's
Authorization: Bearer <JWT>unchanged. With the plugin's defaults, APISIX also addsX-Access-TokenandX-Userinfo.
Configure AISIX
Create the OIDC provider with the dedicated scope as required_scopes:
curl -sS -X POST "$AISIX_CP/environments/$ENV_ID/oidc_providers" \
  -H "Authorization: Bearer $AISIX_TOKEN" \
  -H "Content-Type: application/json" \
  -d '{
    "name": "keycloak",
    "issuer": "https://sso.example.com/realms/example",
    "audiences": ["aisix"],
    "required_scopes": ["aisix-mcp"]
  }'
The protected resource metadata AISIX publishes then lists scopes_supported: ["aisix-mcp"]. Claude requests aisix-mcp offline_access, and Keycloak accepts it. In the dashboard, this is the Required scopes (optional) field of the provider on the OIDC providers page.
required_scopes applies to every token AISIX verifies against this provider, not only Claude's. Any other Keycloak client whose tokens call AISIX through the same provider needs aisix-mcp too. Gateway sign-in also requests the provider's required_scopes and refuses a sign-in that is not granted them, so a provider that also has login needs aisix-mcp assigned to its login client as well.
Register the MCP server with an auth_type other than oauth2_authorization_code, and allow it in the environment. The verified setup used auth_type: none:
curl -sS -X POST "$AISIX_CP/mcp_servers" \
  -H "Authorization: Bearer $AISIX_TOKEN" \
  -H "Content-Type: application/json" \
  -d '{
    "name": "my-tools",
    "type": "mcp",
    "url": "https://tools.internal.example.com/mcp",
    "auth_type": "none",
    "allowed_environments": ["'"$ENV_ID"'"]
  }'
MCP server names are unique in the organization. If my-tools already exists for gateway sign-in, register this server under another name, such as my-tools-jwt, and use that name in the caller API key's mcp_access, as in my-tools-jwt__*. Its tools then appear as my-tools-jwt__get_weather.
Then create the caller API key and claim mapping exactly as in the gateway sign-in architecture.
Add the Connector in Claude
As with gateway sign-in, add the connector in claude.ai or in the Claude desktop app. These steps were verified on claude.ai in the browser.
-
Go to Customize > Connectors, select + Add, and then select Add custom connector. On Team and Enterprise plans, an Owner adds it, as in gateway sign-in.
-
In the Add custom connector dialog, enter a name and the aggregated URL
https://gateway.example.com/ai/mcp. Select Continue.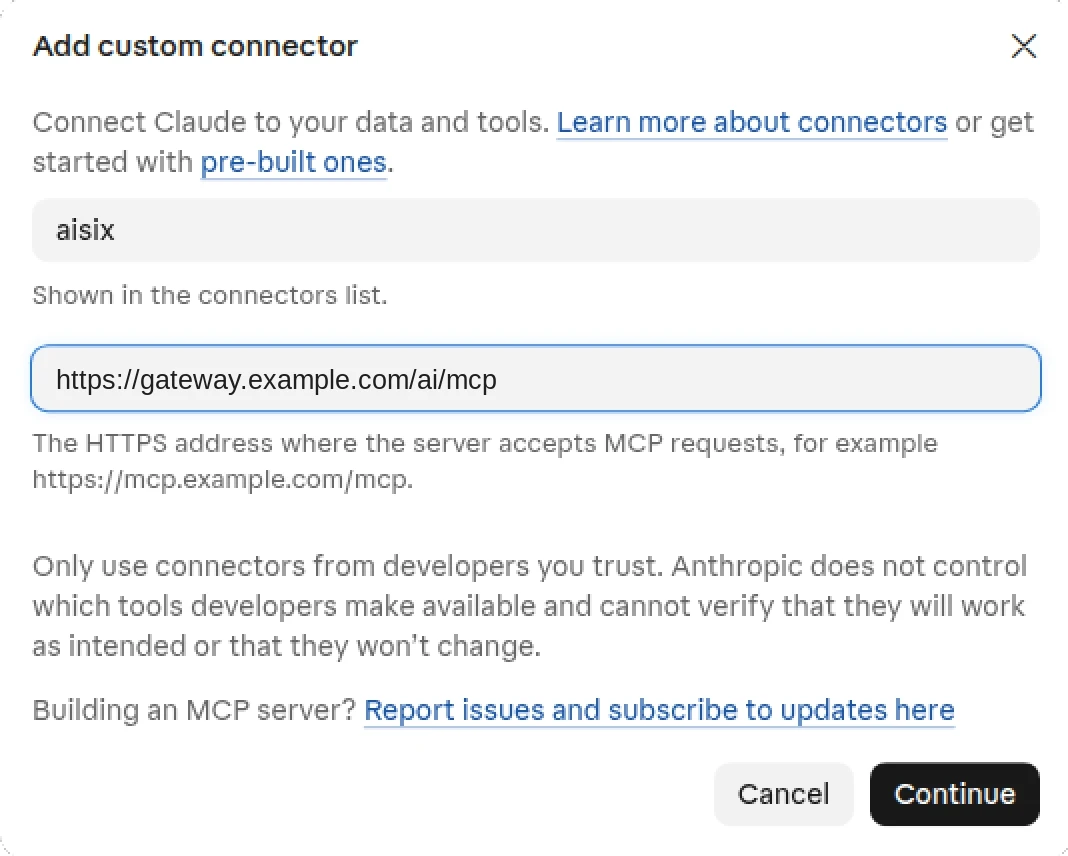
-
Keep Authentication at Sign in now. Under OAuth client, select Use your own OAuth client, although Register automatically is marked Detected. Enter
claude-connectorin OAuth client ID and the client's secret in OAuth client secret (optional). The client has Client authentication on, so Keycloak requires the secret. Select Add.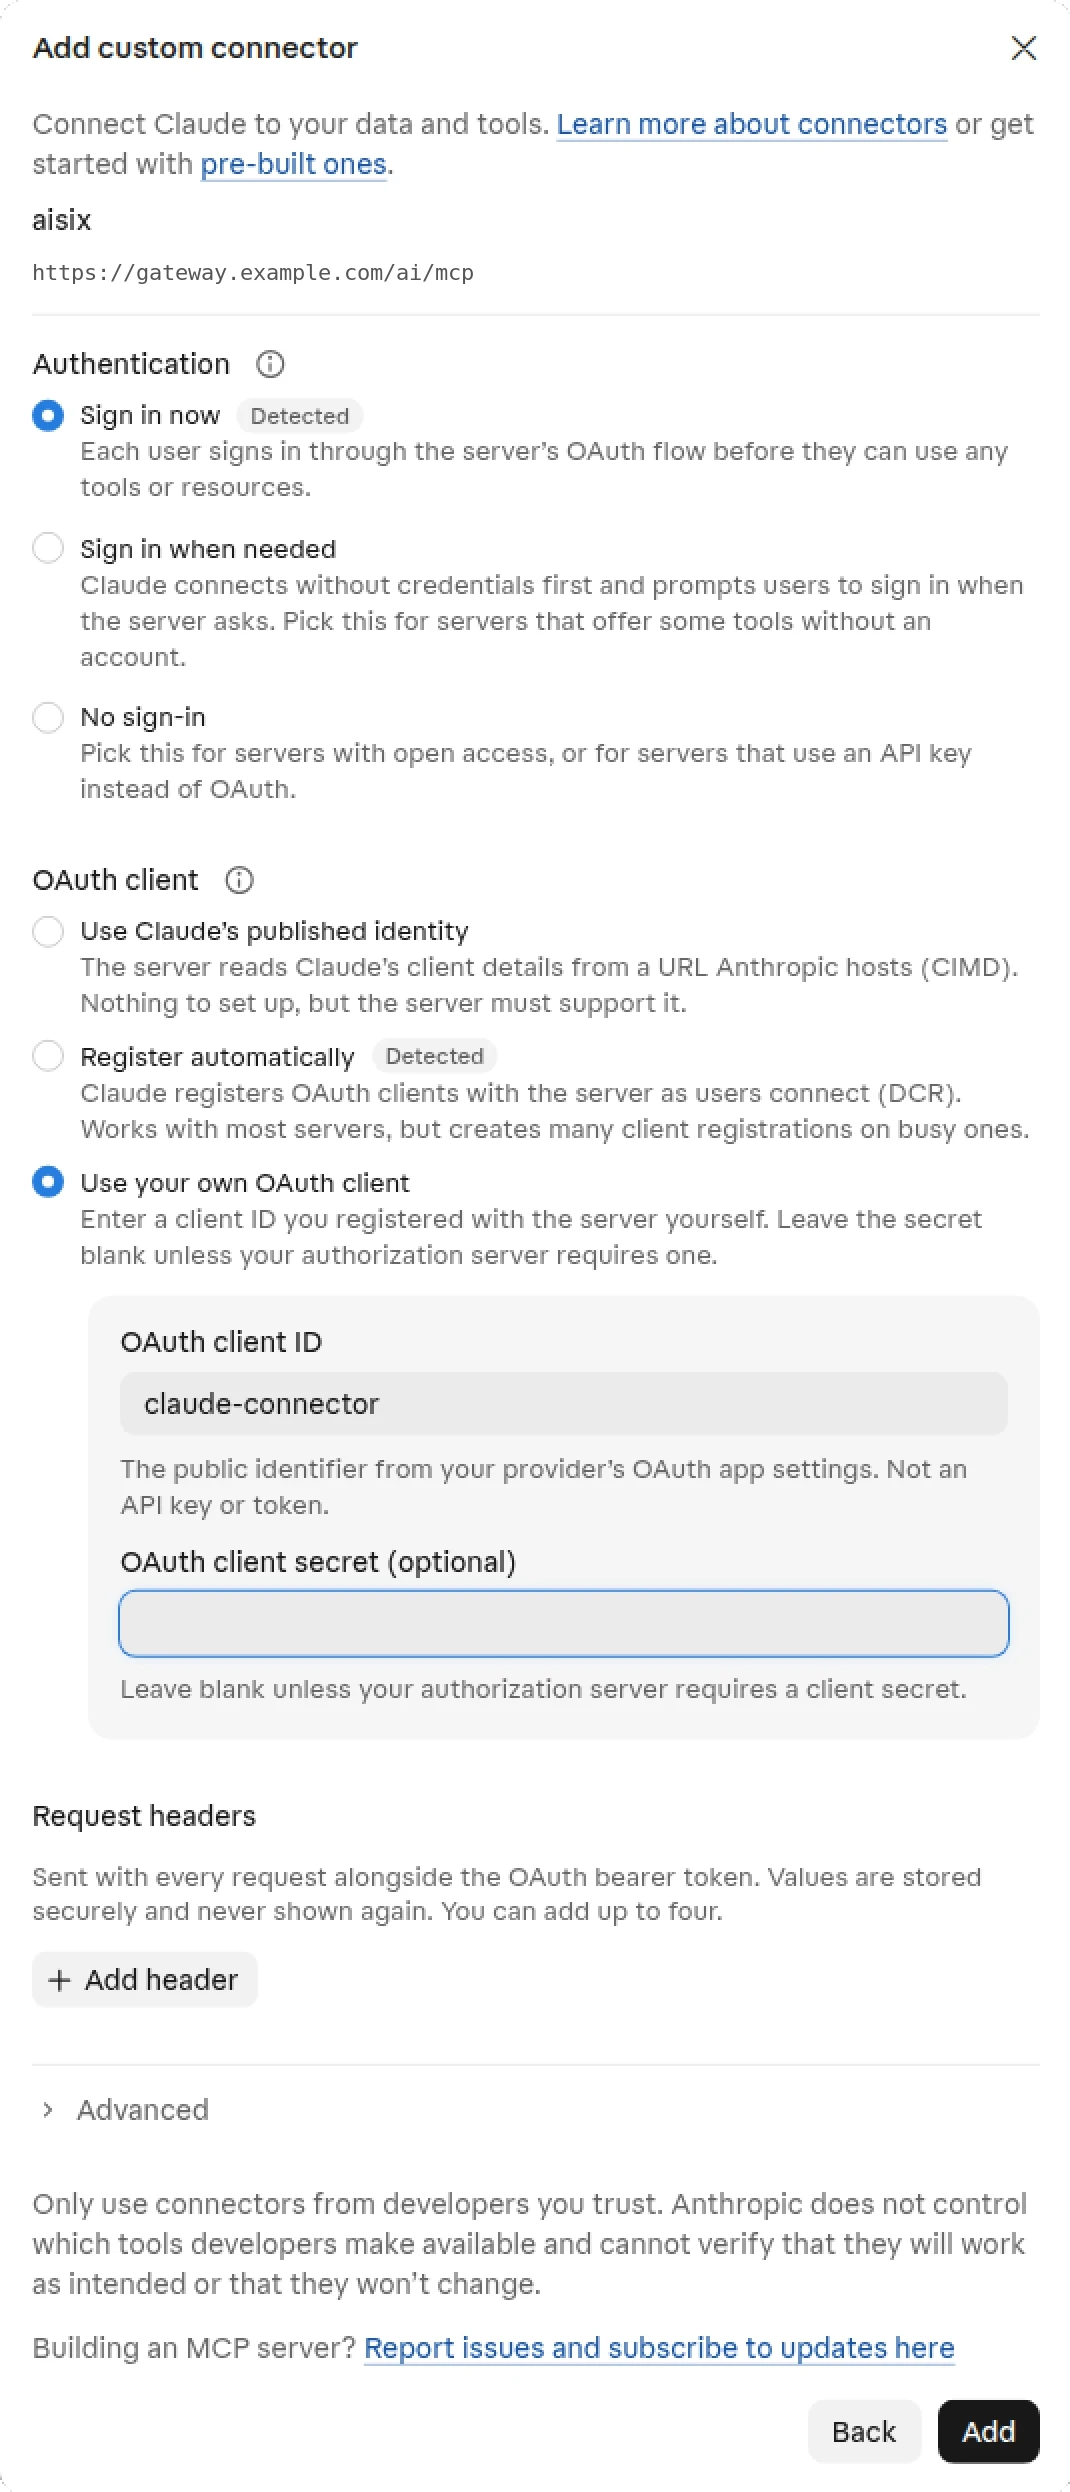
-
On the connector, select Connect. The browser opens Keycloak's sign-in page. After the user signs in, and grants consent if Keycloak asks for it, the connector is connected. A user who already has a Keycloak session sees no prompt.
-
The connector lists the tools under Tool permissions. On the aggregated URL, each tool is named
<server>__<tool>, and Claude shows that name in readable form. In the verified run, where the server was registered asmy-tools-jwt,my-tools-jwt__get_weatherappears as My-tools-jwt get weather.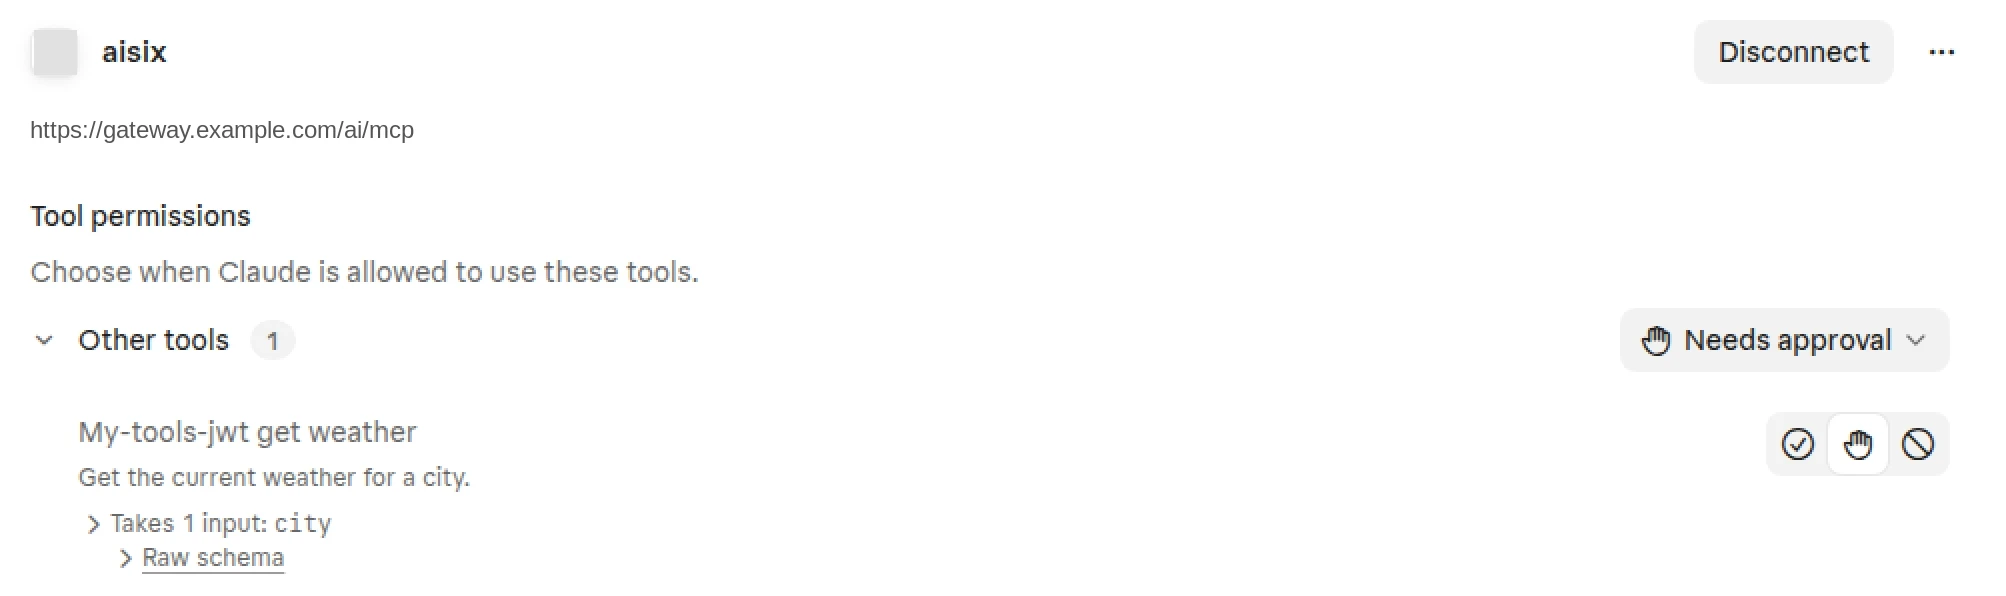
-
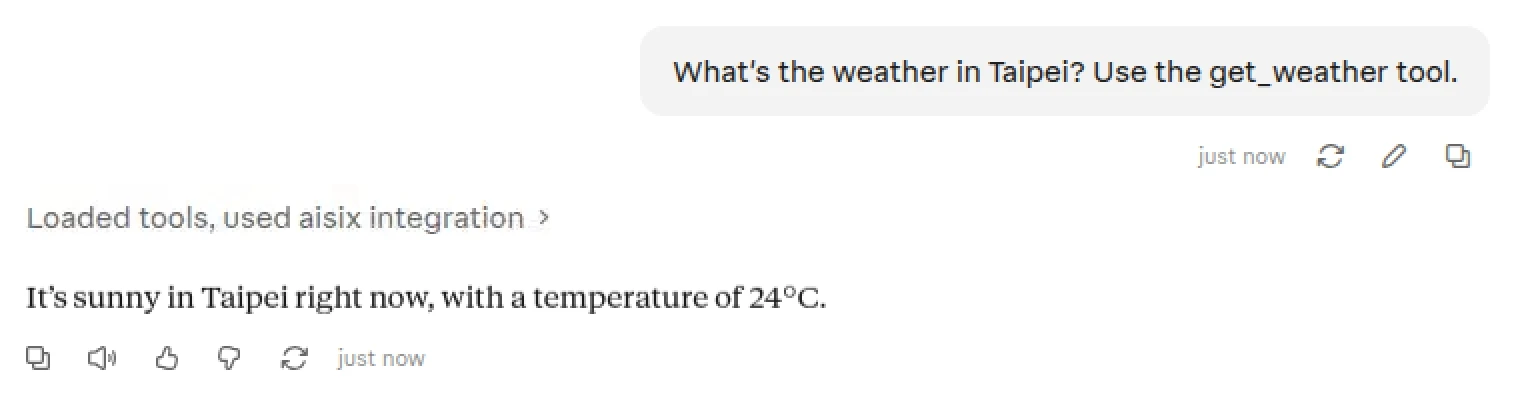
Ask Claude to use a tool, and approve the call as in gateway sign-in.
How AISIX Identifies the User
In both architectures, a signed-in user runs as the caller API key that the claim mapping selects, and AISIX records the user's own identity separately:
- With gateway sign-in, Claude presents the AISIX session token. AISIX took the user's identity from Keycloak when the user completed the gateway sign-in.
- With Keycloak-issued JWTs, AISIX verifies the Keycloak access token that arrives in
Authorizationagainst the OIDC provider.
Each MCP tools/call writes a usage event that carries the user's identity in jwt_subject, together with the OIDC provider in jwt_provider and the claim mapping in jwt_claim_mapping. With the default identity_claim, jwt_subject is the Keycloak user's sub. initialize and tools/list write no usage event. MCP tool calls carry no token cost, so attribution is per call rather than by spend.
To list one user's calls, filter usage events by jwt_subject, as in GET /environments/{env_id}/usage_events?jwt_subject=<sub>. To aggregate usage by a user attribute, the OIDC provider can read a claim into a cost attribution tag. See Read Tags From JWT Claims.
Troubleshooting
MCP Calls Fail With an Invalid Token After Gateway Sign-In
In the gateway sign-in architecture, sign-in succeeds, but the first MCP call gets 401 with WWW-Authenticate: Bearer realm="apisix", error="invalid_token", and APISIX does not forward it to AISIX.
The MCP path carries openid-connect with bearer_only. APISIX asks Keycloak to introspect the token, and Keycloak answers active: false because the token is the AISIX session token, which Keycloak did not issue. Remove the plugin from the MCP path, as described in Why APISIX Does Not Validate the MCP Calls.
APISIX Rejects Keycloak Tokens When It Uses Introspection
In the Keycloak-issued JWT architecture, every MCP call gets 401 with error="invalid_token" from APISIX when the plugin has neither use_jwks nor public_key set, so that it validates tokens by introspection at Keycloak. Keycloak 26.8.2 refuses to introspect a token whose audience does not include the APISIX client, and logs Client '<apisix client>' is not in the token audience.
Set use_jwks: true, as in the route above, so that APISIX validates the token locally. Alternatively, add the APISIX client to the token's audience with an audience mapper on the Claude client.
Claude Reports That the Service Refused Its Request After Sign-In
Claude shows You signed in to <name>, but it then refused Claude's request. Your account there may not allow access from Claude, or a firewall may be blocking Claude. and no authenticated MCP request reaches APISIX.
A WAF, CDN, or bot-management rule in front of APISIX that blocks the User-Agent Claude-User causes this. Claude's discovery, client registration, and token requests use a different User-Agent and pass, while every authenticated MCP call carries Claude-User and is blocked before it reaches APISIX. Exempt the MCP paths from AI-bot rules, or allow Anthropic's egress range 160.79.104.0/21.
Claude Reports That Authorization Failed
Claude shows Authorization with <name> failed. You can check your credentials and permissions. in the Keycloak-issued JWT architecture, and Keycloak logs a LOGIN_ERROR for the Claude client with Invalid scopes.
The provider has no required_scopes, so Claude requested every scope that Keycloak advertises. Configure the dedicated client scope and required_scopes as described in Keycloak-Issued JWT.
Browsers Are Sent to an Old Keycloak Address
APISIX openid-connect caches the identity provider's discovery document. After changing Keycloak's public hostname, APISIX kept redirecting browsers to the old hostname until it was restarted. Reload or restart APISIX after such a change.
Audience Values Are Not Checked by APISIX
claim_validator.audience.required: true only checks that the token has an aud claim. APISIX compares the value only when match_with_client_id is on, and then against its own client_id. Enforce the audience value with the provider's audiences in AISIX, which rejects a token whose aud matches none of them.
Header Options Do Not Change Bearer Validation
access_token_in_authorization_header, set_access_token_header, set_userinfo_header, and the plugin's other set_*_header options only control which headers APISIX adds to the request it forwards. They do not affect how bearer_only validates the token.
Limitations
- In the Keycloak-issued JWT architecture, this guide does not cover passing the user's Keycloak token on to an upstream MCP server that requires one. The verified upstream required no authentication.
- Keycloak issued Claude an offline refresh token in the verified run, but a token refresh was not observed in the test window.
Next Steps
- Interactive MCP sign-in: sessions, refusals, and disconnecting users in gateway sign-in.
- Client authentication: OAuth discovery and the other ways a client can authenticate.
- Keycloak integration: map Keycloak groups and attributes to caller API keys.
- Control tool access: narrow which tools a key can call.