Integrate with HashiCorp Consul
HashiCorp Consul is a multi-cloud service networking platform that connects and secures services from various clouds and runtime environments. It simplifies the process of service discovery by enabling services to quickly register and find other services.
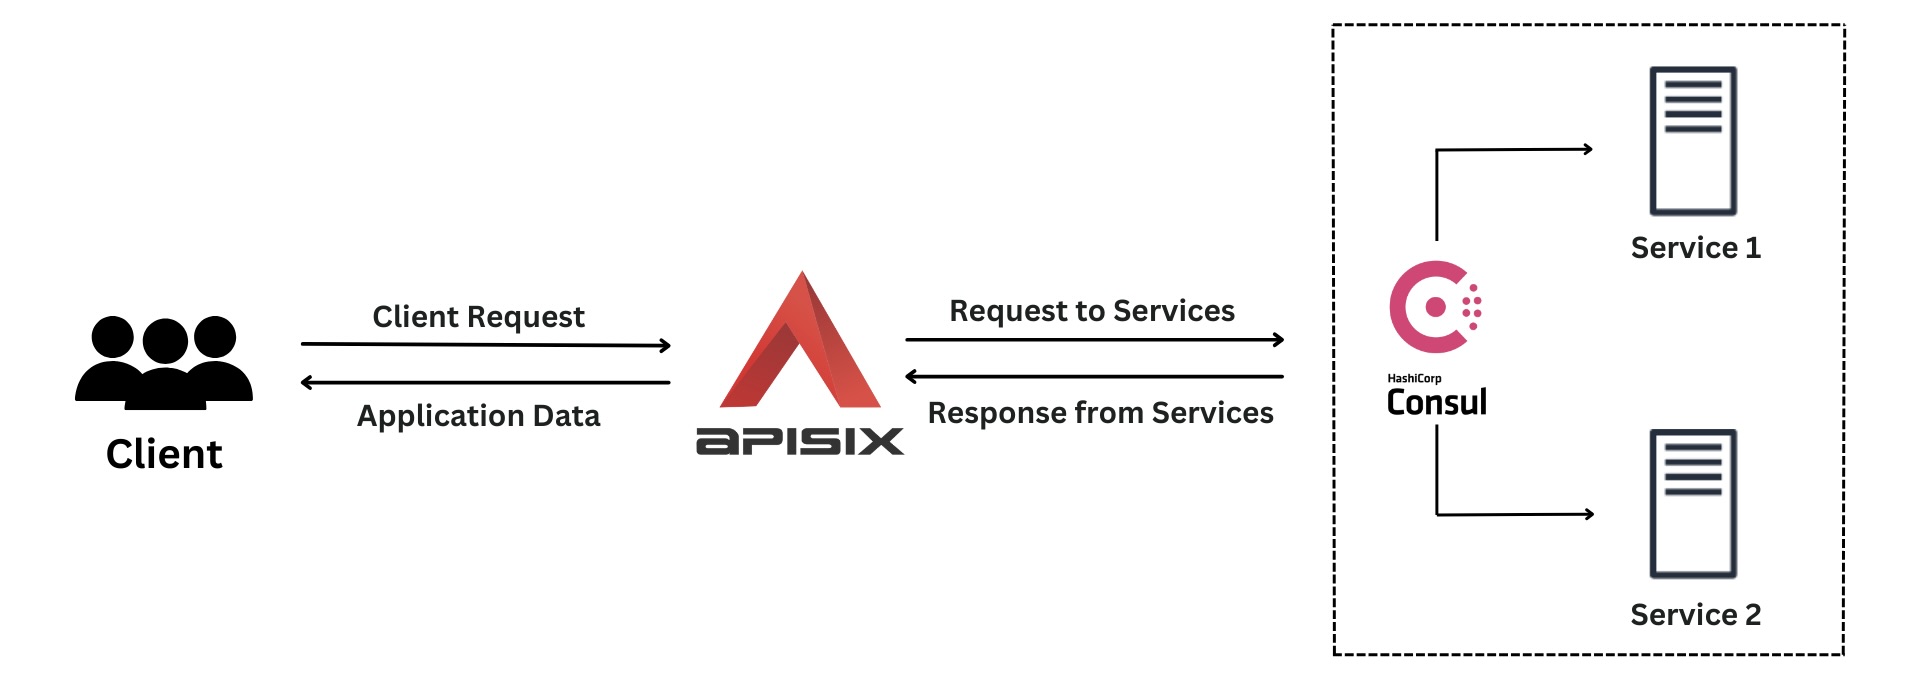
This guide will walk you through the process of setting up HashiCorp Consul for service discovery, and demonstrate how to integrate it with APISIX to dynamically route and load balance traffic across your microservices.
If you are running APISIX and the Ingress Controller in Kubernetes, this guide simulates a hybrid environment where APISIX routes traffic to services outside the cluster through an external Consul registry.
In a setup where all services already run inside Kubernetes, you typically do not need Consul, as Kubernetes provides its own built-in service discovery through the Kubernetes Service registry and DNS.
Prerequisite(s)
- Install Docker.
- Install cURL to send requests to the services for validation.
- Follow the Getting Started Tutorial to start a new APISIX instance in Docker or on Kubernetes.
Start Consul Instance
Start a Consul Docker instance named consul in the same network as the APISIX instance and expose port 8500 to the same port on the host machine:
docker run \
  --name consul \
  -d -p 8500:8500 \
  --network=apisix-quickstart-net \
  consul:1.15.1 \
  consul agent \
  -server \
  -bootstrap-expect=1 \
  -node=agent-one \
  -client 0.0.0.0 \
  -log-level info \
  -data-dir=/consul/data \
  -enable-script-checks
Start Sample Web Services
In this section, you will start two sample web services based on NGINX.
Create two configuration files, web1.conf and web2.conf, which instruct NGINX to serve static text responses at root:
echo 'worker_processes 1;
error_log stderr notice;
events {
    worker_connections 1024;
}

http {
    variables_hash_max_size 1024;
    access_log off;
    real_ip_header X-Real-IP;
    charset utf-8;

    server {
        listen 80;

        location / {
            return 200 "Application 1 is running";
        }

        location /static/ {
            alias static/;
        }
    }
}' > web1.conf
echo 'worker_processes 1;
error_log stderr notice;
events {
    worker_connections 1024;
}

http {
    variables_hash_max_size 1024;
    access_log off;
    real_ip_header X-Real-IP;
    charset utf-8;

    server {
        listen 80;

        location / {
            return 200 "Application 2 is running";
        }

        location /static/ {
            alias static/;
        }
    }
}' > web2.conf
Start the web services web1 and web2:
docker run -d \
  --name web1 \
  --restart always \
  -v $(pwd)/web1.conf:/etc/nginx/nginx.conf \
  -p 9081:80 \
  --network=apisix-quickstart-net \
  nginx:1.25-alpine
docker run -d \
  --name web2 \
  --restart always \
  -v $(pwd)/web2.conf:/etc/nginx/nginx.conf \
  -p 9082:80 \
  --network=apisix-quickstart-net \
  nginx:1.25-alpine
❶ Mount web1.conf and web2.conf from the host machine to /etc/nginx/nginx.conf inside the containers.
❷ Map port 80 of the containers to port 9081 and 9082 on the host.
Register Services in Consul
Save the IP address of your host to an environment variable:
HOST_IP=192.168.42.145 # replace with your host IP
Register two services in Consul:
curl "http://127.0.0.1:8500/v1/agent/service/register" -X PUT \
  -H "Content-Type: application/json" \
  --data-binary @- <<EOF
  {
    "ID": "svc-a1",
    "Name": "svc-a",
    "Tags": ["sample_web_svc", "v1"],
    "Address": "$HOST_IP",
    "Port": 9081,
    "Weights": {
      "Passing": 10,
      "Warning": 1
    }
  }
EOF
curl "http://127.0.0.1:8500/v1/agent/service/register" -X PUT \
  -H "Content-Type: application/json" \
  --data-binary @- <<EOF
  {
    "ID": "svc-a2",
    "Name": "svc-a",
    "Tags": ["sample_web_svc", "v1"],
    "Address": "$HOST_IP",
    "Port": 9082,
    "Weights": {
      "Passing": 10,
      "Warning": 1
    }
  }
EOF
❶ Tags: An array of tags or metadata associated with the service.
❷ Address: The IP address or hostname where the service is located.
❸ Port: The port number on which the service is listening.
Verify if the services are registered successfully:
curl "http://127.0.0.1:8500/v1/catalog/service/svc-a"
You should see a JSON response including information of your services.
Connect Consul to APISIX
Add Consul discovery configurations to APISIX's config.yaml configuration file:
docker exec apisix-quickstart /bin/sh -c "echo '
discovery:
  consul:
    servers:
      - "http://consul:8500"
    dump:
      path: "logs/consul.dump"
      expire: 2592000
' >> /usr/local/apisix/conf/config.yaml"
❶ servers: address of the Consul server.
❷ logs/consul.dump: file path where the data dump will be saved.
Reload APISIX for configuration changes to take effect:
docker exec apisix-quickstart apisix reload
Create a Route in APISIX
Create a route and configure the upstream to use Consul for service discovery of svc-a:
- Admin API
- ADC
curl "http://127.0.0.1:9180/apisix/admin/routes" -X PUT -d '
{
  "id": "consul-web-route",
  "uri": "/consul/web/*",
  "upstream": {
    "service_name": "svc-a",
    "discovery_type": "consul",
    "type": "roundrobin"
  }
}'
An HTTP/1.1 200 OK response verifies that the route is created successfully.
services:
  - name: Consul Service
    routes:
      - uris:
        - /consul/web/*
        name: consul-web-route
    upstream:
      service_name: svc-a
      discovery_type: consul
      type: roundrobin
Synchronize the configuration to APISIX:
adc sync -f adc.yaml
Validate
Generate a few requests to the previously created route:
curl "http://127.0.0.1:9080/consul/web/"
You should see the responses alternating between the following:
Application 1 is running%
Application 2 is running%
Next Steps
Service discovery in APISIX creates a few Control API endpoints for examination and troubleshooting. See Control API reference for more information.
In addition to Consul, APISIX also supports the integration with Eureka, Nacos, and other service discovery platforms.