Set Up SSO with Auth0
OpenID Connect (OIDC) is a simple identity layer on top of the OAuth 2.0 protocol. It allows clients to verify the identity of end users based on the authentication performed by the identity provider, as well as to obtain basic profile information about end users in an interoperable and REST-like manner. With APISIX and Auth0, you can implement OIDC-based authentication processes to protect your APIs and enable single sign-on (SSO).
Auth0 is a highly flexible identity-as-a-service (IDaaS) service backed by Identity Industry Standards. It provides a graphical interface that can be customized with your own branding and offers many sign-on options, such as email, social logins, passwordless authentication, biometric logins, one-time passwords (OTP) via SMS/WhatsApp, and multi-factor authentication (MFA).
The guide will show you how to integrate APISIX with Auth0 using two authentication approaches: authenticating with user credentials and authenticating with client credentials.
Prerequisite(s)
- Install Docker.
- Install cURL to send requests to the services for validation.
- Follow the Getting Started tutorial to start a new APISIX instance in Docker or on Kubernetes.
- Create an Auth0 account.
Configure Auth0
Create an Auth0 API
Log in to the Auth0 console. Click on Applications > APIs > Create API to create a new API named APISIXClientCredentials with https://clientcredentials.com as its identifier. Click on Create to save the changes.
Configure an Auth0 App
Once the API is created, click on the Machine to Machine Applications tab. You should see a test application automatically created, which is authorized to access the API.
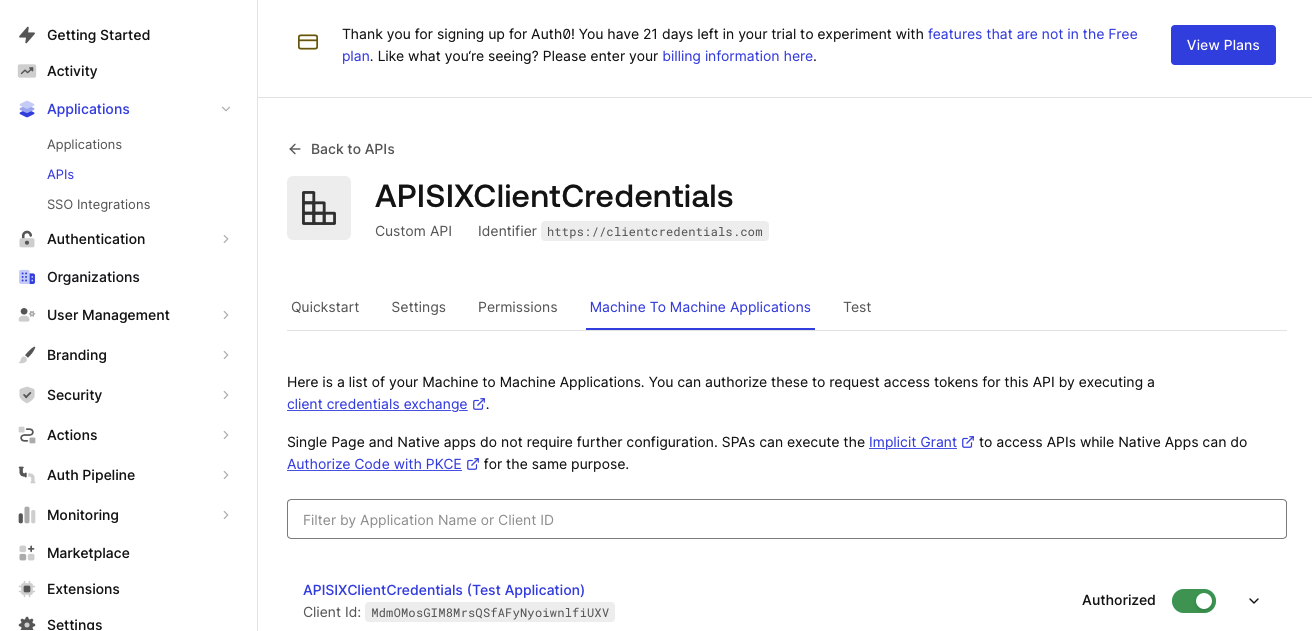
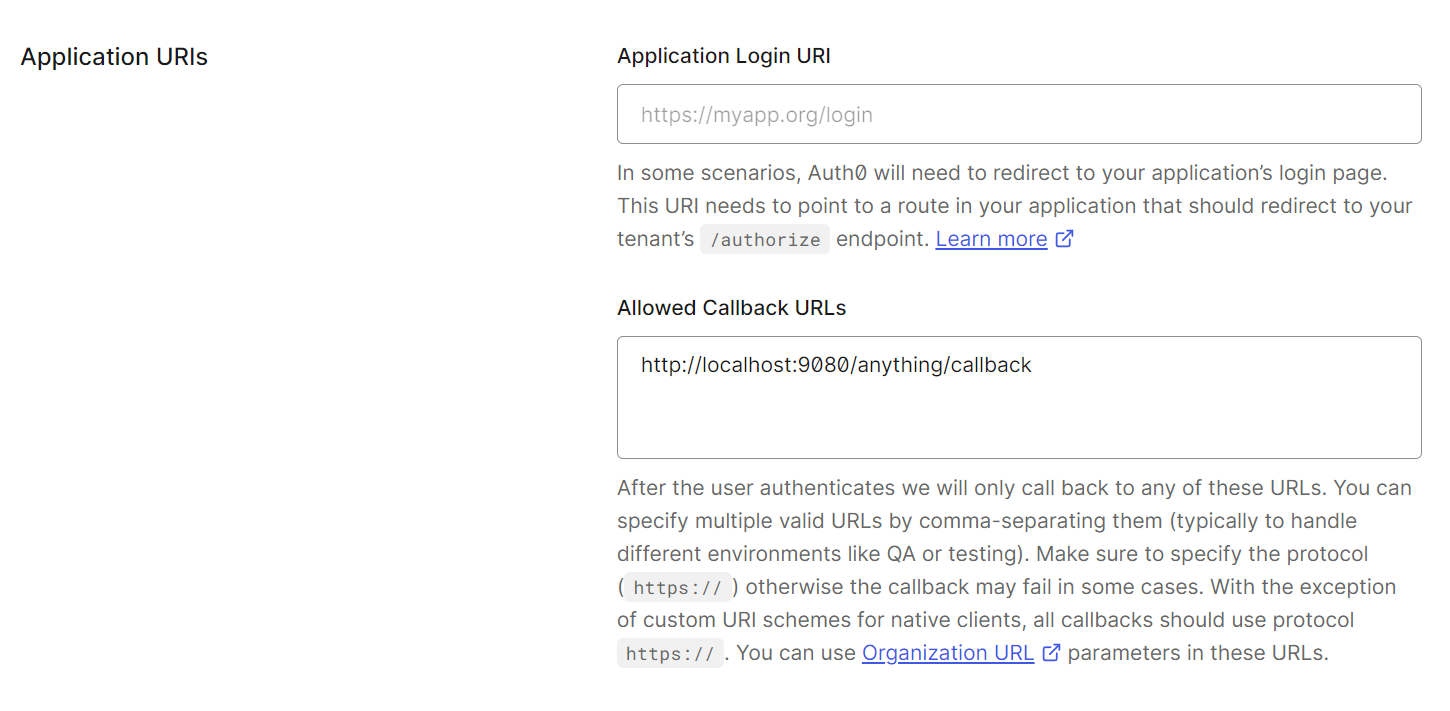
Click on APISIXClientCredentials (Test Application) to configure the application settings. Scroll down to the Application URIs section and add the callback URL http://localhost:9080/anything/callback to the Allowed Callback URLs field. This is the address that the test application redirects users to upon a successful authentication with Auth0.
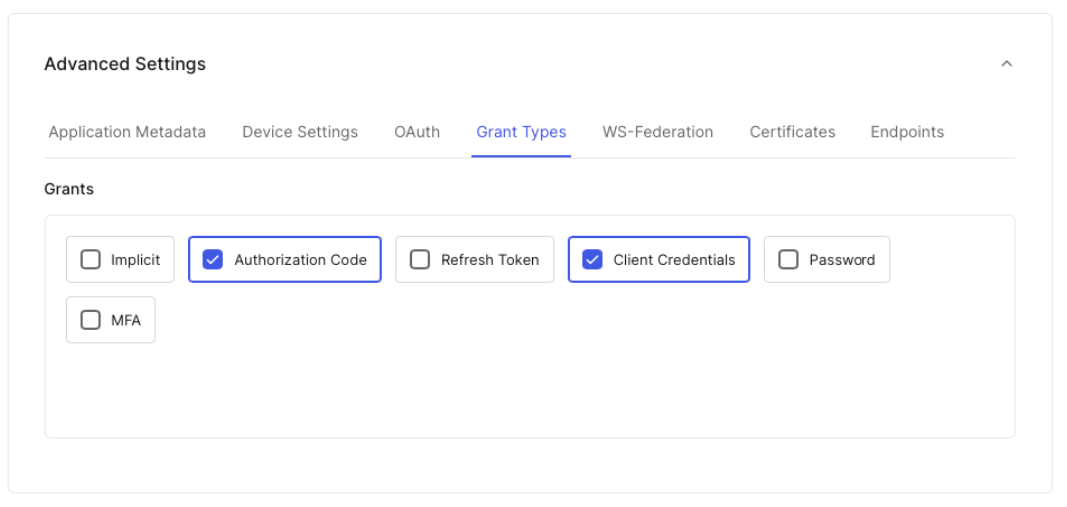
At the bottom of the same page, expand Advanced Settings, select the Grant Types tab, and check the Authorization Code option. Click on Save Changes.
Scroll up to the Basic Information section and find the Domain, Client ID, and Client Secret of the application. Save them to environment variables:
# replace with your values
export AUTH0_DOMAIN=dev-4lg4ifsq4jvpn7s2.us.auth0.com
export AUTH0_CLIENT_ID=eAC8UTVPFirufOh4a1DZtc7F20z7yGuv
export AUTH0_CLIENT_SECRET=52uF_dp5uIOd3TuFyA2Za5tKjB_vEDlwwO08YaHLJw5E93EBmXK8NqlBPCHmOgvc
Configure APISIX
In this section, you will create a route with OIDC that forwards client requests to httpbin.org, a public HTTP request and response service.
The route /anything/{anything} of httpbin.org returns anything passed in request data in JSON type, such as methods, arguments, and headers.
Enable OIDC Plugin
Create a route and enable the plugin openid-connect as such:
- Admin API
- ADC
curl -i "http://127.0.0.1:9180/apisix/admin/routes" -X PUT -d '
{
  "id": "auth-with-oidc",
  "uri":"/anything/*",
  "plugins": {
    "openid-connect": {
      "client_id": "'"$AUTH0_CLIENT_ID"'",
      "client_secret": "'"$AUTH0_CLIENT_SECRET"'",
      "discovery": "https://'"$AUTH0_DOMAIN"'/.well-known/openid-configuration",
      "scope": "openid profile",
      "redirect_uri": "http://localhost:9080/anything/callback",
      "bearer_only": false,
      "session": {
        "secret": "f86cf31663a9c9fa0a28c2cc78badef1"
      }
    }
  },
  "upstream":{
    "type":"roundrobin",
    "nodes":{
      "httpbin.org:80":1
    }
  }
}'
❶ client_id: Auth0 client ID.
❷ client_secret: Auth0 client secret.
❸ discovery: URI to OIDC discovery document of Auth0.
❹ redirect_uri: URI to redirect to after authentication with Auth0.
❺ bearer_only: Set to false for authorization code flow.
❻ session.secret: Replace with your key used for session encryption and HMAC operation. Required when bearer_only is false.
services:
  - name: httpbin Service
    routes:
      - uris:
          - /anything/*
        name: auth-with-oidc
        plugins:
          openid-connect:
            client_id: 'eAC8UTVPFirufOh4a1DZtc7F20z7yGuv'
            client_secret: '52uF_dp5uIOd3TuFyA2Za5tKjB_vEDlwwO08YaHLJw5E93EBmXK8NqlBPCHmOgvc'
            discovery: 'https://dev-4lg4ifsq4jvpn7s2.us.auth0.com/.well-known/openid-configuration'
            scope: openid profile
            redirect_uri: 'http://localhost:9080/anything/callback'
            bearer_only: false
            session:
              secret: 'f86cf31663a9c9fa0a28c2cc78badef1'
    upstream:
      type: roundrobin
      nodes:
        - host: httpbin.org
          port: 80
          weight: 1
❶ client_id: Auth0 client ID.
❷ client_secret: Auth0 client secret.
❸ discovery: URI to OIDC discovery document of Auth0.
❹ redirect_uri: URI to redirect to after authentication with Auth0.
❺ bearer_only: Set to false for authorization code flow.
❻ session.secret: Replace with your key used for session encryption and HMAC operation. Required when bearer_only is false.
Synchronize the configuration to APISIX:
adc sync -f adc.yaml
Authenticate with User Credentials
Navigate to http://localhost:9080/anything/test in a browser. You should be redirected to the Auth0 universal login page:
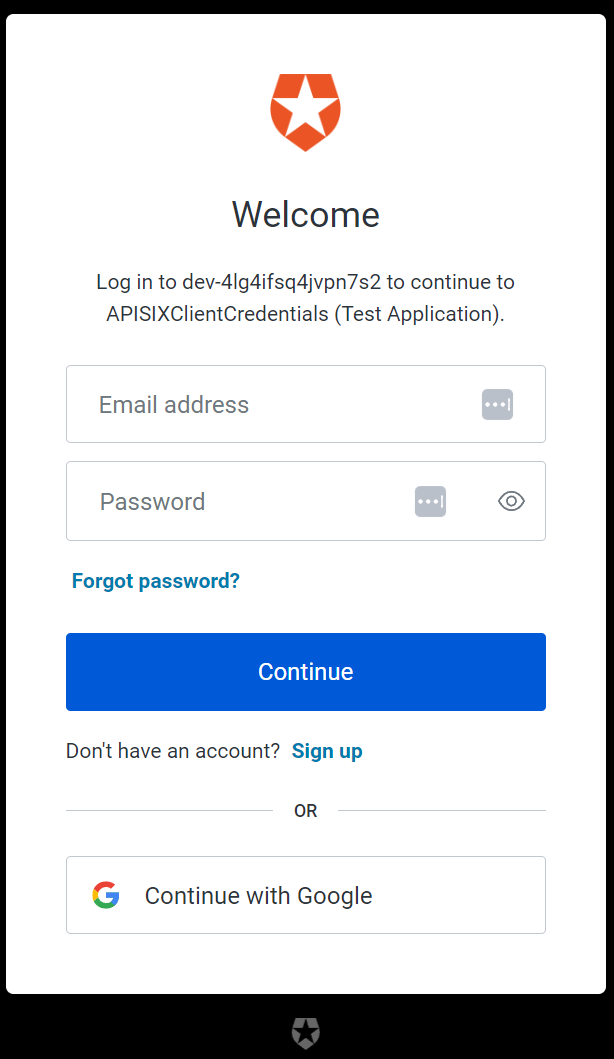
Log in with your credentials. If successful, the request will be forwarded to httpbin.org and you should see a response similar to the following:
{
  "args": {},
  "data": "",
  "files": {},
  "form": {},
  "headers": {
    "Accept": "text/html..."
    ...
  },
  "json": null,
  "method": "GET",
  "origin": "127.0.0.1, 59.71.xxx.xxx",
  "url": "http://127.0.0.1/anything/test"
}
Authenticate with Client Credentials
The client credentials flow involves a machine-to-machine (M2M) application exchanging credentials with services where there is no user involved.
In this section, you will update the existing route with additional OIDC configurations and authenticate to Auth0 with an access token.
Update OIDC Plugin
Update the OIDC plugin on the route to use JWKS endpoint for token validation:
- Admin API
- ADC
curl -i "http://127.0.0.1:9180/apisix/admin/routes/auth-with-oidc" -X PATCH -d '
{
  "plugins": {
    "openid-connect": {
      "use_jwks": true
    }
  }
}'
❶ use_jwks: Allows using the JWKS endpoint of the identity provider to verify the token.
services:
  - name: httpbin Service
    routes:
      - uris:
          - /anything/*
        name: auth-with-oidc
        plugins:
          openid-connect:
            use_jwks: true
            client_id: 'eAC8UTVPFirufOh4a1DZtc7F20z7yGuv'
            client_secret: '52uF_dp5uIOd3TuFyA2Za5tKjB_vEDlwwO08YaHLJw5E93EBmXK8NqlBPCHmOgvc'
            discovery: 'https://dev-4lg4ifsq4jvpn7s2.us.auth0.com/.well-known/openid-configuration'
            scope: openid profile
            redirect_uri: 'http://localhost:9080/anything/callback'
            bearer_only: false
            session:
              secret: 'f86cf31663a9c9fa0a28c2cc78badef1'
    upstream:
      type: roundrobin
      nodes:
        - host: httpbin.org
          port: 80
          weight: 1
❶ use_jwks: Allows using the JWKS endpoint of the identity provider to verify the token.
Synchronize the configuration to APISIX:
adc sync -f adc.yaml
Test Access Token
Obtain an access token for the APISIXClientCredentials test application:
curl -i "https://$AUTH0_DOMAIN/oauth/token" -X POST \
  -H 'content-type: application/json' \
  -d '{
    "client_id":"'$AUTH0_CLIENT_ID'",
    "client_secret":"'$AUTH0_CLIENT_SECRET'",
    "audience":"https://clientcredentials.com",
    "grant_type":"client_credentials"
  }'
You should see a response similar to the following:
{
  "access_token":"eyJhbGciOiJSUzI1NiIsInR5cCI6IkpXVCIsImtpZCI6Ikc2elVuYzgtM0JrVlgtZmdnMTdKNSJ9.eyJpc3MiOiJodHRwczovL2Rldi00bGc0aWZzcTRqdnBuN3MyLnVzLmF1dGgwLmNvbS8iLCJzdWIiOiJlQUM4VVRWUEZpcnVmT2g0YTFEWnRjN0YyMHo3eUd1dkBjbGllbnRzIiwiYXVkIjoiaHR0cHM6Ly9jbGllbnRjcmVkZW50aWFscy5jb20iLCJpYXQiOjE2OTMwNDAwMjcsImV4cCI6MTY5MzEyNjQyNywiYXpwIjoiZUFDOFVUVlBGaXJ1Zk9oNGExRFp0YzdGMjB6N3lHdXYiLCJndHkiOiJjbGllbnQtY3JlZGVudGlhbHMifQ.aePOiFlW0q0mlrQwKdtP1MGfY2nX7TSnTrEjoJI03aG7lBCHhPX_WwszhYvtM5c_cyQtcI6R4ibPskpTssdEXGCe2wbOhstPWeIb9rCFf_kA_g0p1wDM8j8egRfl7PLmFffaEmU0eNrgmjTgYQ0Erk63XDykPFOFWiQKPfDQ2hf4jz_3J_VKNqwy7yQuxisnD5TysybGmrONoiBjYLGIymk1ii-qKEoNt5_DRv10aSBwyRtxDZbiwhAKcWNO7zLaJVmZZLg1aTiRYxgIOU-_AP4iAR6Y4vK_GxyHqf7G6j6yH8wqCj8Nm2bLEg8Gqb9Fd-xbpbQCiC3X14ja5NTYtw",
  "expires_in":86400,
  "token_type":"Bearer"
}
Save the access token to an environment variable:
# replace with your access token
export ACCESS_TOKEN="eyJhbGciOiJSUzI1NiIsInR5cCI6IkpXVCIsImtpZCI6Ikc2elVuYzgtM0JrVlgtZmdnMTdKNSJ9.eyJpc3MiOiJodHRwczovL2Rldi00bGc0aWZzcTRqdnBuN3MyLnVzLmF1dGgwLmNvbS8iLCJzdWIiOiJlQUM4VVRWUEZpcnVmT2g0YTFEWnRjN0YyMHo3eUd1dkBjbGllbnRzIiwiYXVkIjoiaHR0cHM6Ly9jbGllbnRjcmVkZW50aWFscy5jb20iLCJpYXQiOjE2OTMwNDAwMjcsImV4cCI6MTY5MzEyNjQyNywiYXpwIjoiZUFDOFVUVlBGaXJ1Zk9oNGExRFp0YzdGMjB6N3lHdXYiLCJndHkiOiJjbGllbnQtY3JlZGVudGlhbHMifQ.aePOiFlW0q0mlrQwKdtP1MGfY2nX7TSnTrEjoJI03aG7lBCHhPX_WwszhYvtM5c_cyQtcI6R4ibPskpTssdEXGCe2wbOhstPWeIb9rCFf_kA_g0p1wDM8j8egRfl7PLmFffaEmU0eNrgmjTgYQ0Erk63XDykPFOFWiQKPfDQ2hf4jz_3J_VKNqwy7yQuxisnD5TysybGmrONoiBjYLGIymk1ii-qKEoNt5_DRv10aSBwyRtxDZbiwhAKcWNO7zLaJVmZZLg1aTiRYxgIOU-_AP4iAR6Y4vK_GxyHqf7G6j6yH8wqCj8Nm2bLEg8Gqb9Fd-xbpbQCiC3X14ja5NTYtw"
Send a request to the route with the valid access token:
curl -i "http://127.0.0.1:9080/anything/test" -H "Authorization: Bearer $ACCESS_TOKEN"
An HTTP/1.1 200 OK response verifies that the API call was authorized.
Next Steps
APISIX supports the integration with many other OIDC identity providers, such as Keycloak, Authgear, Microsoft Entra ID (Azure AD), and Google.
In addition, APISIX also supports built-in authentication methods such as key authentication, basic authentication, JWT authentication, and HMAC authentication.