Set Up SSO with Amazon Cognito
OpenID Connect (OIDC) is a simple identity layer on top of the OAuth 2.0 protocol. It allows clients to verify the identity of end users based on the authentication performed by the identity provider, as well as to obtain basic profile information about end users in an interoperable and REST-like manner.
Amazon Cognito, a fully managed service by AWS, simplifies the process of adding authentication and identity management to your applications. By leveraging Cognito for SSO, organizations can enhance security, streamline user experience, and reduce the burden of managing multiple credentials.
The guide will show you how to integrate APISIX with Amazon Cognito to implement authorization code grant and client credential grant.
Prerequisite(s)
- Install Docker.
- Install cURL to send requests to the services for validation.
- Follow the Getting Started tutorial to start a new APISIX instance in Docker or on Kubernetes.
- Create an AWS account.
Implement Authorization Code Grant
The authorization code grant is used by web and mobile applications. The flow starts by authorization server displaying a login page in browser where users could key in their credentials. During the process, a short-lived authorization code is exchanged for an access token, which APISIX stores in browser session cookies and will be sent with every request visiting the upstream resource server.
Create a User Pool and App Client
A user pool is a user directory where you can add more applications (app clients) and set up authentication, security, and an authentication UI.
Log in to AWS Console and navigate to the Amazon Cognito Service. Under user pools, click create user pool. The process will create a user pool as well as an application, which you can still update later. During the setup:
- Select traditional web applications as the application type.
- Enter an application name, for example
apisix-app. - Under options for sign-in identifiers, check the email option.
- Under required attributes for sign-up, select email, family name, and given name. When users log in the first time, they will be prompted to change the password and provide the required attributes. Adjust accordingly per your use case.
- Under return URL, enter
http://localhost:9080/anything/callbackas the callback URL.
Note, that options for sign-in identifiers and required attributes cannot be changed after the app client is created.
Finish creating the user pool and the app client.
Obtain Integration Configurations
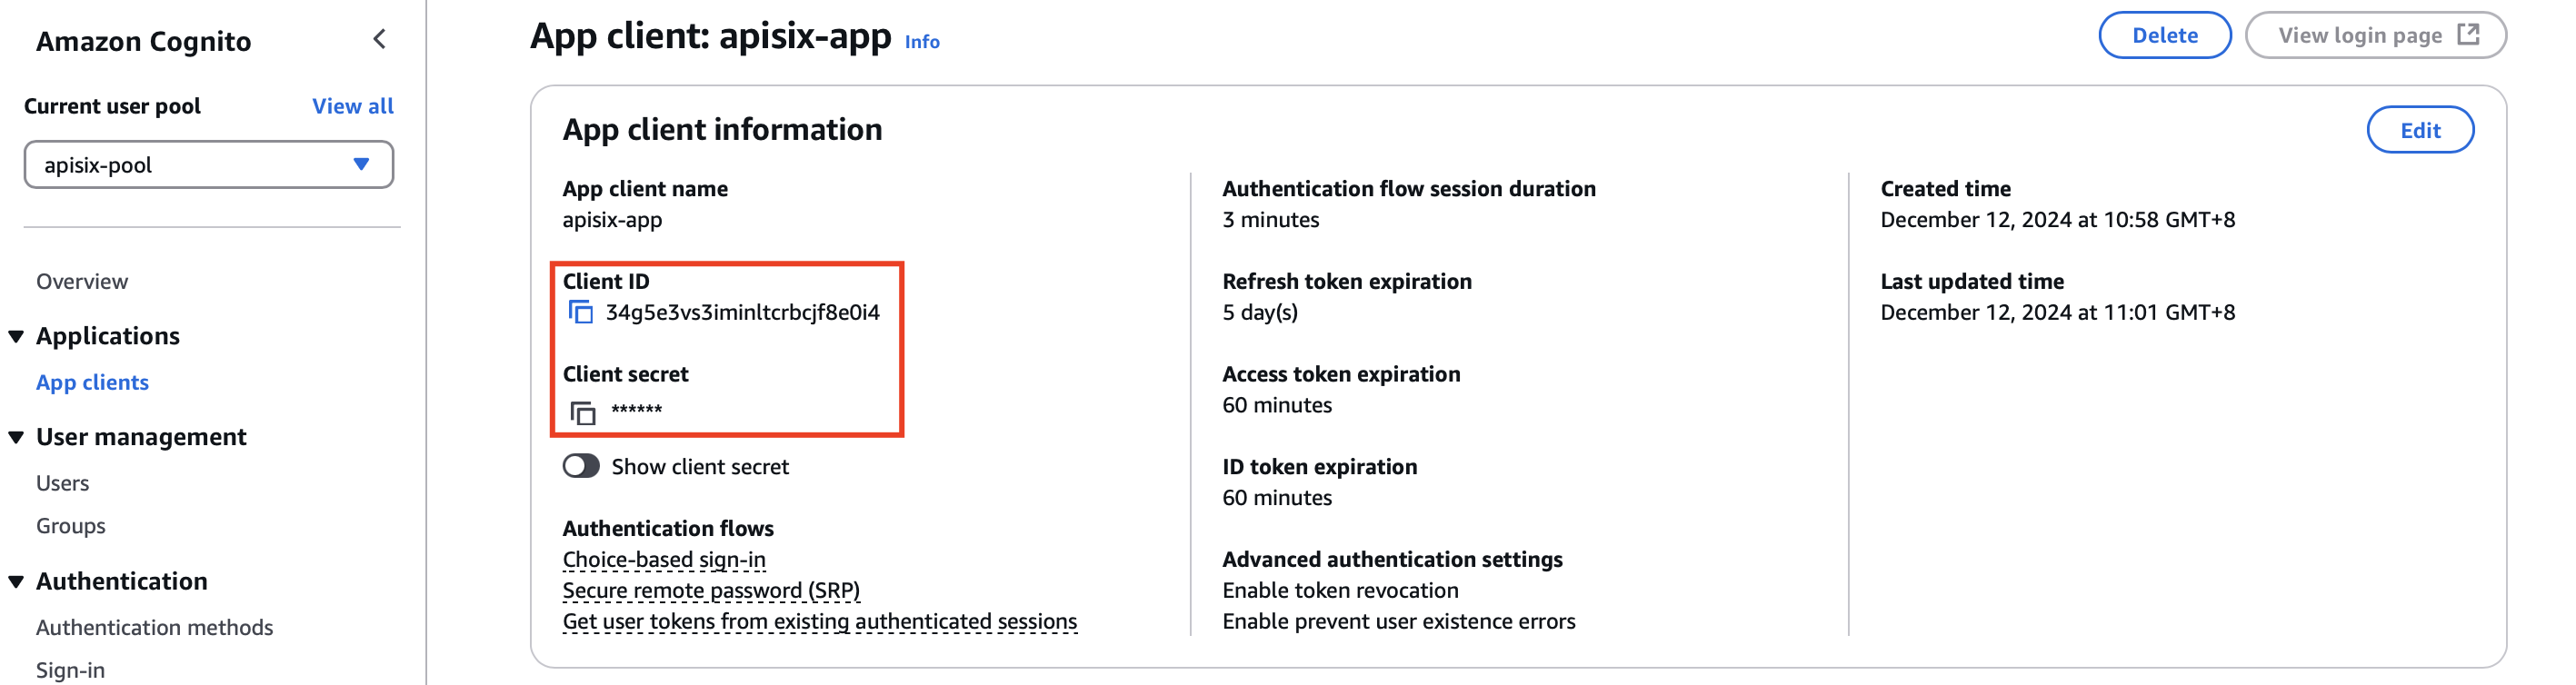
Navigate to the newly created user pool, and click Applications > App clients. Click into the app client and find the client ID and secret:
Scroll down to the quick setup guide, where you can find the issuer URL:
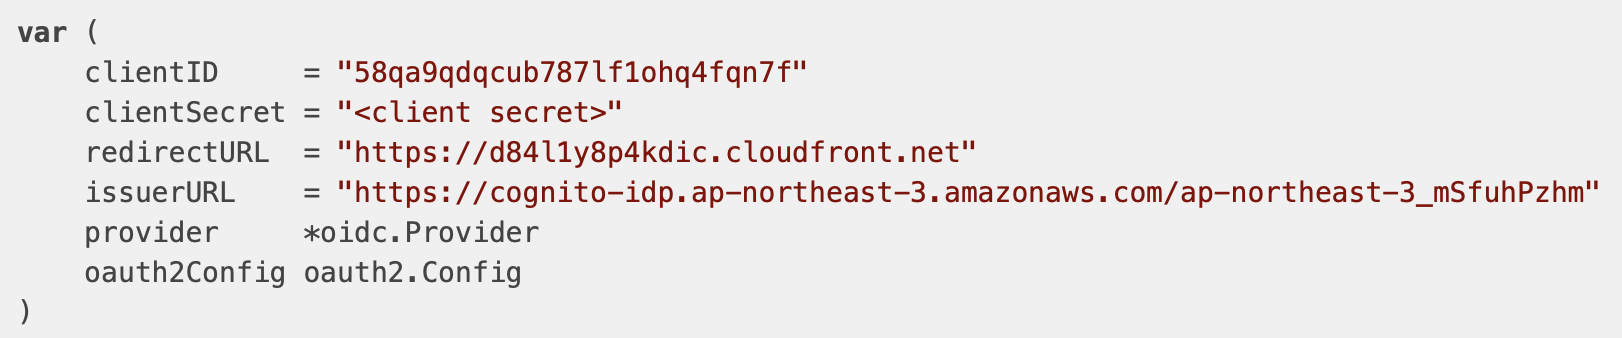
Save these information into environment variables:
# replace with your values
export COGNITO_CLIENT_ID=58qa9qdqcub787lf1ohq4fqn7f
export COGNITO_CLIENT_SECRET=ohtgsk1mkii53vs2m3f7l7ln05foktjf5jso8mce2alahnabpku
export COGNITO_ISSUER_URL=https://cognito-idp.ap-northeast-3.amazonaws.com/ap-northeast-3_mSfuhPzhm
export COGNITO_DISCOVERY="${COGNITO_ISSUER_URL}/.well-known/openid-configuration"
Create a User
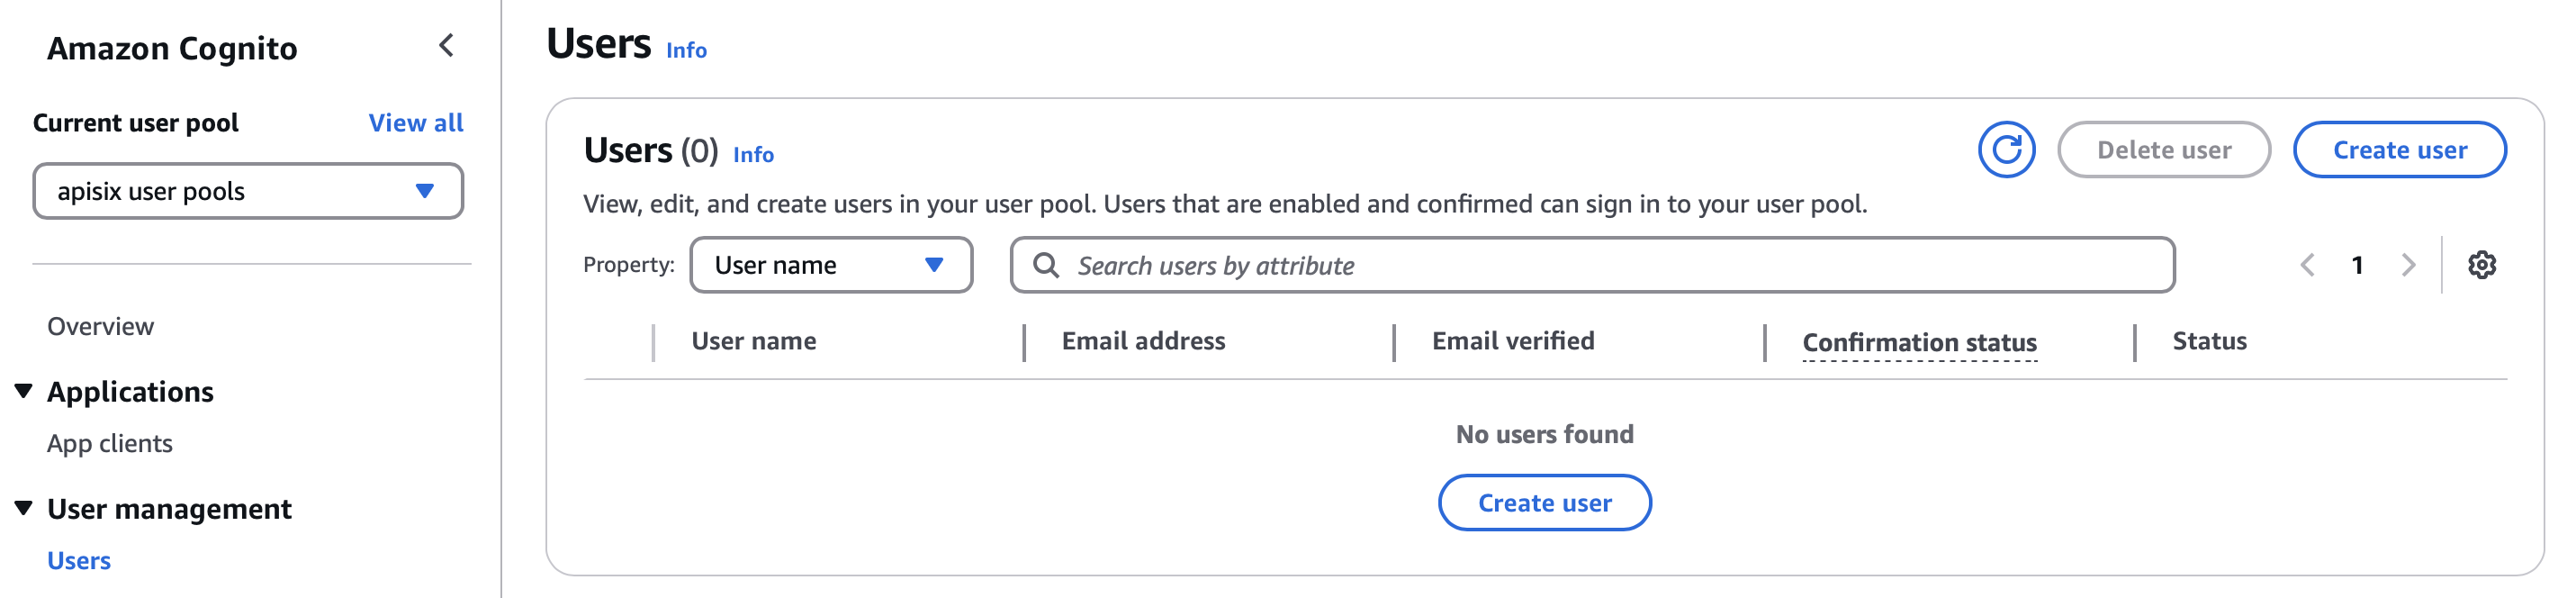
Navigate into the user pool and under User management, select Users. Create a new user:
Enter email address, phone number, first-time password, and create the user:
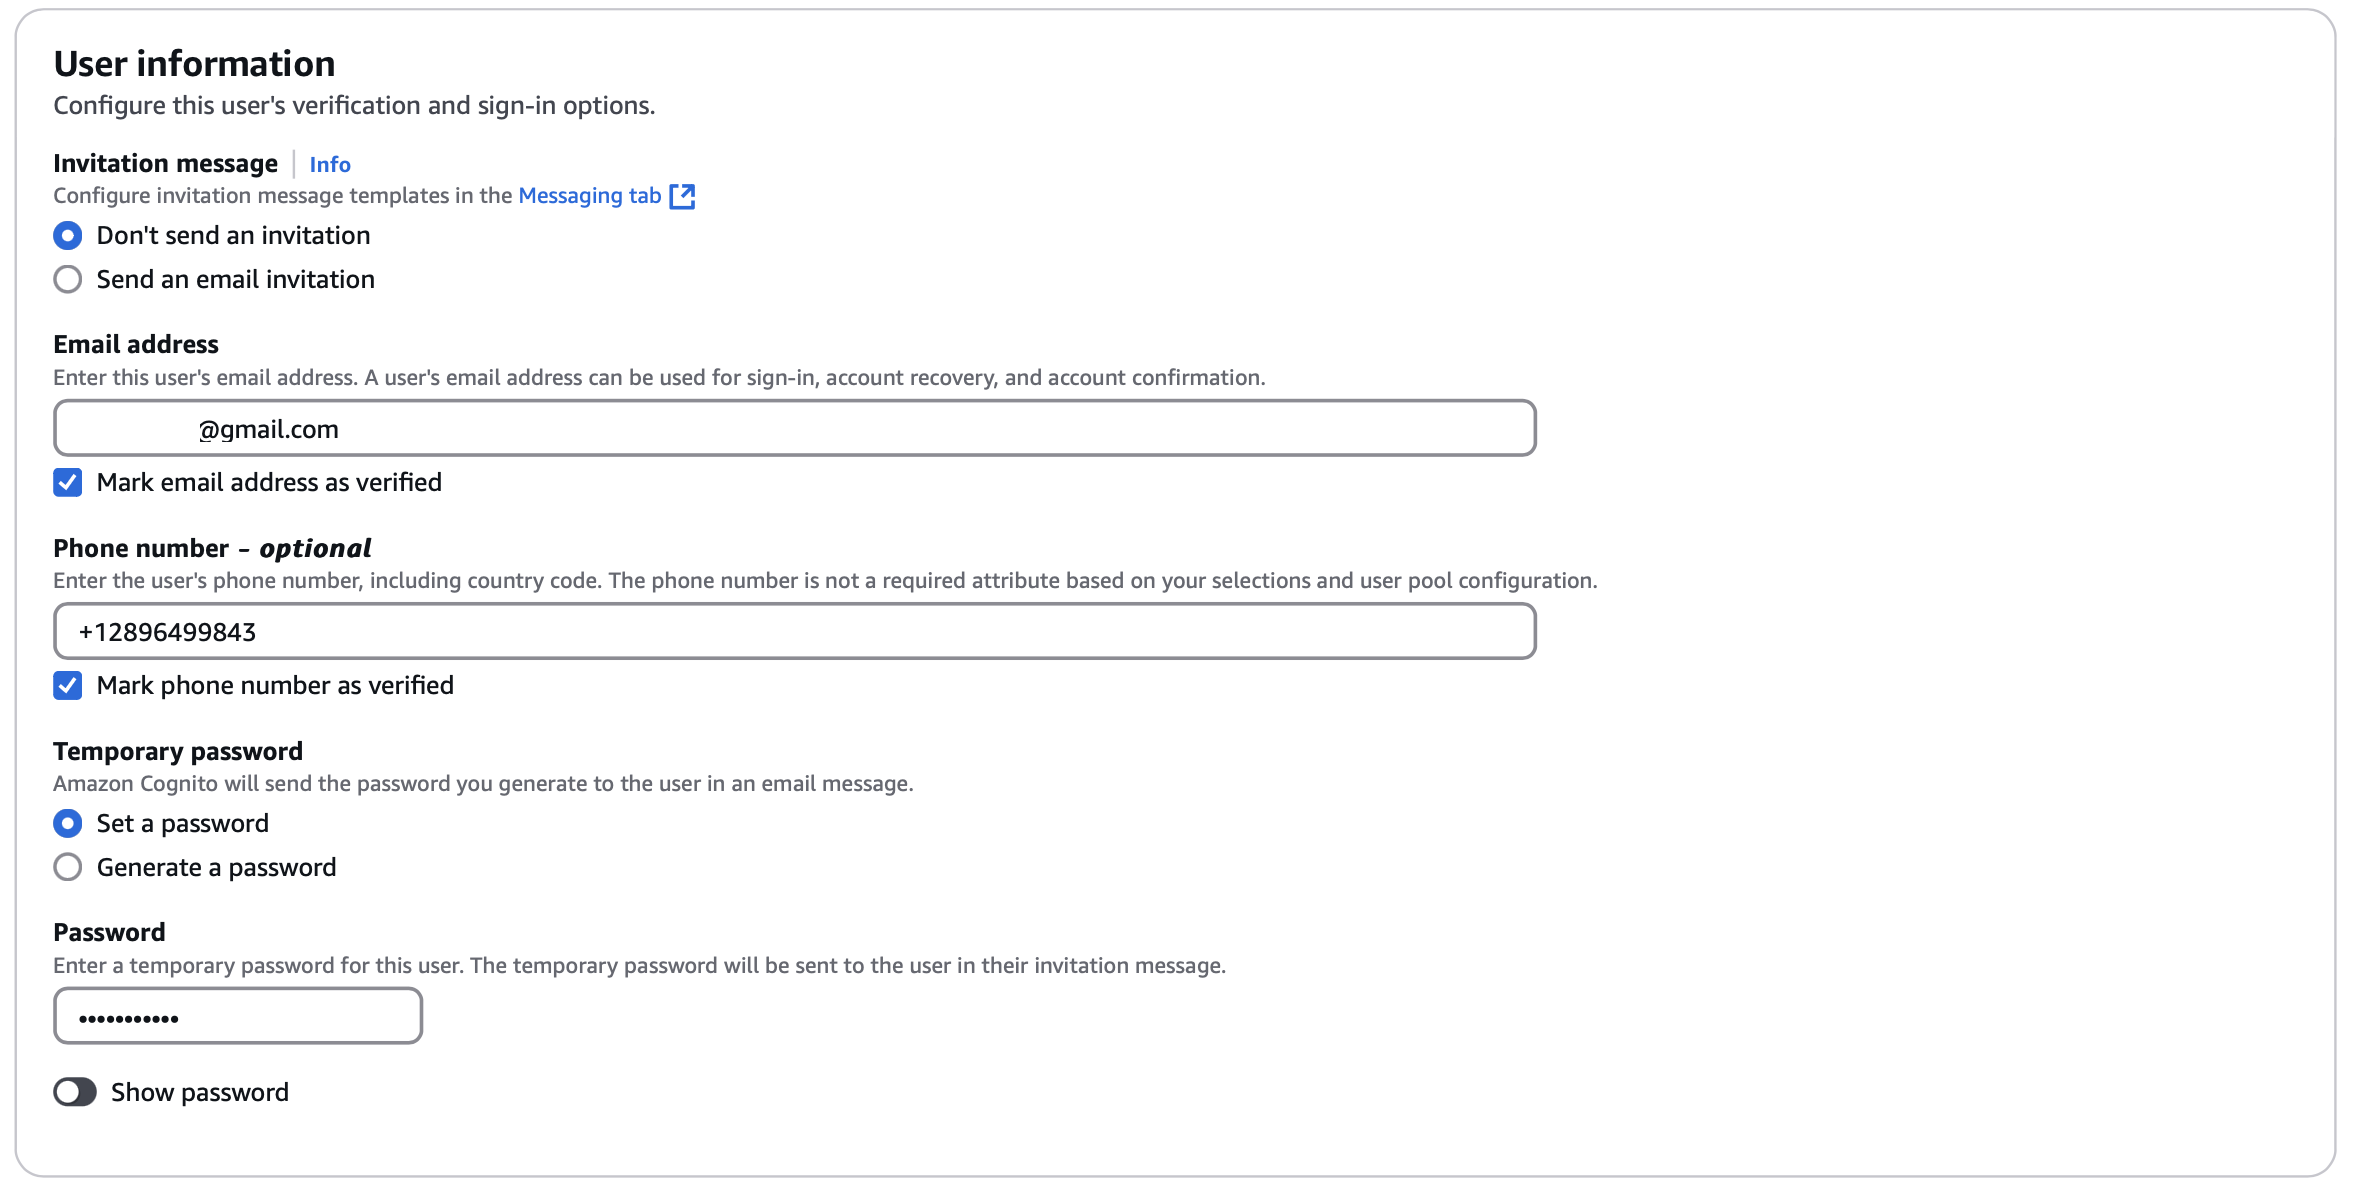
You can create more users based on your user base.
Configure APISIX
In this section, you will create a route with OIDC that forwards client requests to httpbin.org, a public HTTP request and response service. The route /anything/{anything} of httpbin.org returns anything passed in request data in JSON type, such as methods, arguments, and headers.
Create a route with openid-connect plugin as such:
- Admin API
- ADC
curl -i "http://127.0.0.1:9180/apisix/admin/routes" -X PUT -d '
{
  "id": "auth-with-oidc",
  "uri":"/anything/*",
  "plugins": {
    "openid-connect": {
      "client_id": "'"$COGNITO_CLIENT_ID"'",
      "client_secret": "'"$COGNITO_CLIENT_SECRET"'",
      "discovery": "'"$COGNITO_DISCOVERY"'",
      "scope": "openid email phone",
      "redirect_uri": "http://localhost:9080/anything/callback",
      "bearer_only": false,
      "session": {
        "secret": "f86cf31663a9c9fa0a28c2cc78badef1"
      }
    }
  },
  "upstream": {
    "type":"roundrobin",
    "nodes": {
      "httpbin.org:80":1
    }
  }
}'
❶ client_id: Cognito client ID.
❷ client_secret: Cognito client secret.
❸ discovery: URI to the discovery document.
❹ scope: define the scopes corresponding to the scopes defined in the app client. You can double check the scopes under your app client, Login pages tab.
❺ redirect_uri: URI to redirect after authentication.
❻ bearer_only: Set to false for authorization code grant.
❼ session.secret: Replace with your key used for session encryption and HMAC operation. Required when bearer_only is false.
services:
  - name: httpbin Service
    routes:
      - uris:
          - /anything/*
        name: auth-with-oidc
        plugins:
          openid-connect:
            client_id: '58qa9qdqcub787lf1ohq4fqn7f'
            client_secret: ohtgsk1mkii53vs2m3f7l7ln05foktjf5jso8mce2alahnabpku
            discovery: https://cognito-idp.ap-northeast-3.amazonaws.com/ap-northeast-3_mSfuhPzhm/.well-known/openid-configuration
            scope: openid email phone
            redirect_uri: http://localhost:9080/anything/callback
            bearer_only: false
            session:
              secret: f86cf31663a9c9fa0a28c2cc78badef1
    upstream:
      type: roundrobin
      nodes:
        - host: httpbin.org
          port: 80
          weight: 1
❶ client_id: Cognito client ID.
❷ client_secret: Cognito client secret.
❸ discovery: URI to the discovery document.
❹ scope: define the scopes corresponding to the scopes defined in the app client. You can double check the scopes under your app client, Login pages tab.
❺ redirect_uri: URI to redirect after authentication.
❻ bearer_only: Set to false for authorization code grant.
❼ session.secret: Replace with your key used for session encryption and HMAC operation. Required when bearer_only is false.
Synchronize the configuration to APISIX:
adc sync -f adc.yaml
Verify
Navigate to http://localhost:9080/anything/test in a browser. You should be redirected to the login page:
Log in with user credentials. If this is the first time logging in, you will be prompted to change the password, as well as to provide the family name and given name, as configured previously in the required attributes.
If successful, the request will be forwarded to httpbin.org and you should see a response similar to the following:
{
  "args": {},
  "data": "",
  "files": {},
  "form": {},
  "headers": {
    "Accept": "text/html..."
    ...
  },
  "json": null,
  "method": "GET",
  "origin": "127.0.0.1, 59.71.xxx.xxx",
  "url": "http://127.0.0.1/anything/test"
}
Implement Client Credentials Grant
In client credentials grant, clients obtain access tokens without any users involved. It is typically used in machine-to-machine (M2M) communications.
Create a User Pool and App Client
Log in to AWS Console and navigate to the Amazon Cognito Service. If you already have a user pool and would like to create an app client in the same pool, navigate into the user pool and select create app client. Otherwise, under user pools, click create user pool. The process will create a user pool as well as an application, which you can still update later. During the setup:
- Select machine-to-machine application as the application type.
- Enter an application name, for example
apisix-app-m2m.
Finish creating the app client. You should see a quick setup guide generated. Copy the curl command, which will be used in the verification step to obtain an access token. Your command should look similar to the following:
curl -X POST "https://ap-northeast-3msfuhpzhm.auth.ap-northeast-3.amazoncognito.com/oauth2/token" \
  -H "Content-Type: application/x-www-form-urlencoded" \
  -d "grant_type=client_credentials&client_id=1nh91q0q1bgimb7pc79uh2btqe&client_secret=<client secret>&scope=default-m2m-resource-server-hlyky3/read"
Obtain Integration Configurations
In the user pool, note down the user pool ID and token signing key URL domain. Combine them for authority URL and discovery document URL:
# replace with your values
export COGNITO_USER_POOL_ID=ap-northeast-3_mSfuhPzhm
export COGNITO_AUTHORITY_URL="https://cognito-idp.ap-northeast-3.amazonaws.com/${COGNITO_USER_POOL_ID}"
export COGNITO_DISCOVERY="${COGNITO_AUTHORITY_URL}/.well-known/openid-configuration"
Click Applications > App clients. Navigate into the app client and find the client ID and secret:
Save these information into environment variables:
# replace with your values
export COGNITO_CLIENT_ID=1nh91q0q1bgimb7pc79uh2btqe
export COGNITO_CLIENT_SECRET=133cbobt7c9lu372u9tf3kh2p0laj0krtrfkqne3c4kao2hn69k1
Configure APISIX
To implement client credentials grant, create a route with openid-connect plugin as such:
- Admin API
- ADC
curl -i "http://127.0.0.1:9180/apisix/admin/routes" -X PUT -d '
{
  "id": "auth-with-oidc",
  "uri":"/anything/*",
  "plugins": {
    "openid-connect": {
      "use_jwks": true,
      "client_id": "'"$COGNITO_CLIENT_ID"'",
      "client_secret": "'"$COGNITO_CLIENT_SECRET"'",
      "discovery": "'"$COGNITO_DISCOVERY"'",
      "scope": "openid email phone",
      "redirect_uri": "http://localhost:9080/anything/callback",
      "bearer_only": false,
      "session": {
        "secret": "f86cf31663a9c9fa0a28c2cc78badef1"
      }
    }
  },
  "upstream": {
    "type":"roundrobin",
    "nodes": {
      "httpbin.org:80":1
    }
  }
}'
❶ Use the JWKS endpoint of the identity provider to verify the token. The endpoint is obtained from the discovery document.
services:
  - name: httpbin Service
    routes:
      - uris:
          - /anything/*
        name: auth-with-oidc
        plugins:
          openid-connect:
            use_jwks: true
            client_id: "58qa9qdqcub787lf1ohq4fqn7f"
            client_secret: "ohtgsk1mkii53vs2m3f7l7ln05foktjf5jso8mce2alahnabpku"
            discovery: "https://cognito-idp.ap-northeast-3.amazonaws.com/ap-northeast-3_mSfuhPzhm/.well-known/openid-configuration"
            scope: openid email phone
            redirect_uri: "http://localhost:9080/anything/callback"
            bearer_only: false
            session:
              secret: "f86cf31663a9c9fa0a28c2cc78badef1"
    upstream:
      type: roundrobin
      nodes:
        - host: httpbin.org
          port: 80
          weight: 1
❶ Use the JWKS endpoint of the identity provider to verify the token. The endpoint is obtained from the discovery document.
Synchronize the configuration to APISIX:
adc sync -f adc.yaml
Verify
Obtain an access token at the token endpoint:
curl -X POST "https://ap-northeast-3msfuhpzhm.auth.ap-northeast-3.amazoncognito.com/oauth2/token" \
  -H "Content-Type: application/x-www-form-urlencoded" \
  -d 'grant_type=client_credentials' \
  -d 'client_id='$COGNITO_CLIENT_ID'' \
  -d 'client_secret='$COGNITO_CLIENT_SECRET'' \
  -d 'scope=default-m2m-resource-server-hlyky3/read'
The expected response is similar to the following:
eyJraWQiOiJoOGhya3pDVkx4Y1ZUaXJONmZKZ2FtbjFScGtKNTBsQVV2cDRzdDEzbkJjPSIsImFsZyI6IlJTMjU2In0.eyJzdWIiOiIxbmg5MXEwcTFiZ2ltYjdwYzc5dWgyYnRxZSIsInRva2VuX3VzZSI6ImFjY2VzcyIsInNjb3BlIjoiZGVmYXVsdC1tMm0tcmVzb3VyY2Utc2VydmVyLWhseWt5M1wvcmVhZCIsImF1dGhfdGltZSI6MTczMzM4NDE0NCwiaXNzIjoiaHR0cHM6XC9cL2NvZ25pdG8taWRwLmFwLW5vcnRoZWFzdC0zLmFtYXpvbmF3cy5jb21cL2FwLW5vcnRoZWFzdC0zX21TZnVoUHpobSIsImV4cCI6MTczMzM4Nzc0NCwiaWF0IjoxNzMzMzg0MTQ0LCJ2ZXJzaW9uIjoyLCJqdGkiOiJmMmMxOWFjNy04YWNmLTQ3NDUtYjQ4MS05MDFkZDFhZWM2OTMiLCJjbGllbnRfaWQiOiIxbmg5MXEwcTFiZ2ltYjdwYzc5dWgyYnRxZSJ9.a89gU2BYFGX-qKMx85ZBMQ8Ik1FWekg1Ci-0z5d6MMTiV0AWfY17nxrD9nbSxNyrxzm1dVU4Ah6nOaqwqnBfUMplfy0FL3L-YmFjNoTzGe3NIFGZe4QjZcubf--r5Px7kY2ESsYZgNCUX6v5X123uuHfqG0Ugd0nkFWUKIbAYjVjlAzBpnQh2nqhg0Q99Bm-QSYZM4pM8ClxZ1haaOL8f1WrlGwRUAqYmEgeU4M0ldIi-7Oe0vhXsW8sK6c3Wdd6aH0z2L-9lgj7n9sw5gDlq6yy5lvmDKnZy-lSGo_9i-h7XVk2WdYKf1pF5IBpBboiEtBvPrZXCK_L8lK2GshdMg","expires_in":3600,"token_type":"Bearer"}
Save the access token to an environment variable:
# replace with your access token
export ACCESS_TOKEN=eyJraWQiOiJoOGhya3pDVkx4Y1ZUaXJONmZKZ2FtbjFScGtKNTBsQVV2cDRzdDEzbkJjPSIsImFsZyI6IlJTMjU2In0.eyJzdWIiOiIxbmg5MXEwcTFiZ2ltYjdwYzc5dWgyYnRxZSIsInRva2VuX3VzZSI6ImFjY2VzcyIsInNjb3BlIjoiZGVmYXVsdC1tMm0tcmVzb3VyY2Utc2VydmVyLWhseWt5M1wvcmVhZCIsImF1dGhfdGltZSI6MTczMzM4NDE0NCwiaXNzIjoiaHR0cHM6XC9cL2NvZ25pdG8taWRwLmFwLW5vcnRoZWFzdC0zLmFtYXpvbmF3cy5jb21cL2FwLW5vcnRoZWFzdC0zX21TZnVoUHpobSIsImV4cCI6MTczMzM4Nzc0NCwiaWF0IjoxNzMzMzg0MTQ0LCJ2ZXJzaW9uIjoyLCJqdGkiOiJmMmMxOWFjNy04YWNmLTQ3NDUtYjQ4MS05MDFkZDFhZWM2OTMiLCJjbGllbnRfaWQiOiIxbmg5MXEwcTFiZ2ltYjdwYzc5dWgyYnRxZSJ9.a89gU2BYFGX-qKMx85ZBMQ8Ik1FWekg1Ci-0z5d6MMTiV0AWfY17nxrD9nbSxNyrxzm1dVU4Ah6nOaqwqnBfUMplfy0FL3L-YmFjNoTzGe3NIFGZe4QjZcubf--r5Px7kY2ESsYZgNCUX6v5X123uuHfqG0Ugd0nkFWUKIbAYjVjlAzBpnQh2nqhg0Q99Bm-QSYZM4pM8ClxZ1haaOL8f1WrlGwRUAqYmEgeU4M0ldIi-7Oe0vhXsW8sK6c3Wdd6aH0z2L-9lgj7n9sw5gDlq6yy5lvmDKnZy-lSGo_9i-h7XVk2WdYKf1pF5IBpBboiEtBvPrZXCK_L8lK2GshdMg
Send a request to the route with the valid access token:
curl -i "http://127.0.0.1:9080/anything/test" -H "Authorization: Bearer $ACCESS_TOKEN"
You should receive an HTTP/1.1 200 OK response from the upstream service.
Send a request to the route with an invalid access token:
curl -i "http://127.0.0.1:9080/anything/test" -H "Authorization: Bearer invalid_token"
You should receive an HTTP/1.1 401 Unauthorized response.
Next Steps
APISIX supports the integration with many other OIDC identity providers, such as Okta, Keycloak, Authgear, Microsoft Entra ID (Azure AD), and Google.
In addition, APISIX also supports built-in authentication approaches such as key authentication, basic authentication, JWT authentication, and HMAC authentication.