Use HMAC Auth to Protect Your APIs
You may want to protect your routes or services by using API authentication.
With the authentication requirement, API7 Cloud will only forward API requests with valid authentication credentials. Other requests (without
credentials or with a wrong one) will be rejected and get a 401 Unauthorized response.
Hash-based message authentication code (HMAC) is a mechanism for calculating a message authentication code involving a hash function combined with a secret key. It can be used to verify the integrity and authenticity of a message.
HMAC (Hash-based message authentication code) Auth is an API authentication method that can verify clients' identity and check the message's integrity and authenticity.
This guide will use HMAC Auth to protect your APIs on API7 Cloud. You can also safeguard Service as long as you configure the service's authentication plugin (instead of a specific route).
API7 Cloud uses the Consumer concept to implement fine-grained API authentication, so please learn what is Consumer before you go ahead.
Prepare the Environment
Deploy Apache APISIX
Please refer to How to Deploy Apache APISIX to learn how to deploy Apache APISIX and connect it to API7 Cloud. In this guide, we'll deploy an Apache APISIX instance on Docker.
Create Service and Route
We'll create a service with the following details in this guide.
- The service name is
hmac-auth-app. - The path prefix is
/v1. - The HTTP Host is
hmac-auth.httpbin.org. - The upstream URL is
https://httpbin.org.
Besides, we'll create a route inside the hmac-auth-app Service.
- The route name is
post. - The path is
/post(exact match). - Accepted HTTP method is
POST.
If you don't know how to configure a service and route, please refer to the Getting Started guides first
Configure Authentication Plugin on the Route
You need to enable the Authentication plugin on the post route as per the steps below:
- Enter the
postroute details page. - Click on Add Plugin and select the Authentication plugin.
- Choose HMAC Auth as the authentication method and fill out the form.
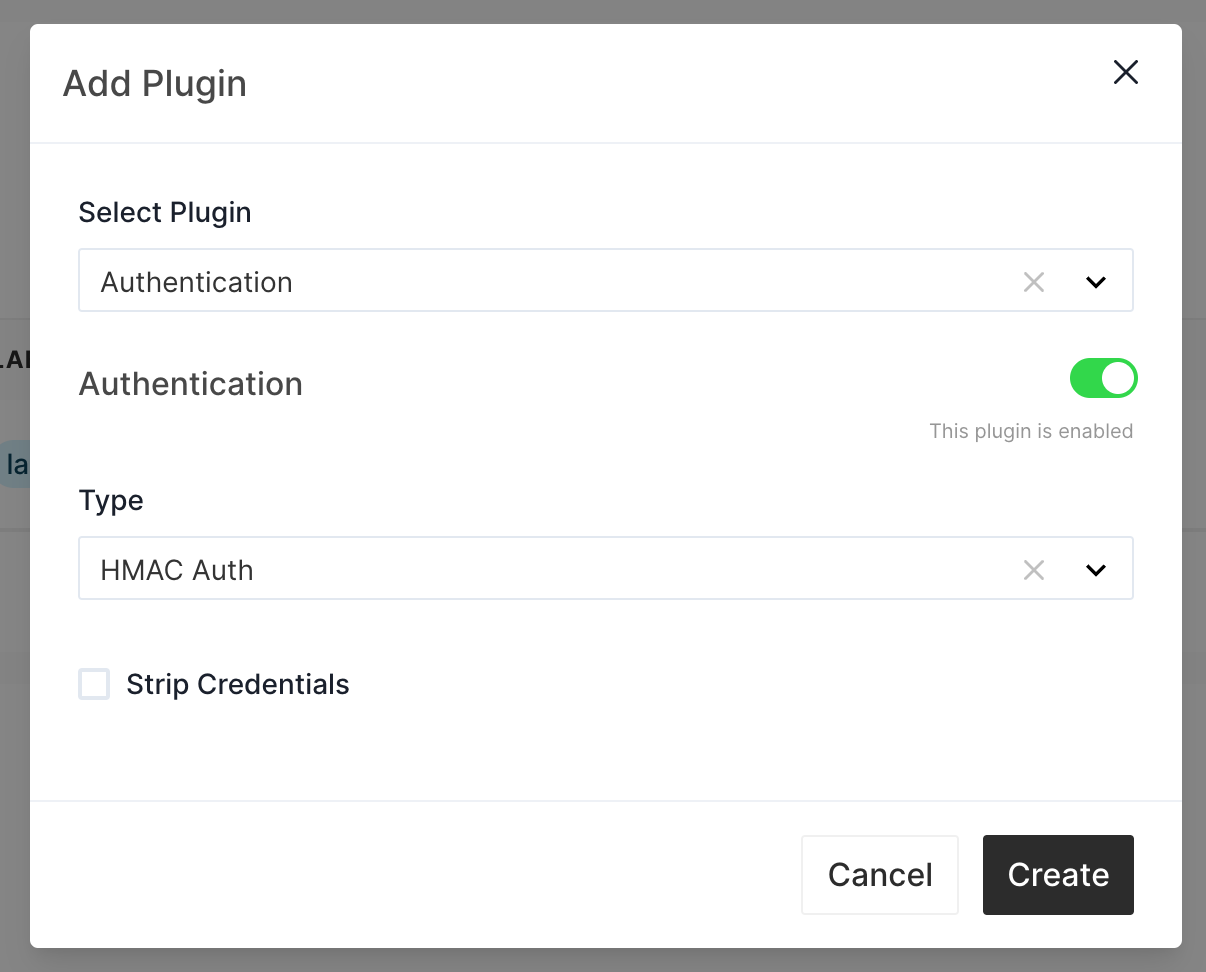
The Strip Credentials checkbox controls if Apache APISIX should remove the authentication credentials before forwarding
requests to the backend. By default, it will be reserved.
Now let's try to access this route.
curl -XPOST http://127.0.0.1:9080/v1/post -H 'Host: hmac-auth.httpbin.org' -i
HTTP/1.1 401 Unauthorized
Date: Mon, 13 Jun 2022 07:58:32 GMT
Content-Type: text/plain; charset=utf-8
Transfer-Encoding: chunked
Connection: keep-alive
Server: APISIX/2.15.0

{"message":"access key or signature missing"}
Since we don't take any credentials, Apache APISIX will reject the request.
Configure HMAC Auth Plugin on Consumer
Now let's create a Consumer and enable the Authentication plugin.
- The Consumer's name is
alex. - Enable the Authentication plugin and choose HMAC Auth as the authentication method.
- Fill in the form just like the screenshot below:
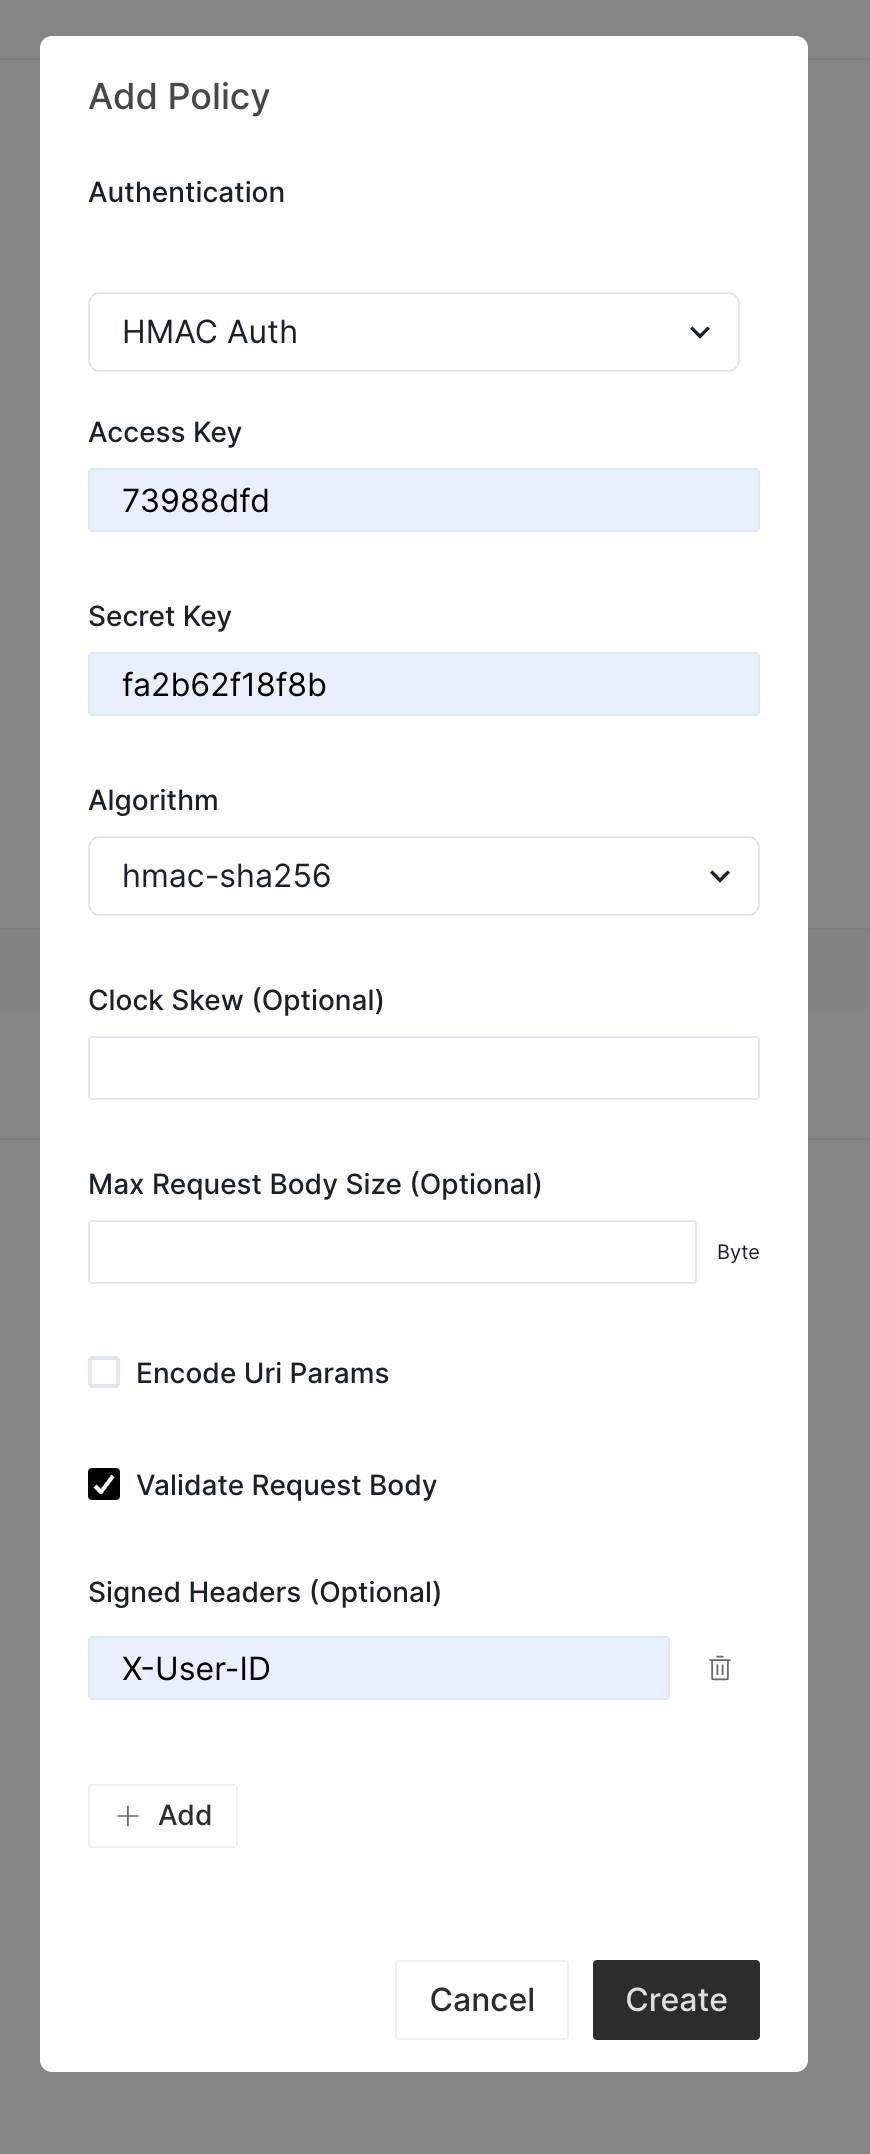
In this case, we:
- Set
Access Keyto73988dfd; - Set
Secret Keytofa2b62f18f8b; - Use
hmac-sha256as the algorithm; - Only sign the request header
X-User-ID; - Validate the request body (since we will send
POSTrequests);
If you don't need to validate the request body in your case, you can
just disable the Validate Request Body checkbox.
Test the Authentication
By running the commands below, let's calculate the essential HMAC signature and date.
ACCESS_KEY=73988dfd
SECRET_KEY=fa2b62f18f8b
URI=/v1/post
DATE=`date +"%a, %d %b %Y %H:%M:%S GMT"`
USER_ID=X-User-ID:0ced89c3-f99c-42cf-8e8c-35372e3b2ce2
MESSAGE="POST\n$URI\n\n$ACCESS_KEY\n$DATE\n$USER_ID"
BODY="{\"method\": \"post\"}"

# Calculate the HMAC signature and encode it into base64 string.
SIGNATURE=`echo -e $MESSAGE | openssl dgst -sha256 -hmac $SECRET_KEY -binary | base64`
# Calculate the digest of the request body.
DIGEST=`echo -n $BODY | openssl dgst -sha256 -hmac $SECRET_KEY -binary | base64`
Please keep your secret key safe!
Then let's send a request with the essential headers.
curl http://127.0.0.1:9080/v1/post \
  -d '{"method": "post"}' \
  -H "Host: hmac-auth.httpbin.org" \
  -H "X-HMAC-ACCESS-KEY: $ACCESS_KEY" \
  -H "X-HMAC-SIGNED-HEADERS: X-User-ID" \
  -H "X-HMAC-ALGORITHM: hmac-sha256" \
  -H "X-HMAC-SIGNATURE: $SIGNATURE" \
  -H "X-HMAC-DIGEST: $DIGEST" \
  -H "X-User-ID: 0ced89c3-f99c-42cf-8e8c-35372e3b2ce2" \
  -H "Date: $DATE" \
  -H "Content-Type: application/json" \
  -i
HTTP/1.1 200 OK
Content-Type: application/json
Content-Length: 885
Connection: keep-alive
Date: Tue, 14 Jun 2022 01:25:38 GMT
Access-Control-Allow-Origin: *
Access-Control-Allow-Credentials: true
Server: APISIX/2.15.0

{
  "args": {},
  "data": "{\"method\": \"post\"}",
  "files": {},
  "form": {},
  "headers": {
    "Accept": "*/*",
    "Content-Length": "18",
    "Content-Type": "application/json",
    "Date": "Tue Jun 14 09:13:01 AM CST 2022",
    "Host": "hmac-auth.httpbin.org",
    "User-Agent": "curl/7.76.1",
    "X-Amzn-Trace-Id": "Root=1-62a7e392-512d15d4414b4d485f2425fd",
    "X-Forwarded-Host": "hmac-auth.httpbin.org",
    "X-Hmac-Access-Key": "73988dfd",
    "X-Hmac-Algorithm": "hmac-sha256",
    "X-Hmac-Digest": "fBQ3fP5ix7Zcc4HiSzr0tlLmlhuPMOLahHzWnYl6ew8=",
    "X-Hmac-Signature": "ph7jEJSd6T+3TFan1/GMdT8t+mfL7IrgH1SuEh+4xiU=",
    "X-Hmac-Signed-Headers": "X-User-ID",
    "X-User-Id": "0ced89c3-f99c-42cf-8e8c-35372e3b2ce2"
  },
  "json": {
    "method": "post"
  },
  "origin": "172.17.0.1, 61.241.66.251",
  "url": "https://hmac-auth.httpbin.org/post"
}
If you enable the Validate Request Body but the request body is empty, just calculate the
digest for an empty string.
After taking the correct signature, and digest headers, the request is forwarded to the backend.
Test the Clock Skew
Now let's add another limitation, requests whose signature was generated ten minutes earlier will be rejected by Apache APISIX.

We set the Clock Skew field to 600 seconds (ten minutes). Then re-calculate the signature and digest with the past time.
ACCESS_KEY=73988dfd
SECRET_KEY=fa2b62f18f8b
URI=/v1/post
# Use the past time
DATE='Tue, 14 Jun 2022 01:38:05 GMT'
USER_ID=X-User-ID:0ced89c3-f99c-42cf-8e8c-35372e3b2ce2
MESSAGE="POST\n$URI\n\n$ACCESS_KEY\n$DATE\n$USER_ID"
BODY="{\"method\": \"post\"}"

# Calculate the HMAC signature and encode it into a base64 string.
SIGNATURE=`echo -e $MESSAGE | openssl dgst -sha256 -hmac $SECRET_KEY -binary | base64`
# Calculate the digest of the request body.
DIGEST=`echo -n $BODY | openssl dgst -sha256 -hmac $SECRET_KEY -binary | base64`
Then send a request that Apache APISIX will reject due to the exceeded clock skew.
HTTP/1.1 401 Unauthorized
Date: Tue, 14 Jun 2022 01:38:07 GMT
Content-Type: text/plain; charset=utf-8
Transfer-Encoding: chunked
Connection: keep-alive
Server: APISIX/2.15.0

{"message":"Clock skew exceeded"}
You can rectify the date and see if the request can pass the validation. Since we deploy Apache APISIX on Docker and the container's timezone might differ from your host. Let's calculate the current date time in the container.
docker exec -it <APISIX Container Name> date +"%a, %d %b %Y %H:%M:%S GMT"
Use the current date time to calculate the signature and digest again, sending a new request to Apache APISIX to verify it.
Generate HMAC Signature in Several Programming Languages
You can refer to HMAC Generate Signature Examples for the details.