Use JWT Auth to Protect Your APIs
You may want to protect your routes or services by using API authentication.
With the authentication requirement, API7 Cloud will only forward API requests with valid authentication credentials. Other requests (without
credentials or with a wrong one) will be rejected and get a 401 Unauthorized response.
JWT Auth is an API authentication method that requires API clients to provide a valid JSON Web Token in a request header, cookie or query string.
This guide will introduce using JWT Auth to protect your APIs when using API7 Cloud. You can also safeguard services as long as you configure the Service's authentication plugin (instead of a specific route).
API7 Cloud uses the Consumer concept to implement fine-grained API authentication, so please learn what is Consumer before you go ahead.
Prepare the Environment
Deploy Apache APISIX
Please refer to How to Deploy Apache APISIX to learn how to deploy Apache APISIX and connect it to API7 Cloud. In this guide, we'll deploy an Apache APISIX instance on Docker.
Create Service and Route
We'll create a service with the following details in this guide.
- The service name is
jwt-auth-app. - The path prefix is
/v1. - The HTTP Host is
auth.httpbin.org. - The upstream URL is
https://httpbin.org.
Besides, we'll create a route inside the jwt-auth-app Service.
- The route name is
json. - The path is
/json(exact match). - Accepted HTTP method is
GET.
If you don't know how to configure a service and route, please refer to the Getting Started guides first
Configure Authentication Plugin on the Route
You need to enable the Authentication plugin on the json route as per the steps below:
- Enter the
jsonroute details page. - Click on Add Plugin and select the Authentication plugin.
- Choose JWT Auth as the authentication method and fill out the form.
The default token header is Authorization, the default token query is jwt, and the default token field in Cookie is also jwt.
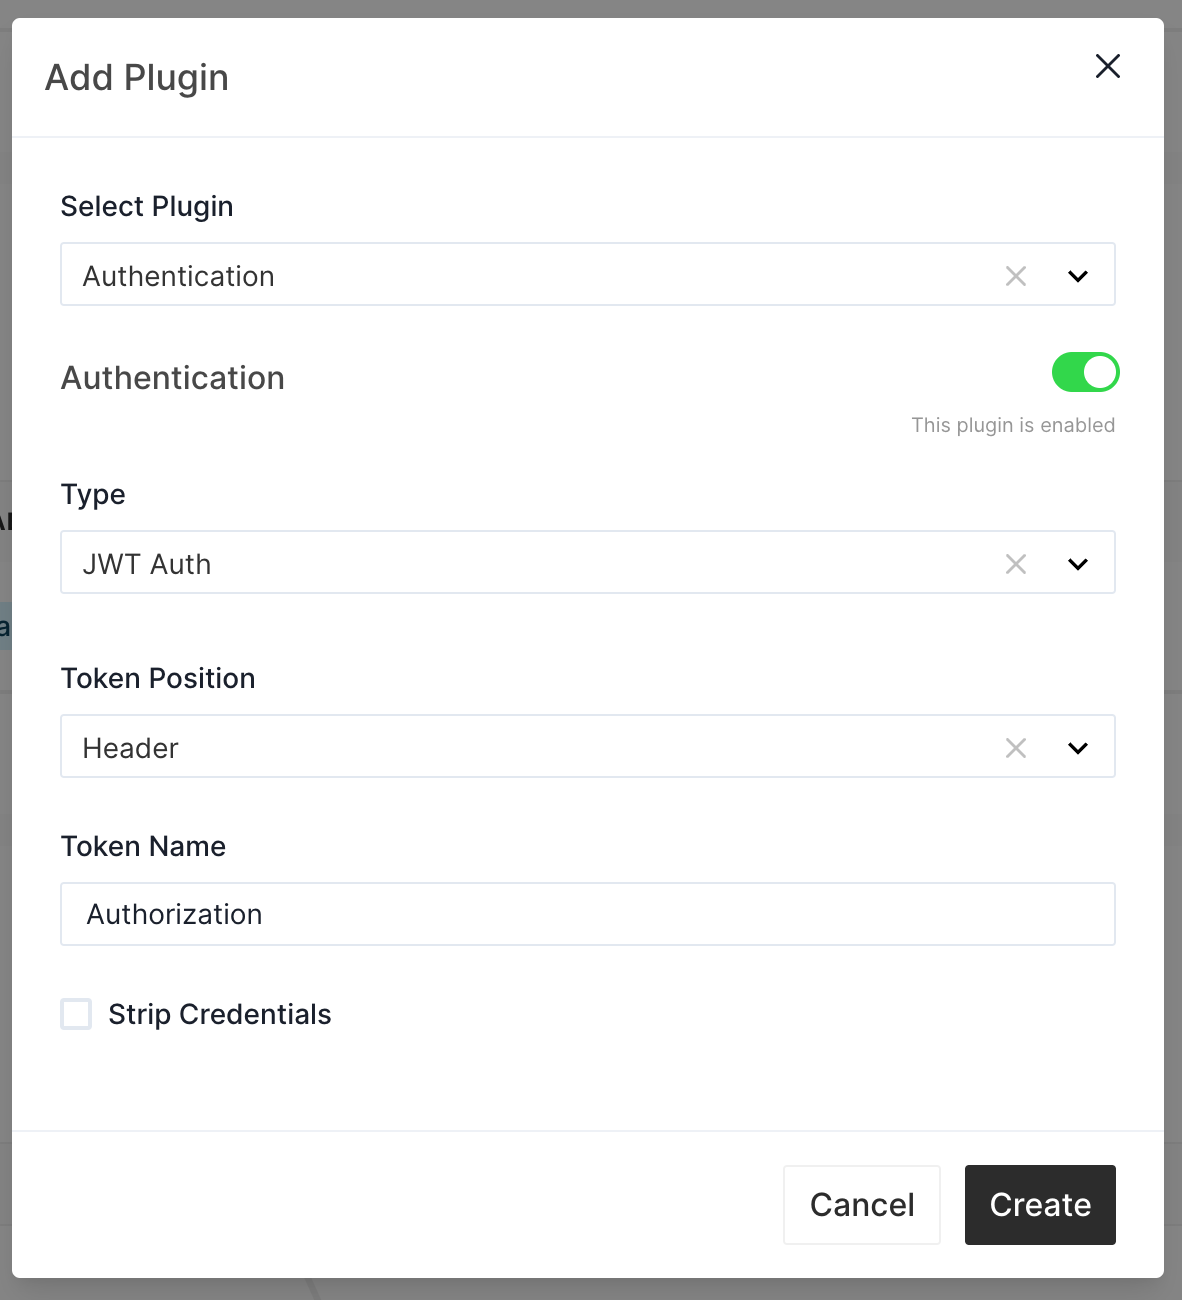
In this case, we set the token position is Header and its name is Authorization.
The checkbox Strip Credentials controls if Apache APISIX should remove the authentication credentials before forwarding
the requests to the backend. By default, it will be reserved.
Now let's try to access this route.
curl http://127.0.0.1:9080/v1/json -H 'Host: auth.httpbin.org' -i
HTTP/1.1 401 Unauthorized
Date: Fri, 24 Jun 2022 01:59:35 GMT
Content-Type: text/plain; charset=utf-8
Transfer-Encoding: chunked
Connection: keep-alive
Server: APISIX/2.15.0

{"message":"Missing JWT token in request"}
Since we don't take any credentials, Apache APISIX will reject the request.
Configure JWT Auth Plugin on Consumer
Now let's create a Consumer and configure the JWT credentials.
- The Consumer's name is
oiloil. - Add a credentials of type JWT Auth.
- Fill in
oiloil_keyas the key and click the random button to generate a secret. - Check the base64 encoding and algorithm uses the default
HS256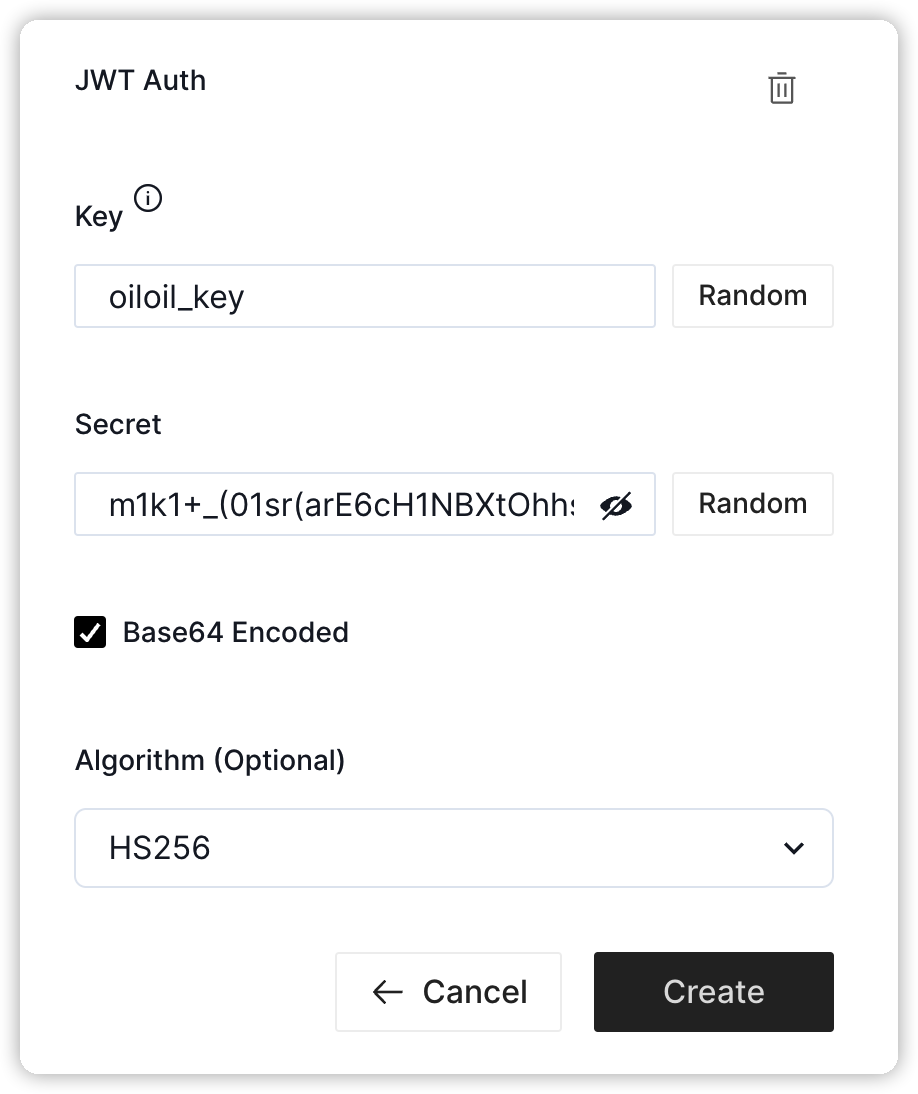
Since some systems can only use ASCII characters, base64 is a method used to convert data in non-ASCII characters to ASCII characters.
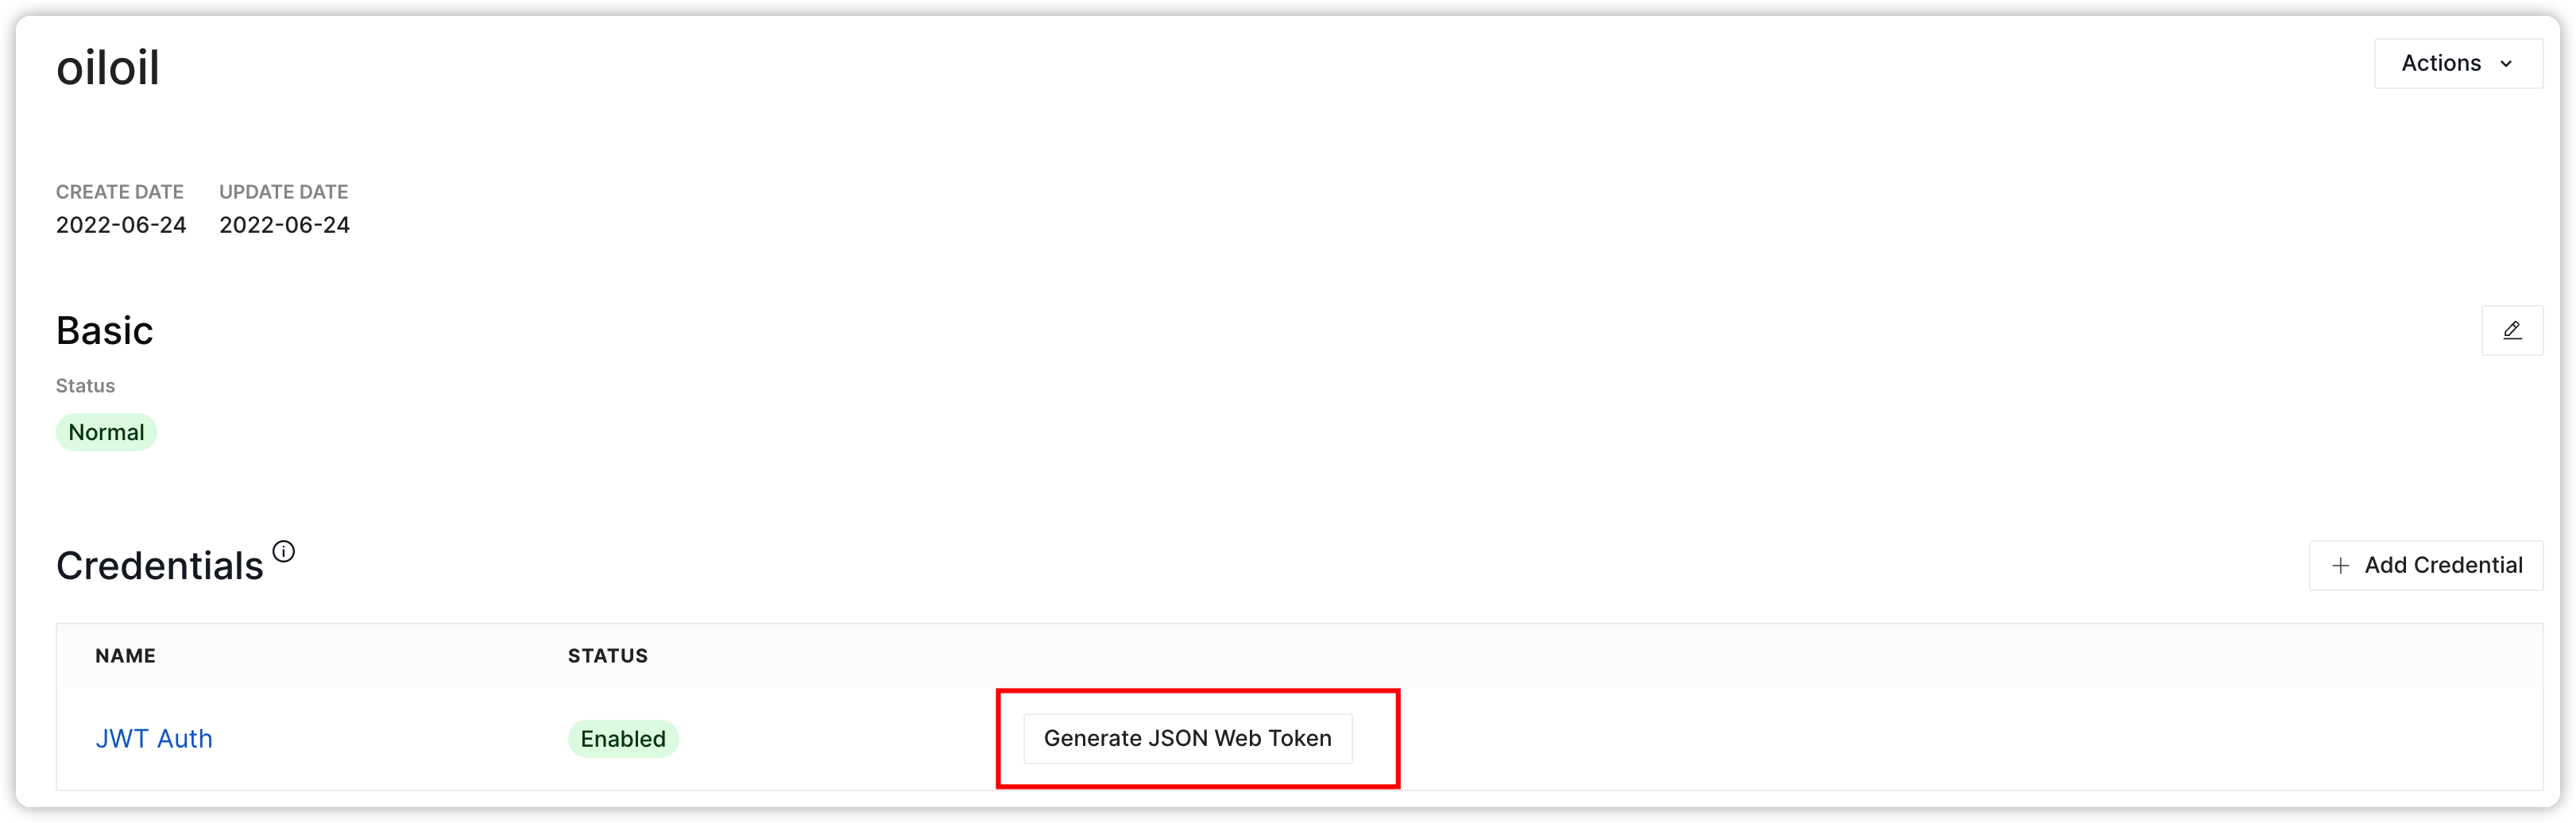
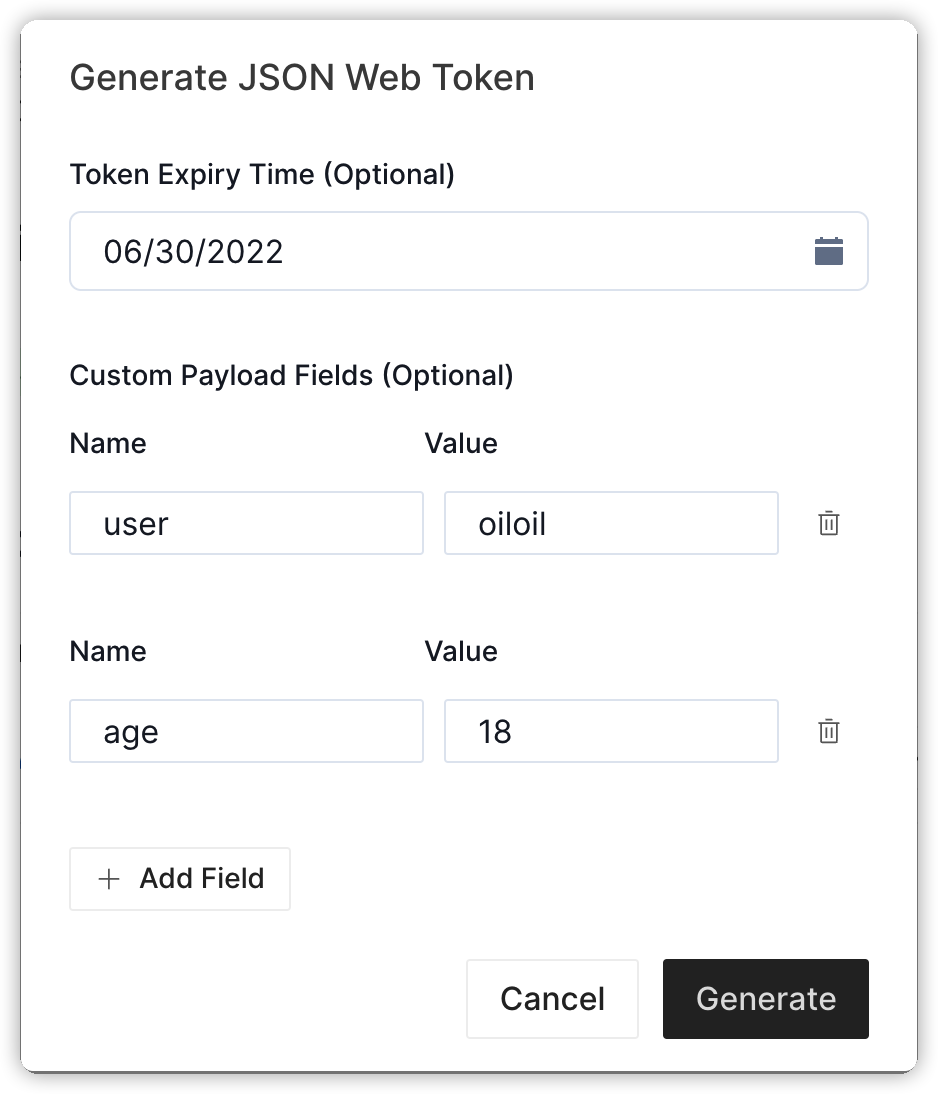
Generate JSON Web Token for the Consumer
Now let's generate a new JSON Web Token. You can enter the Consumer details page and click on the Generate JSON Web Token button to open the popup create window.
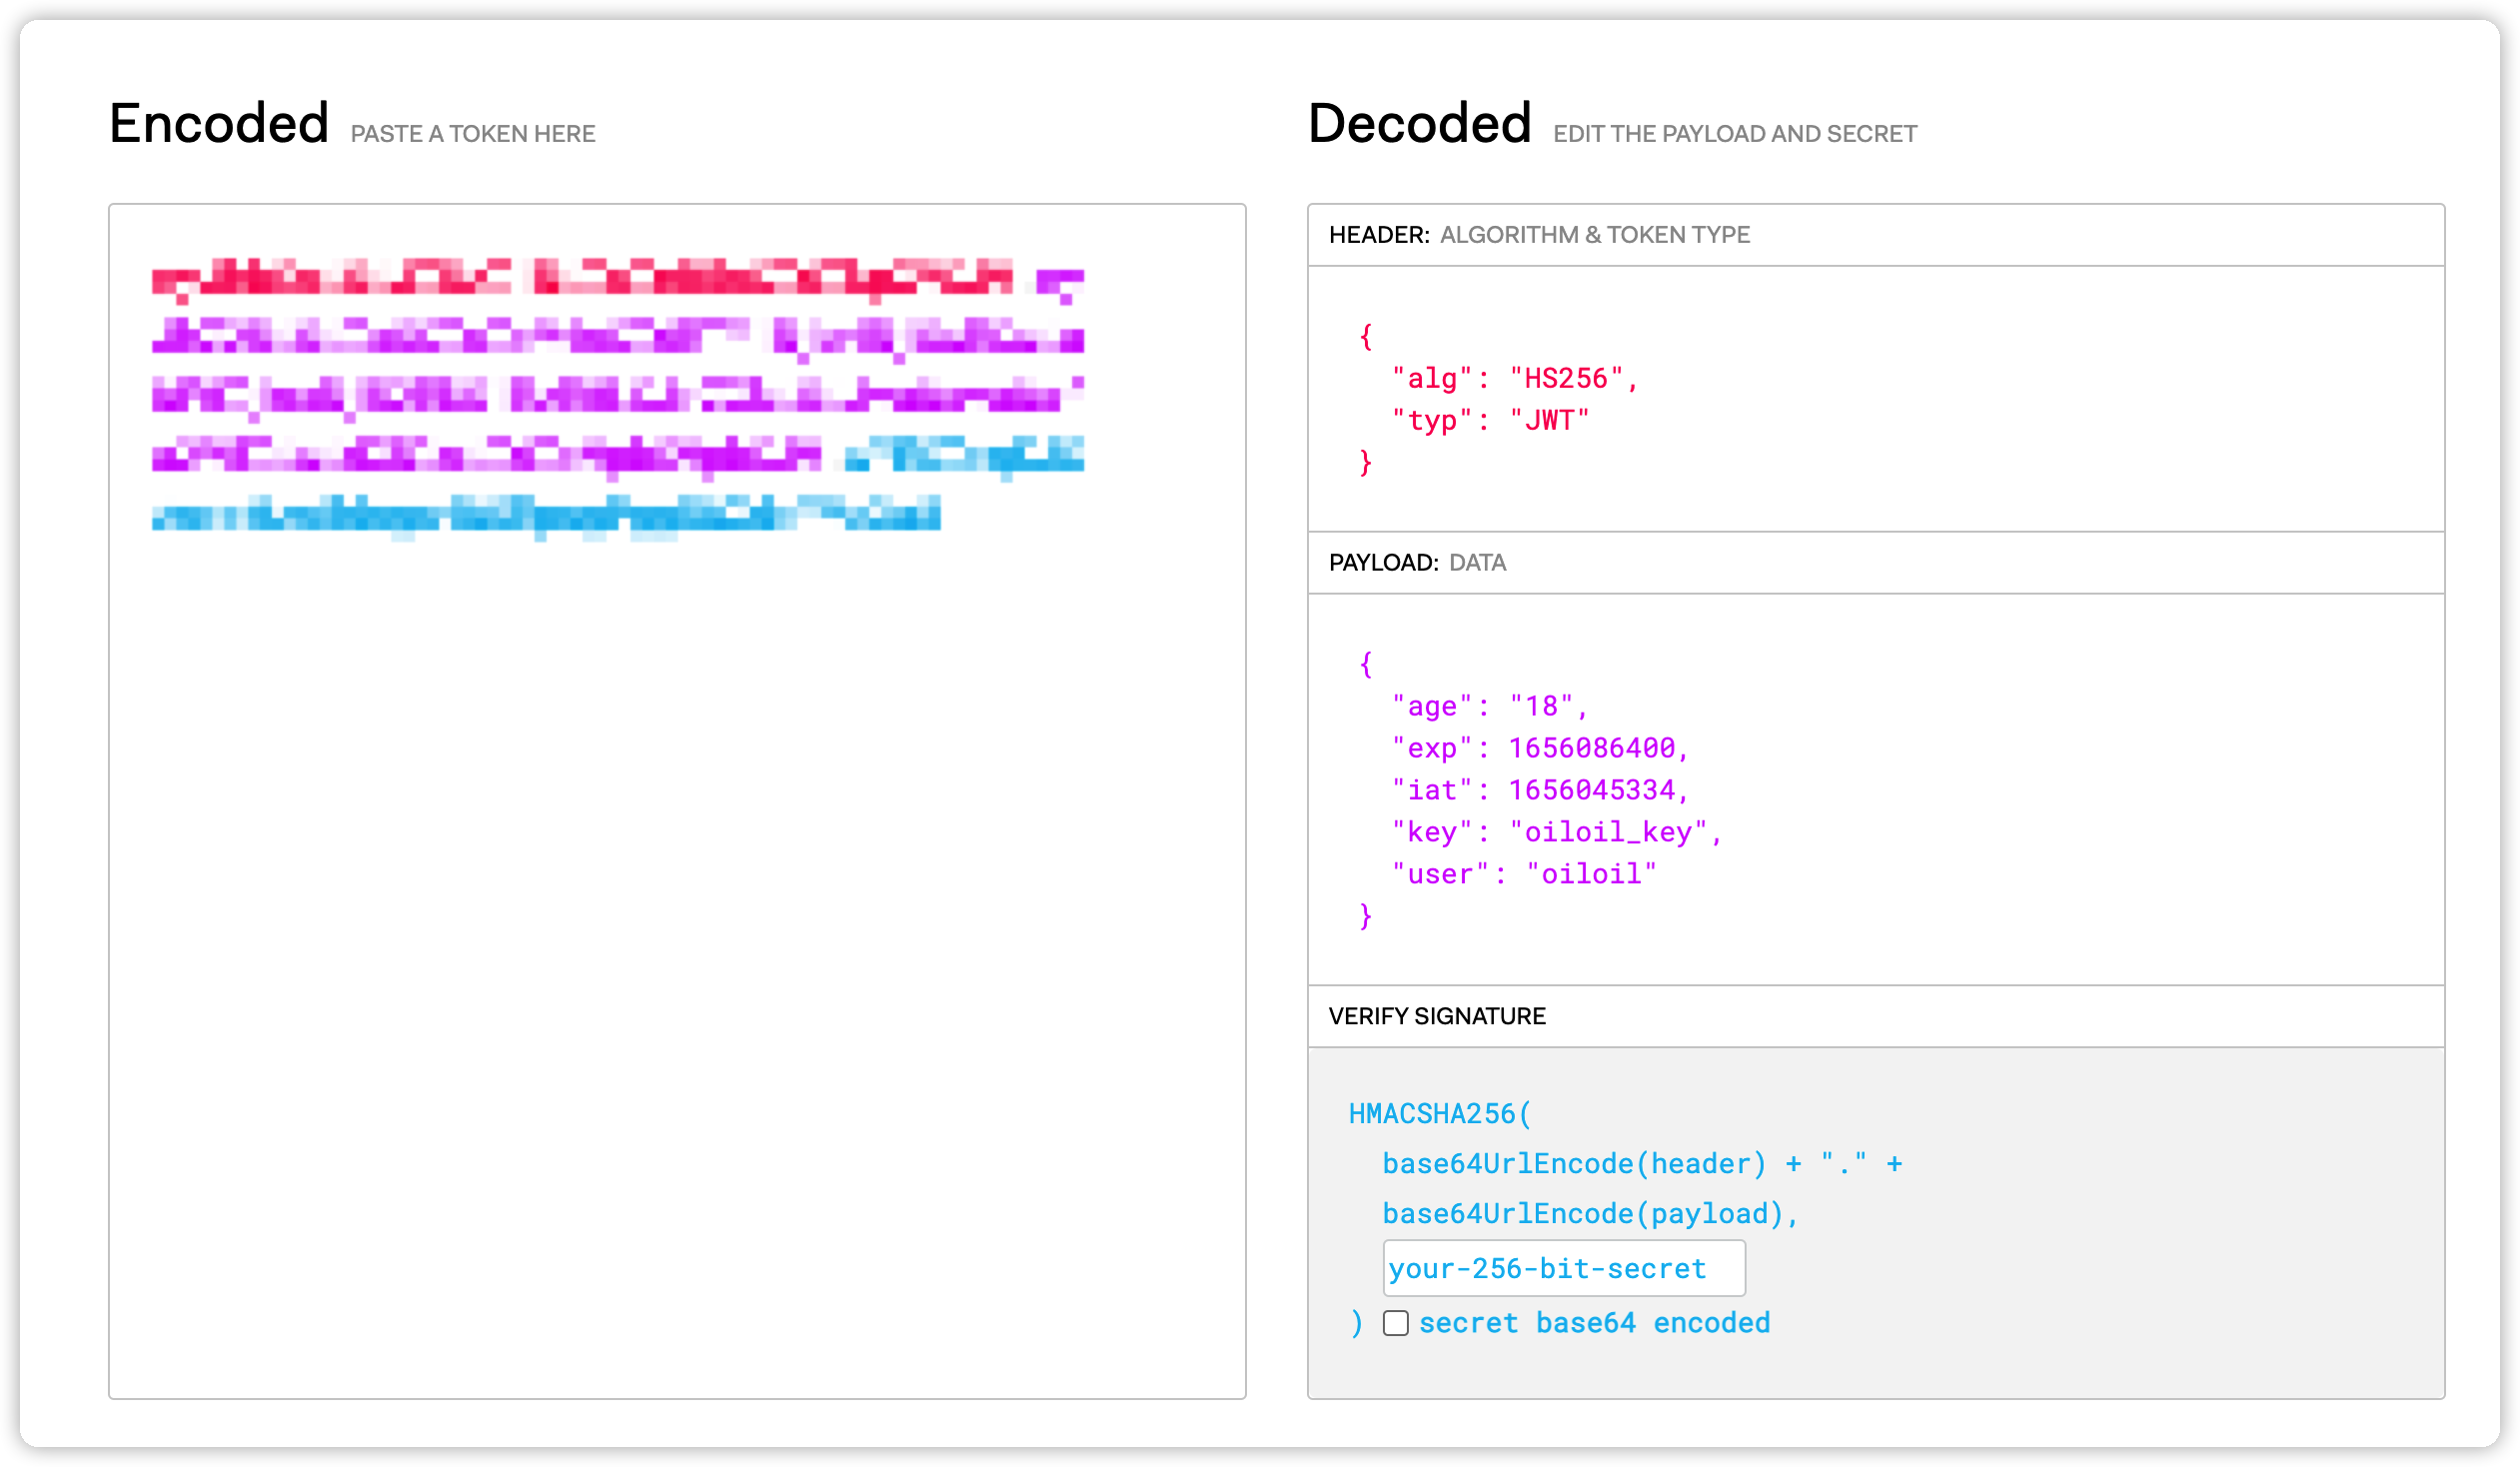
- Set the token expiry date to expire on June 30, 2022. Note please select a proper time when you execute this step.
- Add two custom payload fields,
userandage, values areoiloiland18perspectives.
After clicking the Generate button, another pop-up window will appear with the successful prompts, you can click the Copy button to copy the token to the clipboard.
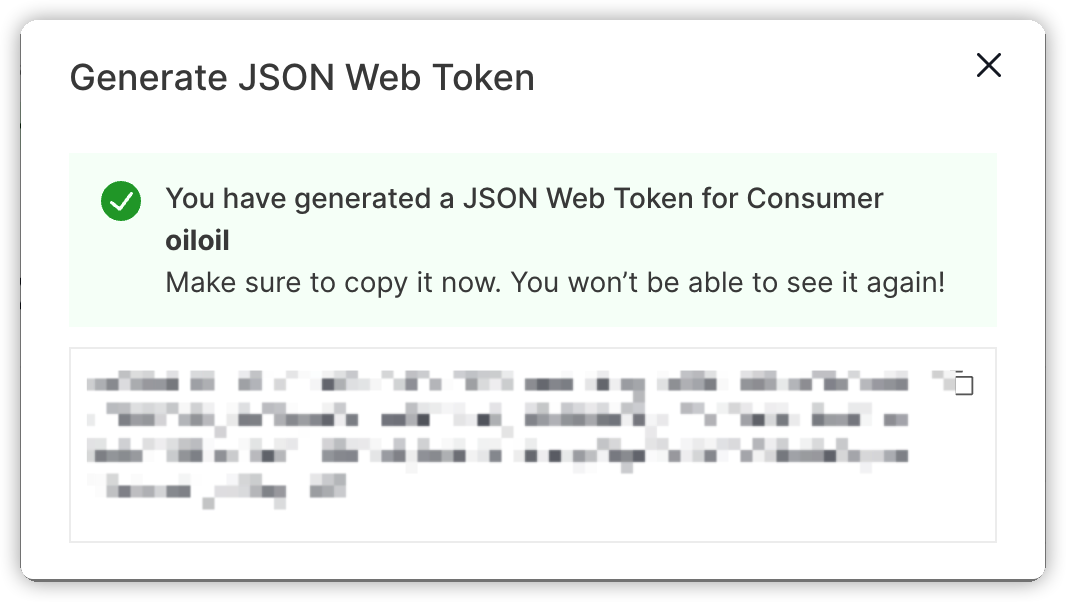
Please make sure to copy the token in the current pop-up window and save it, you won’t be able to see it again!
Test the Authentication
Let's send a request with the JSON Web Token.
curl http://127.0.0.1:9080/v1/json -H 'Host: auth.httpbin.org' -H 'Authorization: <Your JSON Web Token>'
-i
HTTP/1.1 200 OK
Content-Type: application/json
Content-Length: 429
Connection: keep-alive
Date: Fri, 24 Jun 2022 04:47:22 GMT
Access-Control-Allow-Origin: *
Access-Control-Allow-Credentials: true
Server: APISIX/2.15.0

{
  "slideshow": {
    "author": "Yours Truly",
    "date": "date of publication",
    "slides": [
      {
        "title": "Wake up to WonderWidgets!",
        "type": "all"
      },
      {
        "items": [
          "Why <em>WonderWidgets</em> are great",
          "Who <em>buys</em> WonderWidgets"
        ],
        "title": "Overview",
        "type": "all"
      }
    ],
    "title": "Sample Slide Show"
  }
}
After taking the correct JSON Web Token, Apache APISIX will forward the request to the backend.
If we take a wrong JSON Web Token, the API request will be rejected by Apache APISIX.
curl http://127.0.0.1:9080/v1/json -H 'Host: auth.httpbin.org' -i -H 'Authorization: wrong token'
HTTP/1.1 401 Unauthorized
Date: Fri, 24 Jun 2022 04:49:20 GMT
Content-Type: text/plain; charset=utf-8
Transfer-Encoding: chunked
Connection: keep-alive
Server: APISIX/2.15.0

{"message":"JWT token invalid"}
You can decode your json web token at jwt.io to verify that the token is carrying the correct data.